
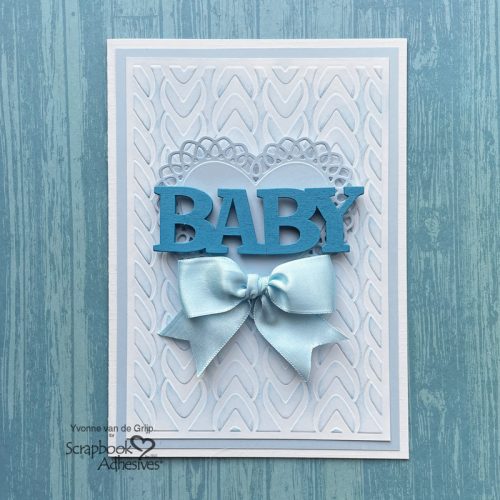
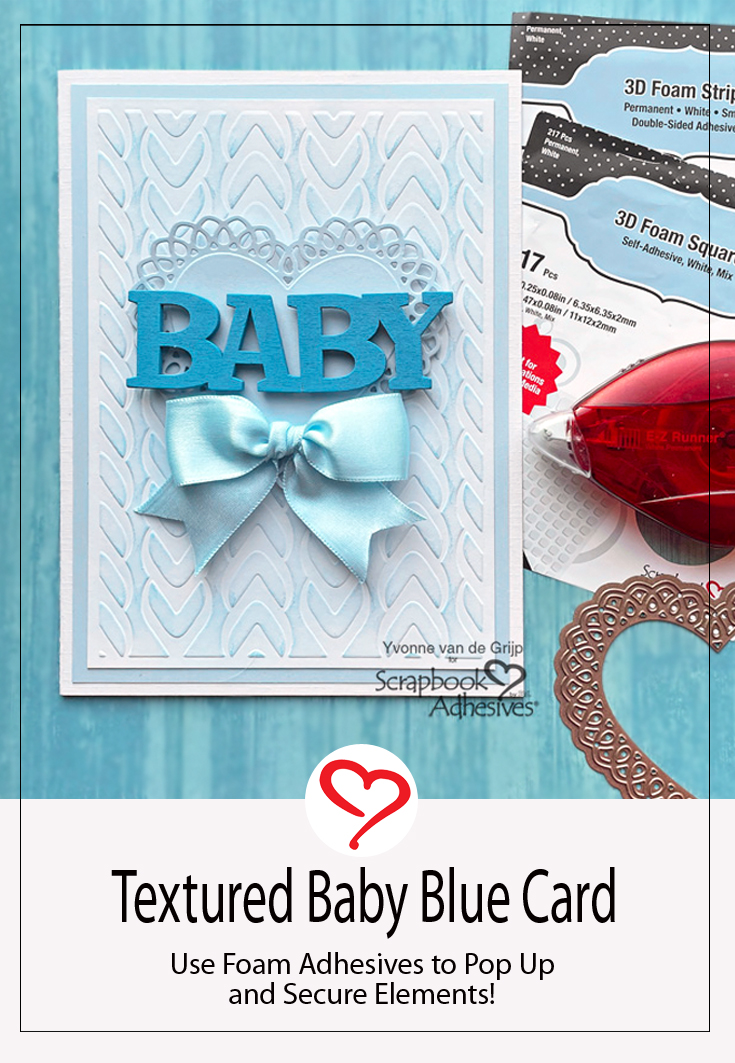
Hi everyone, Yvonne here with a simple and easy-to-make textured baby blue card. I love an elegant look for cards and this card is so simple to make that it’s also suitable for beginner card makers.
Some simple inking and a few die-cuts adhered with Scrapbook Adhesives® by 3L this card will be fun to make. Shall we get started?
Baby Blue Card Panel
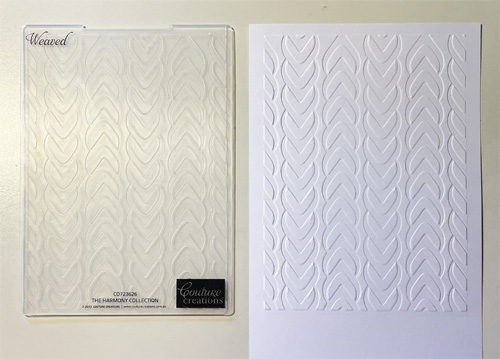
Put a piece of white cardstock in an embossing folder and run through your die-cutting and embossing machine (follow the sandwich recommended by its manufacturer). Then trim the cardstock to the right size with a paper trimmer.
Next use an ink blending tool and soft blue ink to slightly color the textured paper. It’s a great way to show off the embossed design.
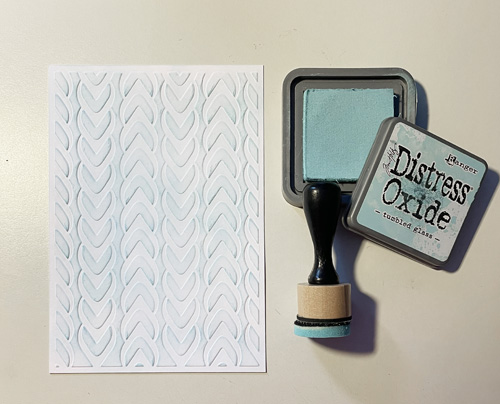
Make sure you use very little ink to prevent over-inking your embossed paper. Remember it’s better to add multiple layers than have too much ink in one layer.
The Card Base
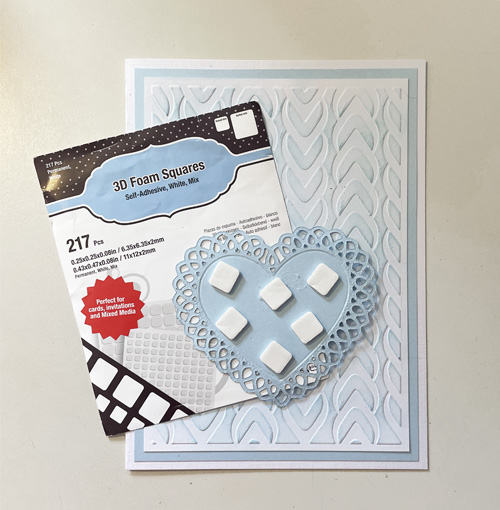
Use the E-Z Runner® Permanent Strips Refillable Dispenser to mat the embossed card panel onto a soft blue card layer. Then adhere to a white card base also using the E-Z Runner® Permanent Strips Refillable Dispenser.
Embellishing the Card
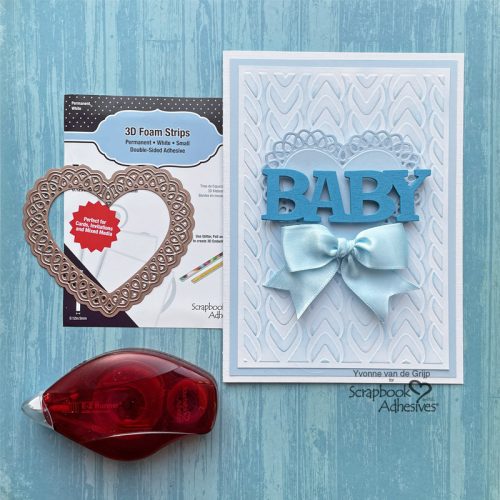
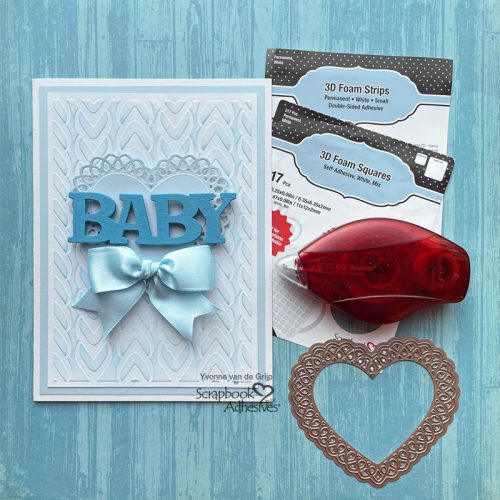
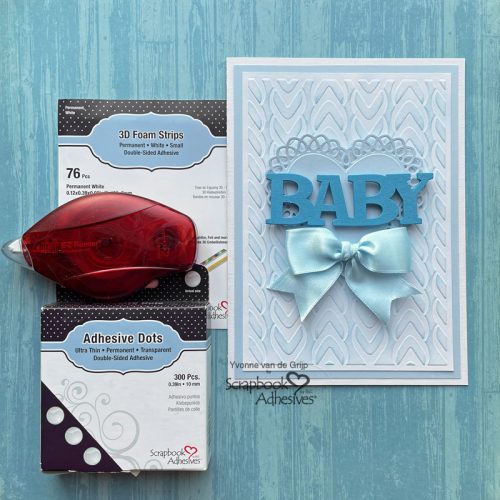
Die-cut and emboss a heart shape from soft blue cardstock. To pop up and adhere to the card front, use some of the 3D Foam Squares White Regular Size. Not only does this will give interest to your textured baby blue card, but I also love how the foam square sticks to a textured surface with no issue!
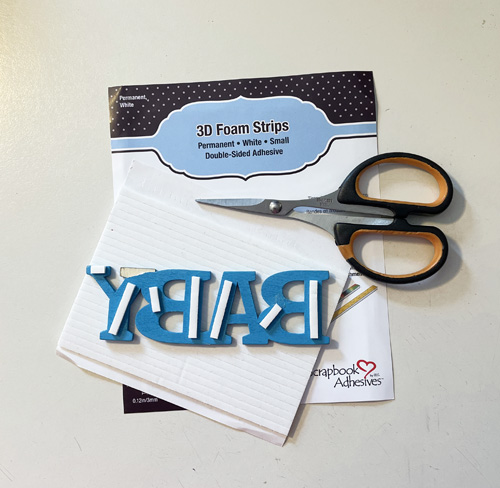
Adhere the wooden word, Baby, to the card front with 3D Foam Strips. Again, the foam adhesives have no problem sticking a wood surface to the paper.
Don’t you love the beautiful 3D effect you have just created? For a finishing touch adhere a satin bow onto the card using Adhesive Dots Ultra Thin. I love using Adhesive Dots since they are perfect for this kind of work!
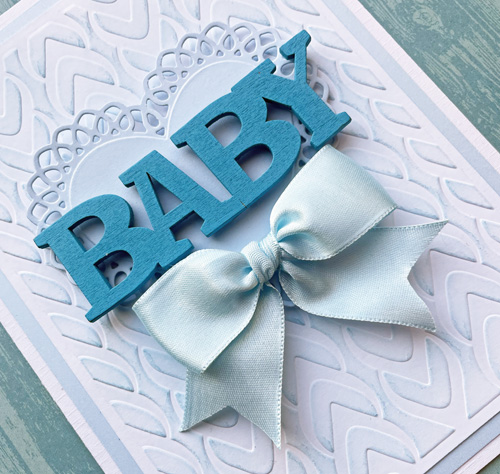
Voilá, your textured baby blue card is ready to be sent! I hope you enjoyed this simple tutorial.
Wishing you happy crafting!
Yvonne van de Grijp
Creative Time: 30 minutes
Skill Level: Beginner
Materials needed:
Scrapbook Adhesives by 3L®
E-Z Runner® Permanent Strips Refillable Dispenser
3D Foam Squares White Regular Size
3D Foam Strips
Adhesive Dots Ultra Thin
Other
Cardstock (White, Soft Blue); Etched dies (Spellbinders® Paper Arts: Lace Hearts); Die-Cutting and Embossing Machine (Spellbinders® Paper Arts: Platinum 6 Machine); Blue Inkpad; Ink Blending Tool; Wood Baby embellishment; Satin Bow; Paper Trimmer; Scissors
Save to Pinterest!
Visit our Website and Blog!
Sign up for our Newsletter so you never miss a contest or giveaway!


