
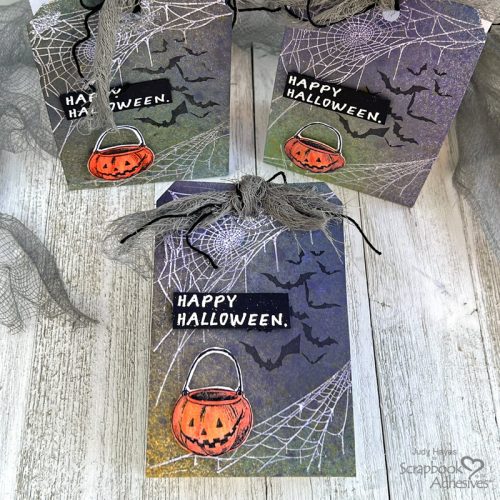
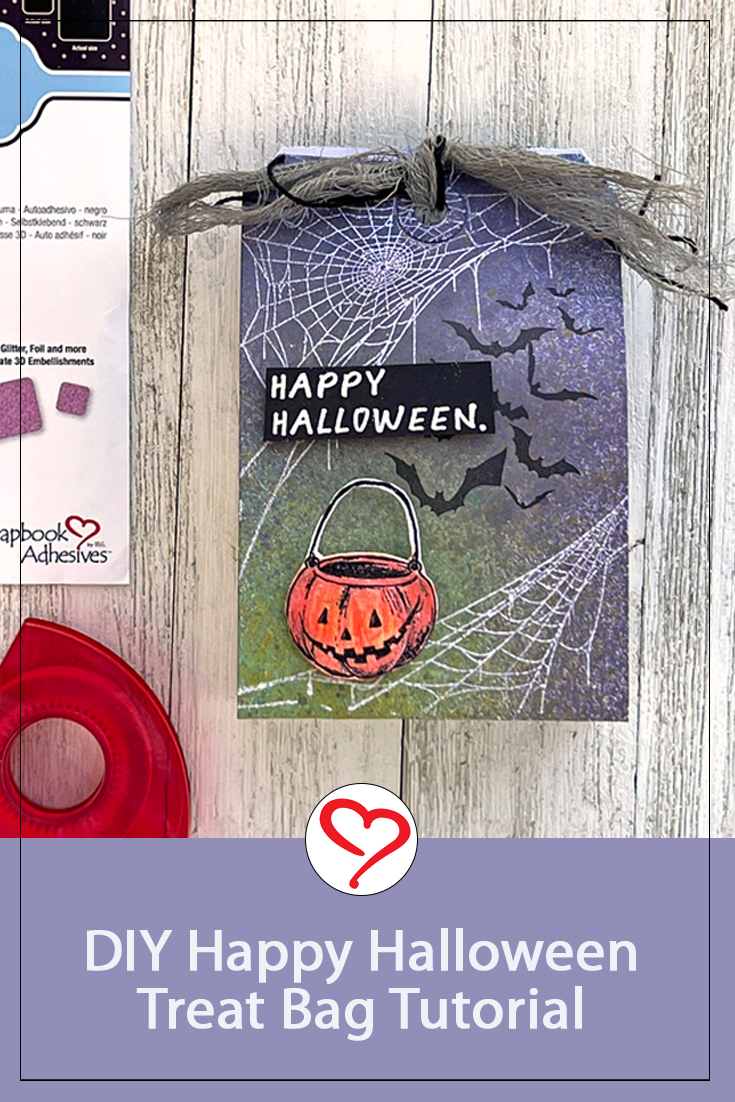
Hello friends! Here it is at the end of September already! Next comes October and that brings Halloween. With that in mind, I put together an easy-to-assemble Halloween Treat Bag! The basic treat bag is easy to make with #8 tags. You can decorate with stamping as I did or go in your own direction.
Treat Bag Base
The basic components to make Halloween Treat Bag are two #8 white tags and two 2 x 2.25-inch pieces of white cardstock.
Designer Tip: Two 3.125 x 6.25 inches pieces of white cardstock can be used in place of tags. Simply punch a hole at the top and cut corners as desired.
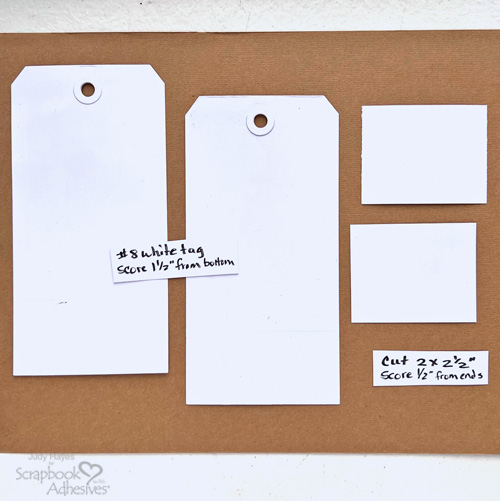
Score 1.5 inches from the bottom on each tag and score 0.5 inches from each edge of the longer side of both cardstock pieces
Stamping and Spraying on Tags
On one tag, stamp web with Versamark ink and heat emboss with clear embossing powder. This will be in front of the Halloween Treat Bag.
The photo below shows the process. The first tag shows it’s stamped with web, The second one shows it’s sprayed with stains, and the last one is stamped with bats
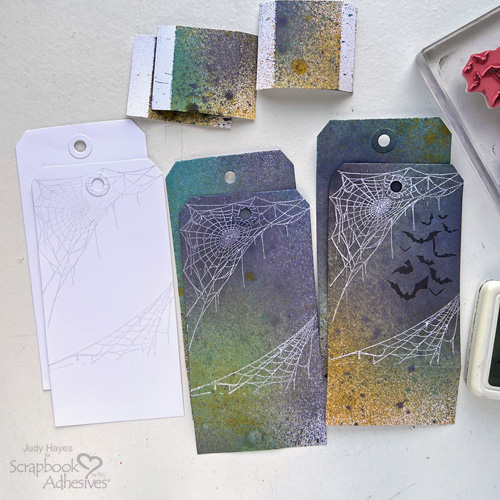
Spray stamped tag and plain tag plus side pieces with Distress Spray Stains (Villainous Potion, Uncharted Mariner, Wild Honey). Mist lightly with water. Repeat spray stains as desired. Set aside to dry or dry with a heat tool.
When dry, rub over the web with a towel to remove excess ink. Clear embossing on the web acts as a resist to allow the white color of paper to show through.
Use Distress Archival Ink (Black Soot) to stamp bats. I inked only a portion of the bat stamp.
Assemble Halloween Treat Bag
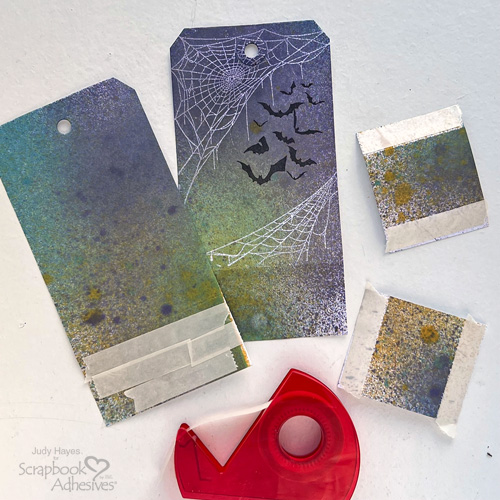
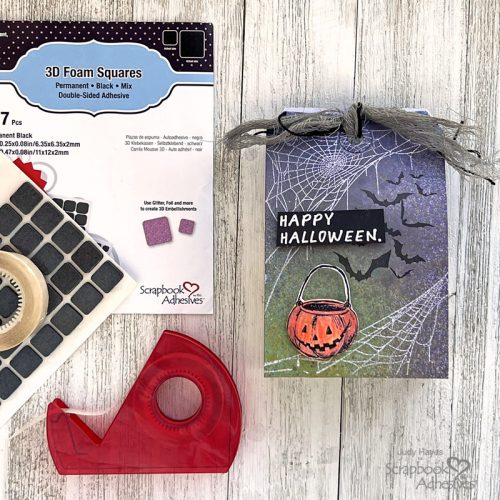
Fold tags and side pieces along the score lines. Apply strips of the Crafty Power Tape Dispenser 20’ to the bottom of the back tag below the score line (the one that’s not stamped). Also, apply Crafty Power Tape on scored edges of both side pieces.
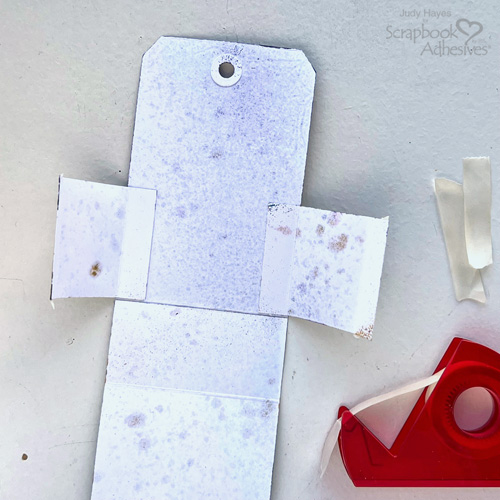
Remove the liners from the Crafty Power Tape Dispenser 20’ on the tag and attach tags together between score lines.
Remove liners from one end of each side piece. Adhere to one tag along the side and next to the bottom fold as shown in the photo. Remove liners from other ends, fold tags up to form a bag, and press the side piece against the other tag to form a treat bag.
Designer Tip: The following steps can be done before the assembly of the treat bag if you so choose.
Stamping the Greeting and Pumpkin
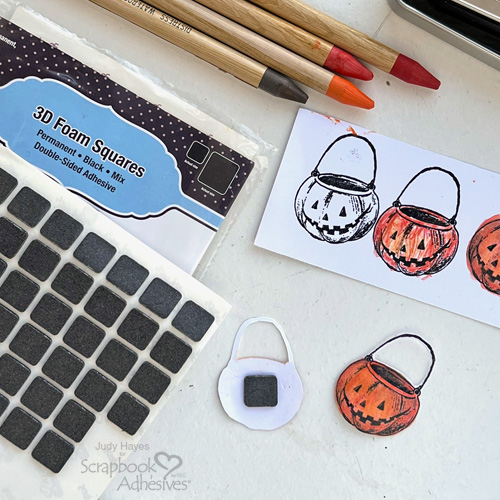
Stamp greeting with Versamark ink on black cardstock and heat emboss with white embossing powder. Trim to a rectangle around the greeting
Stamp pumpkin with black ink and heat emboss with clear embossing powder. Use watercolor crayons to color pumpkin and then blend colors with a water brush. Fussy cut out the pumpkin and use a craft knife to cut out the inside space of the handle.
Secure the Pumpkin and Greeting
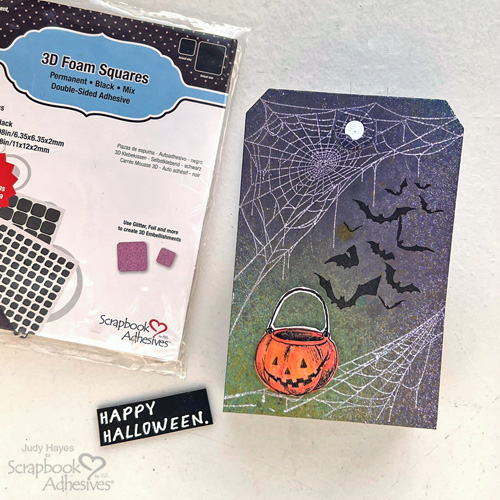
Place a large square from 3D Foam Squares Black Mix on the back of the pumpkin, remove the liner, and fasten the pumpkin to the Halloween Treat Bag.
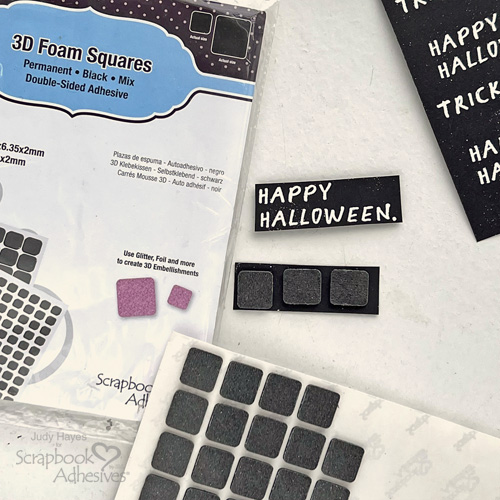
Apply a regular size 3D Foam Squares Black Mix to the back of the greeting, peel liners and attach to the Halloween Treat Bag.
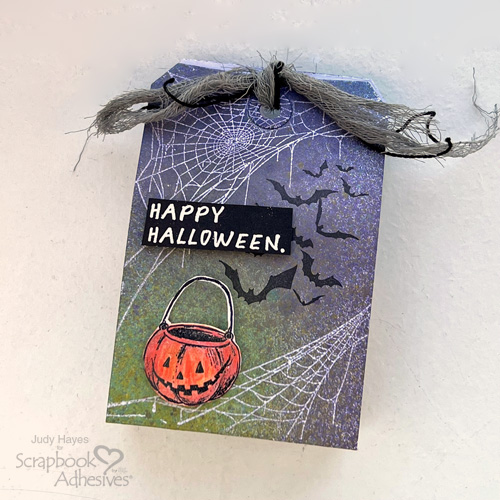
Simply repeat to make as many Halloween Treat Bags as you like! All that’s left is to fill it with treats and share it with someone special!
Thanks for Visiting!
Judy Hayes
Creative Time: 30 mins
Skill Level: Intermediate
Materials Needed:
Scrapbook Adhesives by 3L®
Crafty Power Tape Dispenser 20’
Other
Imagine Crafts/Tsukineko – Versafine Ink (Onyx Black, Versamark); Ranger Ink – Distress Spray Stains (Villainous Potion, Uncharted Mariner, Wild Honey), Distress Archival Ink (Black Soot), Embossing Powder (Clear, White), Tim Holtz Watercolor Crayons (Spiced Marmalade, Barn Door, Crackling Campfire, Walnut Stain); Stampers Anonymous Tim Holtz Stamps (Unraveled), #8 White Tags; Cardstock (White, Black; Gray Cheesecloth; Black Pearl Cotton
Save to Pinterest!
Visit our Website and Blog!
Sign up for our Newsletter so you never miss a contest or giveaway!


