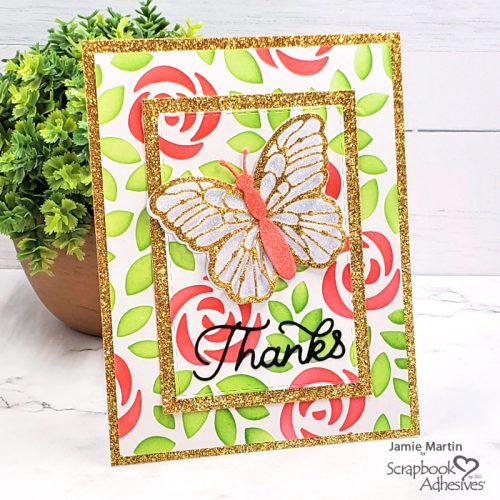
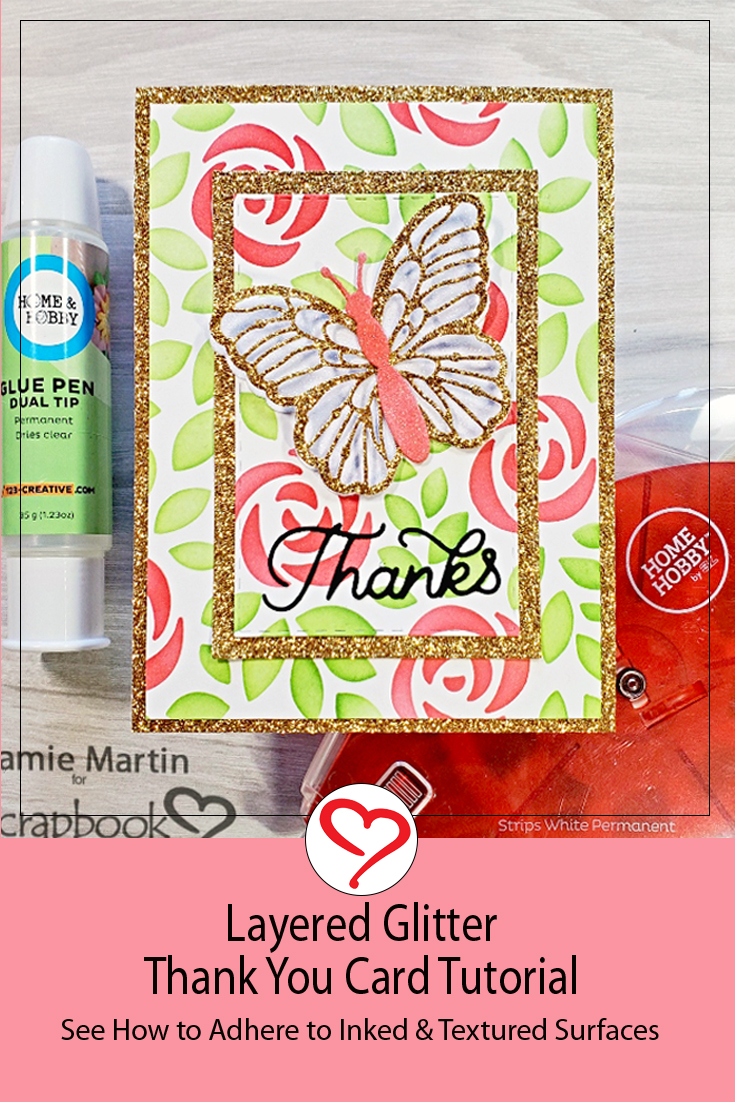
Hi, Jamie here with you today. Can you believe that it’s December already?! Today I have a layered glitter thank you card to help spark your creativity. Get prepared when you send them out after Christmas.
![Layered Glitter Thank You Card by Jamie Martin for Scrapbook Adhesives by 3L](https://www.scrapbook-adhesives.com/blog/wp-content/uploads/2022/11/120122-Layered-Glitter-Thank-You-Card-Jamie-Martin-Main-500x500.jpg)
Glitter Thank You Stenciled Background
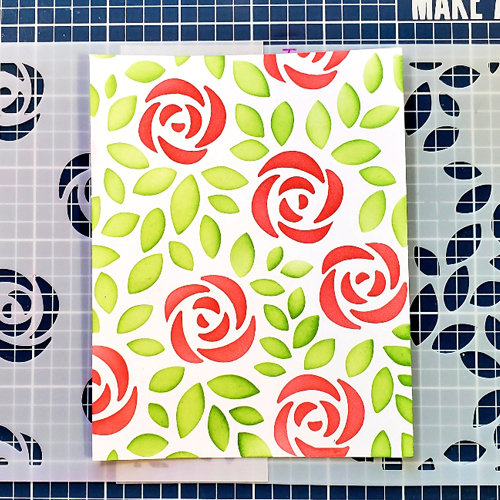
To create the background, I used a two-piece layered floral stencil. The first layer was to add the flowers with red ink on a white cardstock panel. Then layer the second stencil over the floral background and add the leaves with green ink.
Designer’s Tip: use the E-Z Dots® Repositionable Dots to hold the stencil in place. When finished, simply rub the dots off without residue!
![Layered Glitter Thank You Card by Jamie Martin for Scrapbook Adhesives by 3L](https://www.scrapbook-adhesives.com/blog/wp-content/uploads/2022/11/120122-Layered-Glitter-Thank-You-Card-Jamie-Martin-Step1a.jpg)
Get the Glitter Thank You Layers On
Next, die-cut the center of the decorative panel using a rectangle die and die-cut gold glitter paper using one size larger than the rectangle die.
![Layered Glitter Thank You Card by Jamie Martin for Scrapbook Adhesives by 3L](https://www.scrapbook-adhesives.com/blog/wp-content/uploads/2022/11/120122-Layered-Glitter-Thank-You-Card-Jamie-Martin-Step2a.jpg)
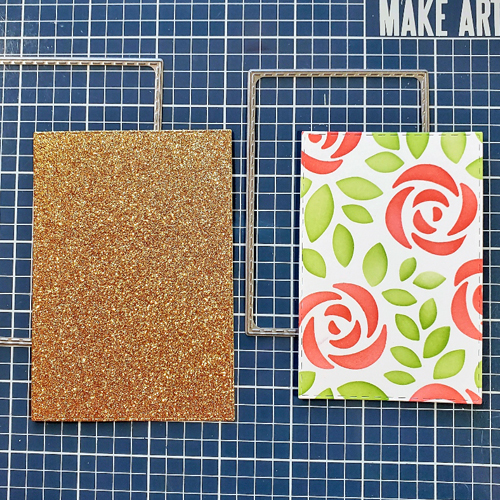
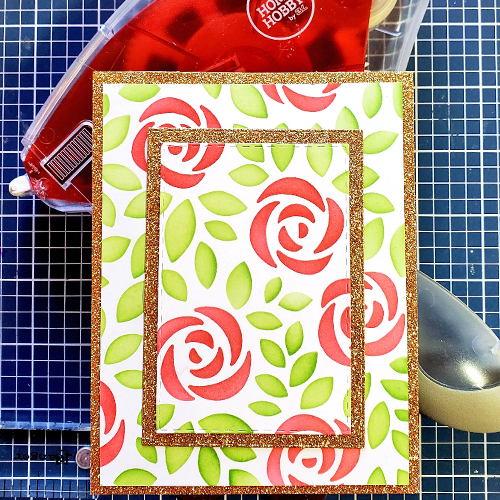
Layer all of the pieces using the E-Z Runner Grand and layer onto a gold glitter card.
![Layered Glitter Thank You Card by Jamie Martin for Scrapbook Adhesives by 3L](https://www.scrapbook-adhesives.com/blog/wp-content/uploads/2022/11/120122-Layered-Glitter-Thank-You-Card-Jamie-Martin-Step3a.jpg)
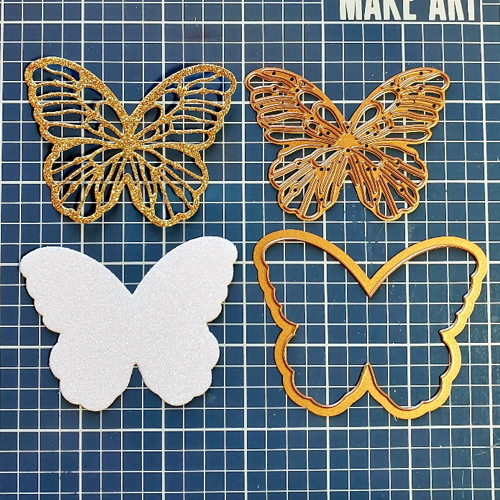
The Glitter Butterfly Element
Die-cut the butterfly pieces with white glitter and gold glitter cardstock.
![Layered Glitter Thank You Card by Jamie Martin for Scrapbook Adhesives by 3L](https://www.scrapbook-adhesives.com/blog/wp-content/uploads/2022/11/120122-Layered-Glitter-Thank-You-Card-Jamie-Martin-Step4a.jpg)
Grab the butterfly body and brush to color it with Nectar ink.
![Layered Glitter Thank You Card by Jamie Martin for Scrapbook Adhesives by 3L](https://www.scrapbook-adhesives.com/blog/wp-content/uploads/2022/11/120122-Layered-Glitter-Thank-You-Card-Jamie-Martin-Step5a.jpg)
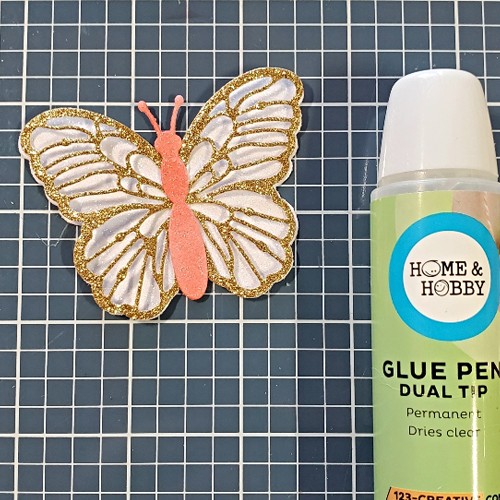
Use the Dual Tip Glue Pen to assemble the butterfly pieces together. Then place it diagonally to the center of the smallest card panel.
Die-cut the “Thanks” with black cardstock. Glue it below the butterfly with the Dual Tip Glue Pen.
![Layered Glitter Thank You Card by Jamie Martin for Scrapbook Adhesives by 3L](https://www.scrapbook-adhesives.com/blog/wp-content/uploads/2022/11/120122-Layered-Glitter-Thank-You-Card-Jamie-Martin-Main2-500x500.jpg)
Skill Level: Intermediate
Creative Time: 45 minutes
Materials Needed:
Scrapbook Adhesives by 3L®
EZ Runner Grand Refillable Dispenser
E-Z Dots® Repositionable Dots (Designer’s Tip)
Home Hobby by 3L®
Dual Tip Glue Pen
Save to Pinterest!
![Layered Glitter Thank You Card by Jamie Martin for Scrapbook Adhesives by 3L Pinterest](https://www.scrapbook-adhesives.com/blog/wp-content/uploads/2022/11/120122-Layered-Glitter-Thank-You-Card-Jamie-Martin-Long-Pin.jpg)
Visit our Website and Blog!
Sign up for our Newsletter so you never miss a contest or giveaway!