
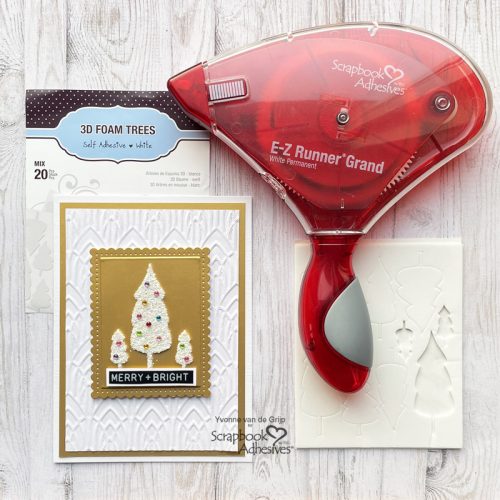
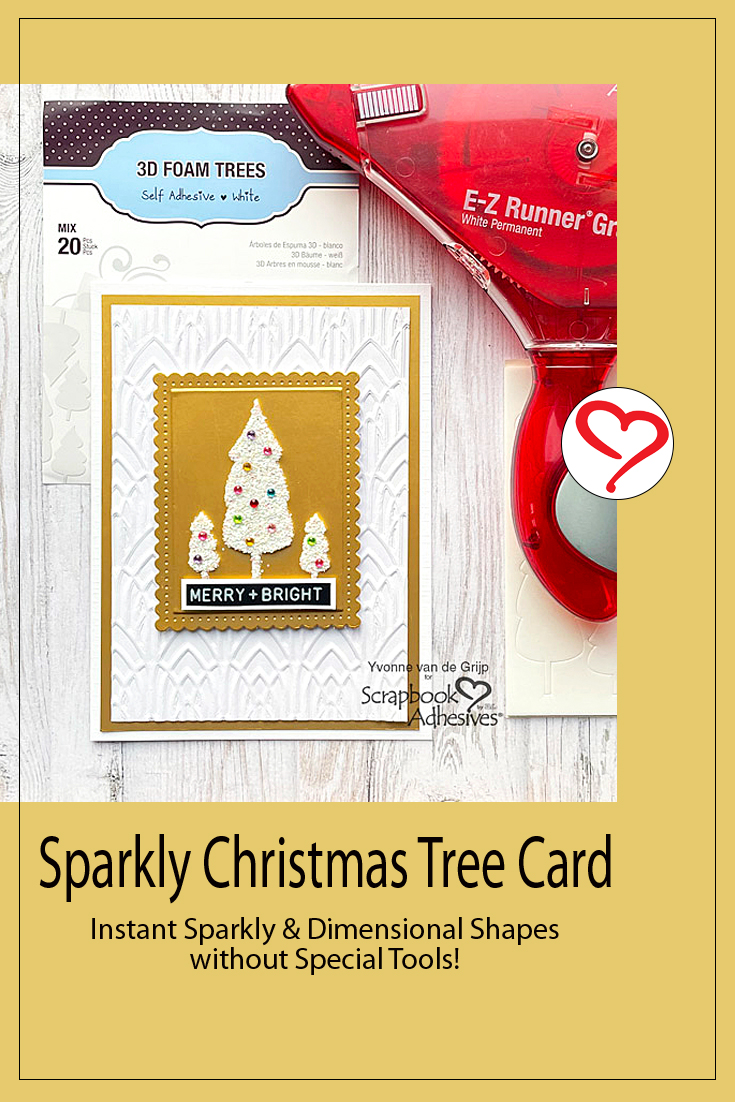
Hi everyone, Yvonne here with a quick and easy way to create a sparkly Christmas tree card. The holiday season is coming up, so time for some Christmas card inspiration. The 3D Foam Trees are such a whimsical design that makes this Christmas card a playful twist.
Using the Wear Your Adhesive on the Outside concept creates a stunning effect on your card. And…the great thing is, this card is also suitable for beginner cardmakers. Join me in making the card!
Making the Card Base
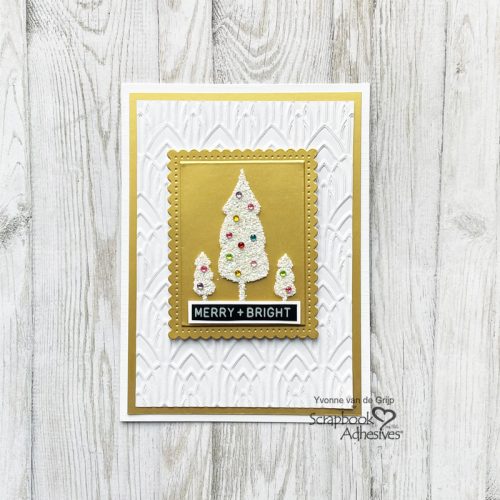
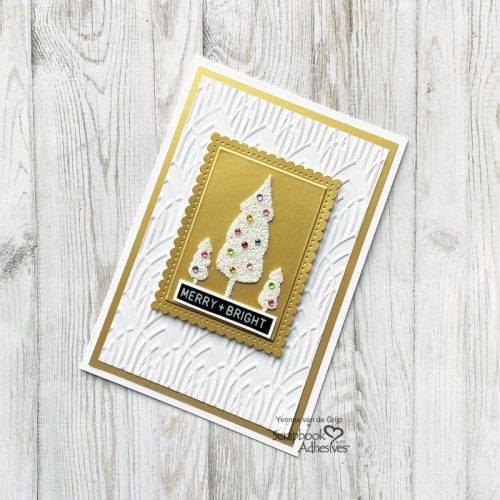
For my card, I chose the colors white and gold, a great combination for your festive Christmas cards.
Let’s start with an embossed white cardstock panel. Simply put a piece of white cardstock between an embossing folder and run through your die-cutting and embossing machine.
Next. layer the embossed paper onto a brushed gold card panel with the E-Z Runner® Grand Refillable Dispenser.
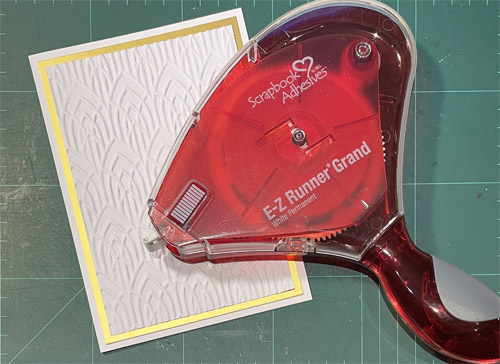
To finish, place the panels onto a white card base with the E-Z Runner® Grand Refillable Dispenser.
Embellish the Top Panel
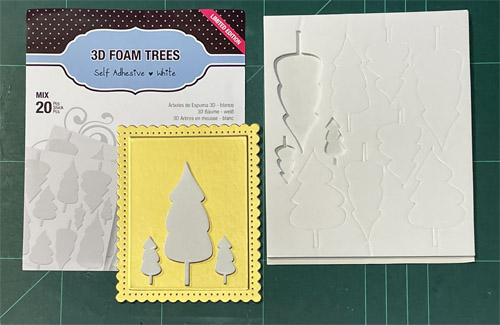
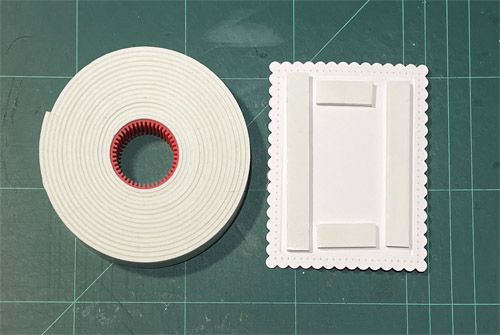
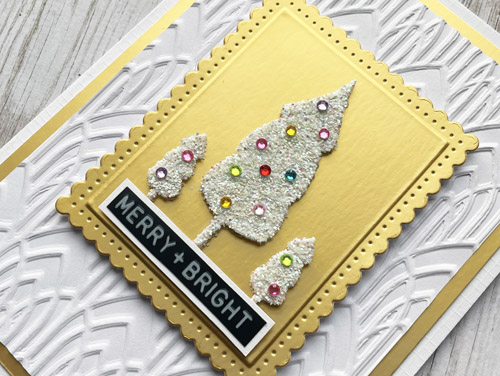
Die-cut and emboss a decorative edge rectangular panel from the brushed gold cardstock. Center one of the largest trees and two of the smallest trees on each side of the large tree from the 3D Foam Trees to the gold panel.
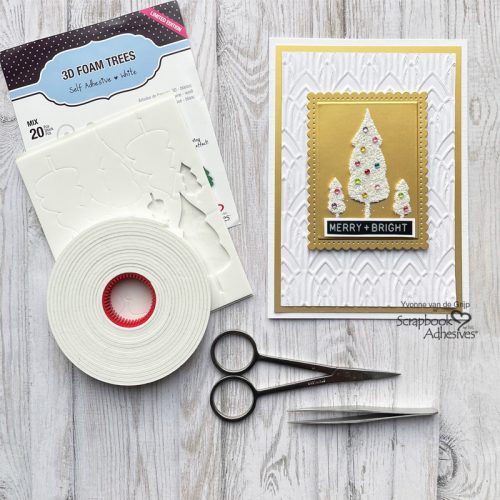
Now for the fun part! Remove the top liners from each of the trees and cover them with white glitter. Press the glitter into them to secure and tap off the excess. Maybe use a small brush to remove the stubborn glitter.
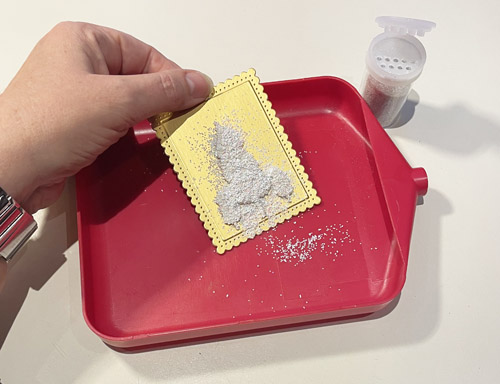
We refer to this technique as Wear Your Adhesive on the Outside. It brings out our adhesives from underneath layers and to the front to shine as embellishments. Easy, right? Perfect idea for holiday kids’ crafts!
Finishing the Christmas Card
To add more dimension, adhere the embellished front panel using Crafty Foam Tape White to the layered card base.
Using a sentiment sticker, place it on a white cardstock banner. Next, add it to the card front, using Crafty Foam Tape White. For the finishing touch, colorful rhinestones adhered to the glittered trees for an extra festive effect on this Sparkly Christmas Tree card.
And voilá… your Sparkly Christmas Tree card is ready to be sent! I hope you enjoyed this simple tutorial and wish you happy holiday crafting!
Creative Time: 30 minutes
Skill Level: Beginner/Intermediate
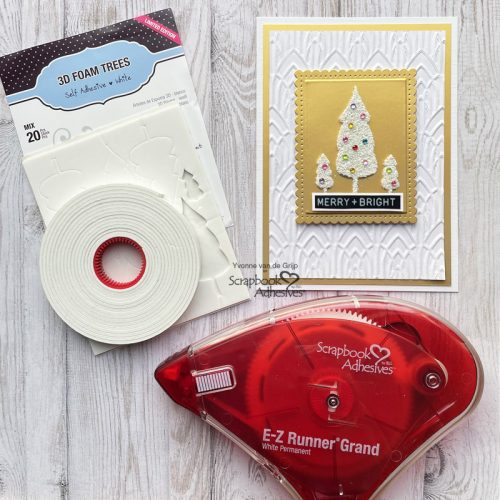
Materials needed:
Scrapbook Adhesives by 3L®
E-Z Runner® Grand Refillable Dispenser
Other
Cardstock (White, Brushed Gold); Etched dies and Die-Cutting and Embossing Machine (Spellbinders Paper Arts®: Platinum 6 Machine, Fancy Edged Rectangles Etched dies); Sentiment Sticker (Tim Holtz: Label Stickers Christmas); Glitter (White); Rhinestones; Tweezers; Scissors; Paper Trimmer
Save to Pinterest!
Visit our Website and Blog!
Sign up for our Newsletter so you never miss a contest or giveaway!


