
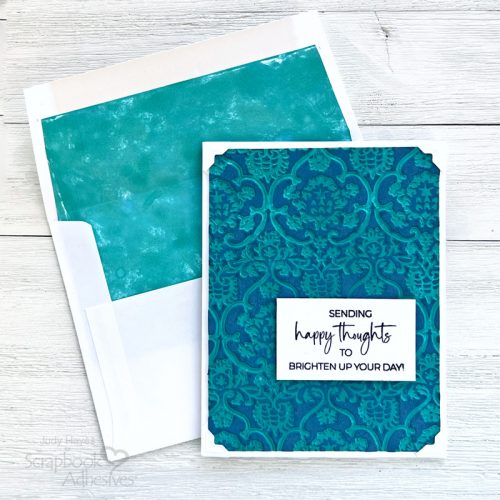
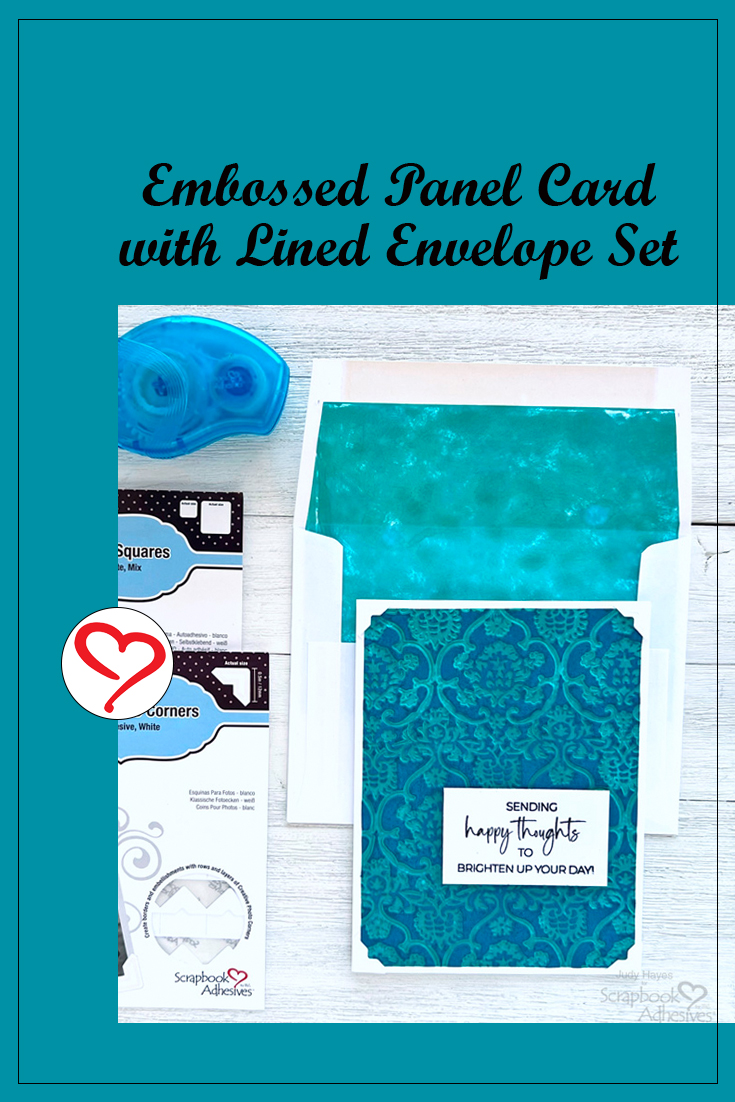
Hi, Judy here today! I’ve put together a striking yet simple embossed panel card with a coordinating lined envelope. I used Creative Photo Corners White as an element of design on the card and lined the envelope with coordinating inked paper. It’s easy to do and adds a touch of elegance.
Create an Embossed Panel and Inked Liner
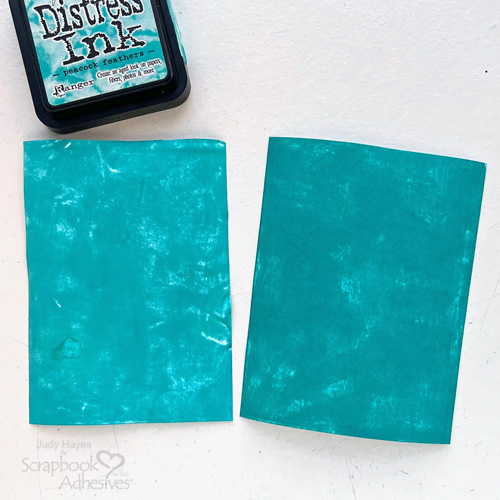
Cut a piece of white cardstock 4.25 x 5.5 inches and a piece of printer paper 4.5 x 5.25 inches. Use the Distress Peacock Feathers ink pad to rub ink directly onto the paper on both pieces. Allow to dry or use a heat tool.
Use an embossing folder and die-cutting machine to emboss the inked cardstock. Trim to 4.0 x 5.25 inches. (Designer Tip: When embossing cardstock, I cut it slightly larger than needed and trim after embossing to allow for shrinkage.) Carefully rub the Distress Oxide Uncharted Mariner ink pad over the embossed pattern. Dry with a heat tool.

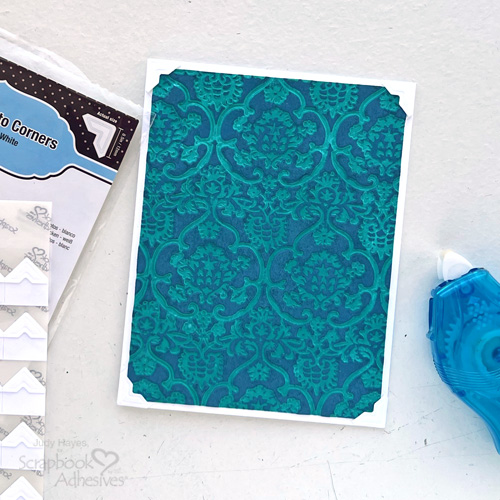
Assemble the Card Panel
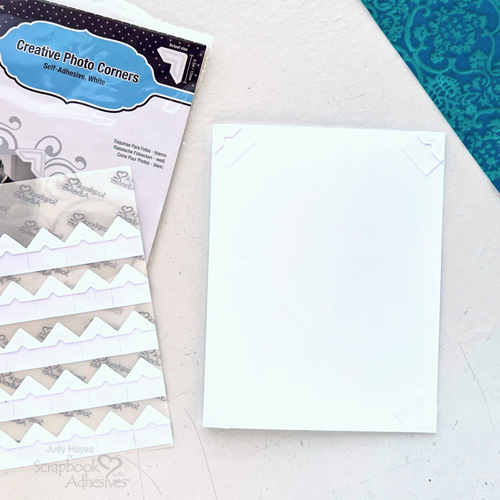
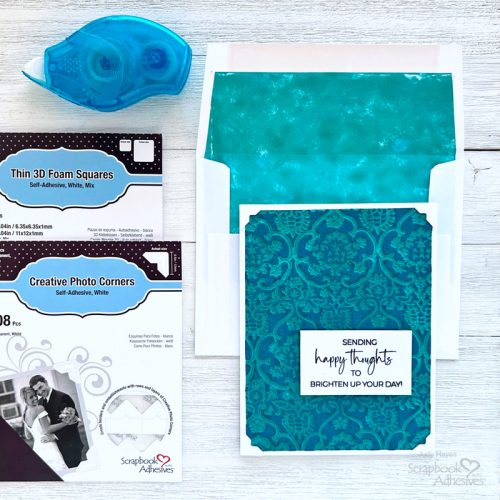
Form a 4.25 x 5.5-inch card from a 5.5 x 8.5-inch piece of white cardstock. Place Creative Photo Corners White on each corner aligned with the corners of the card.
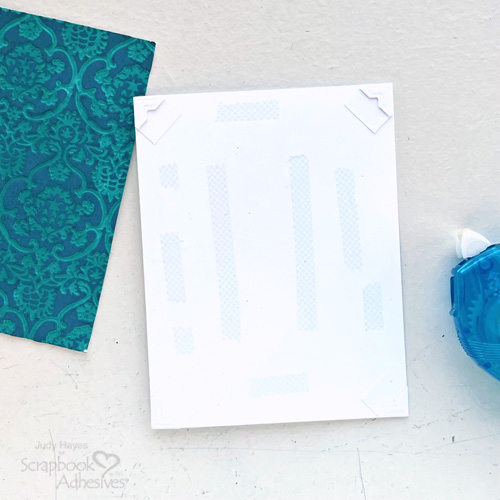
Apply adhesive to the center area of the card front with the E-Z Runner® Petite Permanent Dots Refillable Dispenser. Carefully tuck the corners of the embossed panel into photo corners on the card and press in place.
Add the Verse
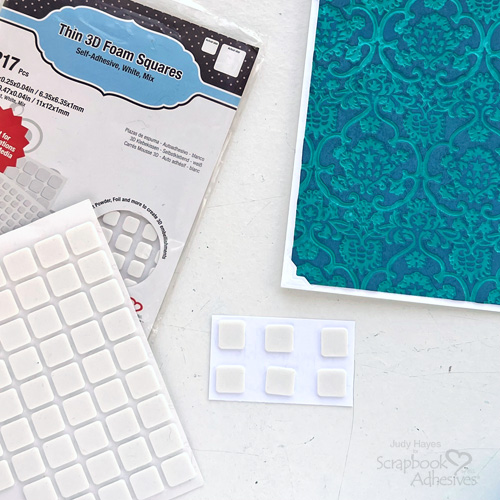
Stamp a verse on white cardstock with black ink and trim to 1.25 x 2.25 inches. Apply Thin 3D Foam Squares White Mix to the back of the verse, peel the liners off, and fasten on the card front.
Make the Envelope Liner
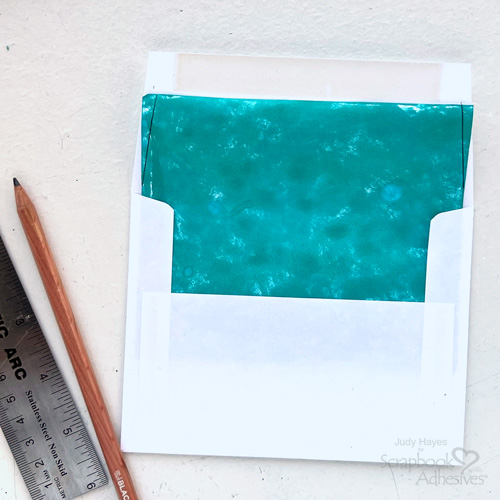
Slide and center the inked printer paper into an envelope so that it is below the glue line on the flap. Use a pencil to draw lines on inked paper to match the angle of the envelope flap. Holding the inked paper in place, fold the envelope flap to make a crease on the liner. Remove the liner and trim off the edges along the drawn lines. Refold if necessary to make nice crisp even fold.
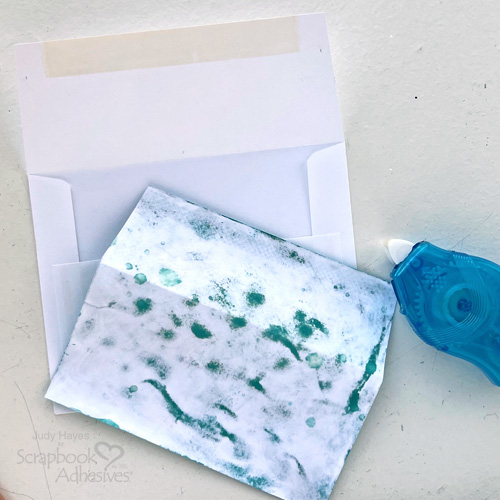
Apply adhesive to the top flap portion of the envelope liner with the E-Z Runner® Petite Permanent Dots Refillable Dispenser. With the liner folded down, slip it into the envelope and align it centered and the liner fold matching envelope fold. Fold the envelope flap over the liner and press to secure.
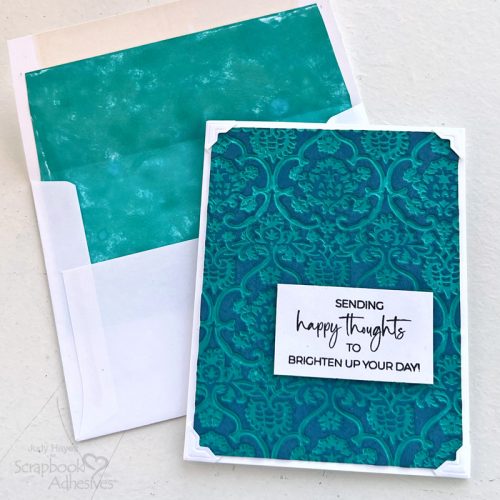
All finished! Now you have a beautiful matching Embossed Panel Card with a Lined Envelope set.
Thanks for Visiting!
Judy Hayes
Creative Time: 20 mins
Skill Level: Beginner
Materials Needed:
Scrapbook Adhesives by 3L®
E-Z Runner® Petite Permanent Dots Refillable Dispenser
Thin 3D Foam Squares White Mix
Other: Stamp: Penny Black (Love Big); Ink: Ranger Ink (Distress Oxide Uncharted Mariner, Distress Peacock Feathers); Imagine Crafts/Tsukineko (Versafine Onyx Black); Embossing Folder: Sizzix (Tim Holtz Tapestry); White Cardstock; White Printer Paper, White Envelope with Square Flap
Click Preferred Retailers List
Save to Pinterest!
Visit our Website and Blog!
Sign up for our Newsletter so you never miss a contest or giveaway!


