
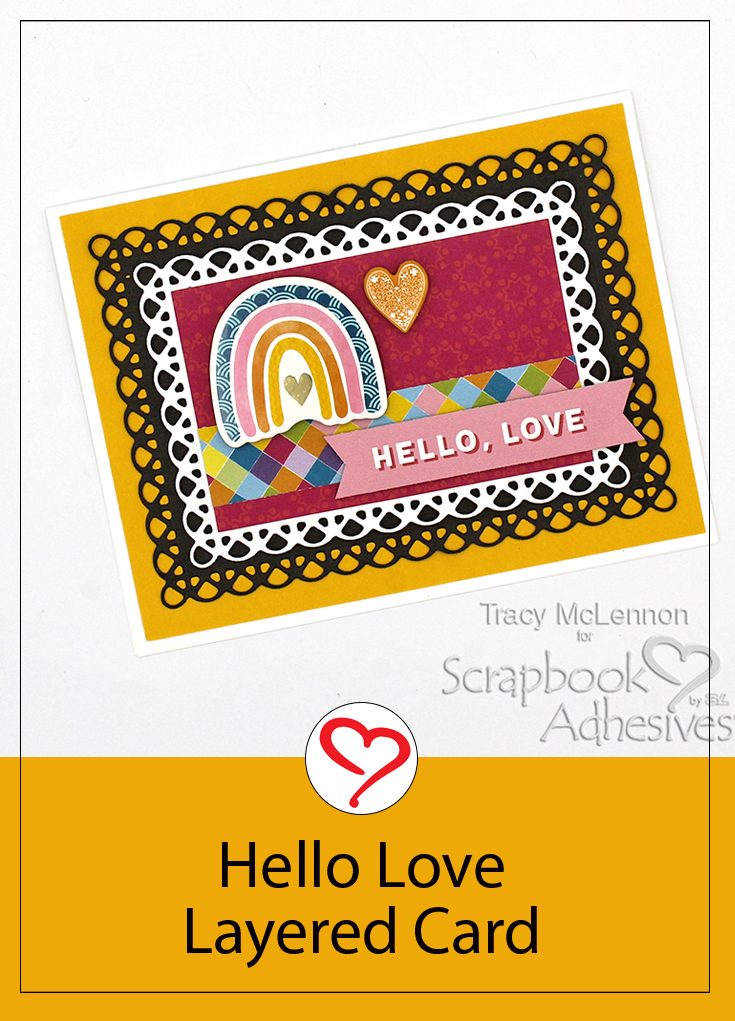
Hello crafty friends! Tracy here and today I have a bright Hello Love Layered Card to share that is so simple to create. Here are all of the crafty details.
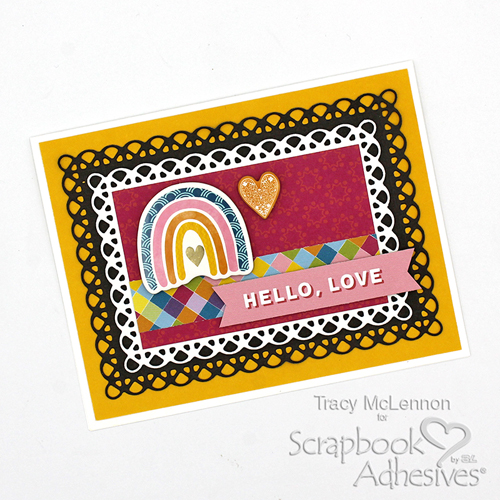
Hello Love Layers
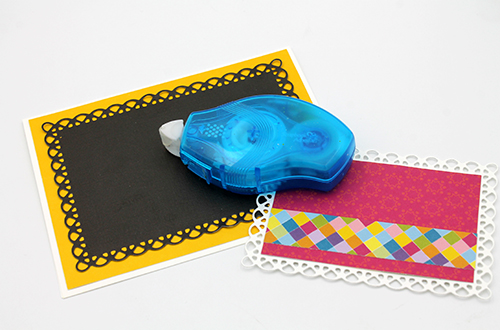
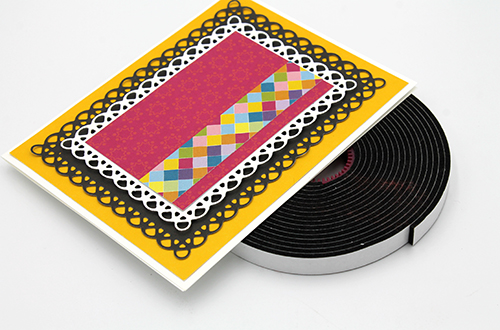
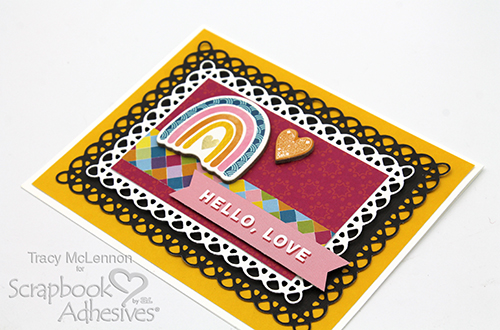
First step in creating this bright layered card is to cut the cardstock and patterned paper layers. The card base is white cardstock, the next layer is yellow cardstock. Die cut the next 2 layers from black and white cardstock. Cut pieces of patterned paper to cover the top layer (the die cut white piece).

Adhere the yellow and black cardstock layers to the white cardstock base using the E-Z Runner® Petite Permanent Dots Refillable Dispenser. Again using the E-Z Runner® Petite Permanent Dots Refillable Dispenser, adhere the top layers together.
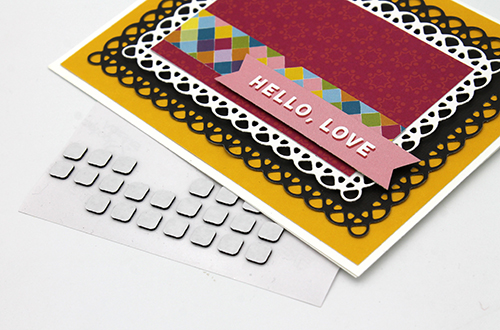
Attach these 2 layered pieces together using Crafty Foam Tape Black to add some dimension to this bright layered card. Add the sentiment to the card with Thin 3D Foam Squares Black Mix.
The Finishing Touches
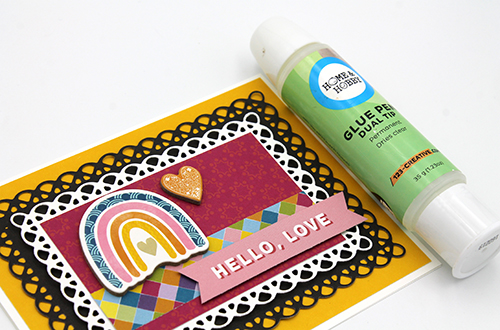
Often I find chipboard stickers to have a lack of stick. In this case, I will pull out my Dual Tip Glue Pen to attach the pieces to my projects. These pieces are the finishing touch to this bright Hello Love Layered Card.
Thanks so much for stopping by!
Tracy
Creative Time: 30 minutes
Skill Level: Beginner
Materials needed:
Scrapbook Adhesives by 3L®:
Thin 3D Foam Squares Black Mix
Crafty Foam Tape Black
Dual Tip Glue Pen by HomeHobby™ by 3L
E-Z Runner® Petite Permanent Dots Refillable Dispenser
Other: Patterned Paper and Chipboard Stickers: Vicki Boutin Collection; Frame Dies; Black, White, and Yellow Cardstock
Save to Pinterest!
Visit our Website and Blog!
Sign up for our Newsletter so you never miss a contest or giveaway!


