
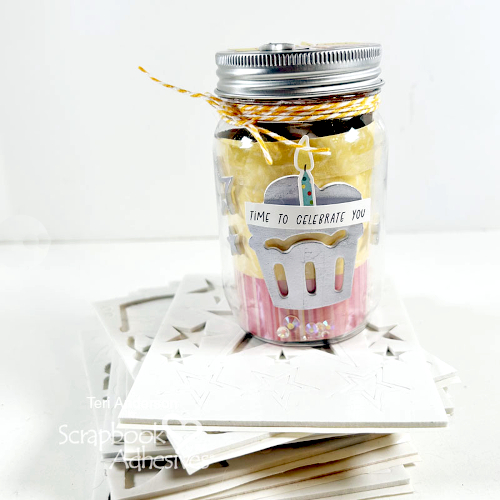
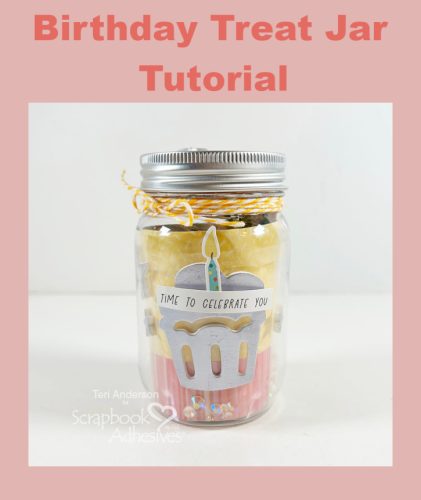
Hi, friends! Got a friend with a birthday coming up? Teri here to show you to make a super cute Birthday Treat Jar! While I filled this little jar with treats, you could easily use it to place money or gift card inside instead.
Create the Inner Pieces for the Jar
For this project, you’ll need a small jar with a lid. You can use a glass jar or a plastic one. Don’t feel like buying one to use for the project? Upcycle an old jar for it.

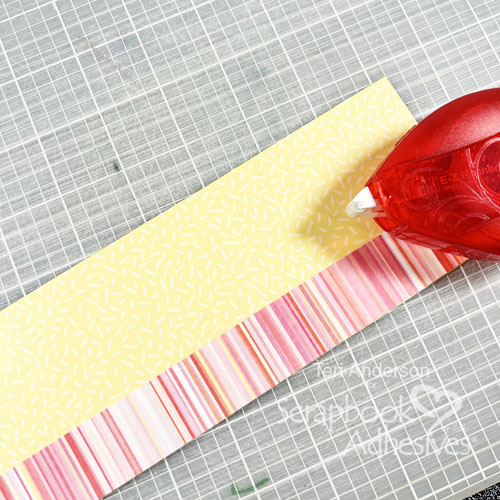
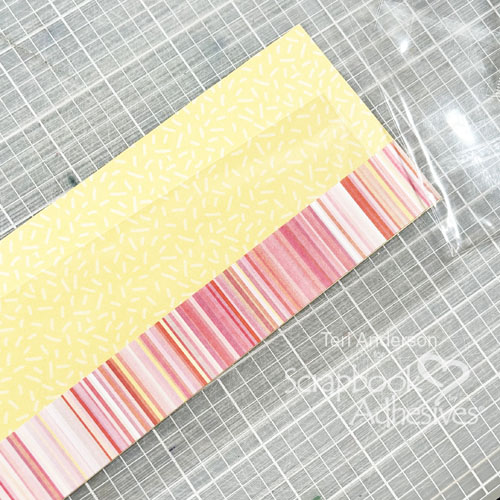
Start by cutting a piece of patterned paper to fit inside the jar. You want the panel to be able to roll up so you can fit it inside it. Decorate it by adding another strip of paper to it.
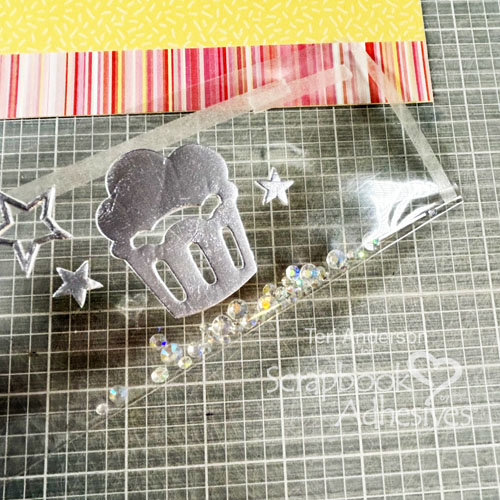
Cut a clear transparency to fit in the jar. Make sure you can fold the transparency in half. Don’t have a transparency? Recycle a piece of clear plastic packaging. It will work just fine.
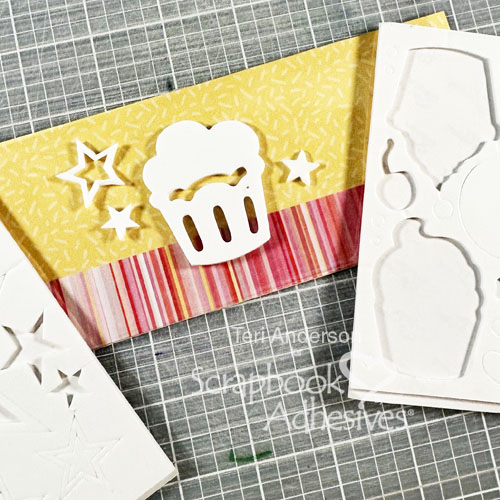
Set your transparency on your patterned paper piece. You’ll need to do this for placement. Adhere some 3D Foam Shapes onto it. Pick ones with a birthday theme.
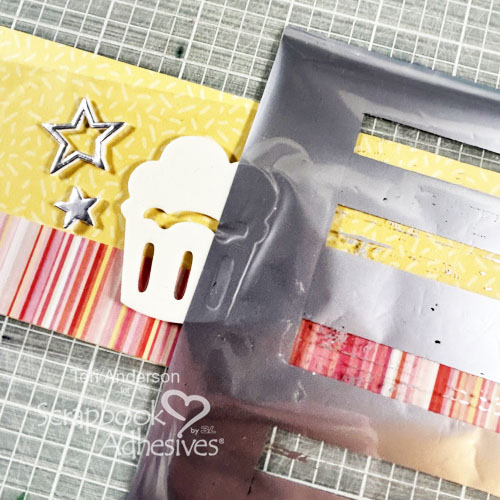
Use Metallic Transfer Foil
Set a piece of Metallic Transfer Foil onto the shapes one at a time with the pretty side up. Burnish the foil onto it. If you are using a piece of foil that you’ve used before and have open spaces, that’s OK. Just apply a little bit of foil at a time. Start with one side of the shape and then do the other. Work toward the middle until the shape is completely covered.
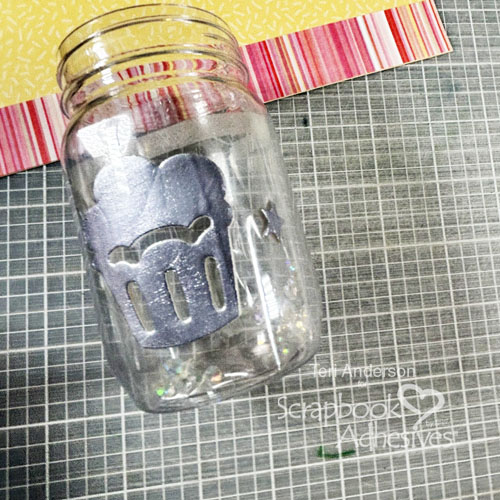
Apply Crafty Power Tape to the inside of your transparency. Add some sequins and seal up the panel. Roll the panel into a circle and place it in your jar. Roll your patterned paper panel and do the same.
Decorate the Jar’s Outside and Lid
Decorate the outside of your jar with stickers or additional 3D Foam Shapes.
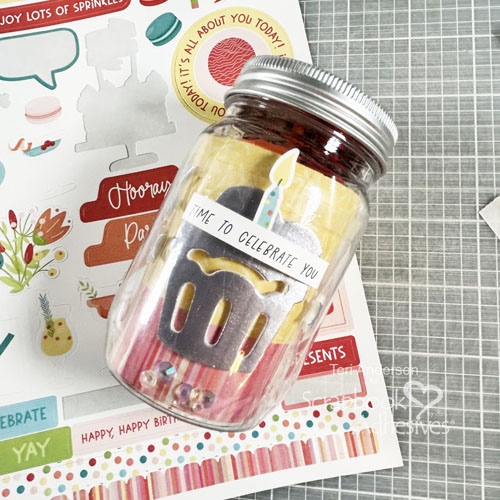
Take the lid and decorate it with stickers and additional 3D Foam Shapes. Apply Metallic Transfer Foil to any of the shapes you add.
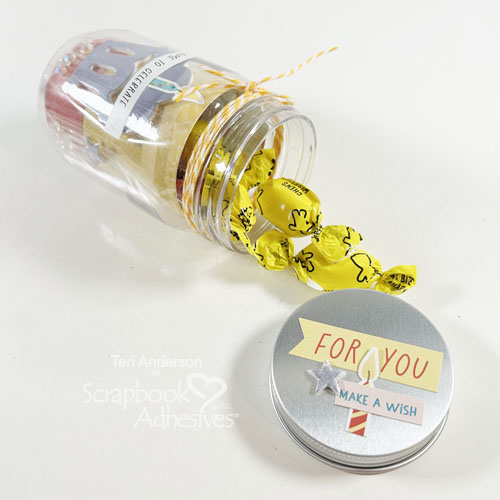
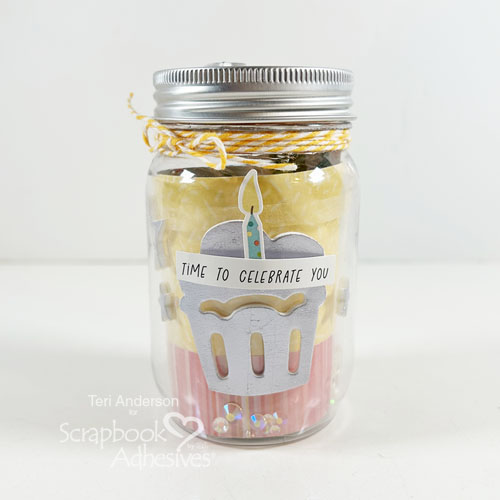
Complete the jar by tying some ribbon or twine onto it. Use an Adhesive Dot Micro to hold the twine or ribbon in place. Fill the inside of the jar up with candy or whatever you desire.
I hope you are inspired to decorate a jar to give as a gift! Let me know if you do!
Happy Creating!
Creative Time: 60 minutes
Skill Level: Beginner
Materials needed:
Scrapbook Adhesives by 3L®:
Metallic Transfer Foil Sheets Nature Colors
E-Z Runner® Permanent Strips Refillable Dispenser
Crafty Power Tape Polybag 81ft
Other: Patterned Paper and Stickers: Photo Play (Birthday Sparkle Collection); Twine: The Twinery; Sequins: This Calls for Confetti; Jar: Dollar Tree; Candy
Save to Pinterest!
Visit our Website and Blog!
Sign up for our Newsletter so you never miss a contest or giveaway!


