
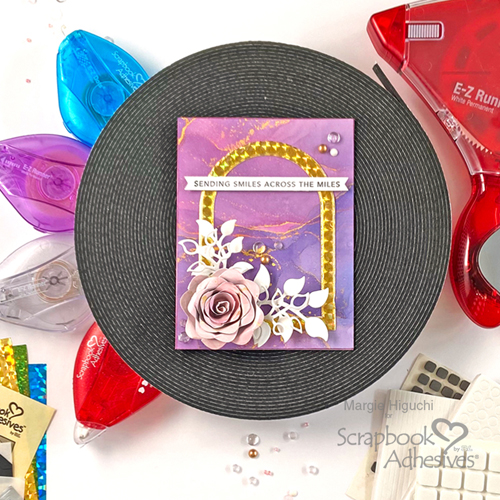
Love a good purple card! So I thought I would create an Arched Friendship Card for a long distance friend. Hi, Margie here today and I hope you can use this idea for your next card creation!
Create the Arch Card Front
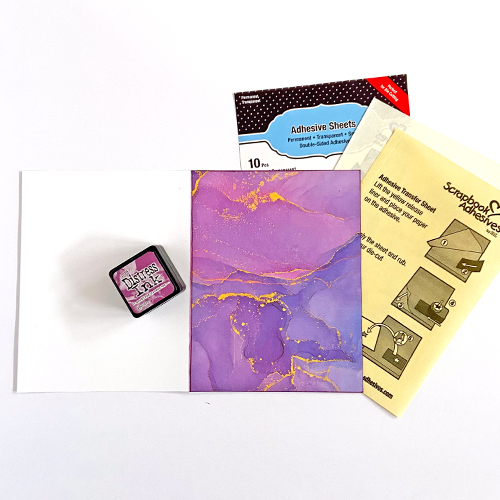
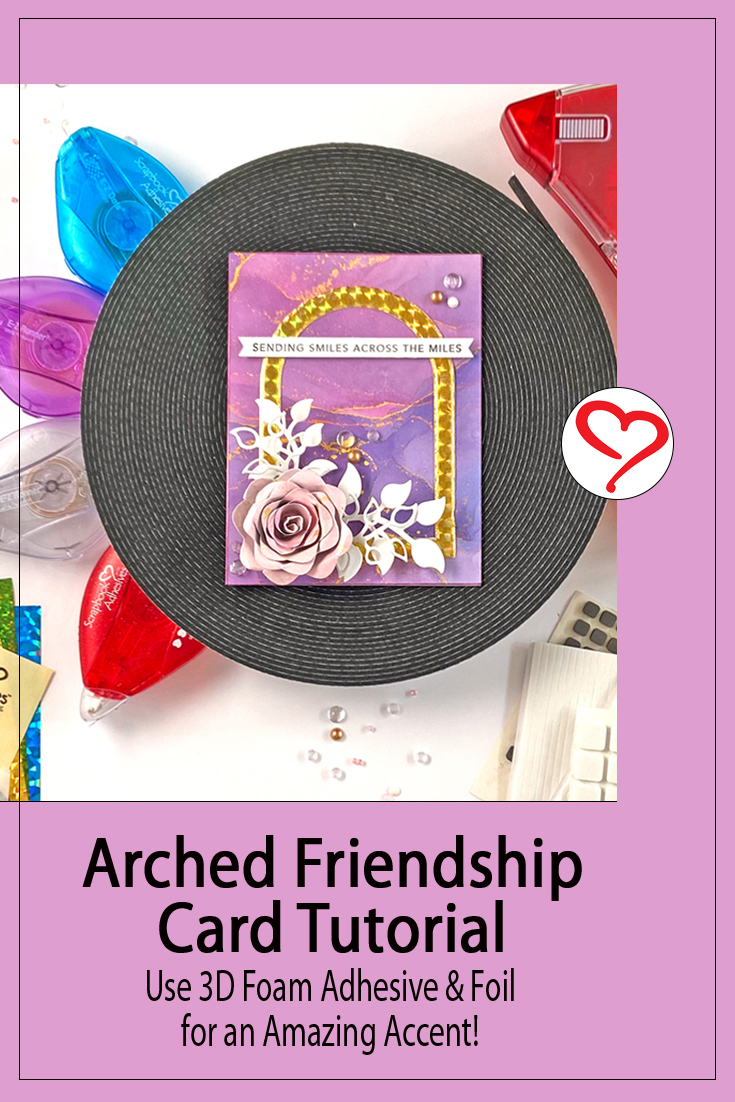
Fold a piece of 8.5 x 5.5 in. white cardstock in half to create a side fold A2-size (4.25 x 5.5 in.) card. Trim the purple patterned paper to 4.25 x 5.5 in. to cover the card front. Apply a sheet of Adhesive Sheets 4 x 6in. to the back of the patterned paper card panel. See How to Use Adhesive Sheet video.
Before placing the panel on the card base. I do one step to keep the card base from peeking out from behind the panel. Designer’s Tip: Ink the edges of the patterned paper panel and card front with matching ink color. This helps to keep the edges uniform.
The Arch Design
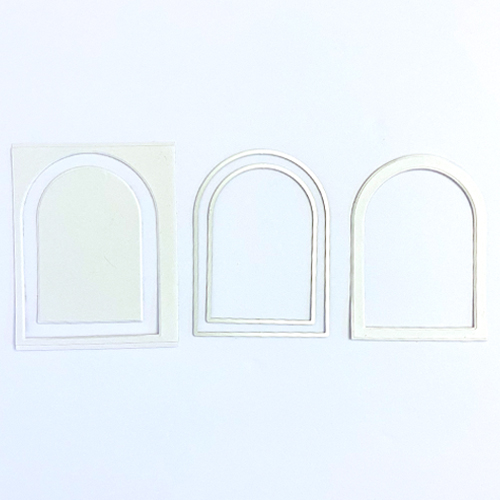
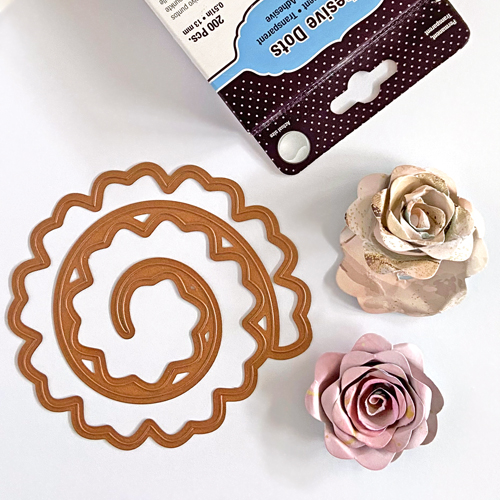
Nest two arch dies together to create a frame and place on a 3D Foam Creative Sheets Small White. Make sure to secure the dies and sheet with washi tape. This will prevent slipping in the die-cutting machine. Next, die-cut and center it to the card front.
Wear Your Adhesive on the Outside with 3D Creative Sheets
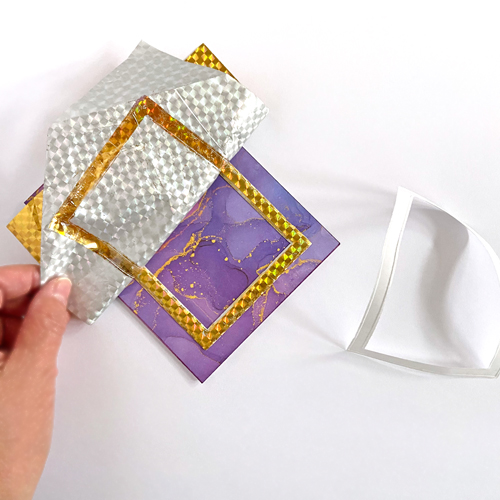
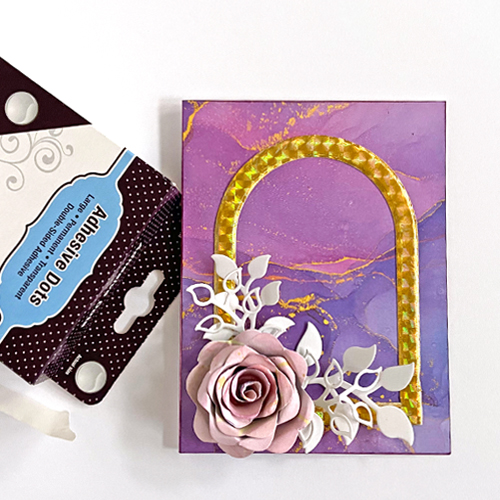
Remove the top liner of the arch and place gold foil from the Metallic Transfer Foil Sheets Celebrate Colors set over the exposed adhesive. Make sure the color side is facing you and gently rub/tap the color into the arch. Remove the foil to reveal the color – beautiful! Reapply foil in missed areas.
Add the Elements
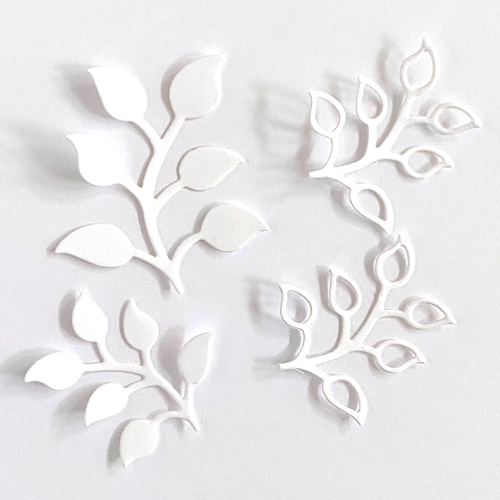
Die-cut the leaves in white cardstock and rosette flower pink patterned paper. Designer’s Tip: light mist the flower with water to soften the paper fibers to easily roll and bend the petals. Secure the flower base with Adhesive Dots Large. Determine placement of the floral elements in the lower left corner of the arch and adhere all with the Adhesive Dots Large.
The Sentiment and Sparkle
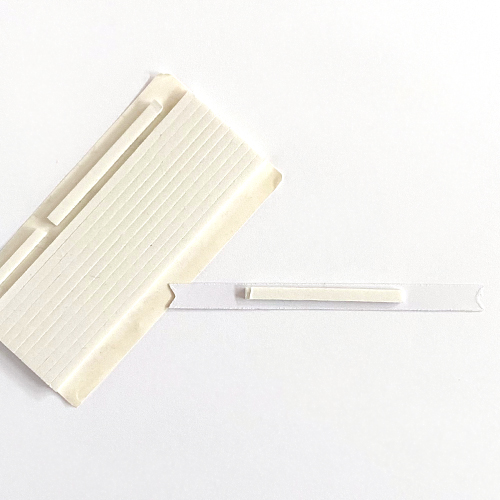
Stamp and die-cut a sentiment strip onto white cardstock. Place a 3D Foam Strips on the back and add it towards the inside top of the arch. Using Adhesive Dots Micro, add rhinestones and sparkle around the card front.
Would you try a sparkly Arch Friendship Card idea? I hope you do – it’s so easy!
Thanks for stopping in!
Margie Higuchi
Creative Time: 40 mins
Skill Level: Intermediate
Materials Needed:
Scrapbook Adhesives by 3L®
3D Foam Creative Sheets Small White and 3D Foam Strips
Adhesive Dots Micro and Adhesive Dots Large
Metallic Transfer Foil Sheets Celebrate Colors
Other: Papers: Reminisce (Liquid Marble Collection); Stamp: Taylored Expressions (Simple Strips – Friendship Stamp + Die Set); Black Ink; Craft Dies: Spellbinders Paper Arts (Flower & Leaves) and Hero Arts (Arch Dies); Pink Patterned Paper; White Cardstock
Click Preferred Retailers List
Save to Pinterest!
Visit our Website and Blog!
Sign up for our Newsletter so you never miss a contest or giveaway!


