
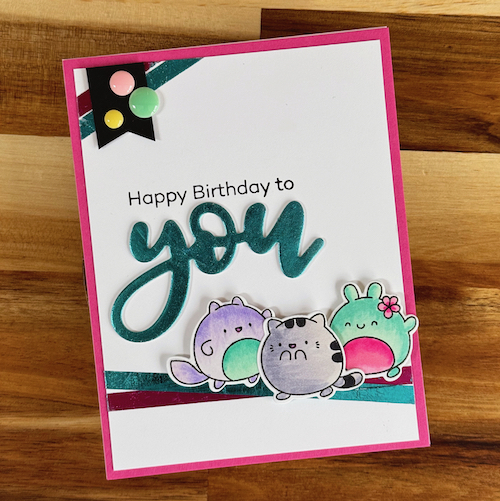
Hi, Jingle here today and I am sharing a super fun Shimmery Birthday to You Card that you can create using some great adhesives along with your favorite colors of Metallic Transfer Foil!
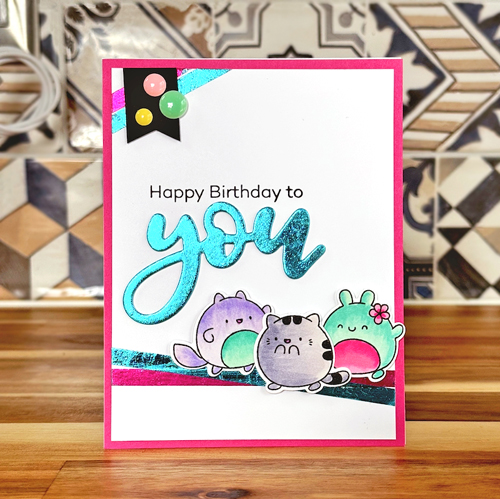
This card is perfect for a kiddo or a kid at heart who loves Squishmallows! I don’t know about you, but in our house, those are quite popular. My son loves to sit on his, naturally. LOL!
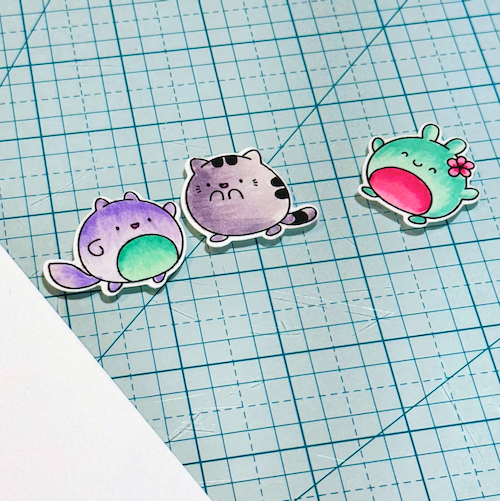
Shimmery Birthday Creatures
Let’s get started! First, I stamped, die-cut, and colored the adorable images I wanted to use on my card.
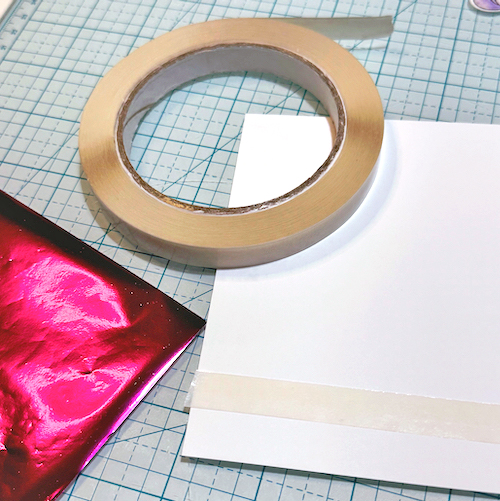
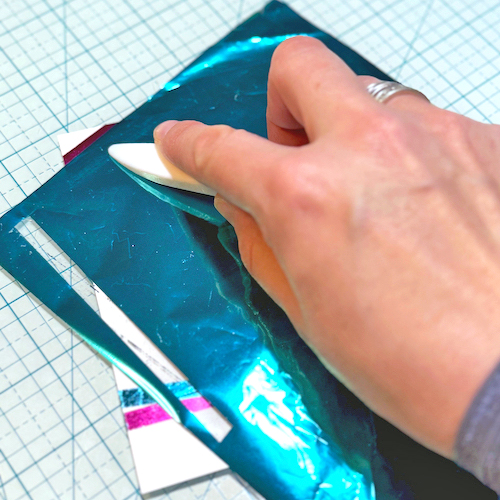
Wear Your Adhesive on the Outside with Crafty Power Tape
Next, I trimmed my card panel and added a strip of Crafty Power Tape Polybag 81ft toward the bottom of the panel. Remove the top liner. Take a piece of magenta foil from the Metallic Transfer Foil Sheets Variety Colors and with the color side up, place it over the exposed adhesive and rub it to transfer the color to the tape. Place another strip of the tape over the foiled tape and use the same foiling steps using the teal foil. This provided extra shine and a great place to ground my images.
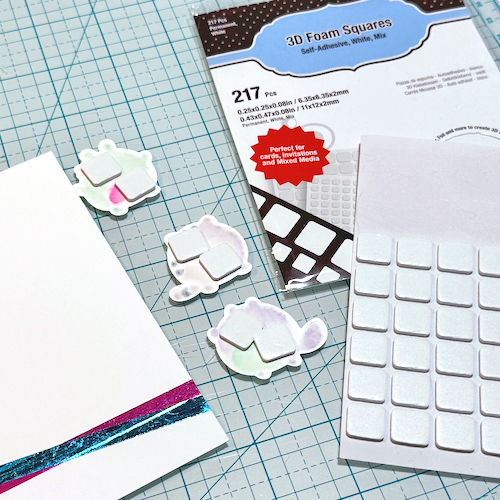
Birthday Creature Placements
Once the strips were foiled, I added 3D Foam Squares White Regular to the back of each image and adhered them right on that foiled accent.
Wear Your Adhesive on the Outside with Crafty Power Tape Part 2
Next, I added two more strips of Crafty Power Tape Polybag 81ft in the top left corner of the panel side-by-side. I didn’t overlap these and used the same foil colors to tie them all together nicely. Designer’s Tip: Using a bone folder transfers the foil really helped me get a nice result.
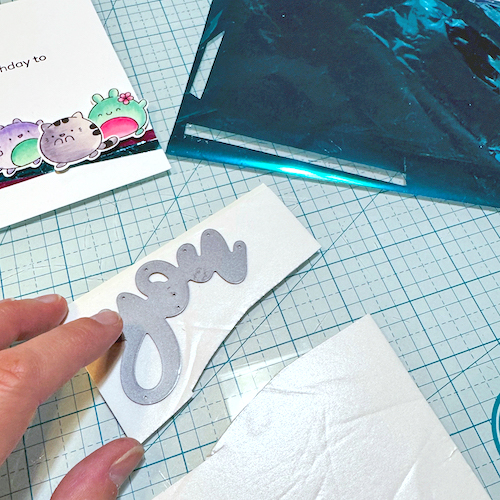
Sentiment Placement
Using the word die as a guide, I placed it on a sheet of 3D Foam Creative Sheets Small White to be sure I cut exactly the right size. Then the piece was covered with the teal foil before die-cutting the word die. It is a great way to ensure full coverage and a beautiful foiled sentiment. This is one of my favorite techniques, actually. Then stamp the other part of the sentiment directly on the panel and adhere the foiled word ‘you’ below it.

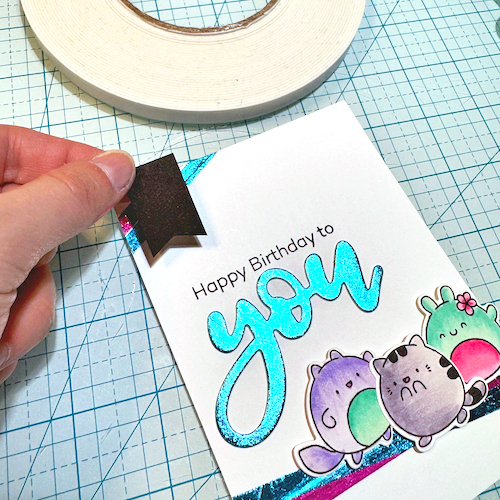
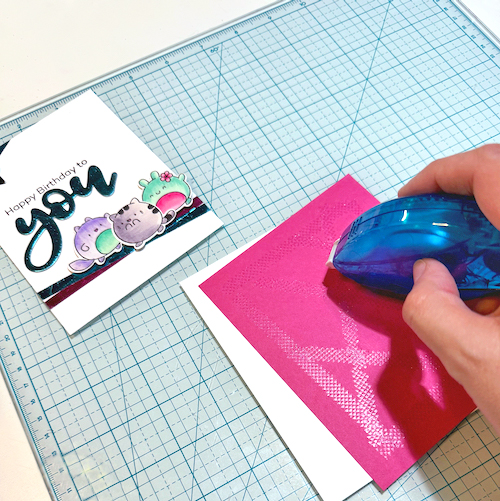
Finishing Touches
To complete the design, I trimmed a strip of cardstock into a short banner shape and adhered it with the Crafty Foam Tape White 54ft. Add a few enamel dots in coordinating colors. Then mat the panel to a pink panel using my trusty E-Z Dots® Permanent Dispenser. Lastly, adhere the layered panel to a card base to finish the card.
I hope you have enjoyed this super fun Shimmery Birthday to You Card design and give some of these techniques a try! The foiled sentiment is a game changer! I can’t wait to see what you create!
Thanks for stopping by!
Jennifer Ingle (aka Jingle)
Creative Time: 30 mins
Skill Level: Intermediate
Materials Needed:
Scrapbook Adhesives by 3L®
E-Z Dots® Permanent Refillable Dispenser
Crafty Power Tape Polybag 81ft.
3D Foam Creative Sheets Small White
Metallic Transfer Foil Sheets Variety Colors
Other: Stamp: My Favorite Things (JB Super Heroes, All About You); Ink: Tsukineko (Versafine, Onyx Black); Craft Dies: My Favorite Things (All About You); Markers: Olo Markers; Pink, White Cardstock
Click Preferred Retailers List
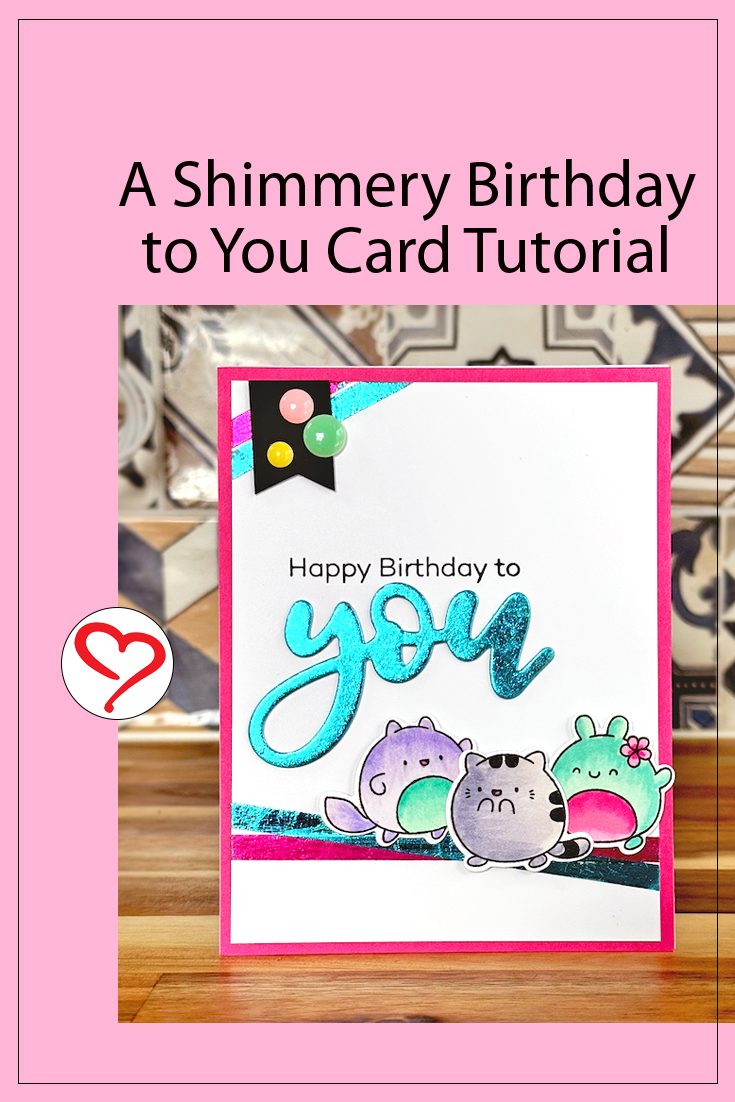
Save to Pinterest!
Visit our Website and Blog!
Sign up for our Newsletter so you never miss a contest or giveaway!


