
Hi there,
I want to show you a little Easter Bag.

Here is a little Tutorial how I made it.
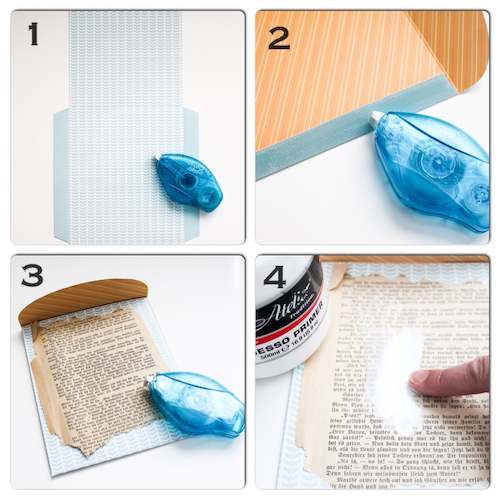
1 – I used a bag from a Pocket Book Pad designed by Leeza Gibbons.
2 – It’s just so easy to adhere it together with the E-Z Dots® Permanent – Refillable
3 – Adhere a old book page with the E-Z Dots® Permanent – Refillable again.
4 – Add white Gesso with fingers to blend the text out.
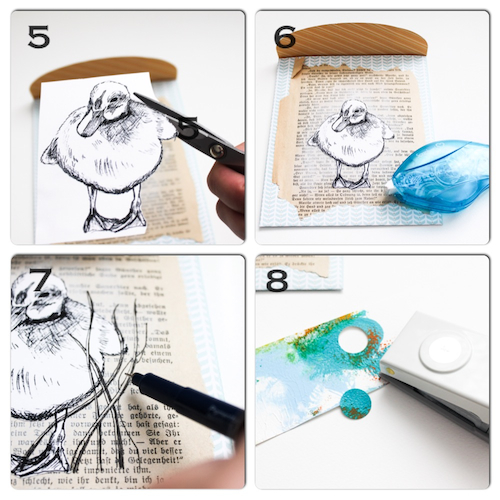 5 – Stamp your image and cut it out with scissors. I used a Duckling as motive I designed for Whiff of Joy . It’s one stamp of the Spring collection “Freshly Hatched” and its available at the 20th of April.
6 – Adhere your motive with E-Z Dots® Permanent – Refillable
7 – Doodle and sketch some grasses with a black pen. If you don’t want to draw you can also use stamps. Grasses is also a stamp on the coming soon Spring stamp set.
8 – Punch a little circle and add a Brad to create a shutter look for the flap.
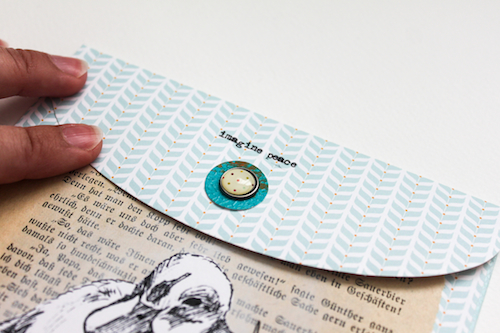
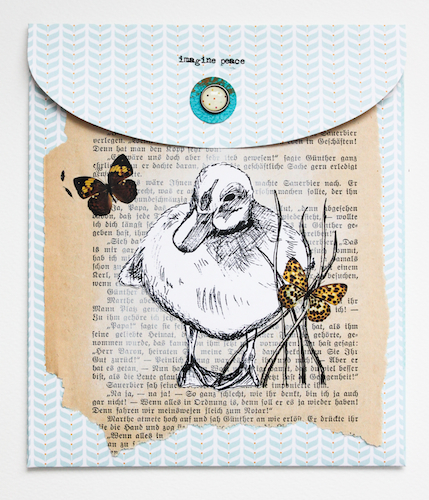
Now you can add some sentiments or other details. I used some Rub-ons. And now it’s ready to fill it with a coupon or card or little Easter present.
I used my favorite E-Z Dots® Permanent – Refillable
Other Supplies:
Stamps “Duckling” from the Spring stamp set “Freshly Hatched” I designed for Whiff of Joy – available at the 20th of April
Bag from Pocket Book Pad “Wishes and Dreams” from Leeza Gibbons Prima Marketing
Rub-ons “Words” from Tim Holtz
Rub-ons “Butterflies” from 7 Gypsies
Old Book Page
Black Pen
Brad from RSVP collection Basic Grey
Piece of handmade paper
By Deborah S April 8, 2014 - 5:10 pm
This is a great little bag to put money or a gift card in I just love that little duckling and all the other little touches you used thanks for the tutorial!
By Amante del Papel April 9, 2014 - 2:34 pm
what a fantastic bag!