
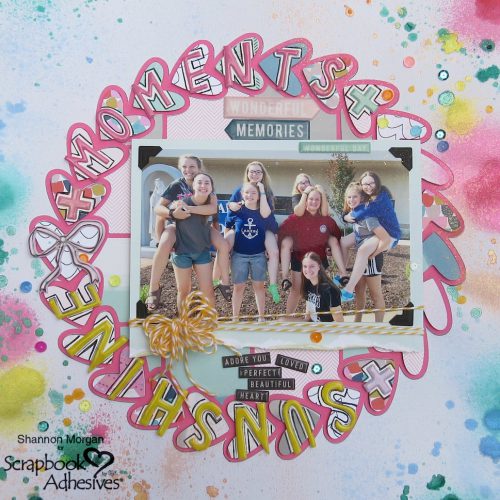
Good morning, Shannon here, sharing a scrapbook layout with you today. Moments in my kids’ lives are barreling by. I’m trying to capture them all as they happen. Especially Mackenzie, who is almost hitting the halls as a freshman. As a result, I am still trying to keep up with things that happened in May! Scrapbook Adhesives by 3L® is definitely going to help me do that with this layout.
Take a look at this layout, you’ll find lots of detail, even if the layout itself is simple in nature. Many different adhesives will play the part in the coming together of this layout.
Tips and Tricks with Adhesives
This scrapbook layout has lots of parts and pieces to assemble. I used the sketch feature on my cutting system to ensure that everything would line up and be straight. You can see this trick in the picture below. This extra step, in the beginning, is a time saver and sanity saver in the end! After using the sketch feature, cut out the pieces and parts.
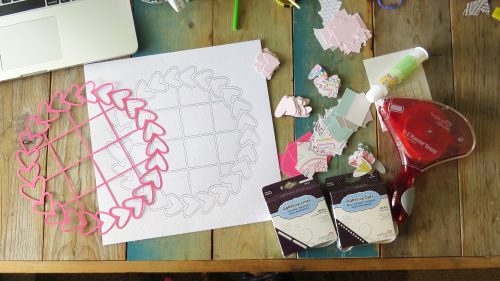
The first thing you want to do is adhere the cut piece to the outlines. I used a combination of Dual Tip Glue Pen and Adhesive Lines to do this. Adhesive Lines were perfect for the lines of the grid. The Dual Tip Glue Pen had the perfect tip for the many hearts.
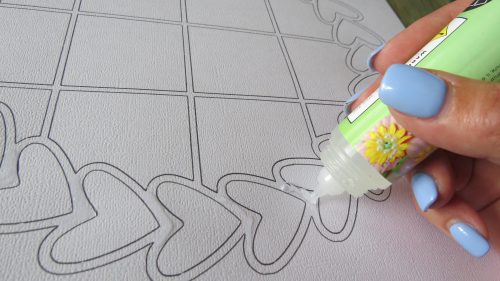
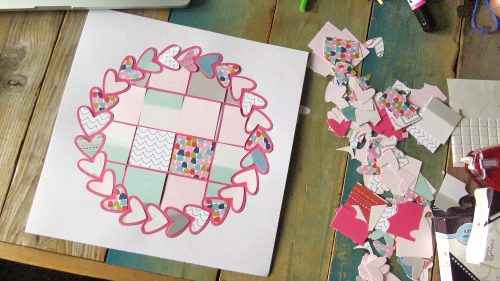
Laying out every piece before adhering it is also a good idea. When you need to use many adhesives because you have a lot of “working pieces” in the layout, this may seem tedious but is entirely worth the effort. The reason for this is simply, you have no duplicates next to each other. Once the hearts and grid are all in place, I begin adhering all the “cuts”. Working on the grid first, I used my go-to E-Z Runner® Grand Refillable Dispenser.
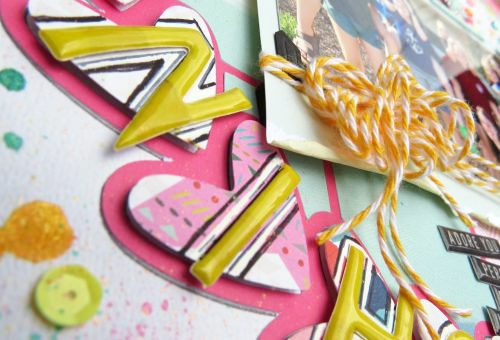
Adhesives and Those Hearts
Three words: 3D Foam Squares. To clarify, each heart is mounted with 3D Foam Squares and then put into place. The truth is, this is time consuming. In the end, the effort is totally worth the pop of dimension on your page. Next, I cut my 3D Foam Squares in half and added them to each heart as shown.

Here is a close up of the dimension I was telling you about. Look at that! The hearts are jumping off the page, literally and figuratively.
I hope you learned something new and thank you for letting me share all the ways I used adhesives to create this layout.
- Creative Time: 1-2 hours
- Skill Level:Intermediate
Materials Needed:
Scrapbook Adhesives by 3L:
E-Z Runner® Grand Refillable Dispenser
Adhesive Lines
3D Foam Squares White Regular
Creative Photo Corners Black
HomeHobby by 3L®:
Dual Tip Glue Pen
Other Materials Used: cardstock, patterned paper, alpha stickers, pens (white and black), twine, puffy stickers, spray mist