
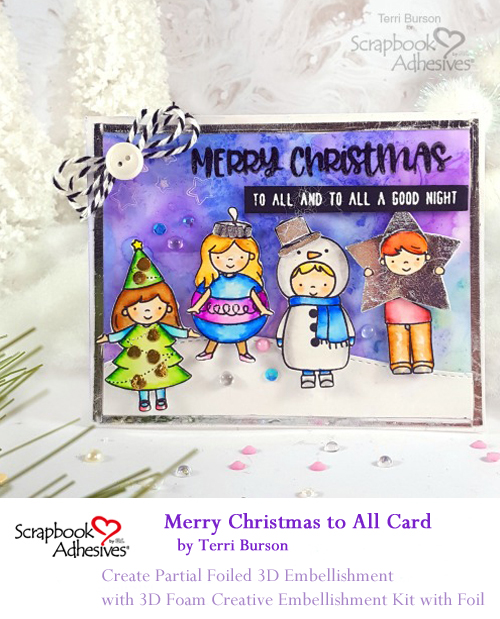
Hello friends, Terri here and I’m popping in to quickly give you some tips for creating partial foiled 3D embellishments. For my example, I’ve pulled some elements together for this Christmas card. It’s never too early to get started on those holiday cards, right?
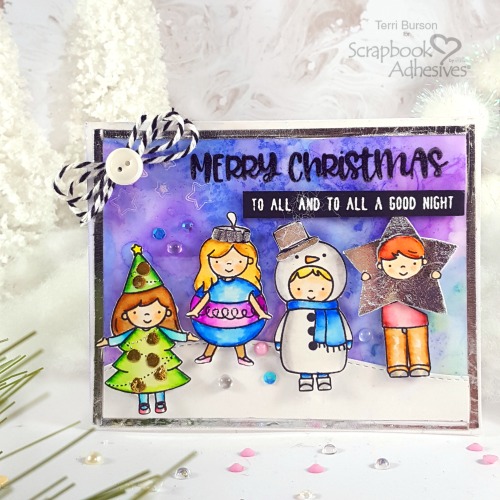
The Visual Appeal of 3D Embellishments
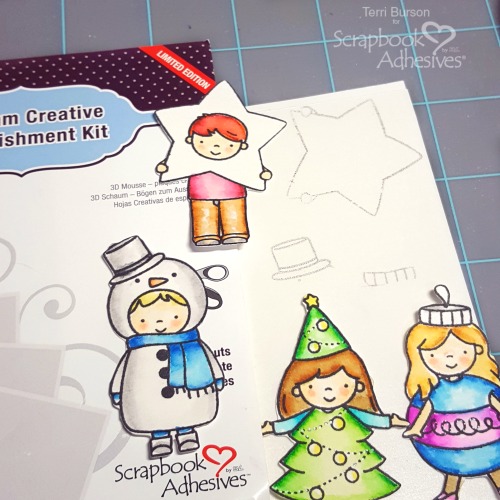
For my stamped and colored images, I wanted to add dimension and foil to select parts of my image for added eye candy. This is easily achieved, thanks to my 3D Foam Creative Embellishment Kit. Simply mask the part of your stamp that you do not want to be stamped. As you can see, to the left of my photo below, I’ve stamped the star from the boy image and fussy cut the boys head and hands, further down. In essence, I removed the star and replaced it with a foiled star as you will see.
Let Your Foil Shine With Adhesive Dots
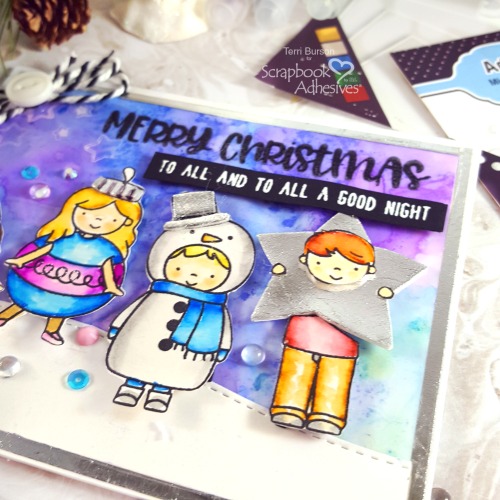
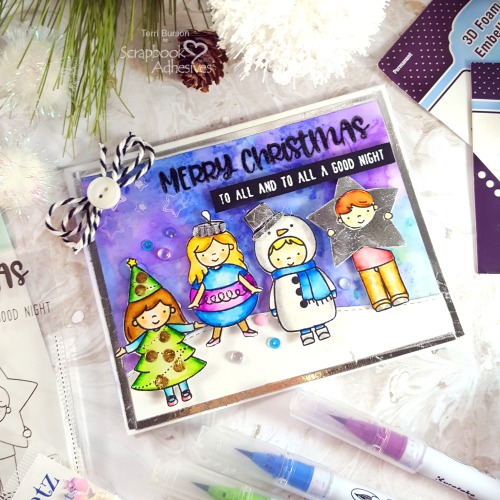
In addition to fussy cutting and foiling the remaining stamped images (snowman’s hat and ornament girl’s metal top), I also wanted foiled embellishments on my last image, the Christmas Tree Girl. I applied Adhesive Dots Micro to the tiny circle ornaments and rubbed in the gold foil from the 3D Creative Foam Embellishment Kit. Make sure the foil is shiny side up, then peel. Beautiful!
Foil All The Things!
Since I was in the mood to foil, I went to the extreme. Literally! I decided to add foil strips along the edges of my card panel, using the Extreme Double-Sided Tape 1/4in. In fact, I used so many different adhesives on this project, it’s a veritable smorgasbord! To round out the foil fest and adhesive buffet (getting hungry yet? I am!), I used the Adhesive Dots Medium for my twine and button, the 3D Foam Circles Black Mix (to pop up all my stamped images), and my E-Z Runner® Grand Refillable Dispenser. The finishing touch? My Dual Tip Glue Pen, to adhere my sequins. I hope I’ve given you some good ideas on creating partial foiled embellishments! It’s a great way to “Wear Your Adhesive On The Outside”!
If you would like links to the products that I’ve used today, be sure and visit my blog post at Waving My Wand. Thanks and have a great day!
Creative Time: 30 Minutes
Creative Skill: Intermediate
Materials Needed:
Scrapbook Adhesives by 3L®:
3D Foam Creative Embellishment Kit
Adhesive Dots Micro
Adhesive Dots Medium
3D Foam Circles Black Mix
E-Z Runner® Grand Refillable Dispenser
HomeHobby by 3L®:
Extreme Double-Sided Tape 1/4in
Dual Tip Glue Pen
Other:
Stamps, white and black cardstock, mixed media paper, black dye ink, brush markers, homemade alcohol ink, yupo paper, border die, manual and electric die cut machine, white pigment ink, twine, buttons, sequins, stamp positioner
Pin It!
By Amy Tsuruta October 8, 2018 - 6:31 am
Terri, this is so cute! Love the added foiling.
By Terri Burson October 8, 2018 - 10:28 am
Thank you so much Amy!
By Marcia October 9, 2018 - 7:06 am
What a fun card! I love the addition of foil!