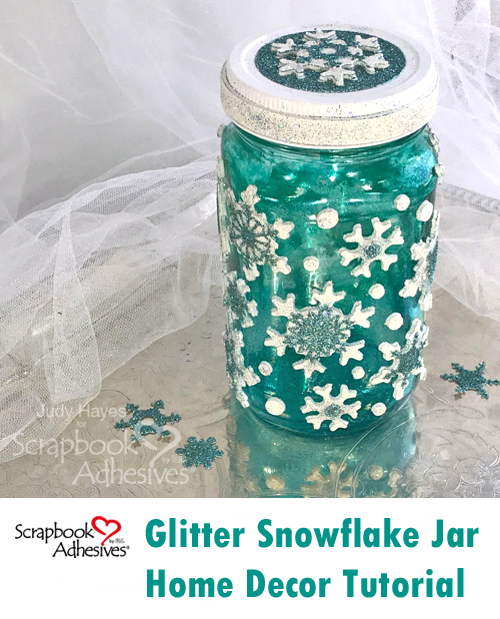
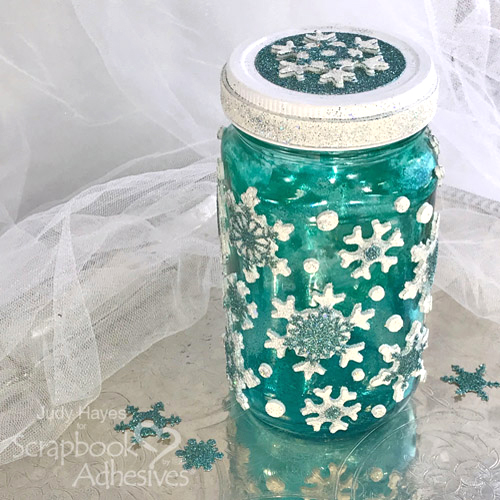
Christmas has past and I wanted something to replace my holiday decorations and brighten my décor through the winter months. For me, winter means snow, so I made this Glitter Snowflakes Jar in my favorite color with 3D Foam Snowflakes and Adhesive Sheets 4 x 6 inch. It can be used as a home décor piece as it is or with little battery LED lights or a candle. Even empty it sparkles! It would be pretty filled with cotton balls!
Glitter Snowflake Steps
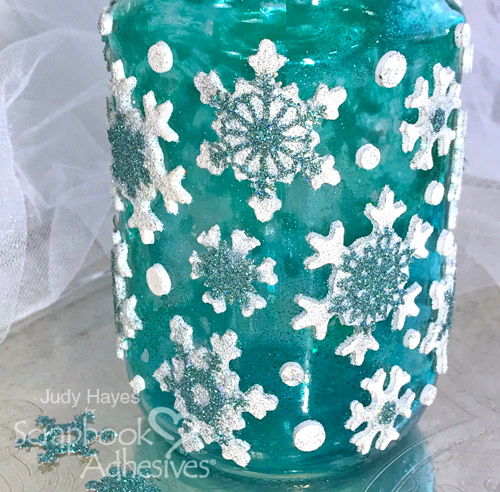
I chose to use a recycled clear jar for my Glitter Snowflakes Jar. Color was added to the inside with alcohol inks. That step can be skipped by using a colored jar.
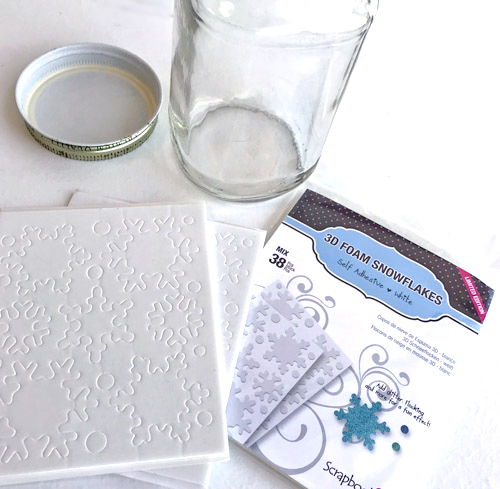
I used 3D Foam Snowflakes along with 6 different small die cut paper snowflakes. I chose snowflake dies that fit the 3D Foam Snowflakes.
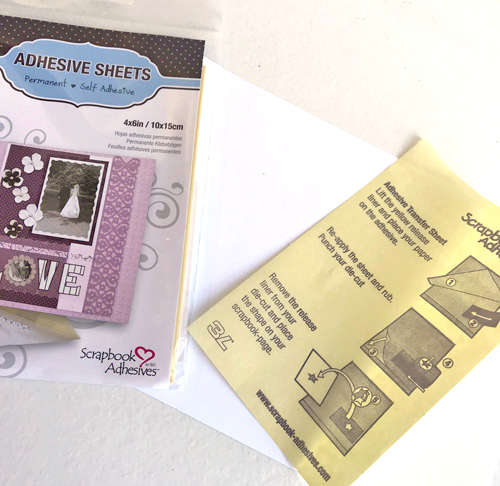
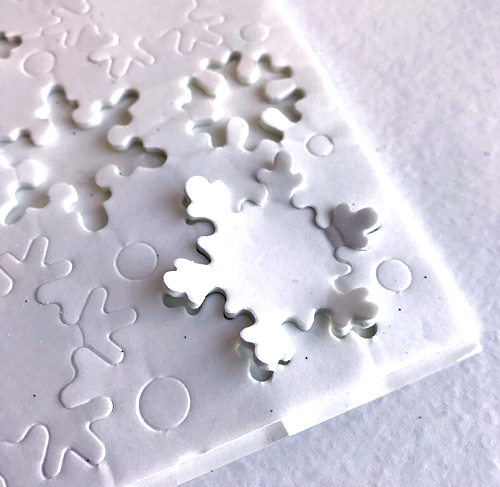
For the die cut snowflakes, apply Adhesive Sheets 4 x 6 inch to white cardstock on one side.
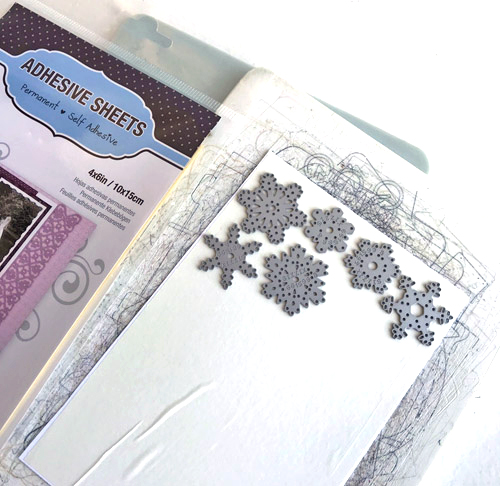
Cut several snowflakes of each design with dies placed on side of paper with Adhesive Sheet. That will be front side on the jar. Tape may be needed to hold dies in place as the Adhesive Sheets liner is slippery.
Wear Your Adhesive on the Outside
The next step is to place 3D Foam Snowflakes on the jar. To remove snowflakes from sheet, gently lift each point and then remove the whole snowflake. That method keeps the snowflake from getting too distorted. Place 3-4 snowflakes at a time on the jar.
Remove the liner from each 3D Foam Snowflake and place a paper snowflake on each one. I varied the styles to add variety. Do not remove liner on paper snowflakes yet! Cover each with embossing powder and press it into the foam snowflake and shake off the excess. Use a dry paint brush to remove excess around snowflake points as it tends to cling to the glass.
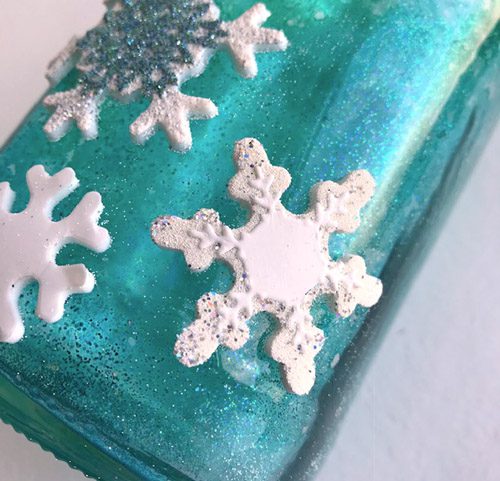
This photo shows closest snowflake with embossing powder applied to it. The liner is still in place on paper snowflake. The next step is to remove the liners on paper snowflake and sprinkle with glitter, then heat emboss. Repeat to cover jar with snowflakes. Add circles (from 3D Foam Snowflakes sheet) between snowflakes and heat emboss. (The snowflake steps are same as shown below with jar lid.)
Jar Lid Detailing
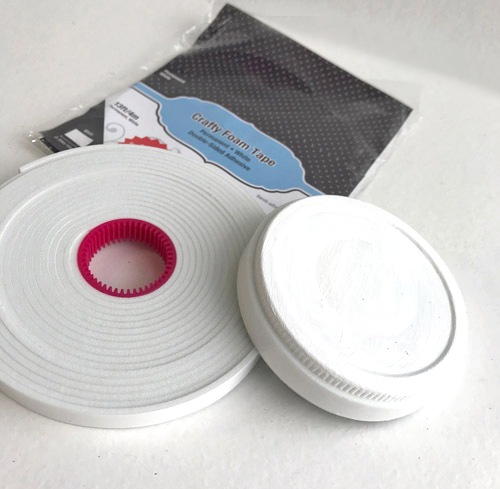
Paint jar lid white and wrap Crafty Foam Tape White around lid edge. Remove the liner and cover with embossing powder. Heat to emboss.

Apply Adhesive Sheets 4 x 6 inch to both sides of piece of white cardstock. Die cut circle to fit jar lid. Peel liner from back side and fasten to jar lid.
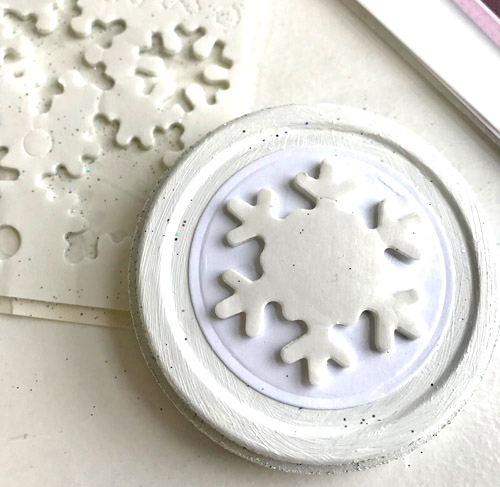
Remove liner from top side. Place large 3D Foam Snowflake on circle. Do not remove liner from snowflake.
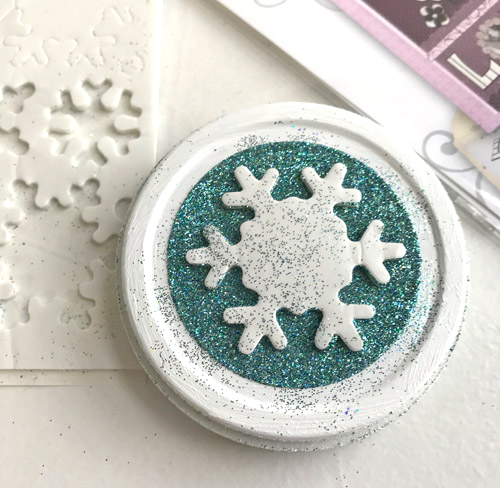
Sprinkle glitter over circle and press in place. Shake off excess and use soft dry paint brush to remove loose glitter. (My paint was not fully dry so glitter clung to it.)
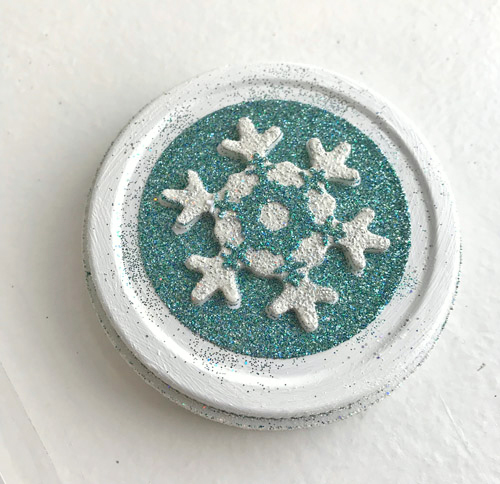
Remove liner from 3D Foam Snowflake and place die cut paper snowflake on it with adhesive liner side up. Do not remove liner from paper snowflake yet. Sprinkle with embossing powder. Remove liner from small paper snowflake and sprinkle with glitter, then heat emboss.
These are same steps I used for snowflakes on jar. It has 19 snowflakes on it.
That completes Glitter Snowflakes Jar! I hope you enjoyed this project!
Thanks for visiting!
Judy
Creative Time: 90 Minutes
Skill Level: Intermediate
Materials Needed
Scrapbook Adhesives by 3L®
3D Foam Snowflakes
Adhesive Sheets 4 x 6 inch
Crafty Foam Tape White
Other:
DecoArt® Americana Satin Paint – Cottonball; Ranger Ink Alcohol Inks: Bottle, Pool, Juniper; Ranger Ink Snowflake Tinsel Embossing Powder; Sizzix® Paper Snowflakes Mini Dies; Sparkle N’ Sprinkle® Glitter Seaspray; Spellbinders® Standard Circles SM; White Cardstock
Pin It!