
Hi everyone, Yvonne here. Adhesive Sheets 4×6 inch are great to make gorgeous Foiled Flourish cards. No special foil machine needed. Simply use the Adhesive Sheets 4×6 inch with a craft die to Wear your Adhesive on the Outside!
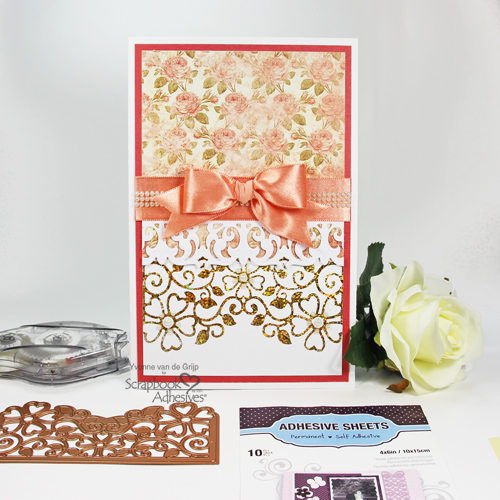
Adhesive Sheet Die Cuts for the Foiled Flourish Card
With a nice detailed flourish etched die, die-cut from an Adhesive Sheets 4×6 inch.
Note: make sure the white liner of the Adhesive Sheet is facing up. Place the die on top and die-cut.
Leave the Adhesive Sheet INSIDE the die-template and carefully remove the excess pieces with a needle or tweezers.
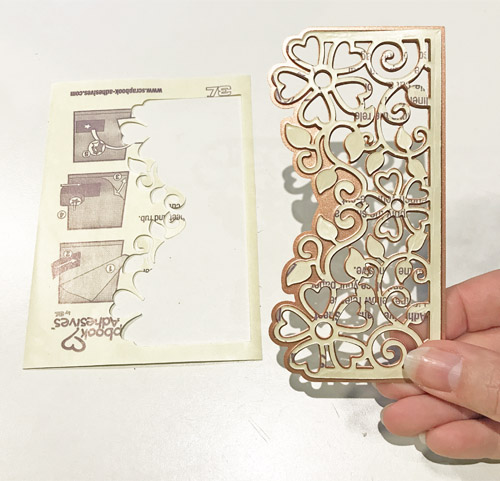
Next, carefully remove the die cut from the etched die.
Creating the Foiled Flourish Layer
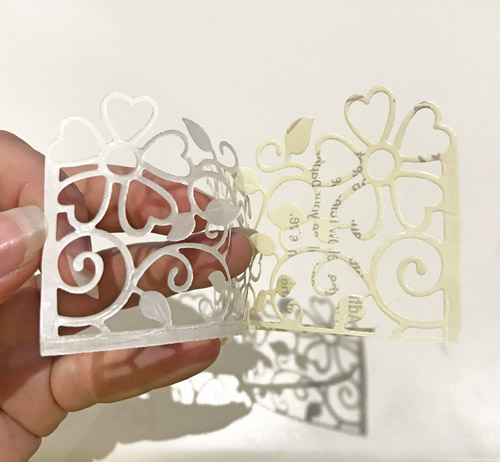
Carefully and slowly remove the yellow liner, making sure not to lift the adhesive. Otherwise, your foiled flourish print will not be perfect!
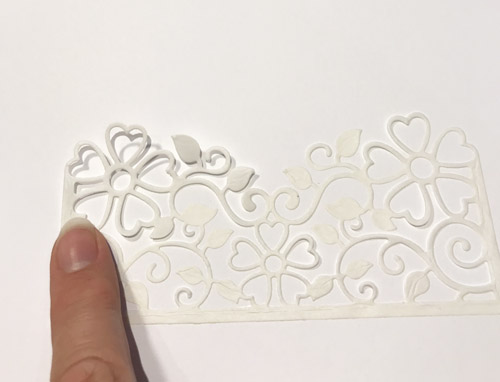
Gently place the flourish die cut, with the adhesive side facing down, onto a piece of white cardstock. Use your fingers (or a bone folder) to rub gently over the yellow liner to secure the adhesive down.
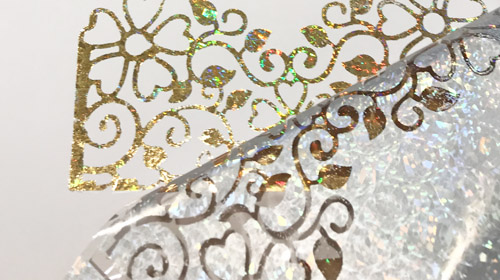
Now carefully remove the yellow liner and place a gold sheet of Metallic Transfer Foil Sheets Holographic Colors (holographic color facing UP) over the adhesive flourish. Gently rub to adhere and transfer the foil to the adhesive. Remove the foil and you have created your foiled flourish layer!
Making the Card Layers
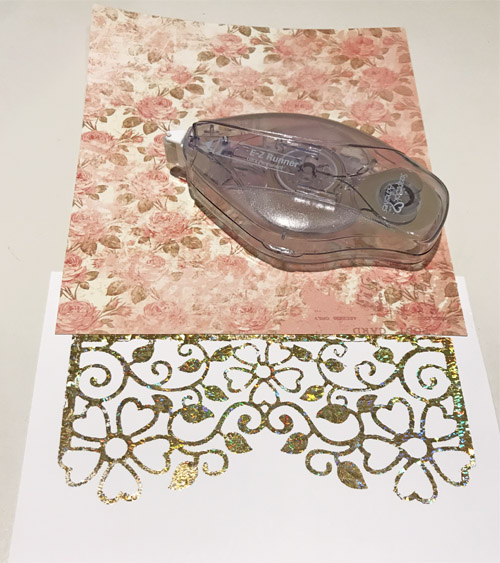
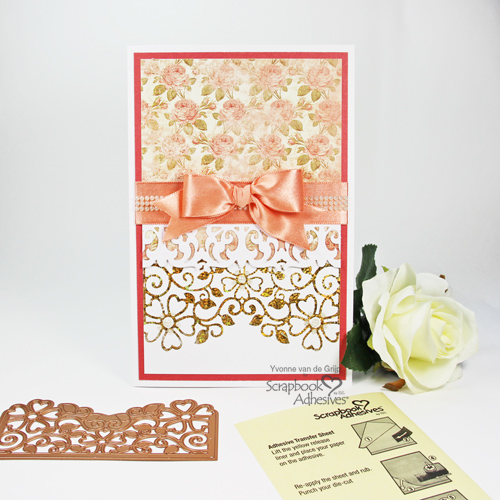
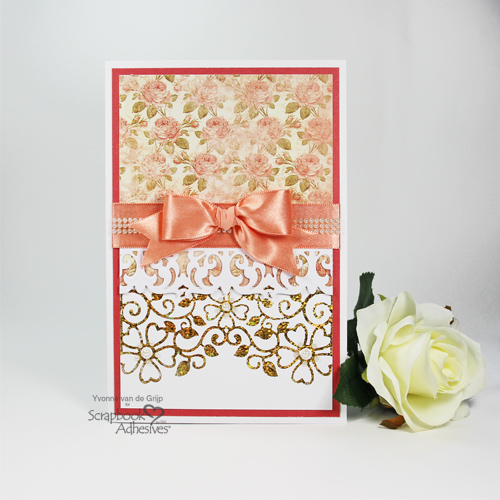
Adhere a piece of patterned cardstock onto the white cardstock (just above the foiled image) with the E-Z Runner® Ultra Strong Refillable Dispenser.
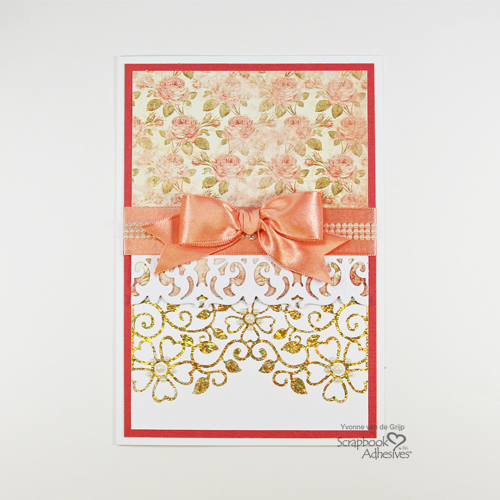
Then adhere a white border die cut to the card front on the edge of the patterned paper. Trim the desired rectangle shape to create your card front.

To create your second layer, adhere a slightly larger dark salmon cardstock and adhere behind the card front with the E-Z Runner® Ultra Strong Refillable Dispenser.
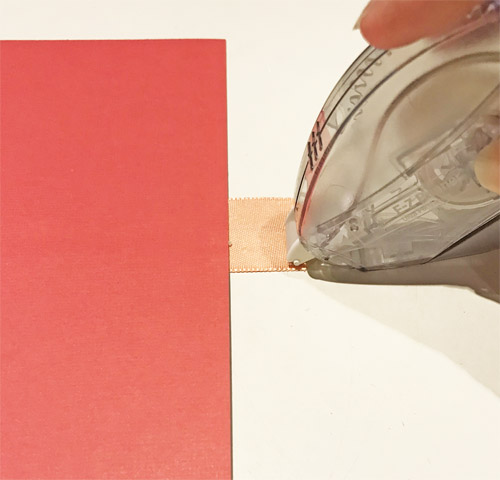
Adhere a piece of salmon satin ribbon to the panel with the ends tucked and adhered to the back. Use the E-Z Runner® Ultra Strong Refillable Dispenser to adhere.
Tip: do not use liquid glue to adhere ribbon to avoid glue stains through the ribbon.
Then add to a white card base using the E-Z Runner® Ultra Strong Refillable Dispenser
Finishing Touches on the Foiled Flourish Card
Place a strip of tiny self-adhesive pearls onto the satin ribbon on the card front. Next, adhere a satin bow on top with Premium Double Sided Tape 1/8in. Lastly, adhere some self-adhesive pearls to the foiled flourishes.
Wishing you happy crafting!
Yvonne
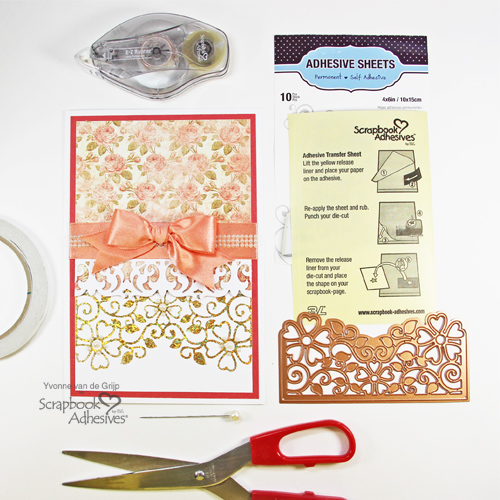
Creative Time: 60-70 minutes
Skill Level: Advanced
Materials needed:
Scrapbook Adhesives by 3L®
E-Z Runner® Ultra Strong Refillable Dispenser
Adhesive Sheets 4×6 inch
Metallic Transfer Foil Sheets Holographic Colors
HomeHobby by 3L®
Premium Double Sided Tape 1/8in
Other
Etched Dies: Spellbinders® Paper Arts (Top Floral Panel by Marisa Job, Platinum 6 Die Cutting and Embossing Machine), Cardstock (White, Patterned, Dark Salmon), Satin Ribbon, Self-adhesive Pearls, Needle or Pin, Tweezers, Bone folder, Paper Trimmer
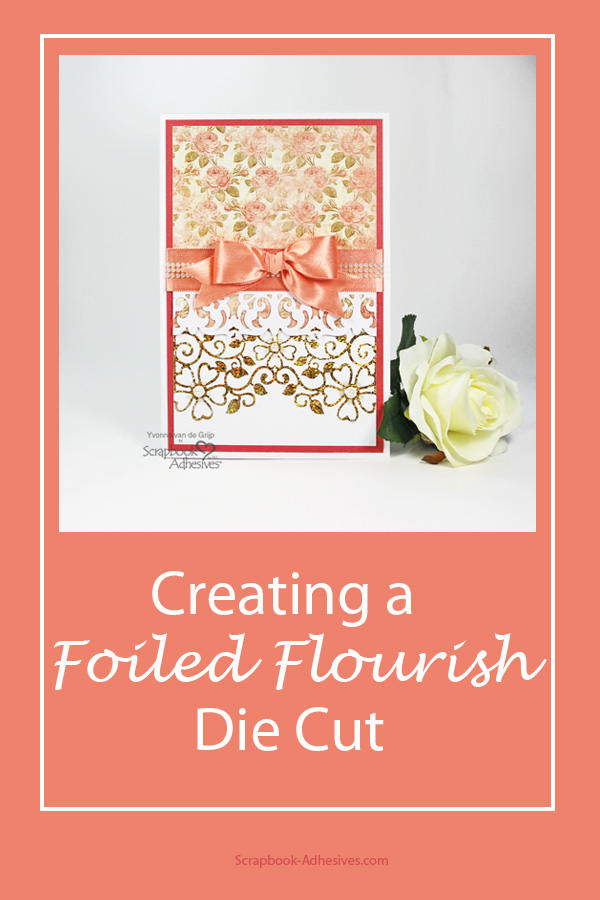
Pin It!
By Helen June 19, 2019 - 7:44 am
This is so lovely…using the adhesive to create the foiled design is a great idea. The various embellishments add so much to the overall design tfs