
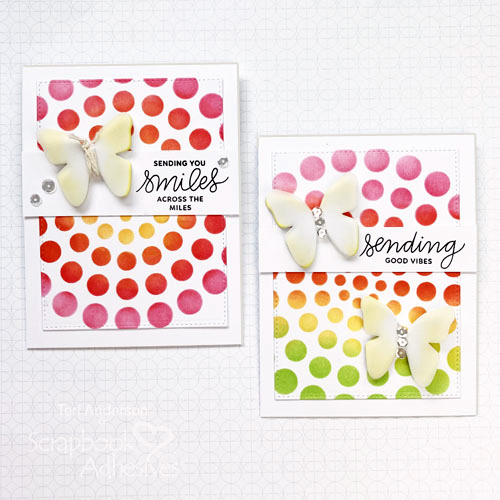
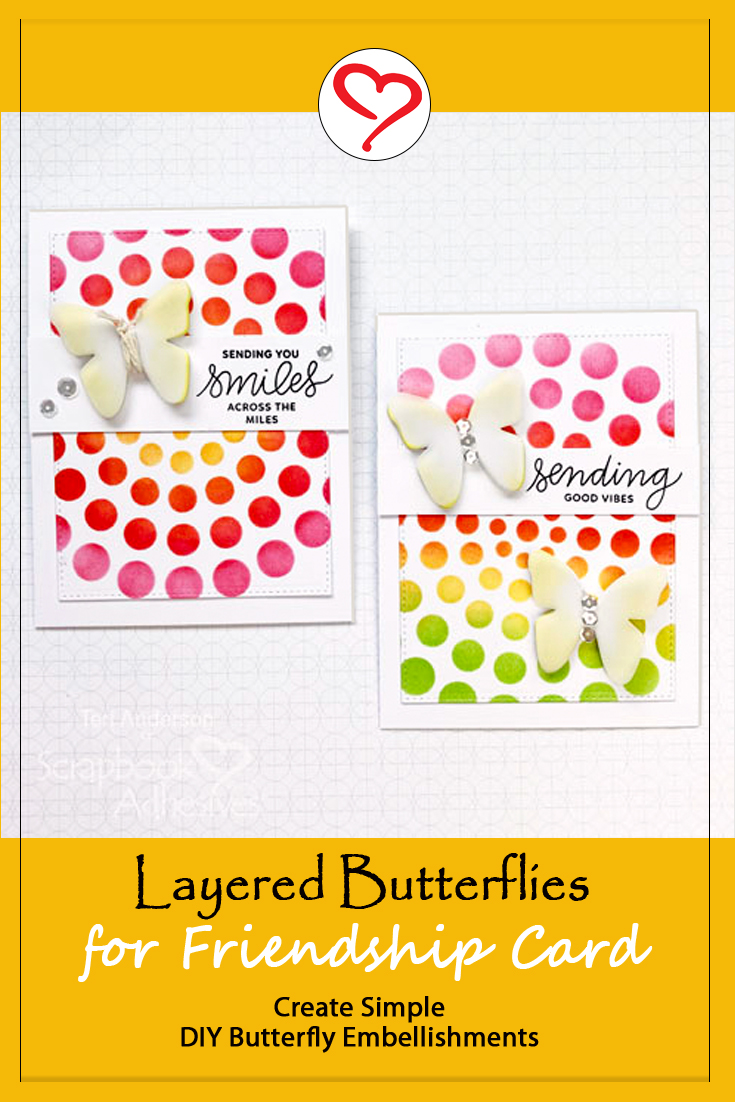
Hi, everyone! How about adding pretty layered butterflies to your handmade cards? Teri here, and I’m going to show you a fun way to do just that with a twist!
These butterflies can be made quickly with just a few basic paper crafting supplies, and they look awesome when added to cards. Let’s get started!
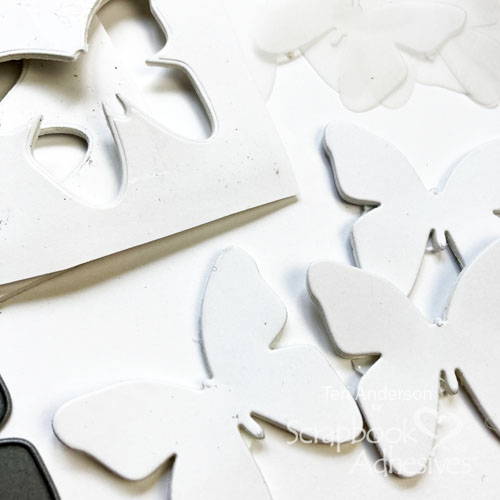
Layered Butterflies Basics
Start by cutting a piece of foam from a 3D Foam Creative Sheets Medium White. Cover it with lightweight cardstock.
Then die-cut some butterflies from it. Any solid butterfly die will work!
Designer’s Note: Use a little Washi tape to hold the die in place while you cut so it doesn’t shift around if you need to run it through your machine more than once.
You’ll also want to cut some butterflies from vellum.
Assembling the Butterflies
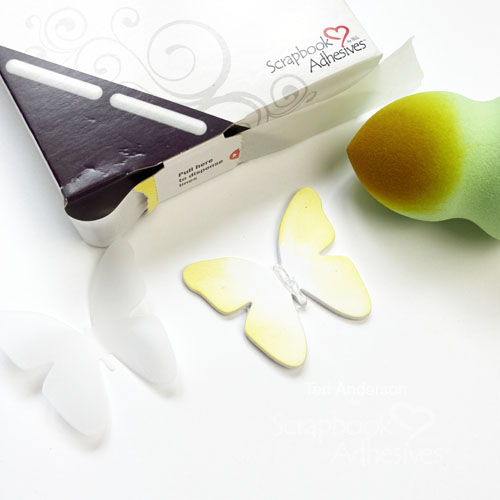
Place an Adhesive Line in the middle of each foam butterfly. Center a vellum butterfly on top. You can keep the vellum flat or you can curl the edges with your fingers.
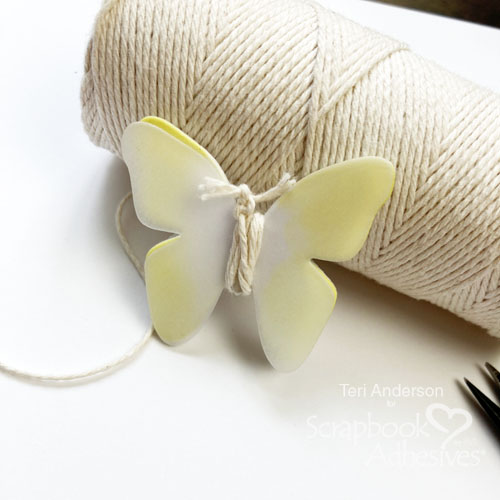
For the butterfly center, wrap twine or jute around the middle. Tie a knot at the top. Snip off the ends of the twine with your scissors. If you leave a little twine at the ends, it will make the butterflies look like they have antennae!
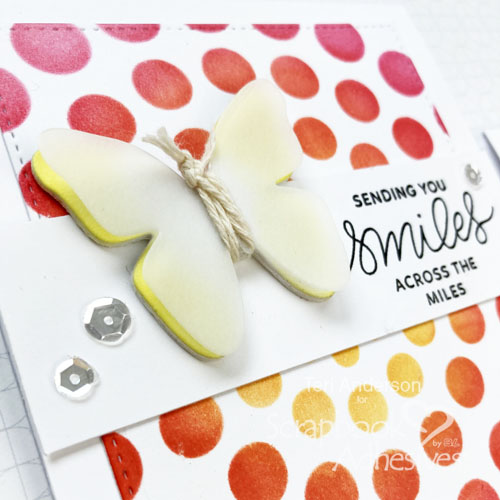
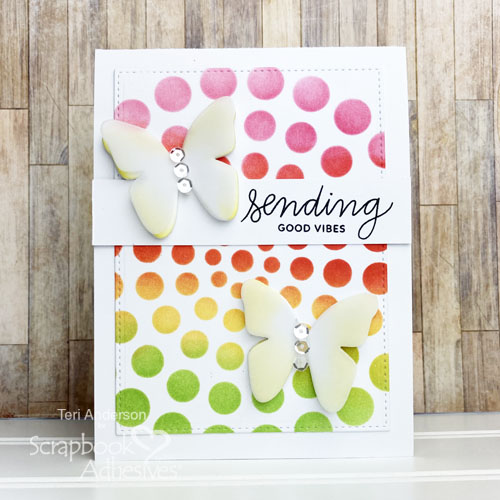
Simply remove the backing paper and adhere them to your cards! It adds a sweet dimensional element that your friends will love.
Layered Butterflies with Sequins
You are not limited to using twine to decorate your butterflies!
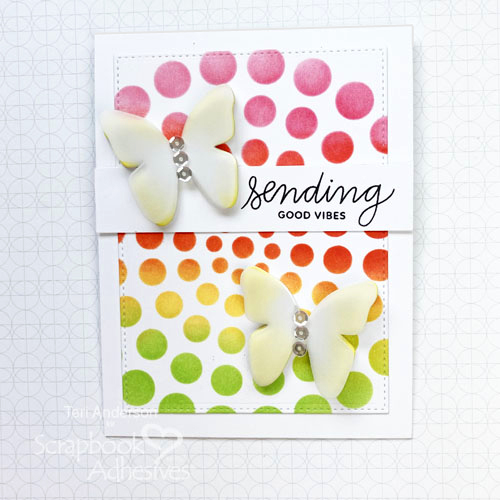
Rather than twine, I used Adhesive Lines on these butterflies for my second card before placing a line of sequins onto it.
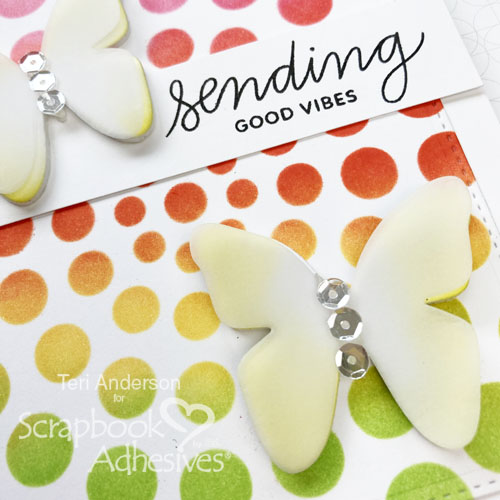
The sequins add a hint of glitz to the card if I do say so! Not a fan of sequins? Trying using gems or beads instead!
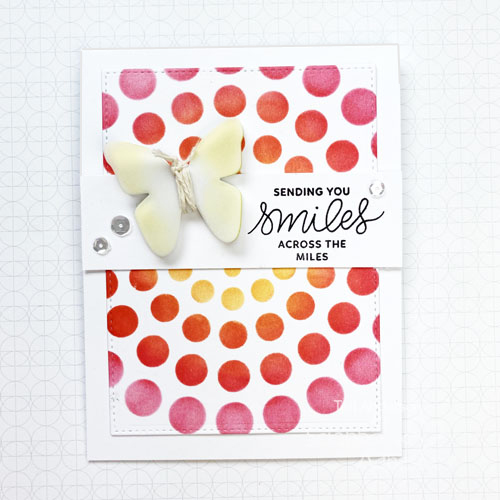
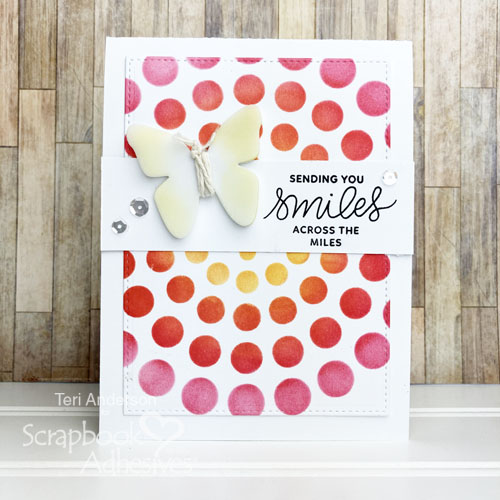
Bonus: Creating Backgrounds for the Layered Butterflies Cards
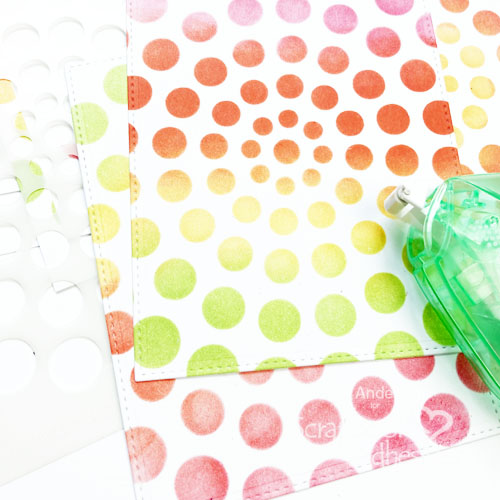
One more tip I wanted to give you! Notice the backgrounds on both cards? Take a stencil and ink to create them!
To keep the stencil from shifting while applying ink, I rolled E-Z Dots® Repositionable adhesive to it. This helps hold it in place without damaging the cardstock as I sponged ink through the stencil design!
Thank you for checking out today’s tutorial. I hope you might try making a few layered butterflies of your own! Let me know if you do!
Happy crafting,
Teri Anderson
Creative Time: 60 Minutes
Skill Level: Beginner
Materials Needed
Scrapbook Adhesives by 3L®
- Adhesive Lines
- E-Z Runner® Permanent Strips Refillable Dispenser
- E-Z Dots® Repositionable Refillable Dispenser
- 3D Foam Creative Sheets Medium White
Other
White Cardstock: Neenah Paper; Vellum: Neenah Paper; Stencil: My Favorite Things; Red, Orange, Yellow, Green Ink Pads: My Favorite Things; Black Ink Pad: Ranger Ink; Dies: Echo Park Paper (Butterfly), My Favorite Things (Rectangle); Stamps: Pretty Pink Posh (Encouraging Greetings Stamp Set); Sequins: Pretty Pink Posh; Black Ink Pad: Ranger Ink; Twine: The Twinery
Save It to Pinterest!
Visit our Website and Blog!
Sign up for our Newsletter so you never miss a contest or giveaway!


