
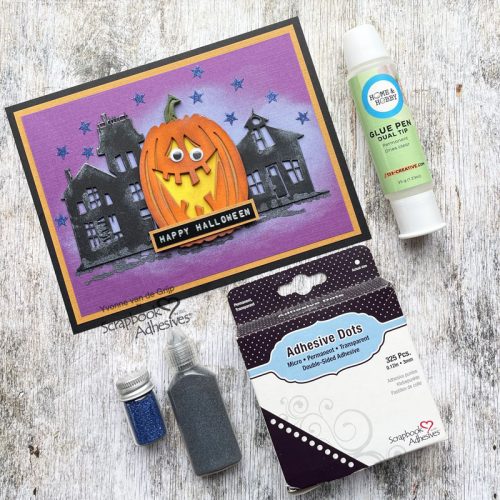
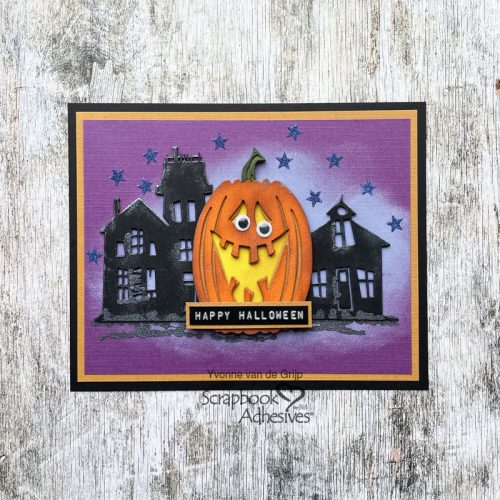
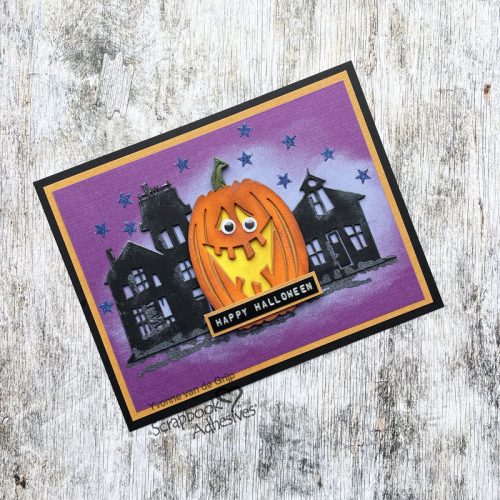
Hi everyone! Halloween is coming up very soon and for some inspiration, I made this Halloween Pumpkin card. Yvonne here….I love the technique called Wear Your Adhesive on the Outside for my cards and I would love to share how I used it to embellish my card. Wanna join me?
Top Card Panel
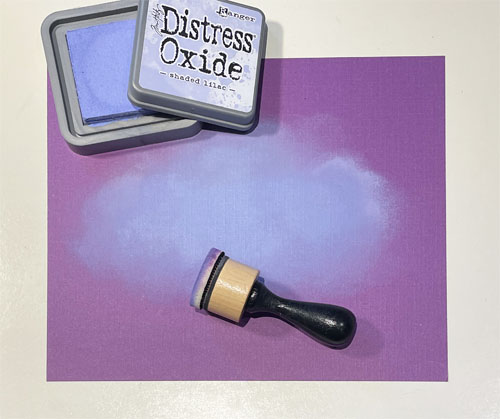
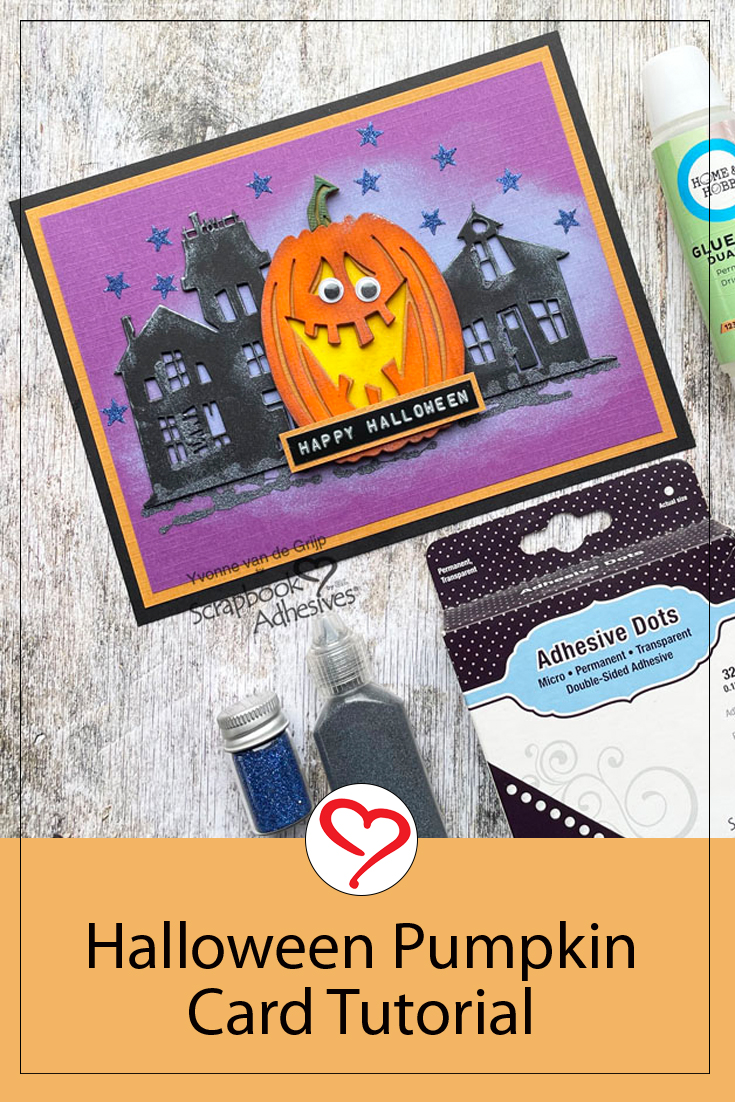
For the top card panel of the Halloween Pumpkin Card, I used a piece of purple cardstock which I inked with chalk ink to lighten it up a bit. This is to create a foggy effect for the background. Since I don’t know the exact size my card will be I did not trim the card panel to the right size yet.
Die-Cutting
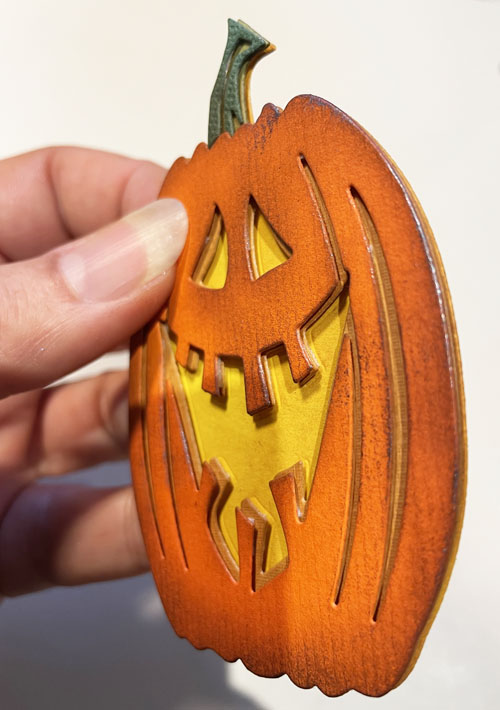
First I die-cut the pumpkin layers from colored cardstock. Then I used an ink blending tool and a brown inkpad to alter the pumpkin.
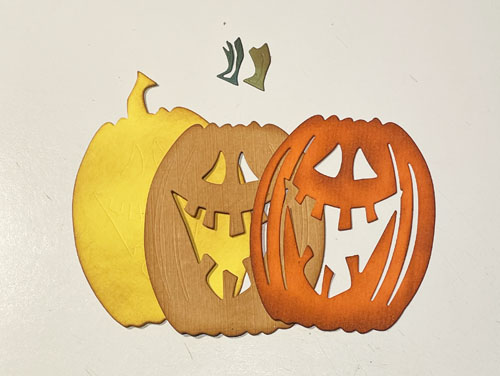
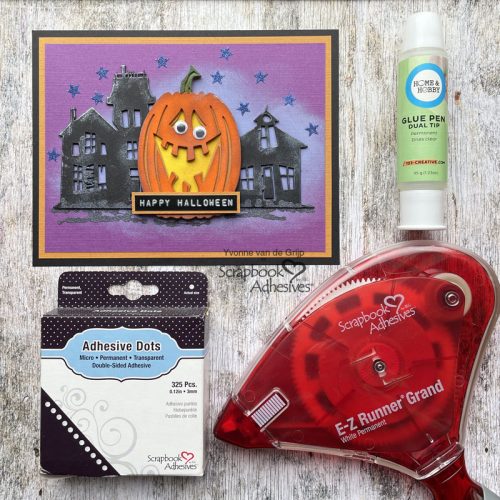
Next, adhere small pieces of Crafty Foam Tape 108ft to the back for the die-cut pumpkins, peel off the liners, and layer the pumpkins. Crafty Foam Tape 108ft is 1mm thick (1/32″ – half of 1/16″) and is perfect for that subtle dimension to the Inked Halloween Pumpkin Card.
Die-cut some creepy houses from black cardstock and apply gilding wax to them. Adhere the elements to the purple-inked card panel using Crafty Foam Tape 108ft.
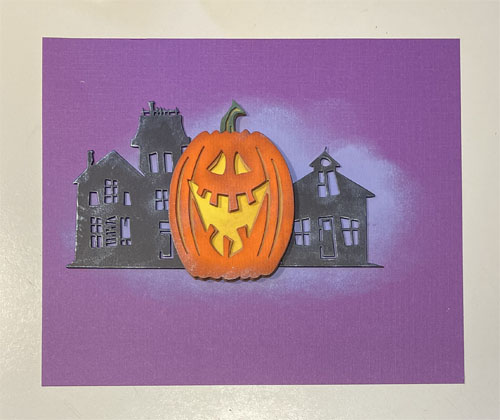
And then trim the card panel to the right size.
Card Base
First adhere the purple card panel onto an orange card panel and next onto a black card panel.

To adhere the layers of the Halloween Pumpkin Card simply use the E-Z Runner® Grand Refillable Dispenser.
Wear Your Adhesive on the Outside
Now the fun starts: embellishing the Halloween Pumpkin Card using a technique called Wear Your Adhesive on the Outside. I used this technique twice! First by adhering some stars from the E-Z Runner® Stars Refillable Dispenser onto the card.
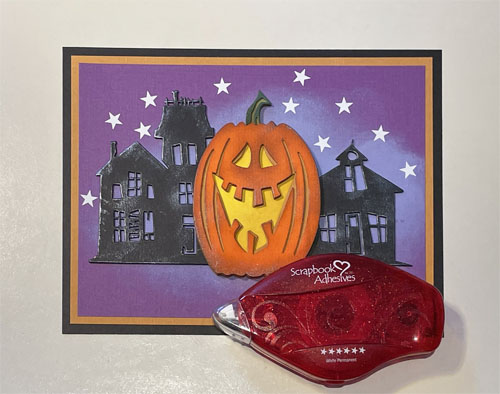
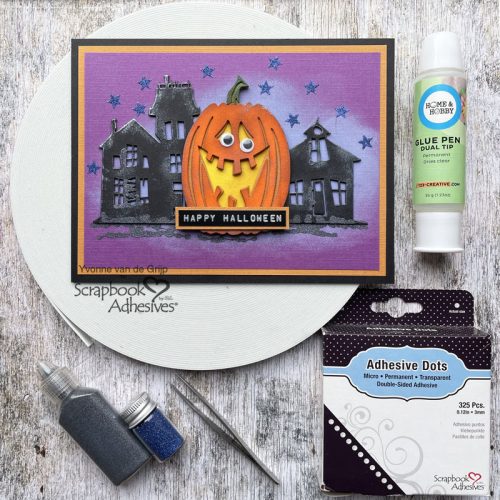
Then sprinkle dark blue glitter over the stars and rub the glitter for secure adhering. Then tap off any excess glitter. For the second use of the technique, I used my Dual Tip Glue Pen to apply glue to the card: for the ground as well as onto small parts the houses.
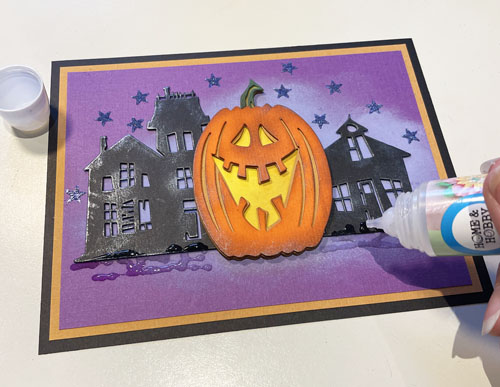
Next sprinkle black glitter over the wet glue and tap off the excess glitter. Then let dry thoroughly.
Finishing Touch
For a finishing touch to the Halloween Pumpkin Card, I glued some wobbly eyes onto the pumpkin. To adhere I used Adhesive Dots Micro. Next I used my dymo to create a sentiment and adhered it onto an orange banner. Then adhere onto the card using Crafty Foam Tape 108ft.
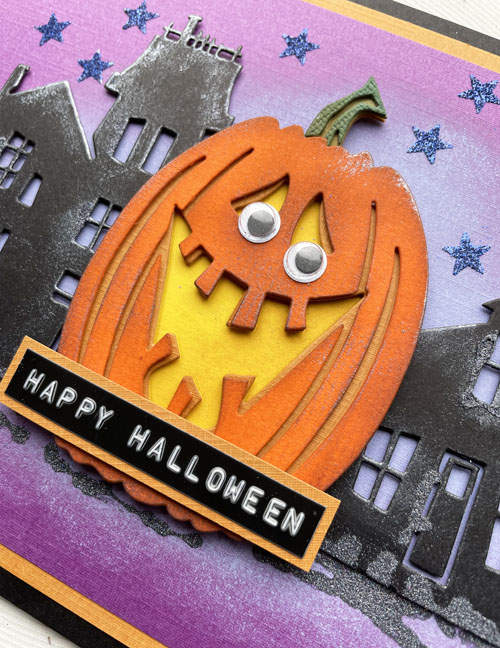
And voilá, your Halloween Pumpkin Card is ready. I hope you enjoyed this tutorial and wish you happy Halloween crafting!
Creative Time: 60 minutes
Skill Level: Intermediate
Materials needed:
Scrapbook Adhesives by 3L®
E-Z Runner® Grand Refillable Dispenser
E-Z Runner® Stars Refillable Dispenser
HomeHobby™ by 3L:
Other
Etched Dies (Sizzix: Thinlits by Tim Holtz: Edison Colorize, Thinlits Ghost Town #2); Die-Cutting and Embossing Machine (Spellbinders Paper Arts®: Platinum 6 Machine); Cardstock (Yellow, Dark Orange, Bright Orange, Purple, Black); Inkpads (Ranger ink: Distress Oxide ink: Shaded Lilac; Distress ink: Brushed Corduroy); Ink Blending Tool; Dymo; Glitter (Dark Blue, Black); Gilding Wax (Coosa Crafts: Graphite) (Scissors; Craft Knife; Twezers; Paper Trimmer
Save to Pinterest!
Visit our Website and Blog!
Sign up for our Newsletter so you never miss a contest or giveaway!


