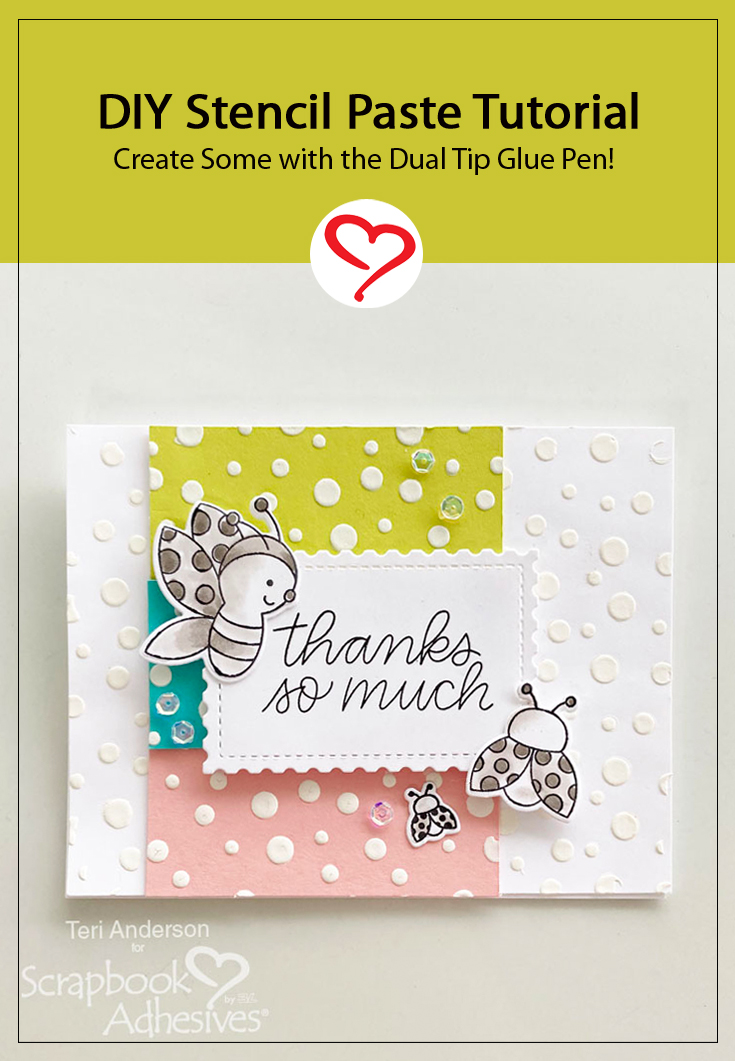
Hi, everyone! Do you love using stencils to make cards and scrapbook pages? Teri here and today’s post is for you! I’m going to show a fun way to create your own DIY Stencil Paste with a Dual Tip Glue Pen
This technique is so fun and the paste looks so good when used with stencils.
Make the DIY Stencil Paste
You’ll need a few supplies to get started: A jar, a plastic spoon or knife, paint, baby powder, and a Dual Tip Glue Pen. Start by squirting one part glue with one part paint. Flip your plastic spoon or knife over and stir the glue and paint together until completely blended.
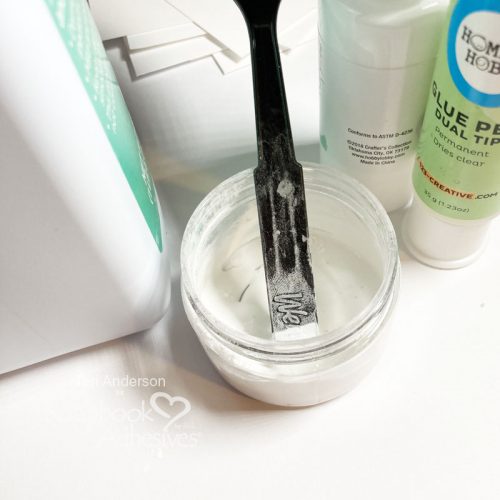
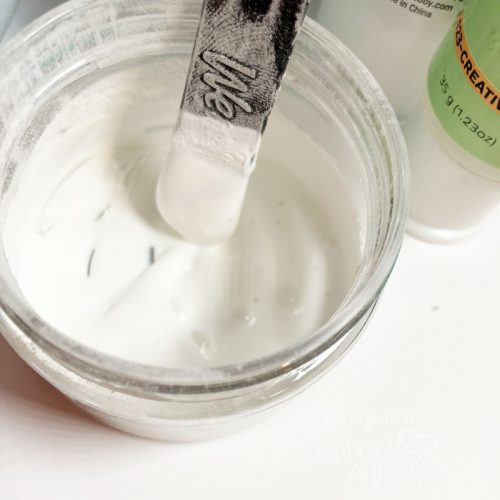
Now, you’re going to start adding baby powder to your mix. Start with just a small amount. Keep adding and stirring until you have a nice thick paste form.
Set a stencil on a piece of cardstock. Apply the paste through the stencil and onto the panel. Use an old gift card to scrape off any excess.
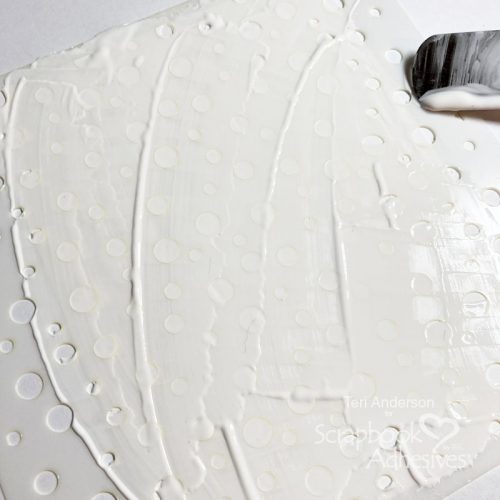

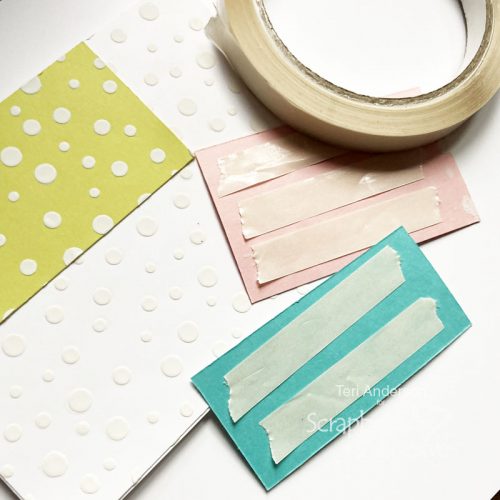
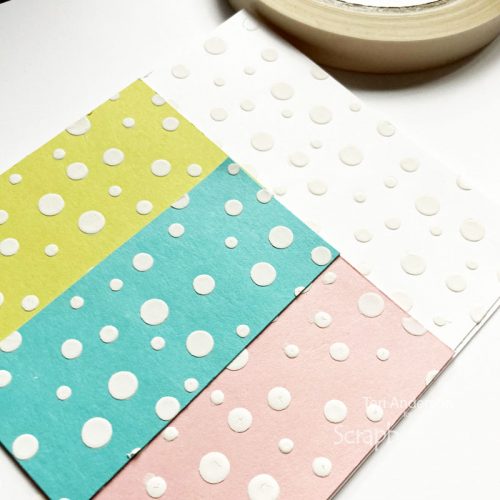
Use this process with additional pieces of cardstock to make more stenciled panels. Be sure to stir the paste in between applications to keep it from drying. Once you’ve completed your panels, let them sit and dry completely.
Create a Card
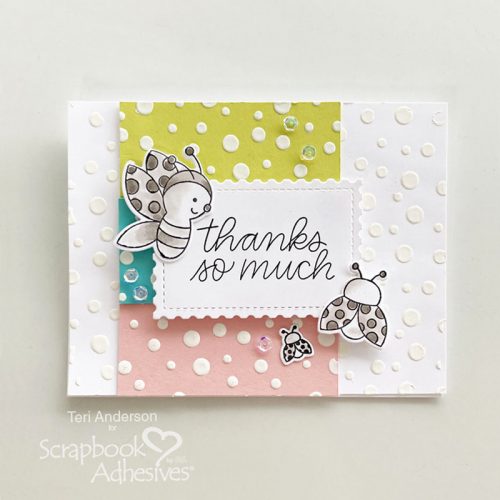
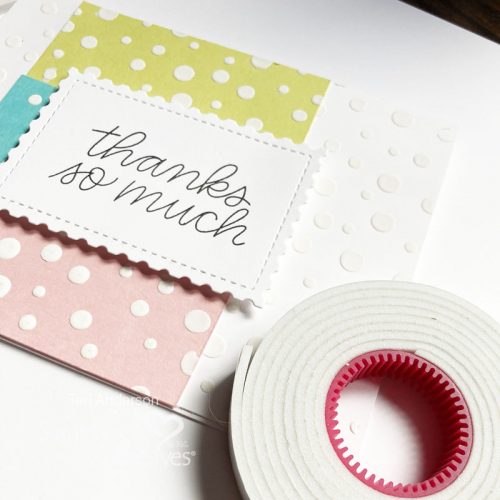
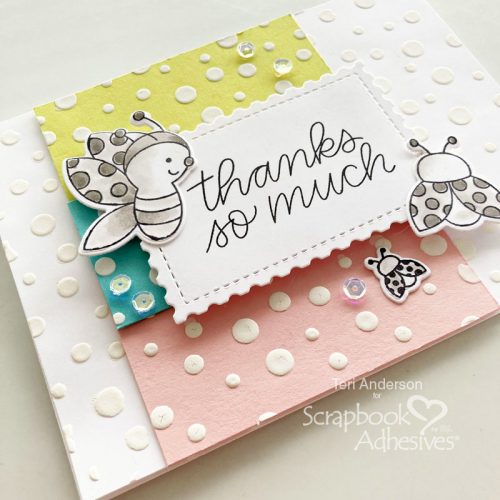
Adhere one of your stenciled panels onto a card created from cardstock with Crafty Power Tape Polybag 81ft. Cut up some of your additional stencil panels and mount them onto the card as well.
Cut a rectangle from cardstock. Stamp a sentiment on it and adhere it to your card with Crafty Foam Tape.
Take a couple stamped and die-cut images. Apply E-Z Runner® Petite Permanent Dots Refillable Dispenser on them, as well as 3D Foam Squares White Small to adhere them to your card.
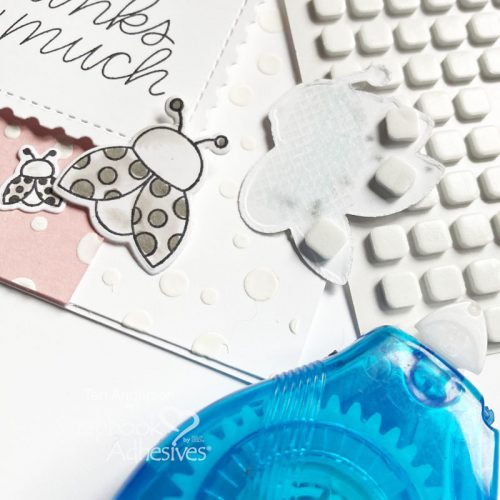
Complete your card by adding a few sequins to it using Adhesive Dots Micro.
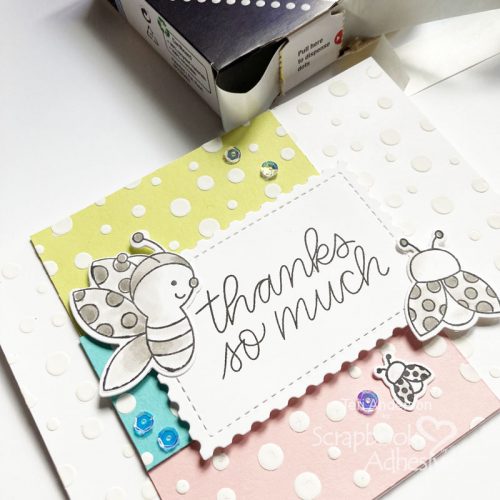
Be sure to save any leftover stenciled background papers so you can use them to make more cards.
Thank you so much for stopping by! Leave me a comment if you decide to give his technique a try!
Happy Creating!
Creative Time: 60 mins
Skill Level: Intermediate
Materials Needed:
Scrapbook Adhesives by 3L®
E-Z Runner® Petite Permanent Dots Refillable Dispenser
Crafty Power Tape Polybag 81ft
HomeHobby™ by 3L
Dual Tip Glue Pen
Other: Cardstock: Neenah; Stamps and Dies: Concord and 9th (Snail Mail Dies), Pretty Pink Posh (Ladybug Friends Stamp Set and Dies); Stencil: Waffle Flower (Snowfall Background); Ink: Ranger Ink (Black); Sequins: Pretty Pink Posh; Gray Markers: Copic; White Paint; Baby Powder; Jar; Plastic Spoon; Palette Knife
Save to Pinterest!