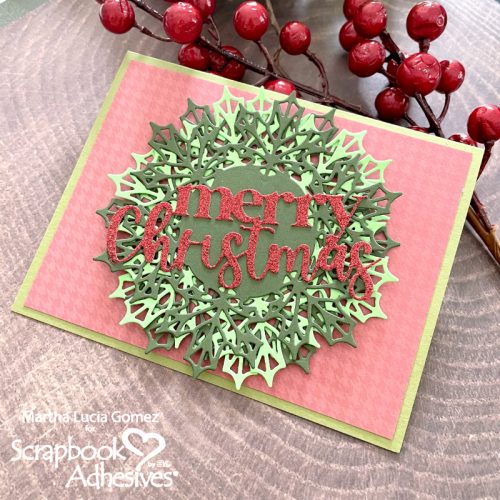
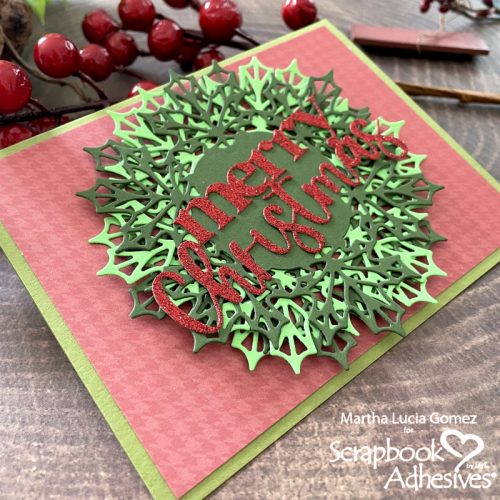
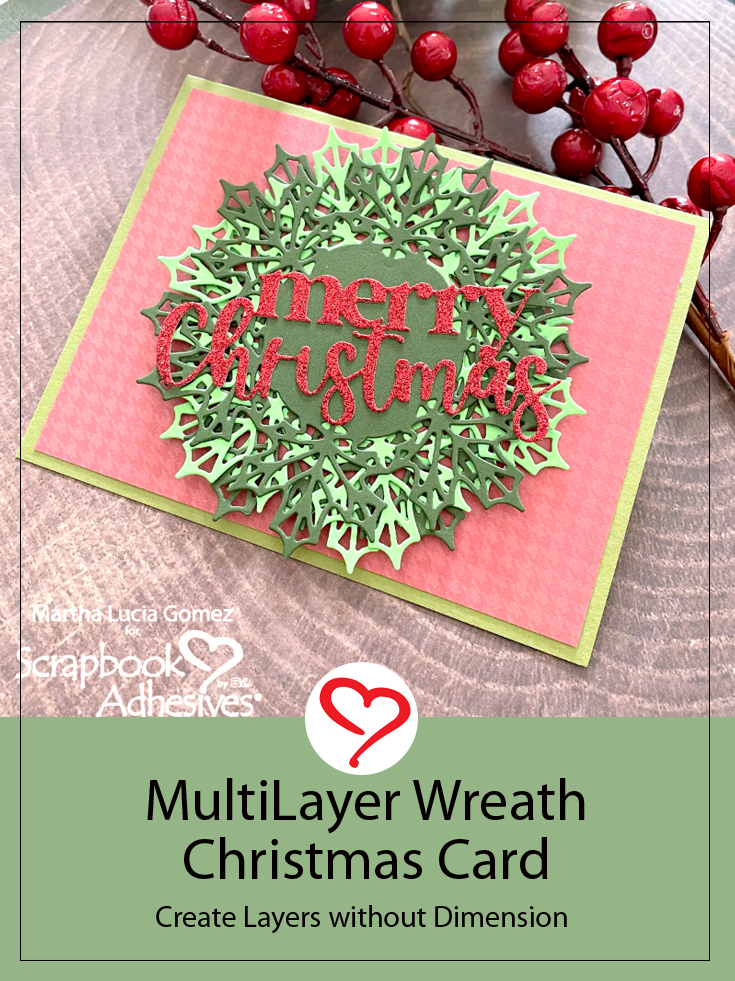
Hello crafty friends, Martha Lucia here to share with you how easy is to make a multilayer wreath Christmas card without Dimension. My today’s project is full of layers but can be easily placed into an envelope to be shipped through our mail service. To make this, I will feature the E-Z Runner Grand Permanent Strips and the Glue Pen Dual Tip.
Multilayer Wreath Process
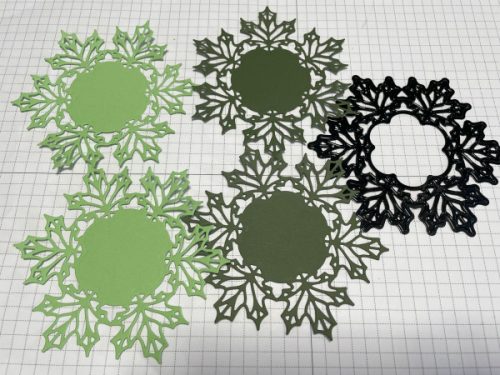
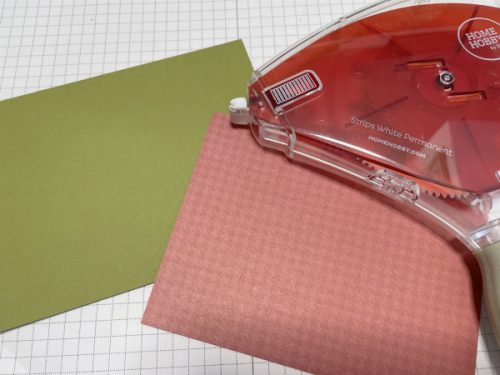
I started selecting one wreath die cut. Then I die cut it four different times using two different colors of green cardstock.
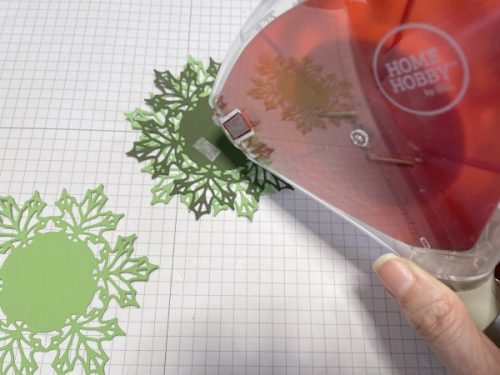
My tip on this type of design alternating the shapes is to avoid bunky parts. I just placed the E-Z Runner Grand Permanent Strips on the center part of the die cuts.
Finishing the Multilayer Christmas Card
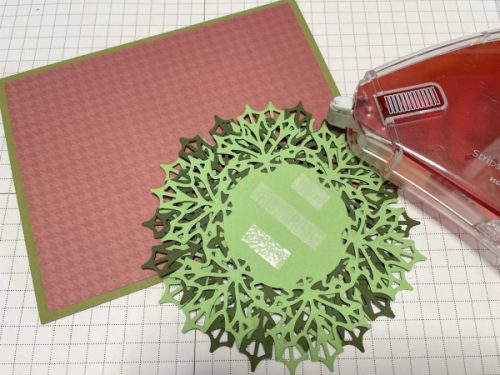
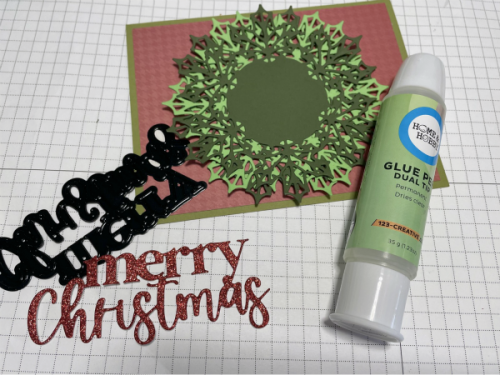
I created the card base using a different tone of green cardstock from the ones that I used to make the wreath. Then, I decorated it with a piece of designer paper in contrasting colors. Additionally, I adhered the layered wreath on the center of the card. To add these two pieces, the designer paper, and the wreath, I used E-Z Runner Grand Permanent Strips.
Additionally, I die cut a message or sentiment onto red glitter cardstock. On this opportunity, I used the Glue Pen Dual Tip. I just placed the adhesive behind the letters that were on the center of the wreath to make the sides more flexible.
Thanks for stopping by and let me share how easily is created with multilayers and without dimension. Don’t be afraid to experiment with the unlimited possibilities of your adhesives! Martha Lucia
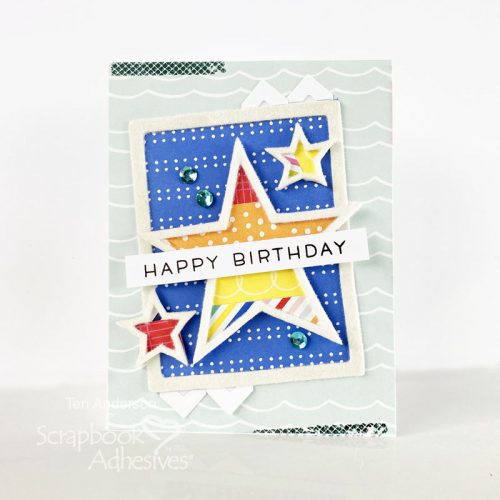
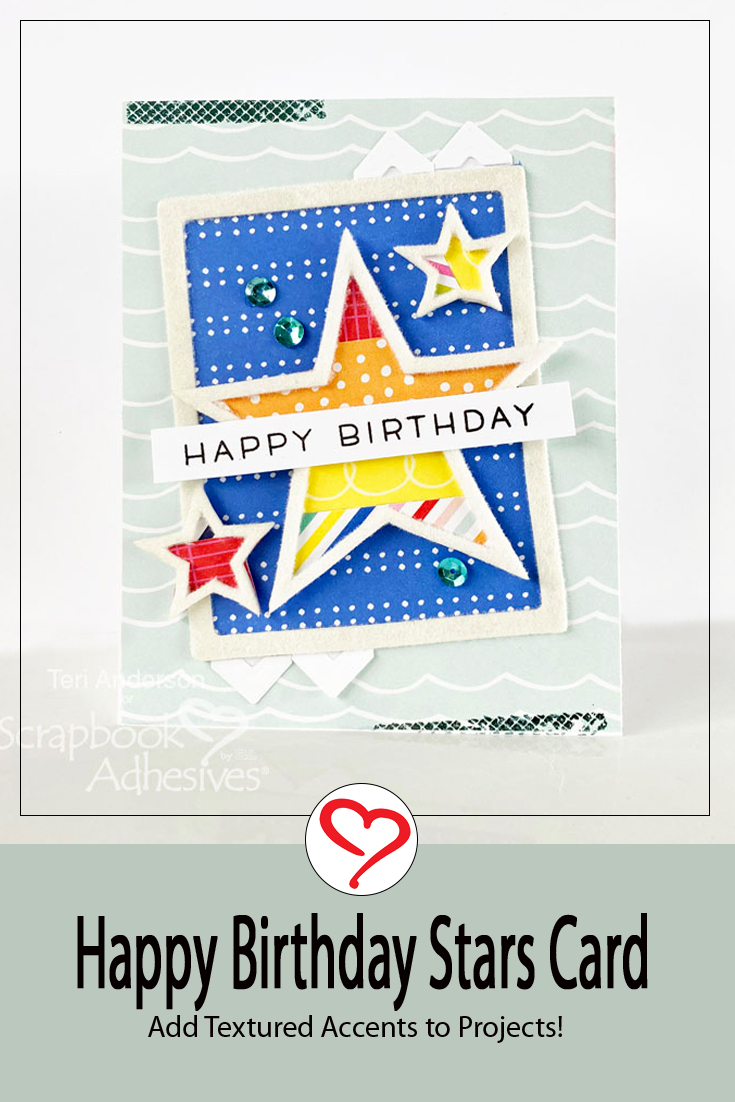
Hi, everyone! Like to add texture to your handmade cards? Teri here to show you how with my Happy Birthday Stars Card with 3D Foam Shapes and flock!
This fun Wear Your Adhesive on the Outside technique is so fun and adds a ton of pizazz and pop to cards.
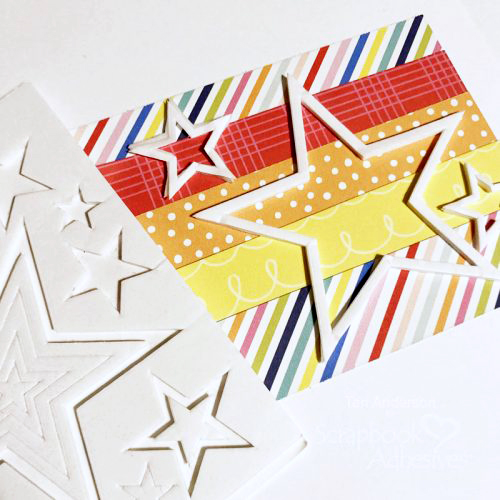
Making the Birthday Stars
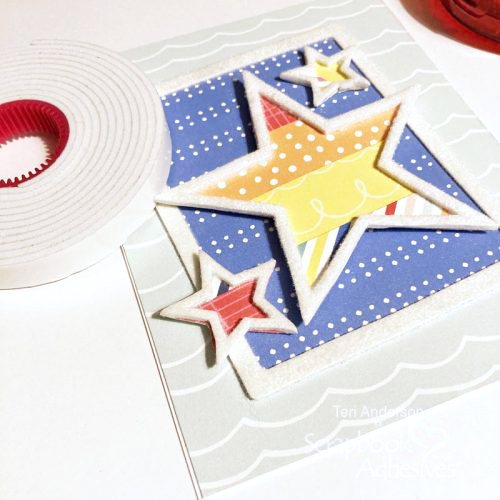
Start by adhering several strips of patterned paper to a piece of cardstock. Place several foam shapes on top. I used 3D stars, but any open foam shape will work.
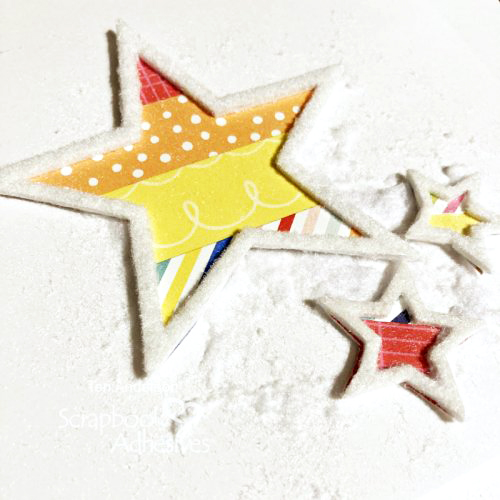
Burnish flock onto the shapes. Rub a piece of wax paper along the shapes to help burnish it down. Cut the shapes out with your scissors and set them aside.
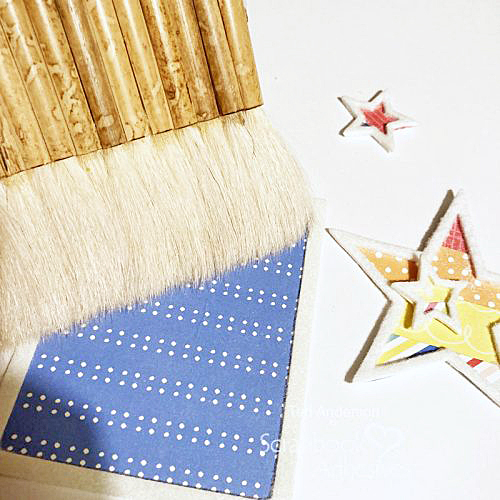
Texture the Frame
Create a frame by adhering a 3D Foam Frame to patterned paper and cutting it out. Cover it with the flock. I recommend using a paint brush to sweep away any stray flock after you’ve burnished the flock to the frame.
Assembling the Card
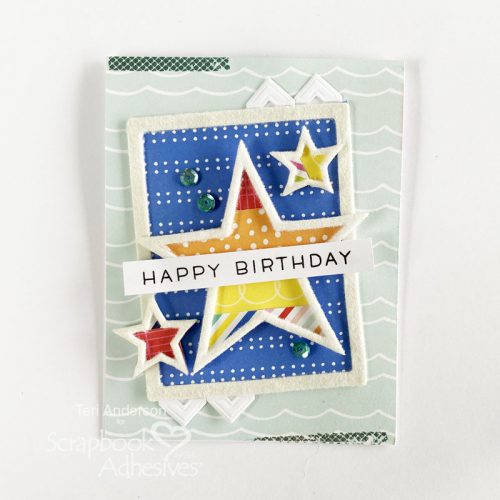
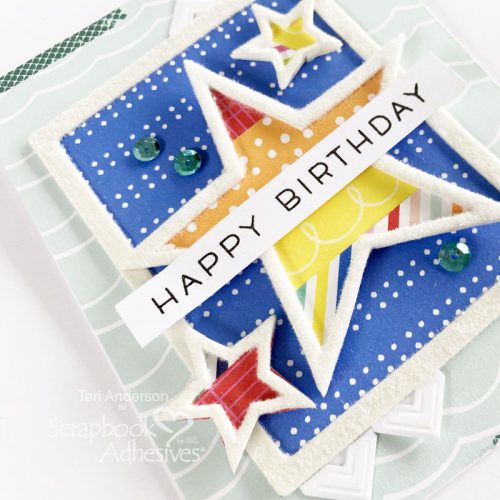
Adhere a panel of patterned paper onto a top-folded card. Add your frame and the stars. Use Crafty Foam Tape to affix the largest element to the card.
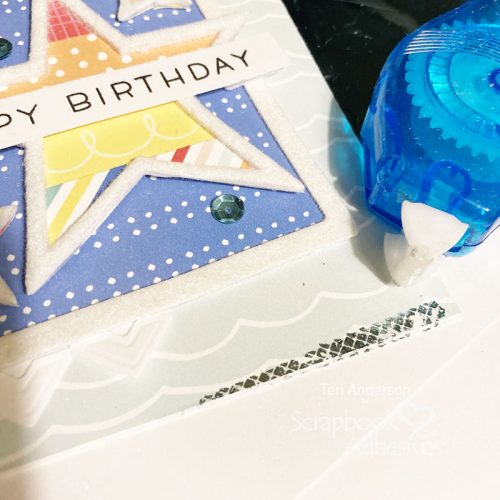
Embellish your frame with a couple of Creative Photo Corners and sequins. Stamp a sentiment on a strip of cardstock and adhere it to the card. Be sure to put foam strips on it, separating where it will overlap your foam shapes.
Complete the card by rolling some adhesive along the top and bottom of the card. Burnish some foil on top. Depending on what look you are going for, use either Dots or Strips for the adhesive.
Thank you so much for stopping by today! I hope you are inspired to add some texture to your next card or scrapbook page just like my Happy Birthday Stars Card!
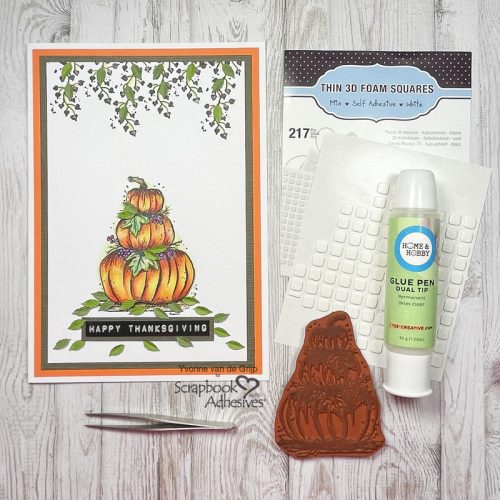
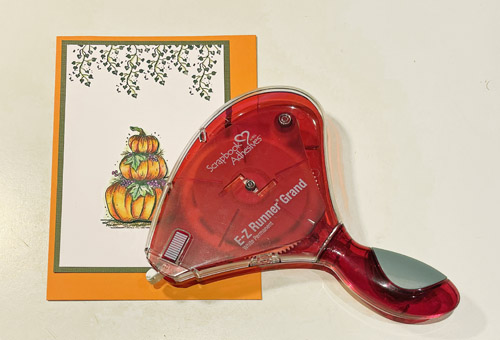
Hi everyone, Yvonne here with a Thanksgiving Pumpkin Card. Being fall, the leaves are falling and pumpkins are ready to harvest. With that in mind, I created this easy-to-create card.
This pumpkin card is all about simple layering, some coloring, and adhering. Wanna join me in creating this thanksgiving card?
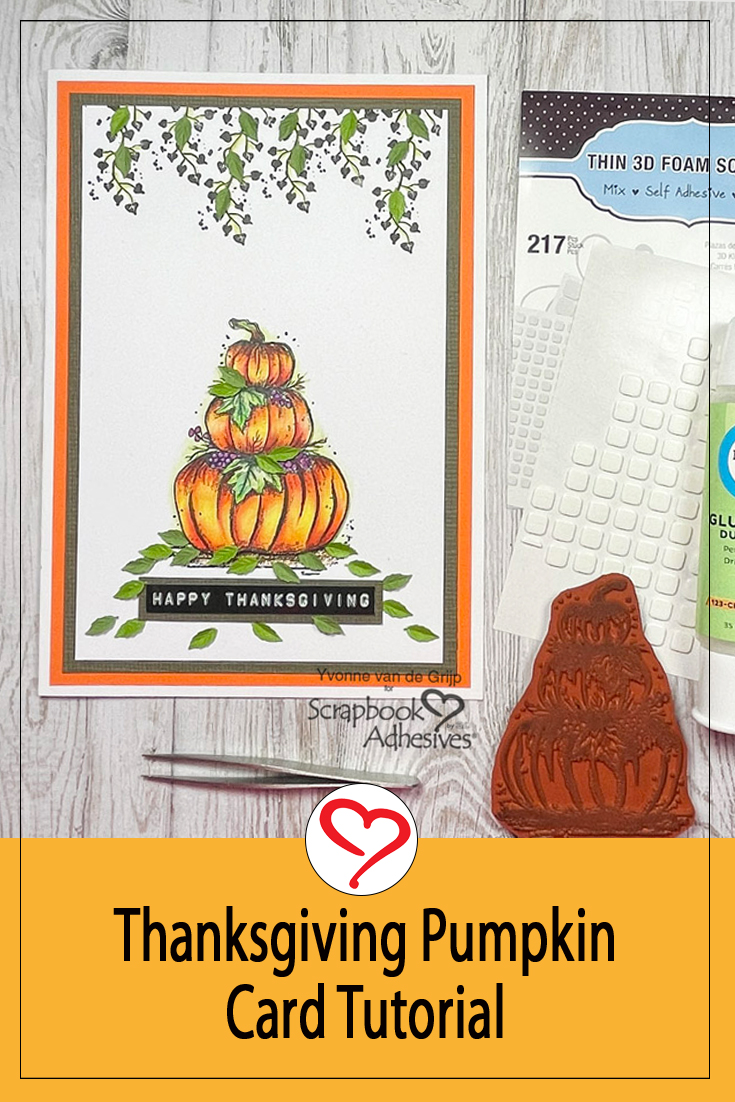
Making the Top Card Panel
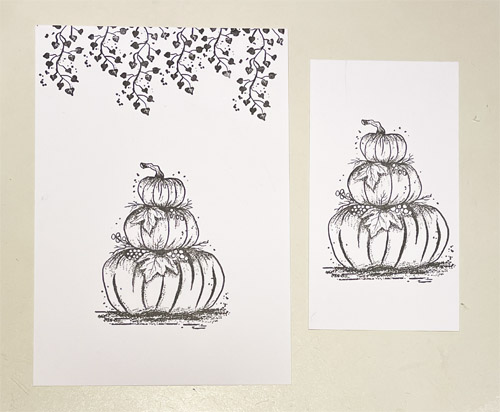
Start by stamping the pumpkins and twines onto a white cardstock panel using a black ink pad. Also, stamp an extra image of the pumpkins onto a smaller piece of paper.
Next color the image of the separately stamped pumpkin. Then color the outlines of the pumpkin image you stamped onto the white card panel.
Layering the Pumpkin Card
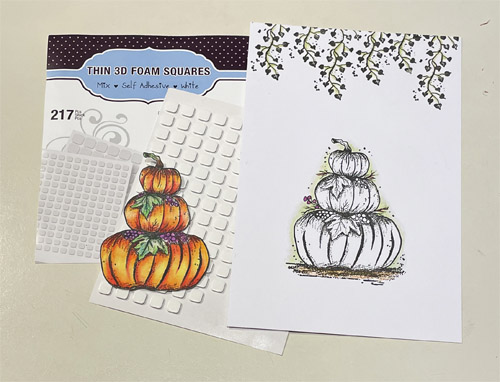
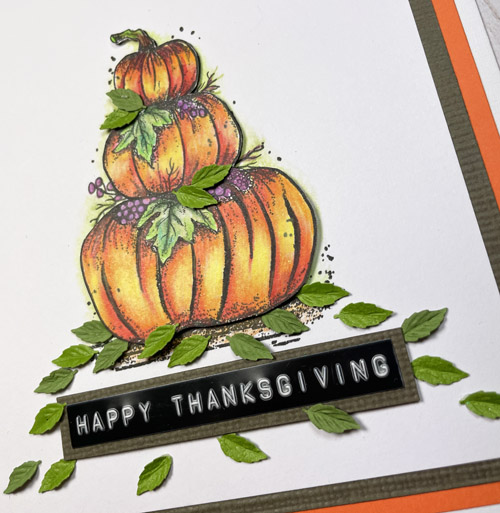
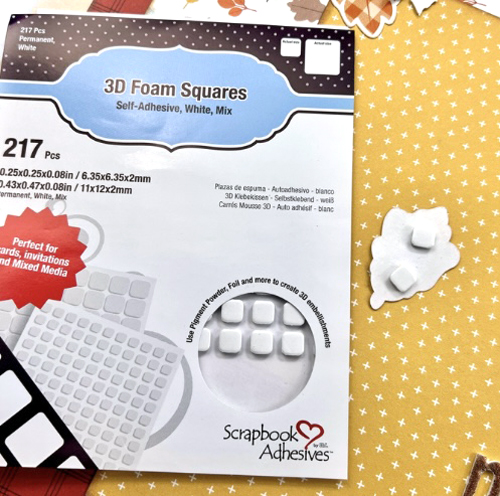
Cut out the colored image of the pumpkins and fussy cut the image. Then adhere onto the top card panel using Thin 3D Foam Squares White Mix.
This way you create a subtle uplifting effect on your card. Then adhere the panel onto a dark brown card panel and use the E-Z Runner® Grand Refillable Dispenser to adhere.
Place a Happy Thanksgiving sticker onto a banner cut out from a leftover piece of dark brown cardstock (the same color you used for the middle card panel) and secure to the card using Thin 3D Foam Squares White Mix.
Adhere some tiny green mulberry leaves all over the card using the Dual Tip Glue Pen for adhering.
And voilá your Thanksgiving Pumpkin Card is ready. Easy to make, wasn’t it?
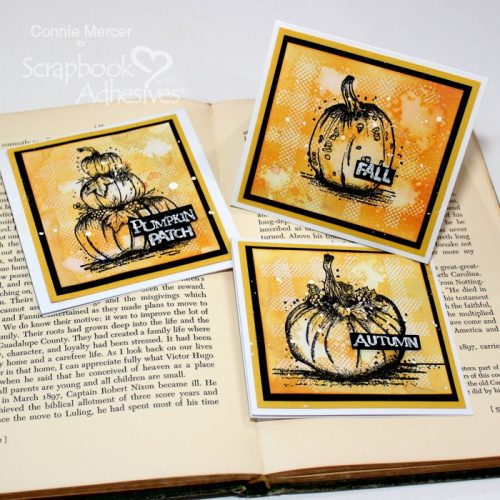
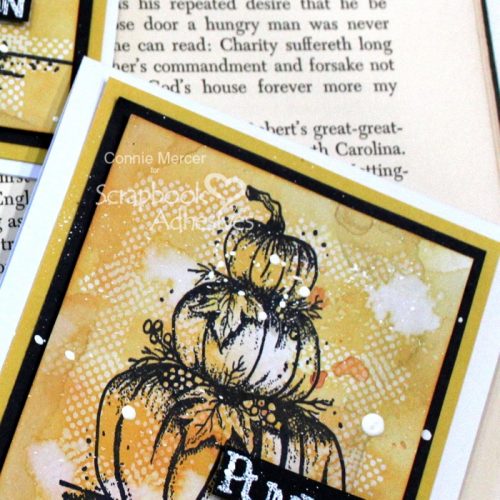
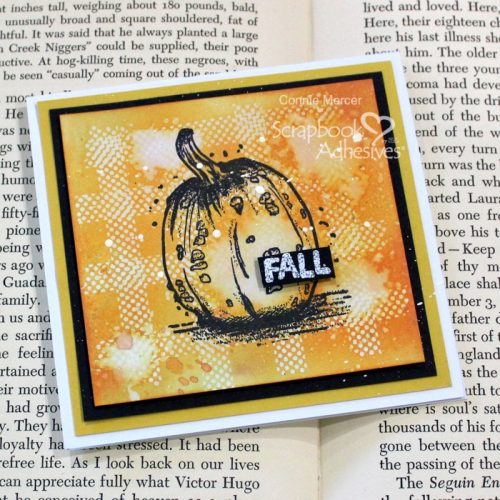
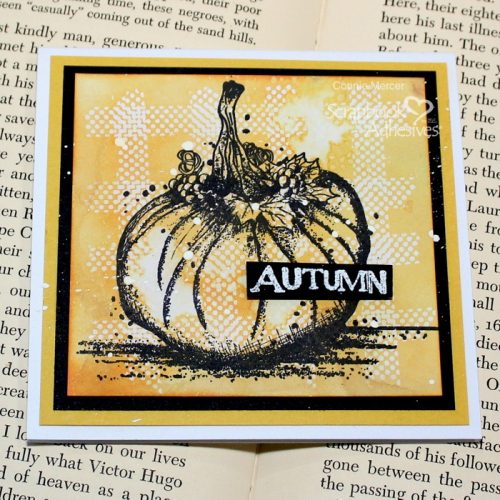
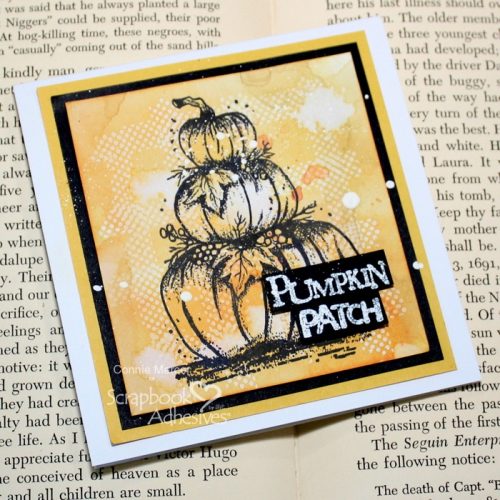
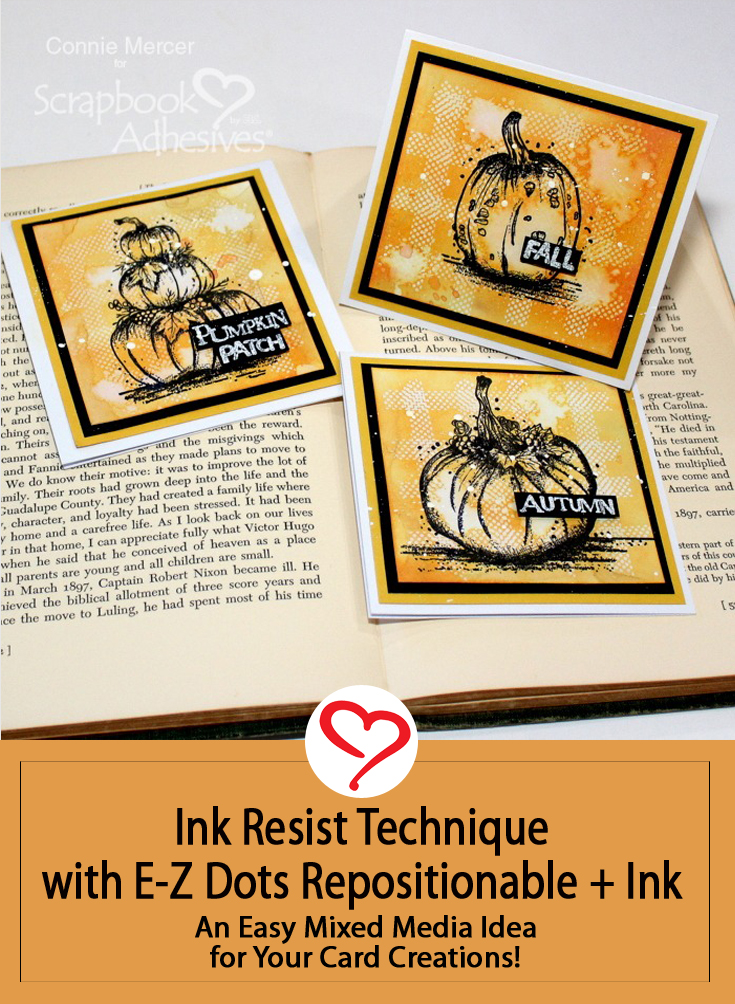
Hi, Connie here with an easy and fun way to make a plaid background using the E-Z Runner Grand Repositionable Dots Refillable Dispenser and Distress Oxide Ink. I’m using pumpkin stamps to bring on the fall weather in this Pumpkin Square Card Set! Hoping anyway!
These Pumpkin Squares Cards are about 4″, so you will need to cut your card base, card mats, and card front accordingly. For my card front, I’m using a piece of white cardstock with some ink stains (in my stash). Now I’m all ready to go!
Plaid Background for the Pumpkin Square Card
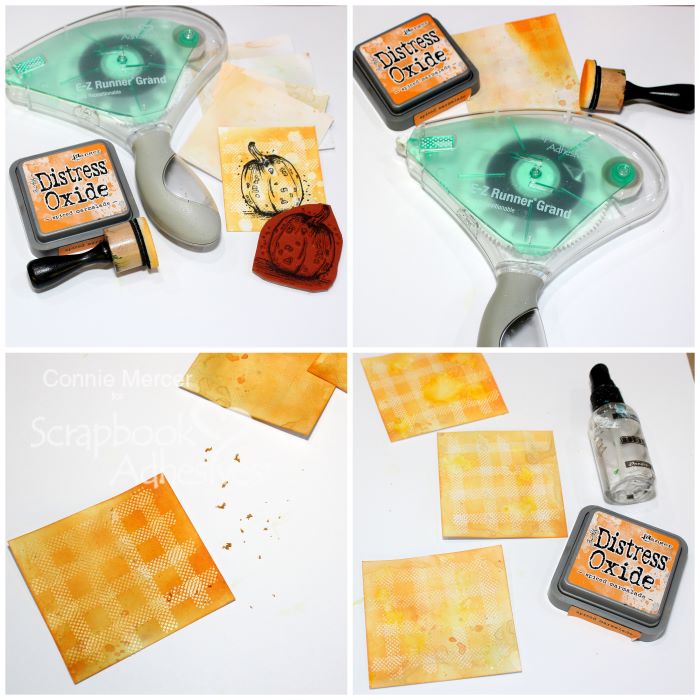
1. Gather the supplies. You will need E-Z Runner Grand Repositionable Dots Refillable Dispenser, Distress Oxide Ink in Spiced Marmalade, and seasonal-themed stamps. 2. Starting from top to bottom, apply the Repositionable Dots Adhesive. Turn the cardstock and go horizontally with the adhesive. Apply the Distress Oxide Ink to the card front using a foam applicator. 3. Using your finger rub off the repositionable adhesive. The plaid design will start to show. 4. When all the adhesive is removed, spray the card front with water and then dab off. This will give you a distressed look.
Stamping and Embossing the Pumpkin Square Card
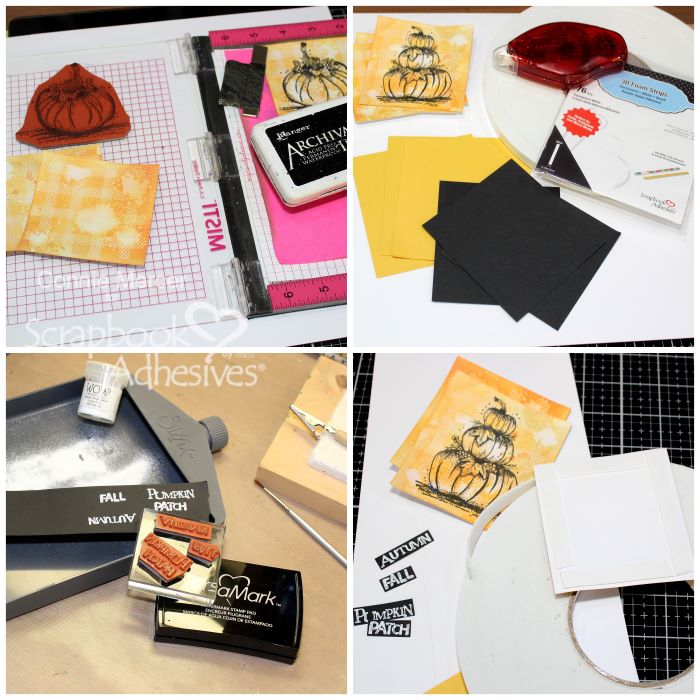
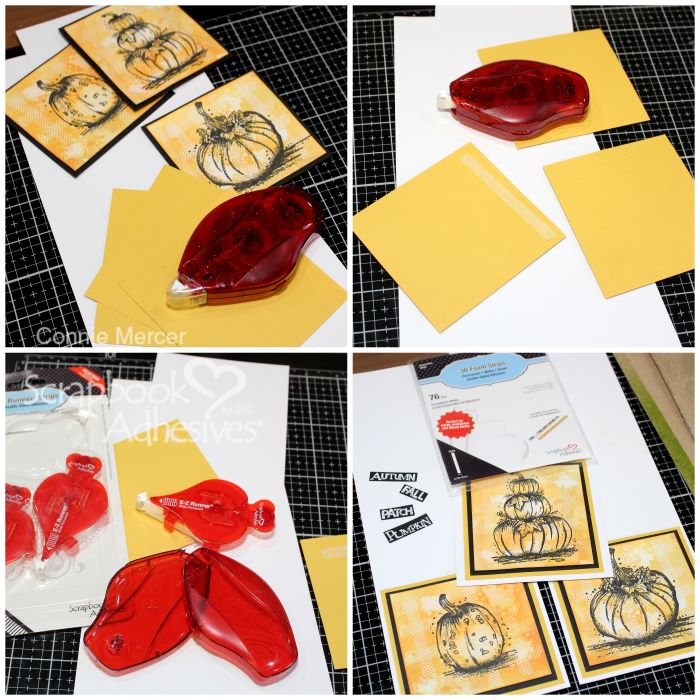
1. Using a stamping platform, stamp the image onto the card front. Re-stamp if necessary. 2. To put the card together, you will need the E-Z Runner Permanent Strips Refillable Dispenser, the Crafty Foam Tape 108′, and 3D Foam Strips (for the words). 3. Emboss the stamped words, using white embossing powder, on black cardstock. Cut into a word strip. 4. Adhere the Crafty Foam Tape 108′ to the card front and then adhere to the black cardstock mat.
Last Finishing Steps
1. Adhere the black cardstock mat to the yellow mat using the E-Z Runner Permanent Strips Refillable Dispenser. 2. Then the yellow cardstock mat to the folded white cardstock base. 3. I ran out of adhesive in between this process so super easy just popped in a NEW E-Z Runner Strips Refill. 4. Add the 3D Foam Strips to the back of the embossed word strips and adhere to the card fronts. Speckle with white acrylic paint to finish the cards.
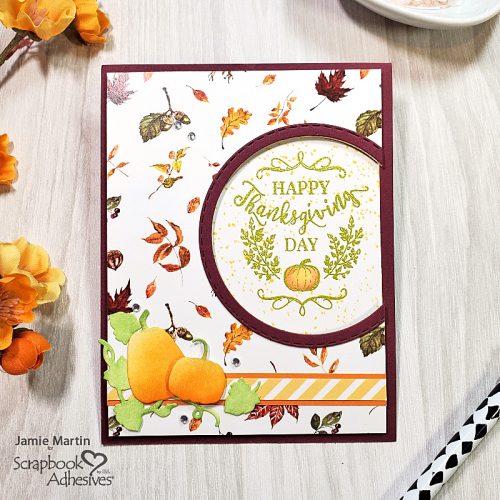
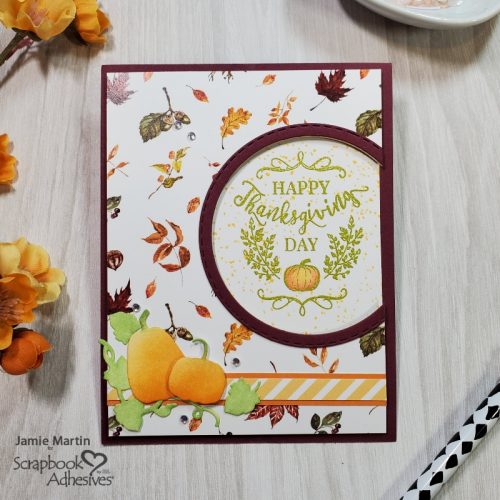
Hi, Jamie here with you today and I have a Dotted Happy Thanksgiving card that is perfect to send out to friends and family that can’t be with us for the holiday
Create a Dotted Happy Thanksgiving Background
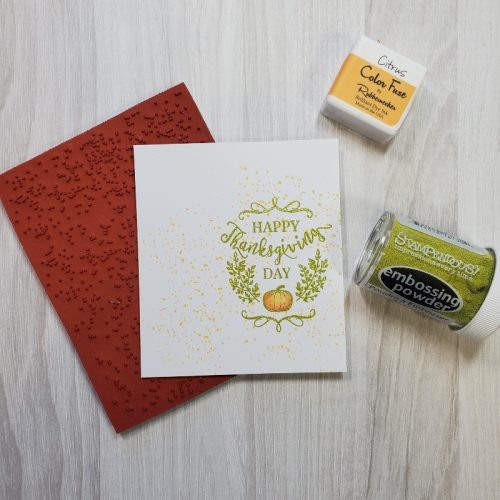
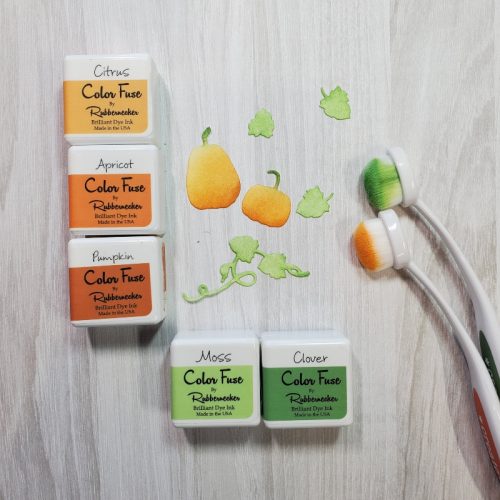
Stamp the sentiment with VersaMark ink and heat emboss with Lettuce Embossing Powder on a piece of white cardstock panel. Make the background by stamping with a dotted background stamp using Citrus ink. Then watercolor the little pumpkin with watercolor pencils using a touch of water since the paper is not watercolor paper.
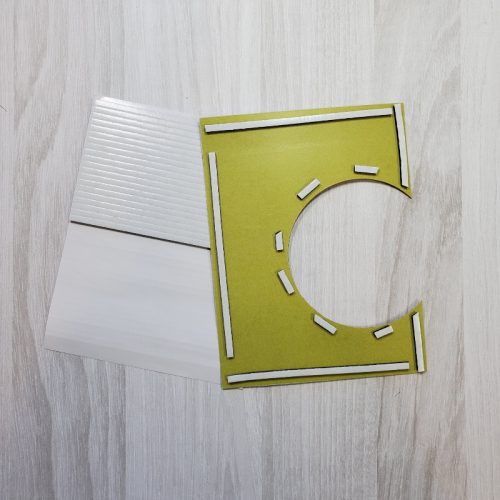
Place a circle die on the right edge of a patterned paper card panel to create an offset window. Next, add 3D Foam Strips on the back of the panel along the edges and around the circle.
Pumpkins and leaves were die-cut from white cardstock and colored with orange and green inks.
The Finishing Touches
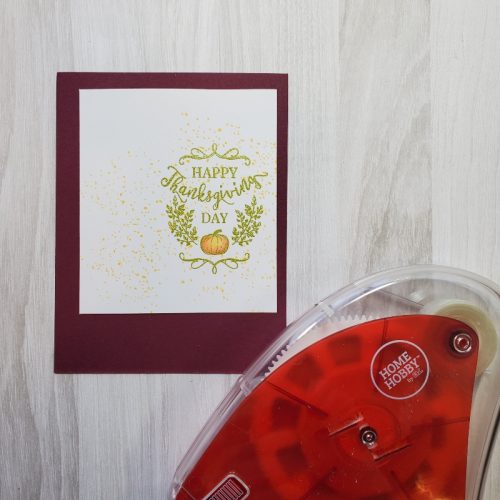
Using circle dies, a circle frame was die-cut from wine cardstock and glued to the top of the circle opening with the Dual Tip Glue Pen. Add a strip of decorative paper to the bottom portion of the card. Use a combination of Dual Tip Glue Pen and 3D Foam Squares to give them differing heights. The Dotted Happy Thanksgiving Card is ready to be sent!
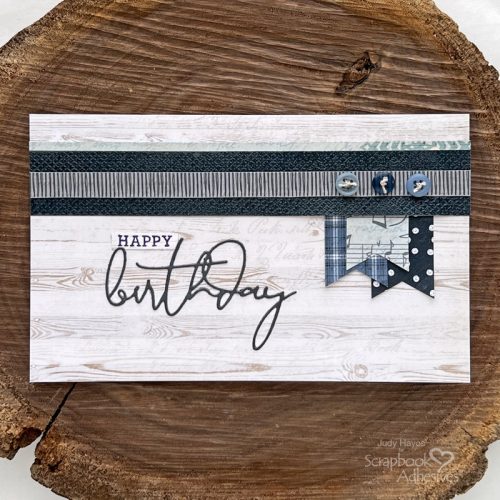
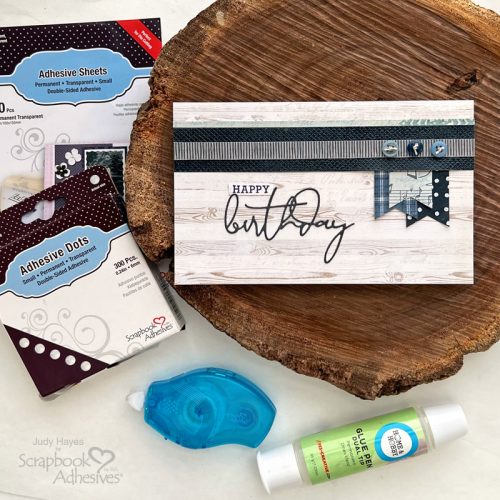
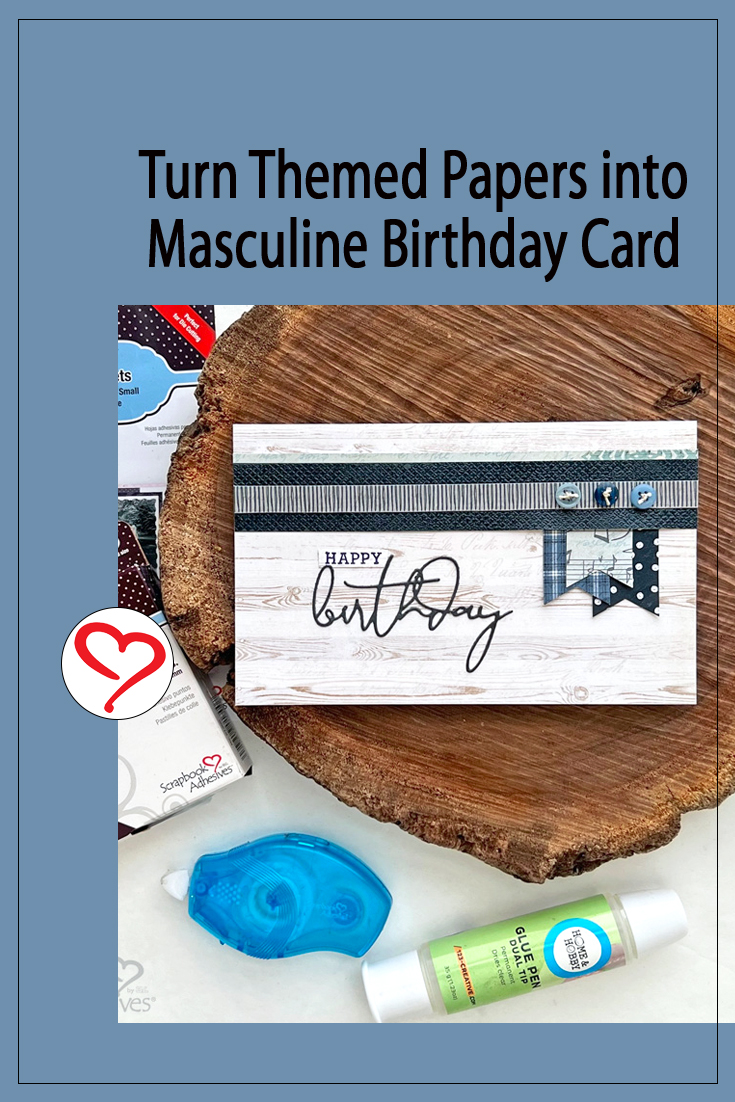
Hello friends! I often like to challenge myself to use products in a little different way. Today’s masculine birthday card features papers from Photo Play’s “For the Love of Winter” Collection! The blue colors seem perfect for a guy’s card, so I chose papers that didn’t necessarily depict winter to make this card. I’m so happy with how it turned out!
Masculine Birthday Card Base
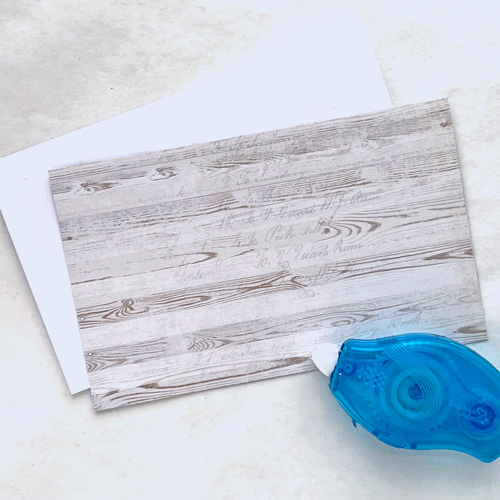
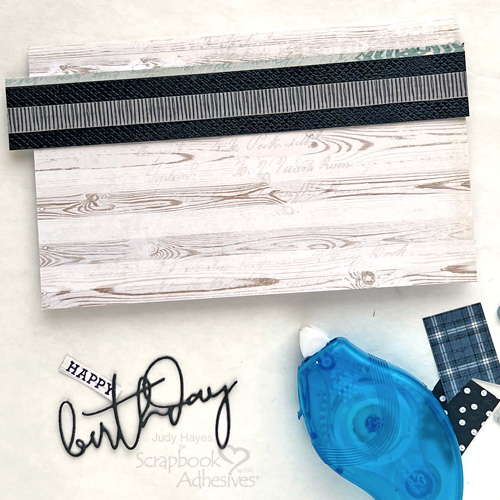
To make this card, form a 4 x 6.5 inches card base from white cardstock. Cut a piece of wood-patterned paper to 4 x 6.5 inches. Secure it to the card front using E-Z Runner® Petite Permanent Dots Refillable Dispenser.
Sprinkle Distress Glaze Uncharted Mariner over the adhesive, tap off the excess and melt with a heating tool. Trim long edges as needed so the glaze pattern is on the very edge.
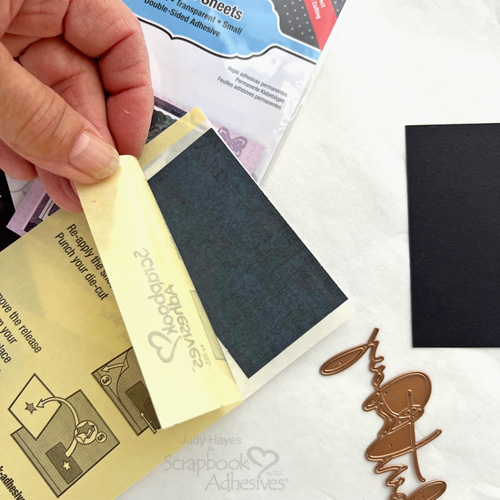
Trim a piece of dark blue paper and black cardstock large enough to cover a “birthday” die. Next, apply a sheet of Adhesive Sheets 4×6 inch to the back of the dark blue paper. Simply pull back the yellow liner, place the dark blue paper facing up on top of the adhesive, cover the liner back on top of the paper and rub the adhesive to transfer it to the paper. Remove the paper and adhere it to the black cardstock.
Place the “birthday” die on the dark blue paper side and run it through the die-cutting machine 2-3 times. Gently remove the die-cut word and set it aside.
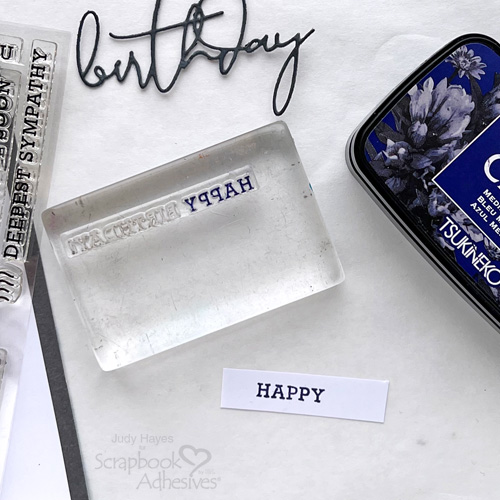
Stamp Part of the Sentiment
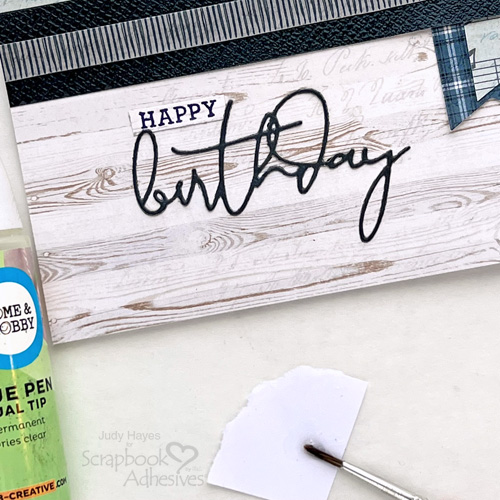
Stamp “Happy” with Medieval Blue ink on a piece of wood grain paper. Trim close around the word.
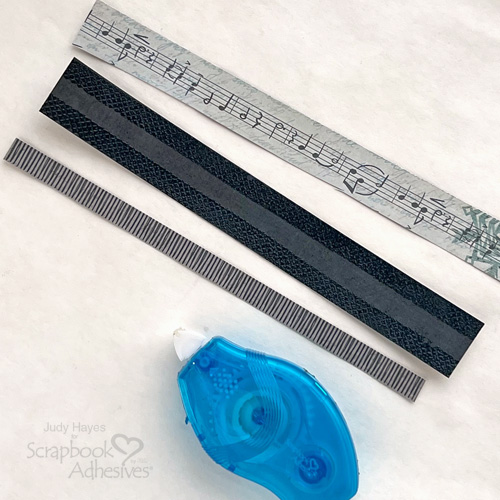
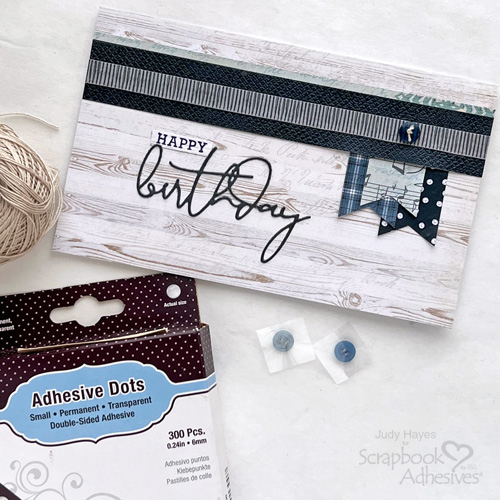
Grab the dot and plaid banners from the collection’s ephemera pack. Use one of the banners as a template to cut a third banner from music paper. Arrange the banners and secure them to the card using E-Z Runner® Petite Permanent Dots Refillable Dispenser. Tuck the top of the banners under the band or trim to fit.
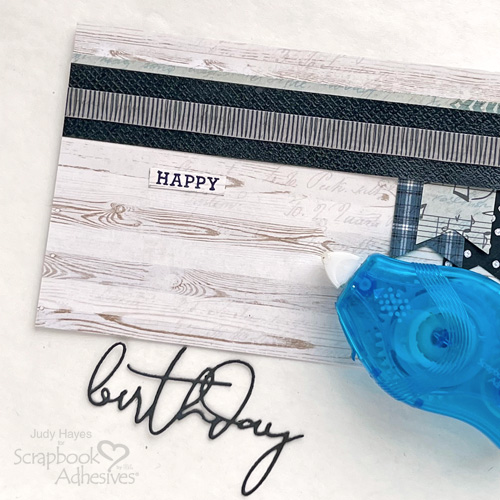
Squeeze a small amount of glue from Dual Tip Glue Pen onto a scrap of cardstock. Use a small brush to apply glue to the back of the “birthday” die cut. It’s not necessary to completely cover all of it with glue. Place on the card and press firmly in place.
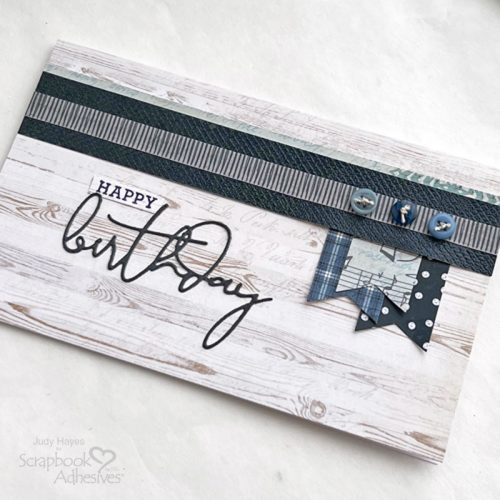
Tie a bow thread to each button and then place an Adhesive Dots Small on the back of each. Peel off the liners and press in place on the band.
So what do you think of my Masculine Birthday Card? I challenge you to take a themed pack of papers and turned them into any occasion card creation.
Buttons Galore and More (buttons), Hero Arts Stamps (Sending Love Mail), Imagine Crafts/Tsukineko Versafine Clair (Medieval Blue), PhotoPlay Paper Co. (For the Love of Winter Collection), Ranger Ink (Distress Glaze-Uncharted Mariner), Spellbinders Paper Arts (Yanna’s Layered Script Sentiment), Thread or Crochet Thread (Cream), Cardstock (White, Scrap of Black)
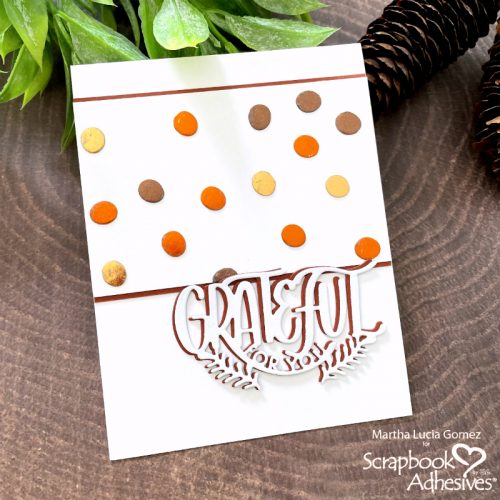
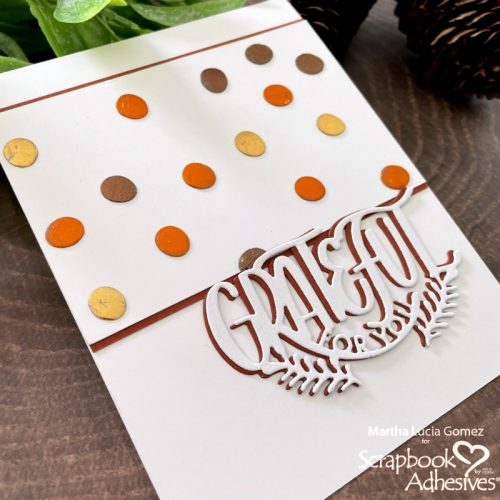
The Wear Your Adhesive on the Outside technique used on this Grateful card is one of the simplest and most fun ways to use your adhesive beyond layers of paper.
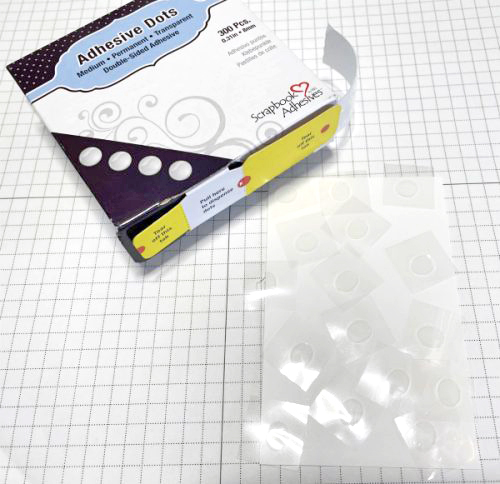
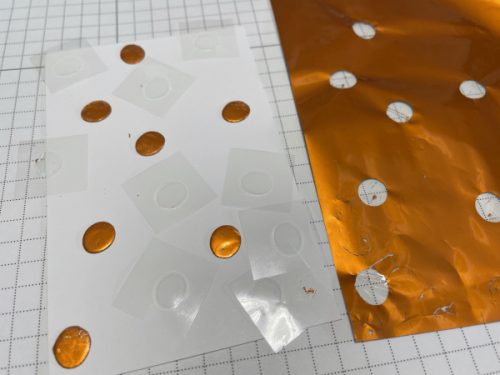
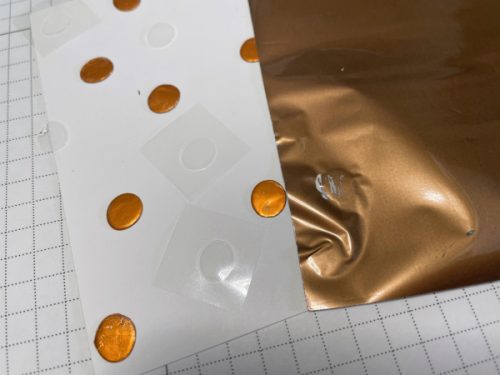
Creating the Dots
Randomly place the Adhesive Dots Medium on a white smooth cardstock panel. Keep the liner on the dots to protect them until you get your desired look.
I started with the Cooper Orange and then moved to the Brown and Gold.
Creating the card
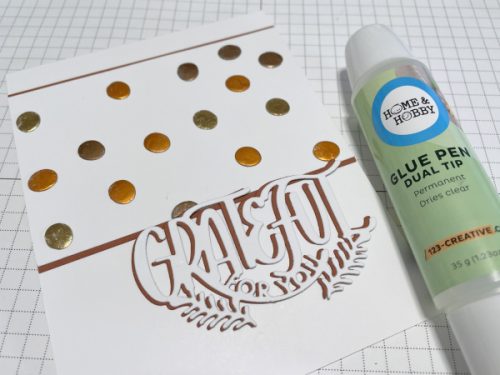
Once I was satisfied with the tones and position of the Adhesive Dots, I matted the foiled dotted piece with a cajun craze cardstock. I pasted both layer using theE-Z Runner Grand Permanent Strips.
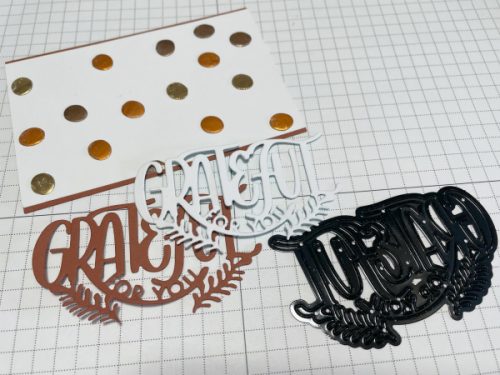
To add a message or sentiment to my card, I decided to use a die cut sentiment in coordinating colors. First, I die cut the Grateful for You Die, twice onto white smooth and cajun craze cardstock.
I created a card base using white smooth card stock. Additionally, I pasted both pieces in between created a little shadow using the Glue Pen Dual Tip. I also pasted the decorative layer over the card base using the same E-Z Runner Grand Permanent Strips.
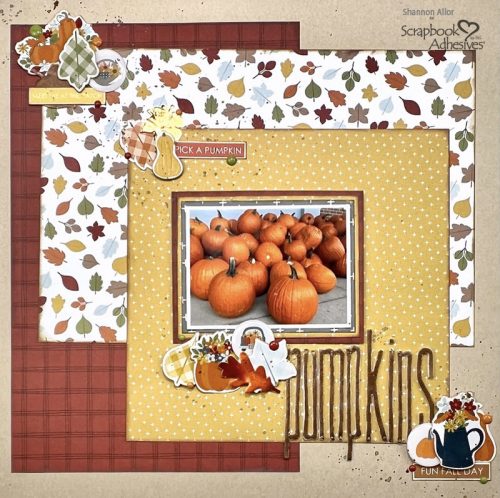
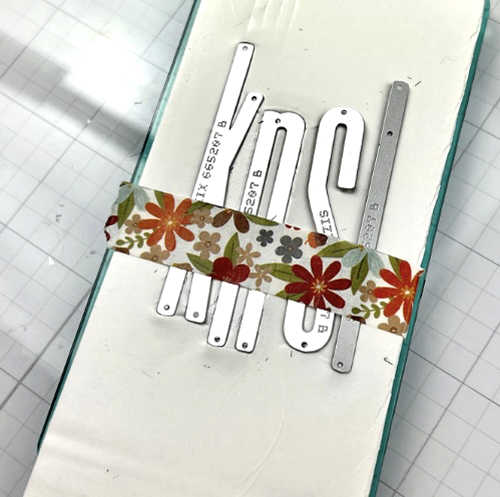
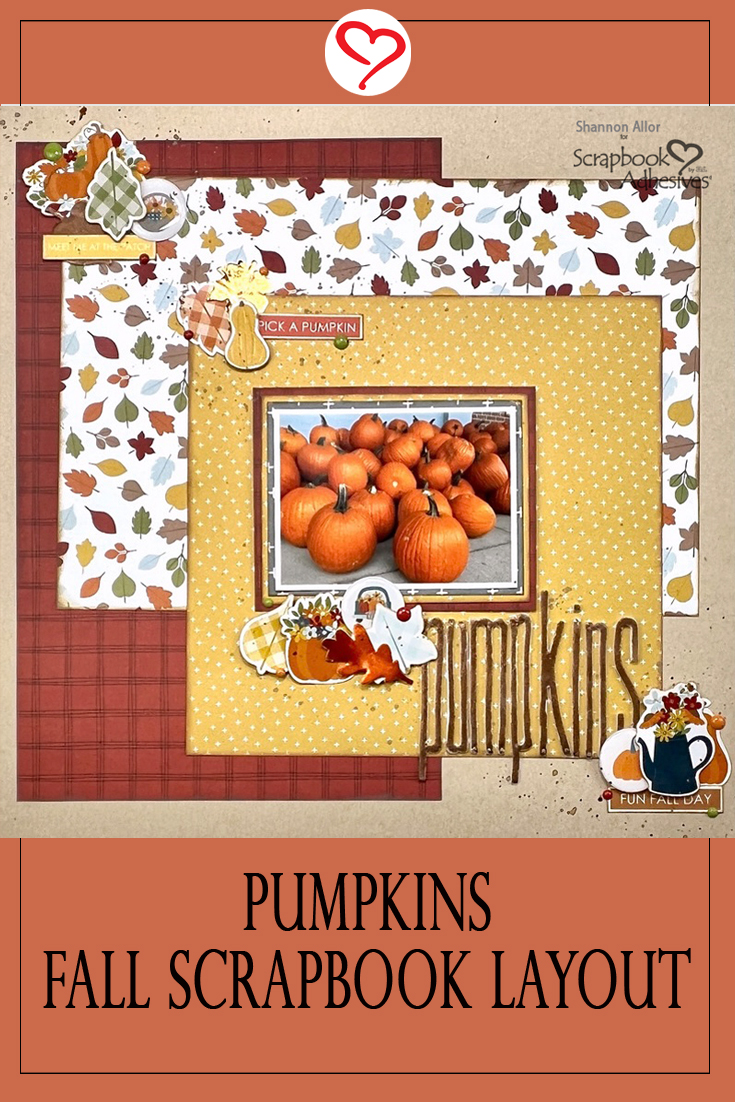
Hello friends! It’s Shannon up on the blog today bringing you this cute Pumpkins fall-themed layout featuring all kinds of fall goodness! I wanted to continue playing with the Metallic Transfer Foil sheets. I had so much fun creating my title using the Foil Sheets and 3D Foam Sheets!
Pumpkins Title
Start with using some dies from my stash to create a title. I ran the foam sheets through my manual die cutting machine and then peeled the top layer from the letters.
Wear Your Adhesives on the Outside with Foil
Next, I applied a brown Foil Sheet to the adhesive. LOVE how it came out! Use the same foiling technique that I did with the title to the leaves. It ties in the embellishments to my title – love it!
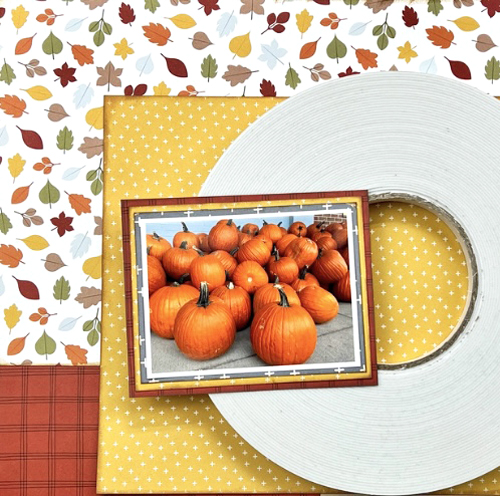
With a bunch of scraps, I created the base of my layout. But first, ink the edges to give a bit of separation between all of the patterns. Now it was time to mat my photo using my E-Z Runner Grand. I love that it provides such a great hold yet I can pick up and move my pieces around if I do it quickly enough!
Finishing Touches
Pop up a few embellishments with the 3D Foam Squares. This creates both dimension and a bit of a shadow.
I love how quickly this Pumpkins fall layout came together! I used some great adhesives and bits and pieces from my stash!
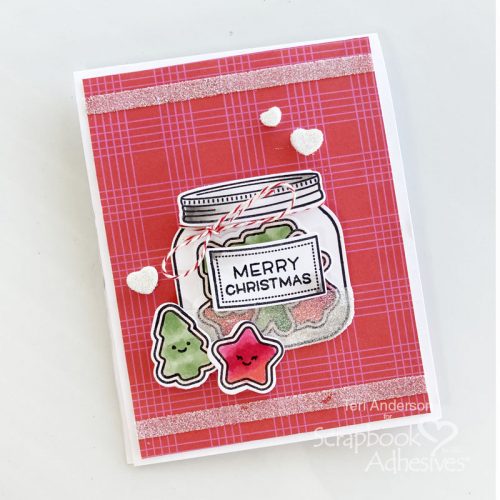
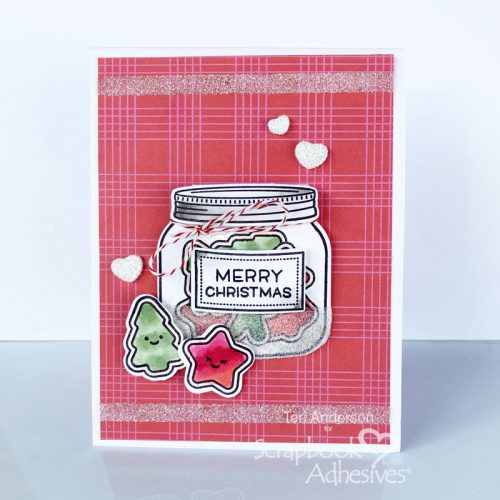
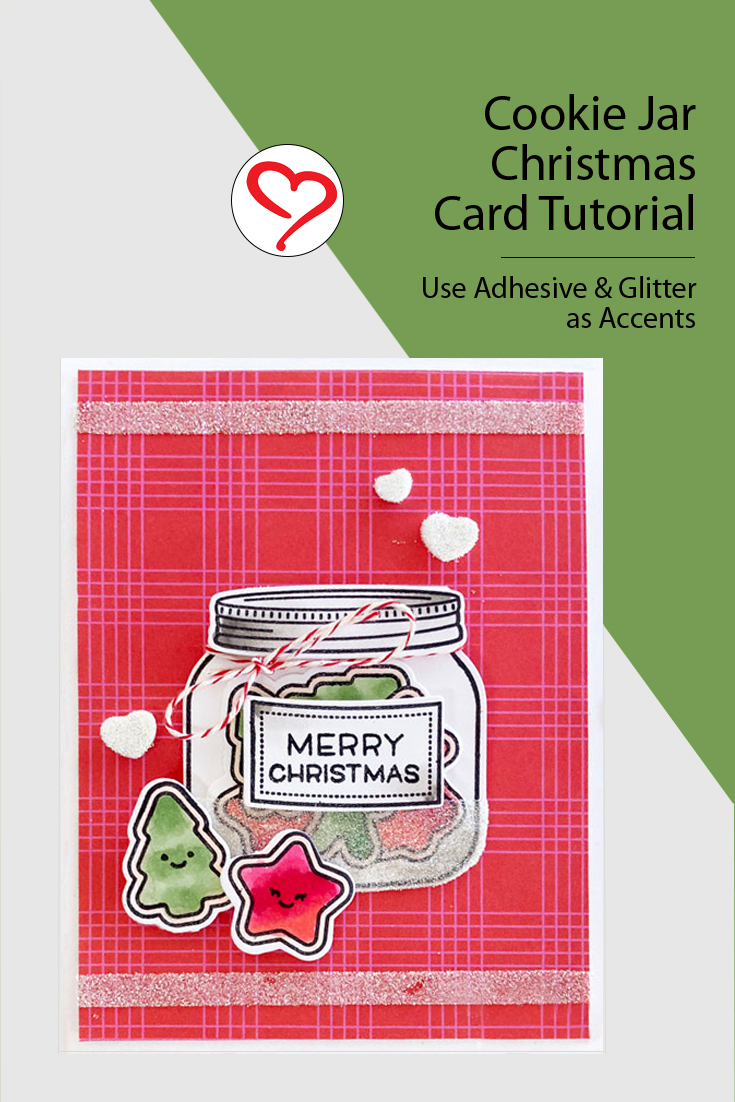
Hi, everyone! It’s hard to believe that Christmas will be here in two months! Teri here to get your holiday cardmaking juices flowing by showing you how to make a super sweet Cookie Jar Christmas Card!
Make the Cookie Jar
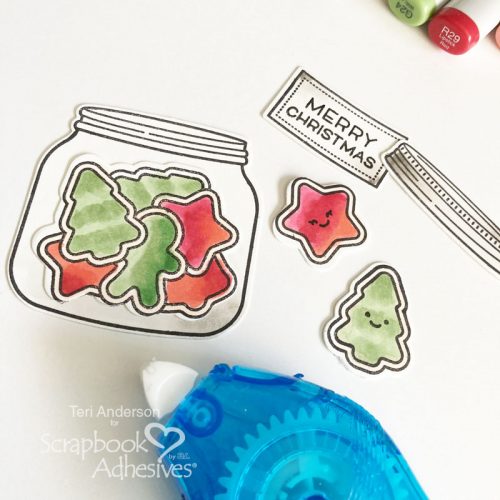
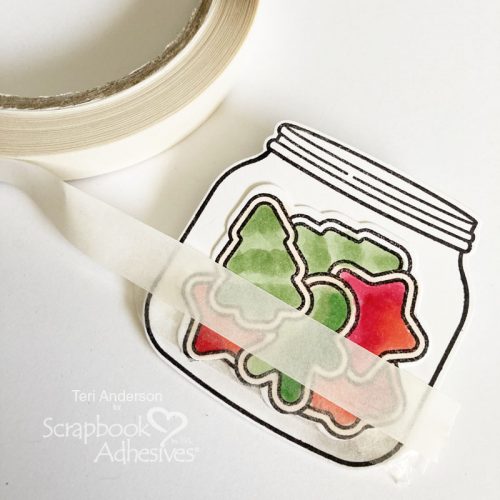
Start by stamping a Christmas jar and some cookies to go in and outside of it. Color them in and die-cut them.
Place some of the cookies in the jar. Add some strips of Crafty Power Tape toward the bottom of the jar.
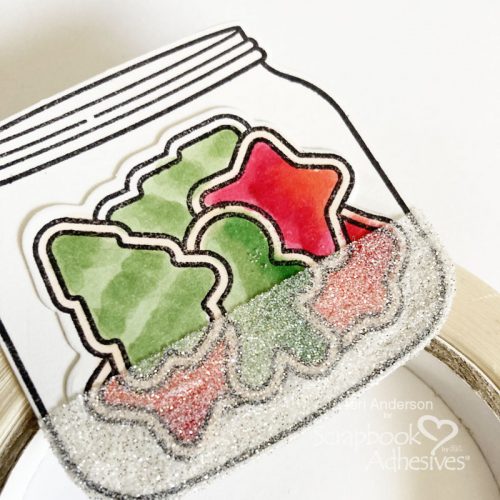
Apply fine glitter to the adhesive strips. Make sure it won’t come off by burnishing the glitter with a little bit of wax paper. Be sure to rub over the paper firmly with your hand.
Place a jar lid and label on the jar with 3D Foam Squares. Tie a little baker’s twine across the top of a jar. Use an Adhesive Dot to hold the twine in place. Set the jar and any other elements you want to put on your card aside.
Decorate the Card Front
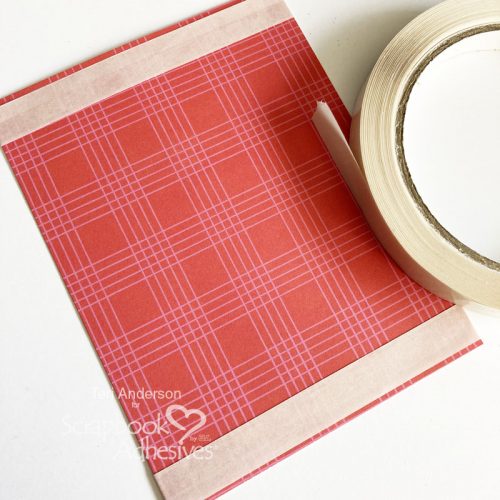
Cut a panel of patterned paper to fit on a card. Add strips of adhesive across the top and bottom. Cover the strips with glitter.
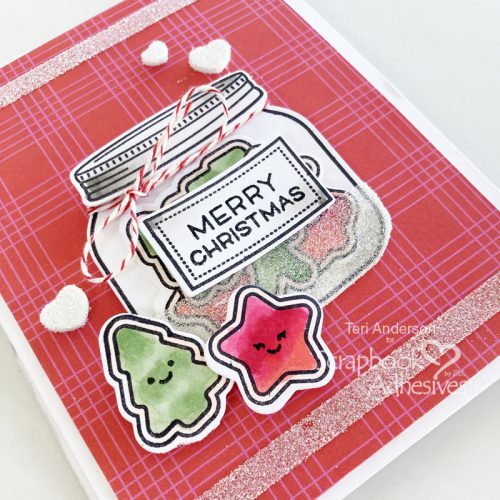
Mount the patterned panel to your card. Add the cookie jar and your extra cookies to it. Complete the front of the card by adding a few foam hearts topped with glitter to it.
Add the Finishing Touches
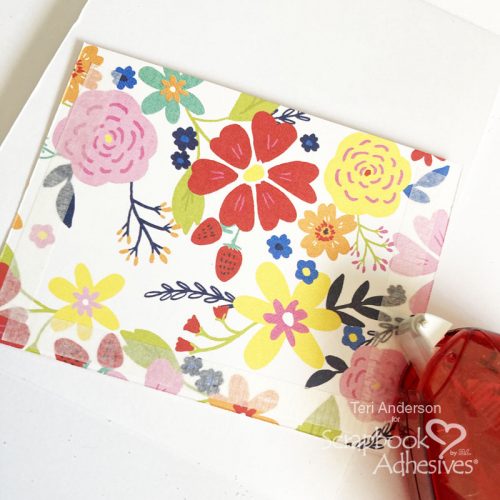
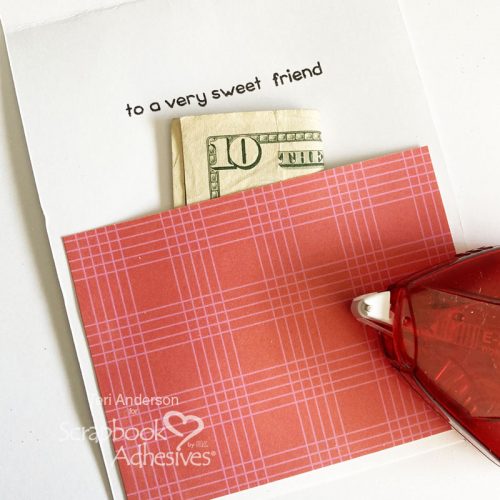
Cut a piece of patterned paper to fit on the inside of the card. Flip it over and apply E-Z Runner® Permanent Strips on three sides to make a pocket to fit cash or a gift card.
Stamp a sentiment on the inside of the card. You could handwrite one instead if you’d prefer. Complete the card by slipping a gift card or cash in the pocket.
Thanks so much for stopping by today! I hope you are inspired to get going on your Christmas cards!
Other White Cardstock: Neenah Paper; Patterned Paper: Simple Stories (Sunkissed Collection); Stamp and Dies: Lawn Fawn (How You Bean? and How You Bean? Christmas Add-on Stamp and Die Sets); Glitter: Stampendous!; Twine: The Twinery; Ink: Ranger Ink; Markers Copic
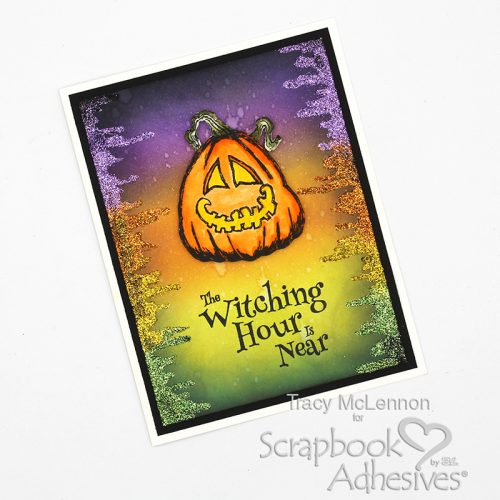
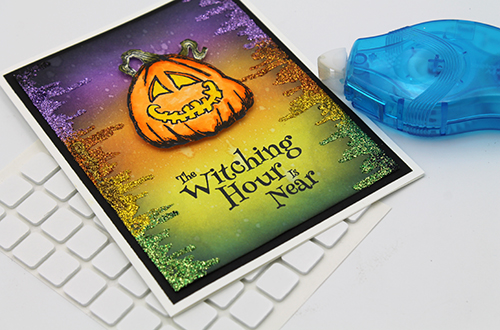
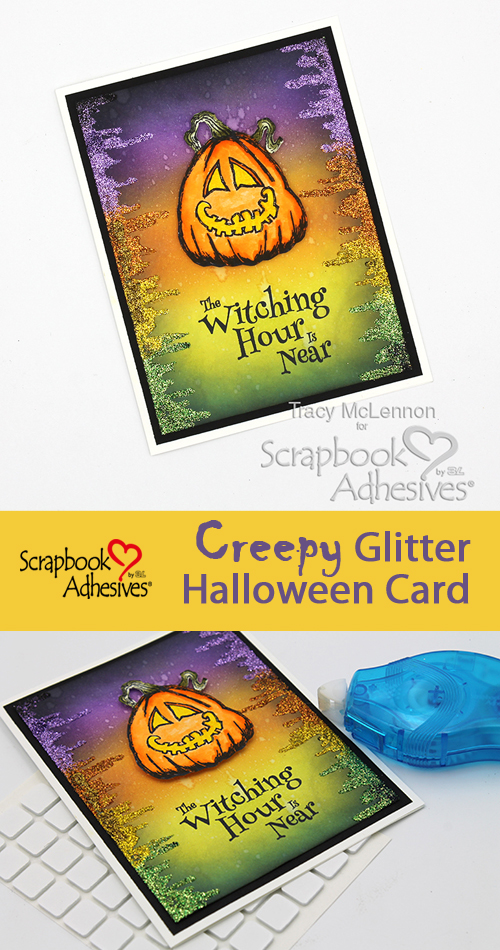
Hello crafty friends! It’s that spooky time of year, so I thought I would celebrate and share this Creepy Glitter Halloween Card with you. Here are all of the spooky details.
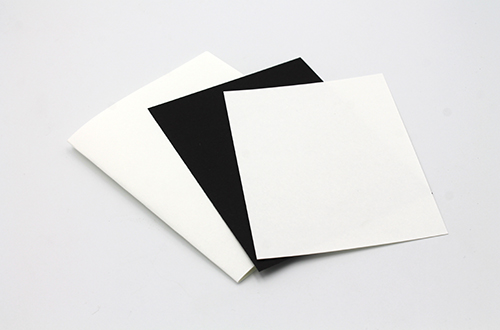
Firstly, I cut the cardstock layers for my card. The card front is white cardstock, then matted in black cardstock and a white cardstock base.
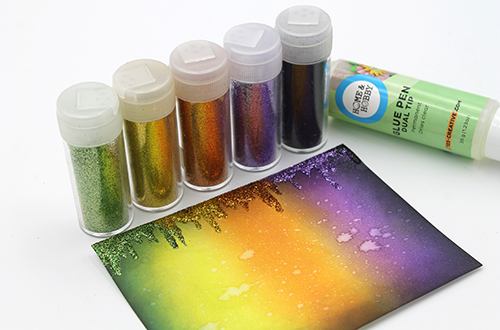
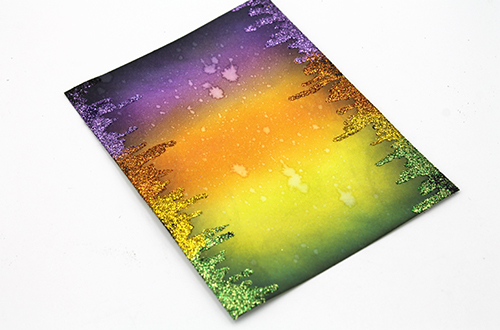
Using Distress Oxide Inks and a blending tool, create a simple blended background for the Creepy Glitter Halloween Card. Once blended, splatter the card front with water. Let dry.
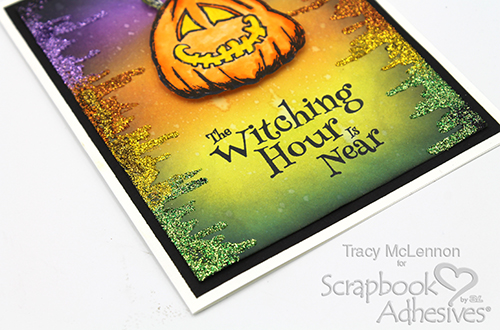
Design the Creepy Glitter Border Card using the Dual Tip Glue Pen, creating a creepy drip-style border. Sprinkle the liquid adhesive with coordinating ultra-fine glitter.
Repeat the same Dual Tip Glue Pen border on the other side of the card. Let the liquid adhesive and glitter dry completely.
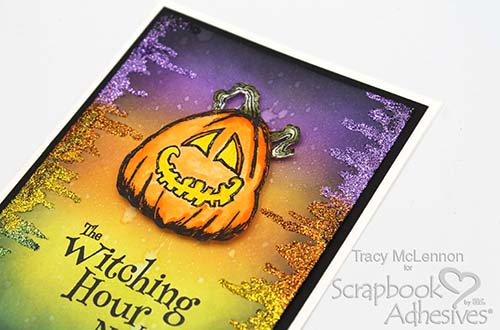
Adhere the card front to the black cardstock mat and the white cardstock card base using the E-Z Runner® Petite Permanent Dots Refillable Dispenser. Stamp the card sentiment onto the card front using black ink. Stamp the image onto white cardstock and add colour using Zig Clean Color Markers and a water brush. Fussy cut out the image and adhere to the Creepy Glitter Halloween Card using 3D Foam Squares White Mix.