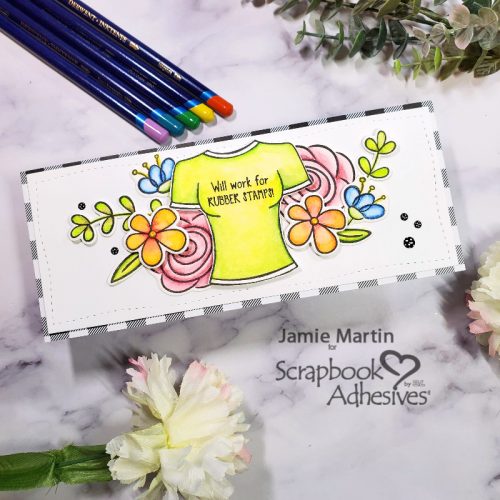
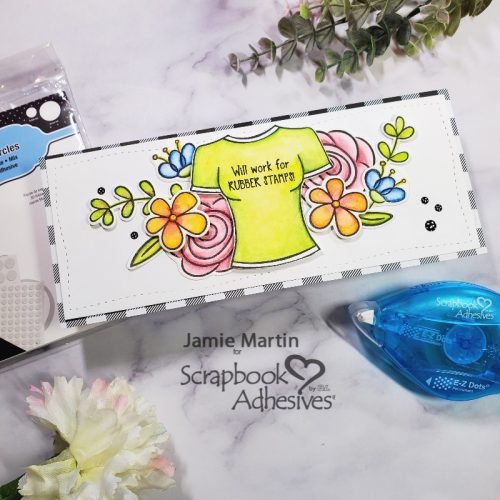
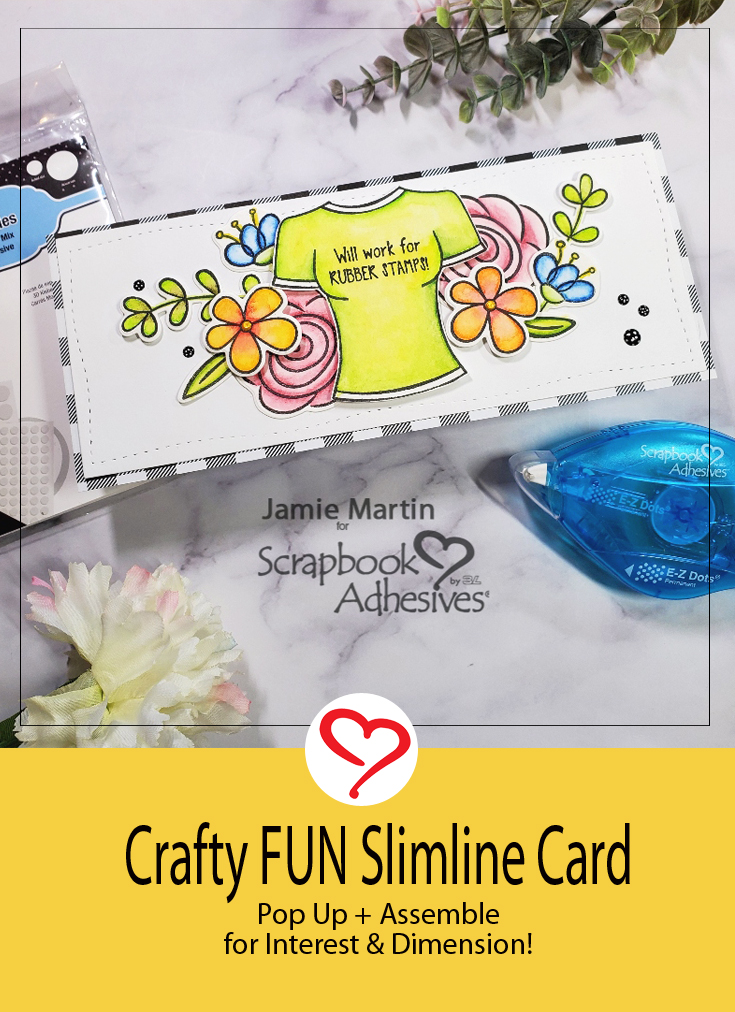
Hi, Jamie here with you today and I made a crafty fun slimline card that your craft peeps will definitely understand! With Scrapbook Adhesives by 3L® sticking power, I can pop up and stick down my many elements with confidence. 🙂
Crafty Fun Starts Here!
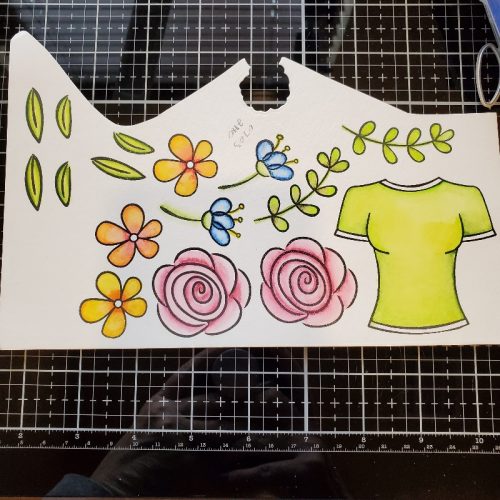
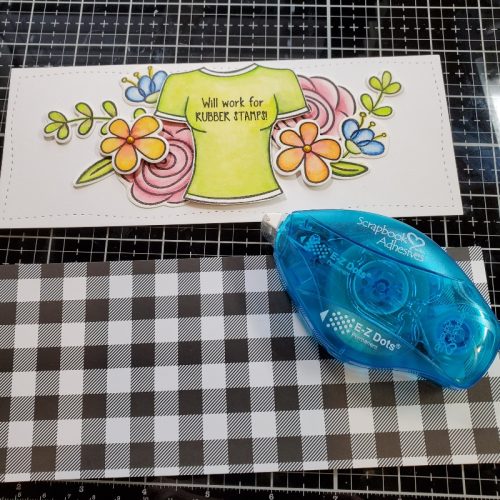
Here’s how I made my card, first I stamped the images on watercolor paper with Onyx Black VersaFine Ink and watercolored them using Inktense Pencils. Stamp the sentiment with Onyx Black VersaFine ink onto the shirt. Die-cut all the images with their matching dies.
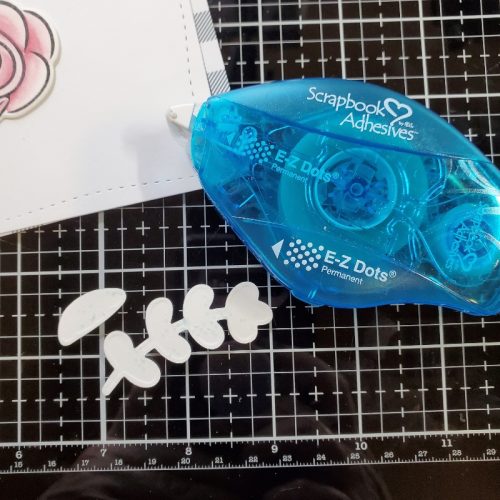
Die-cut white cardstock using a slimline die and use the E-Z Dots Permanent Refillable Dispenser to attach the flowers and leaves except for the daisies, as shown.
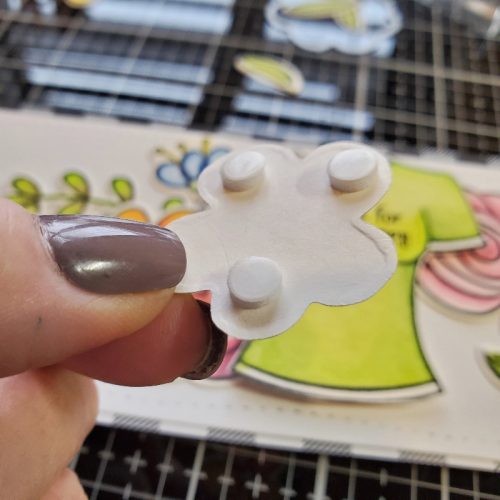
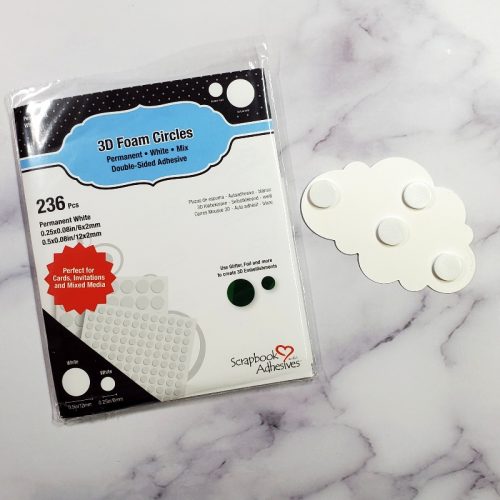
Use the smaller circles from the 3D Foam Circles White Mix to pop up the shirt and the daisies (one on each side of the shirt). You always want to use enough of the 3D Foam Circles so the edges of your images don’t droop, that’s why I don’t use just one in the center of the flower.
Attach the decorated panel to a black and white buffalo plaid card using the E-Z Dots Permanent Refillable Dispenser. Apply Sunflower Liquid Pearls to the center of the daisies. Randomly add a few black and white epoxy dots to the card.
Apply Sunflower Liquid Pearls to the center of the daisies and randomly add a few black and white epoxy dots to the card.
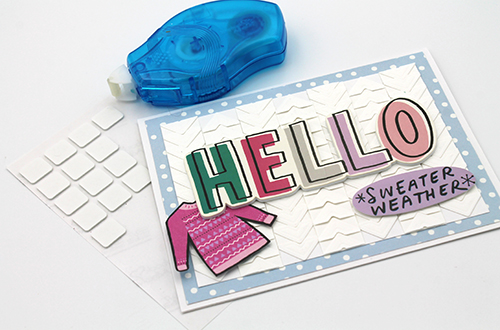
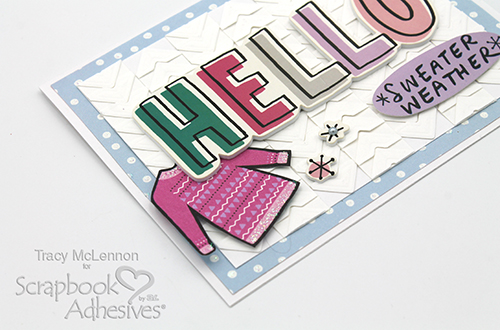
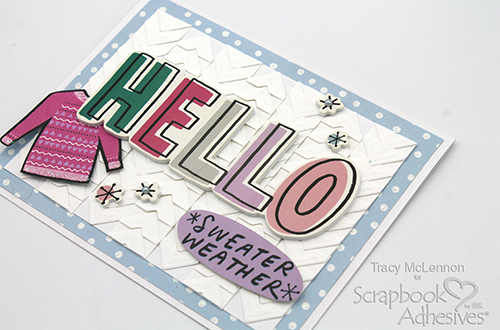
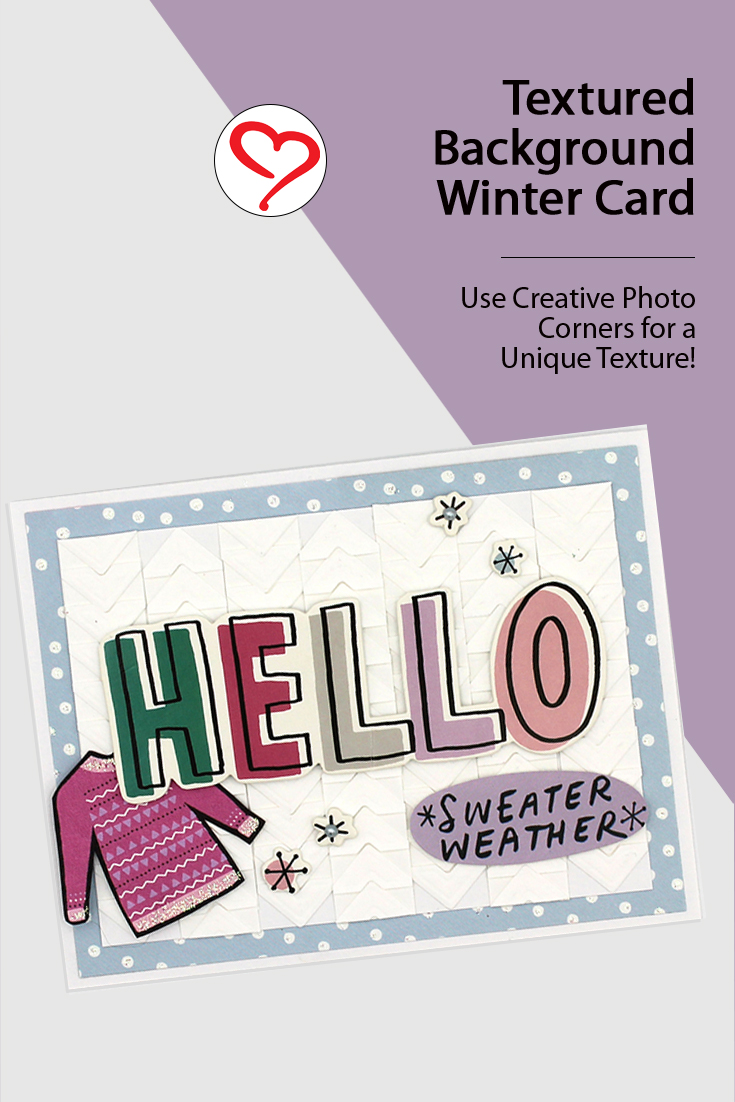
Hello crafty friends! Tracy here and today I have a frosty winter-inspired card to share with an easy textured background that could be perfect for all sorts of cards and projects. Here are all of the details.
Add easy texture
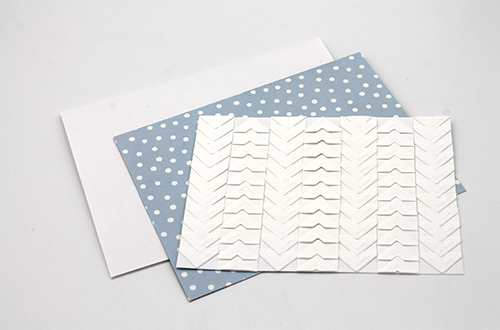
Firstly, start by cutting a piece of white cardstock to 3.5×4.75. Start the textured background with the first row of Creative Photo Corners White going in one direction, and continue layering them up the short edge of the cardstock. You may have to trim off a little bit of over-hang when you reach the edge.
The second row of Creative Photo Corners White are started in the opposite direction. This gives a little bit more visual interest in texture. Continue in opposite directions to cover the entire card front. Trim off any Creative Photo Corners White over-hang from the textured background.
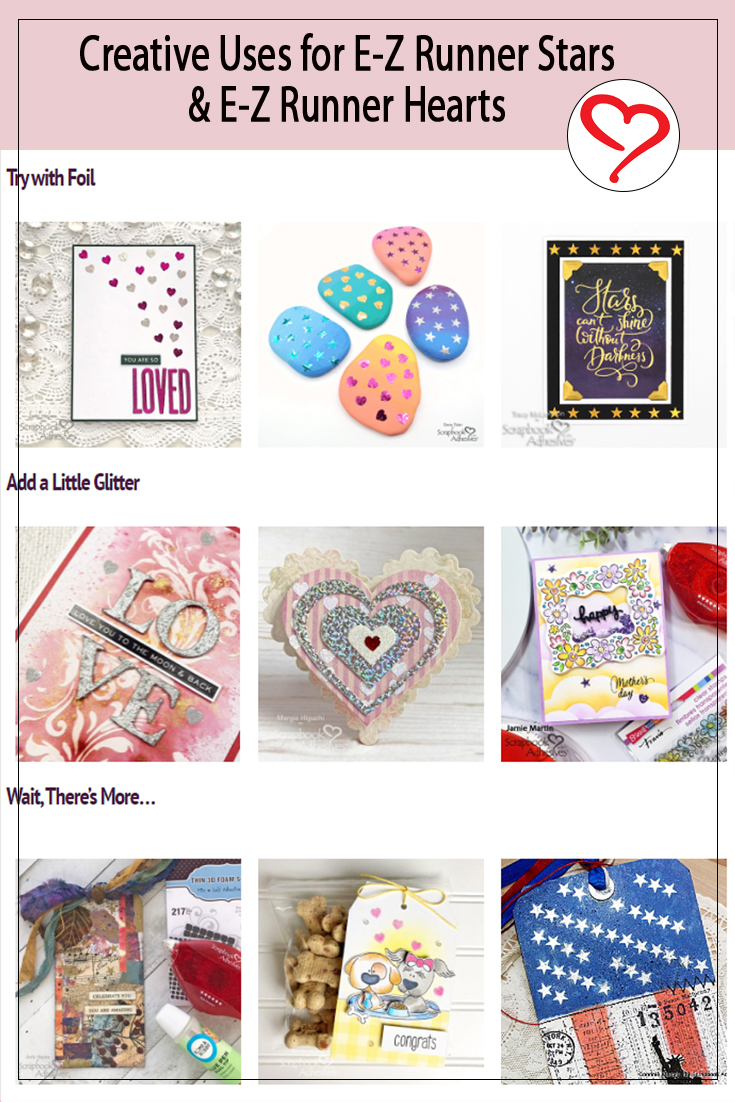
Our E-Z Runner® Stars and Hearts are ergonomically designed for easy usage. The drop in the refill cartridges can be switched mid-use (no need to wait until you run out!), with no winding or threading. So easy! Mix and match any refill with any refillable dispenser.
Yes! There are other mediums you can use with them. Melt embossing powder, add flock and even use pigment powder. To be inspired, click Use Other Medium Projects!
Heat with Embossing Powder
Add Flock
Use Pigment Powder
So, what is your favorite way to use them? Let us know in the comments below! We love to hear from you!
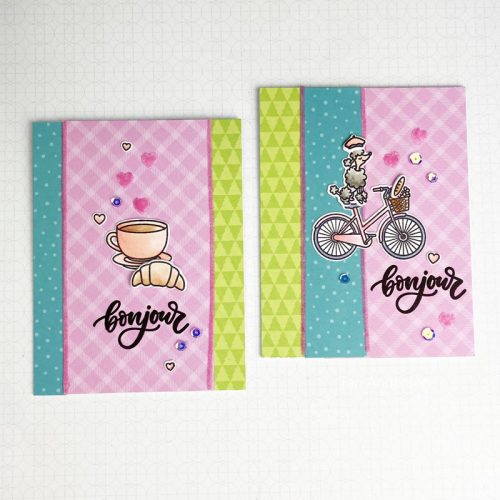
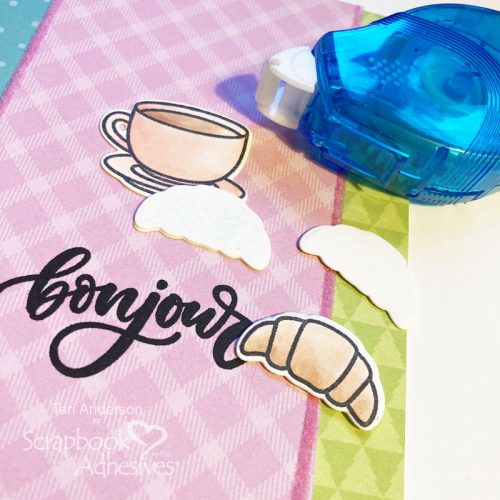
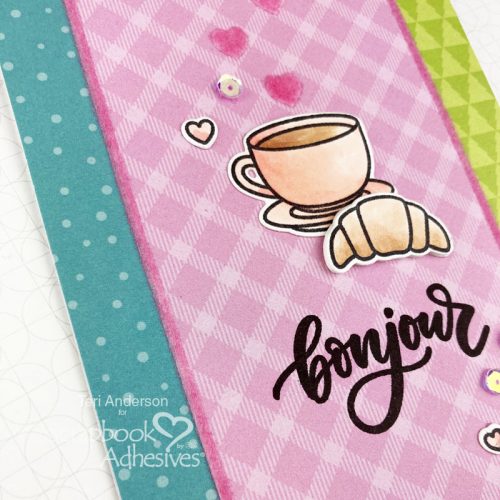
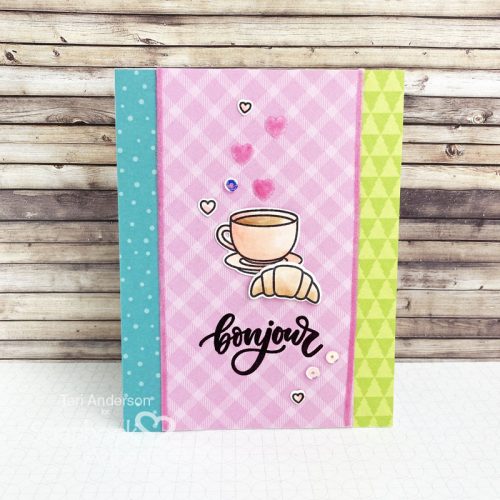
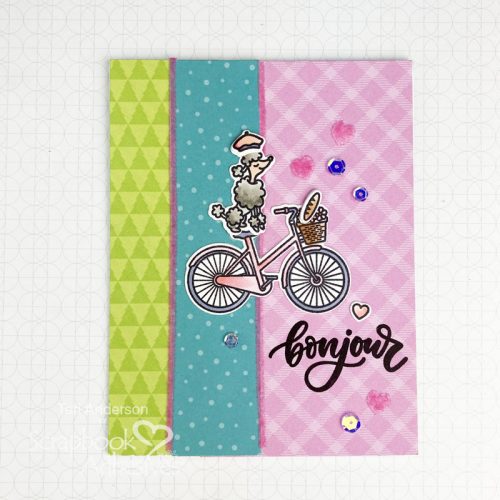
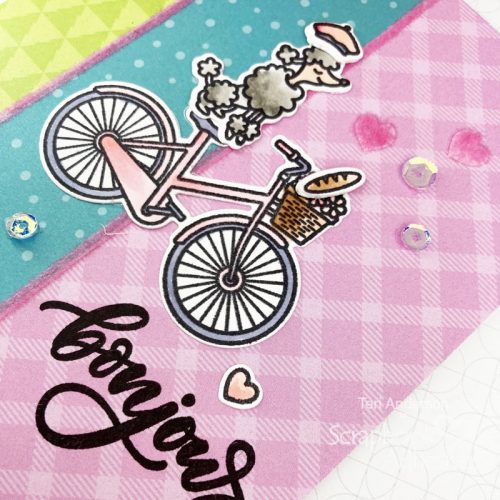
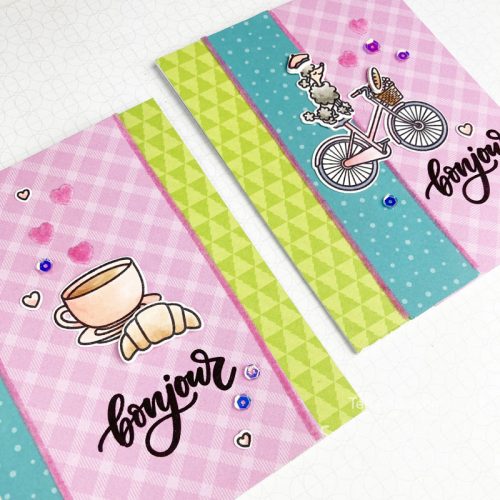
Hi, friends! Like to add texture to your handmade cards? Teri here with a couple of cute and colorful Bonjour cards with backgrounds that pair flock with patterned paper.
This simple combination makes for some really fun backgrounds.
Making the Backgrounds for the Bonjour Cards
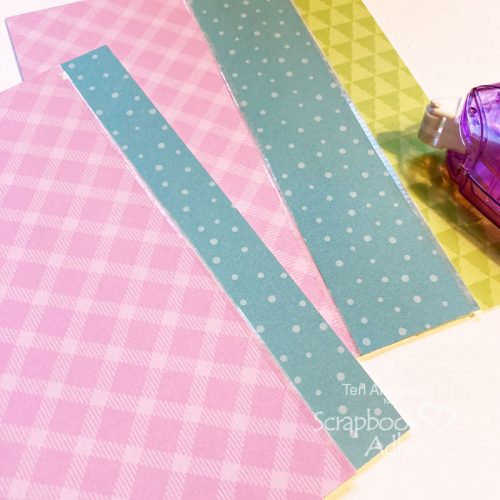
Start by cutting a piece of cardstock to fit on an A2 card. Cover the panel with strips of patterned paper. I played it simple by going with just three strips of paper. You may want to use more! It’s up to you.
Apply strips of adhesive where the paper pieces meet up. You can put the adhesive right on top of where the papers intersect or place the adhesive next to the intersections. Again, it’s up to you. Add a thick layer of flock to the exposed adhesive. Use your fingers to really burnish the flock onto it, making sure no sticky parts are exposed. Once your background suits your liking, mount it onto a card.
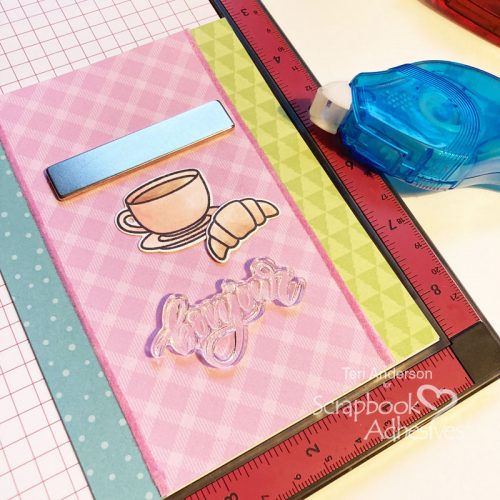
Decorate the Bonjour Cards with Stamps, Die-cuts, Embellishments and More
Decorate the card by stamping a sentiment and adding a few stamped images to it. I find it’s helpful to temporarily affix some of my images to my card and then stamp the sentiment onto it.
Permanently adhere your images to your card. Give some of the images extra pop and mount them onto the card with 3D Foam or die-cut their mats a couple of extra times and stack and adhere the extra mats under your stamped images.
Complete your card by adding a few adhesive hearts to it and covering them with the flock. Add some additional stamped hearts, if desired, and a few sequins.
Use These Techniques to Make Even More Cards
You can make a variety of cards using these techniques in the same cardmaking session!
Change up your background paper by arranging the patterned paper strips differently from the first.
You can also use different stamped images.
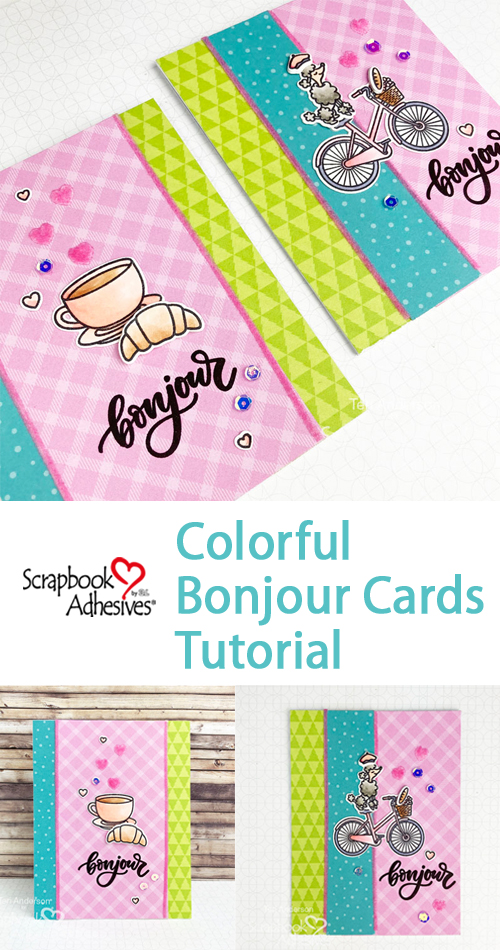
Thank you so much for stopping by today! I hope you are inspired to make a few cards of your own like these Bonjour cards that include flock in the background!
Other White Cardstock: Neenah Paper; Stamps and Dies: Sunny Studio (Paris Afternoon Stamps and Dies); Patterned Paper: Sunny Studio Stamps (All is Bright Paper Pack); Ink Pad: Ranger Ink; Markers: Copic; Sequins: Pretty Pink Posh; Flock: Stampendous
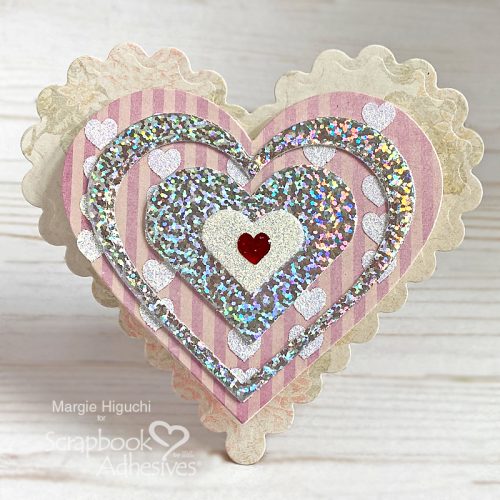
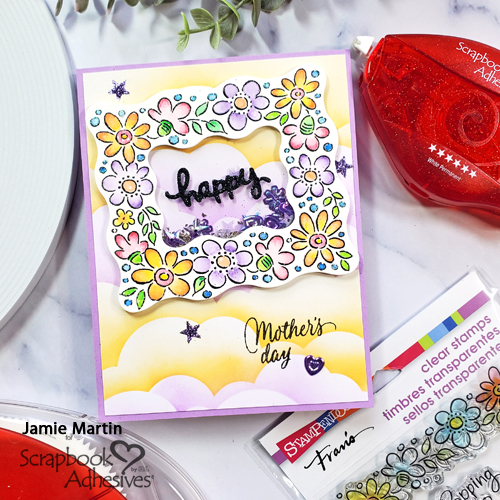
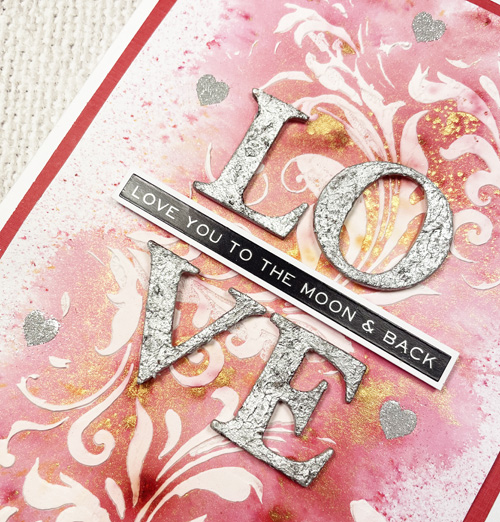
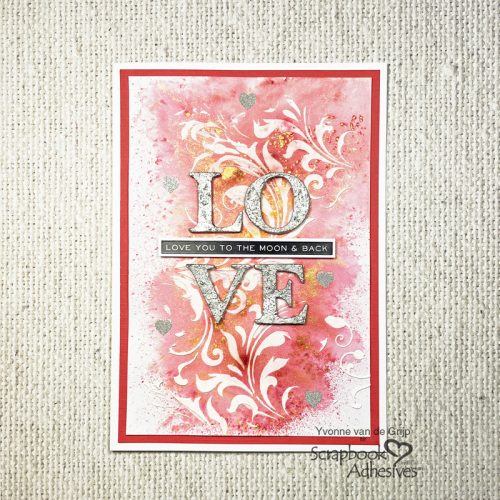
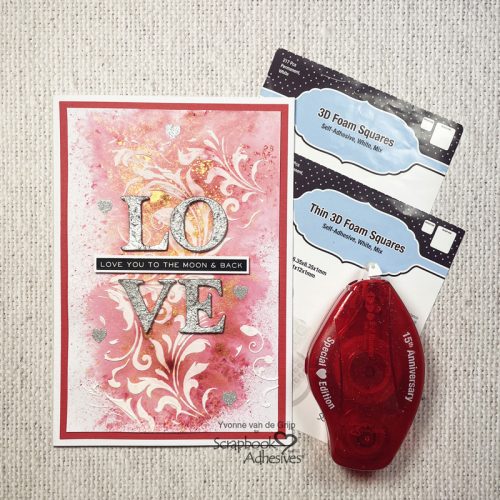
Hi everyone, Yvonne here with Love You to the Moon & Back Valentine’s Day inspiration. A card is such a great way to express your feelings to a loved one and a handmade card is even more special!
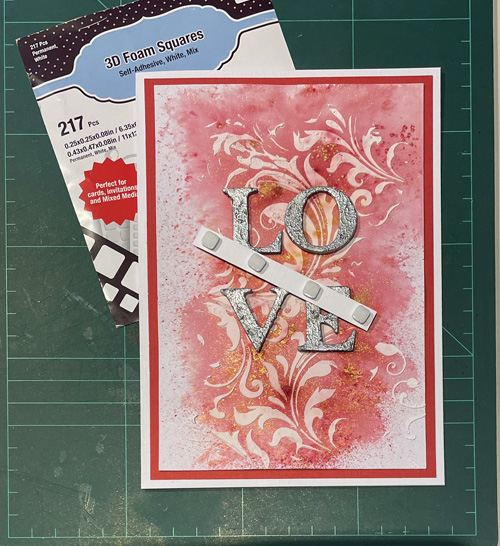
A dimensional element makes a card extra special and is super easy to create with 3D Foam Products. And of course no Valentine’s Day card without hearts which were created using a technique called Wear Your Adhesive on the Outside. Shall we get crafty?
Making the Top Card Panel
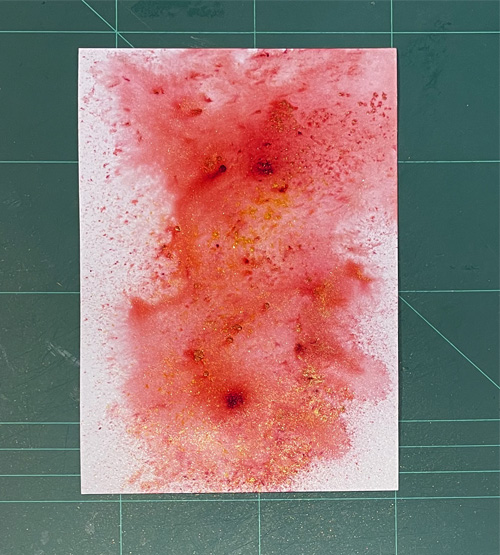
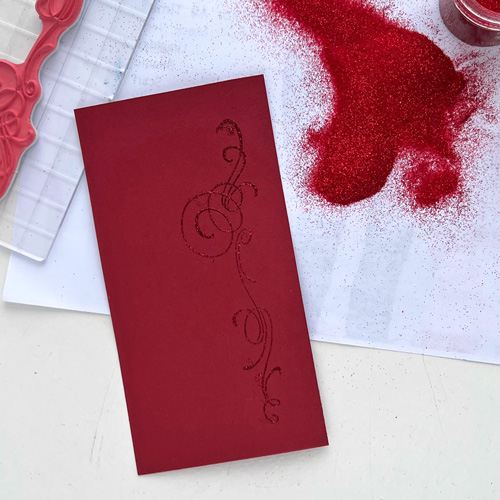
First Trim a piece of white cardstock to a rectangular size. Then sprinkle upon some pigment powder and use a mister (filled with plain tap water) and spray upon the cardstock so the colours will flow over the card panel.
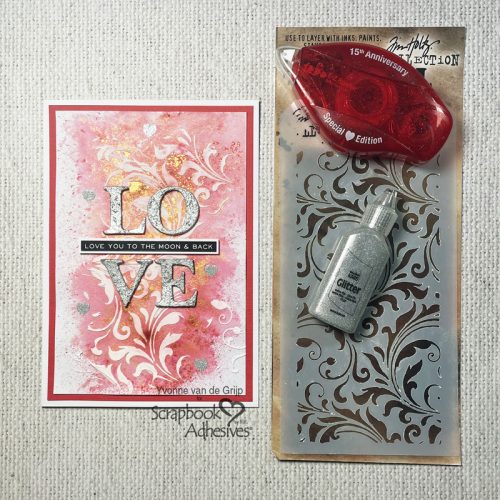
Since it’s a Valentine’s Day card of course I used a red pigment powder! Now let dry. If you want to speed up the drying, use a heat tool. When fully dried, use a flourish stencil and structure paste to create a dimensional pattern on your card panel. Again let dry thoroughly.
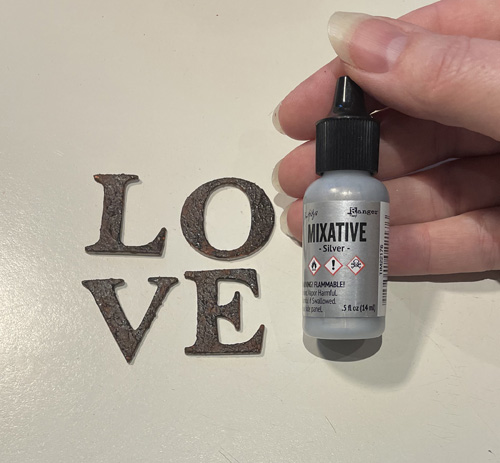
With Valentine’s Day in mind, I used the chipboard “love.” First, I gave them a little support by using paste. The paste color is not important once it dries, it will be colored with silver alcohol ink. To apply the ink, I used a piece of cloth to dab on the letters.
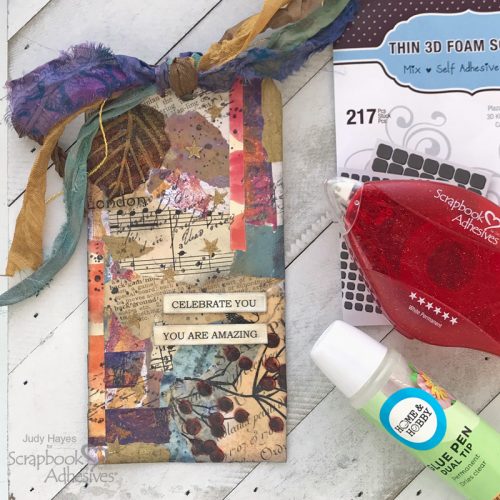
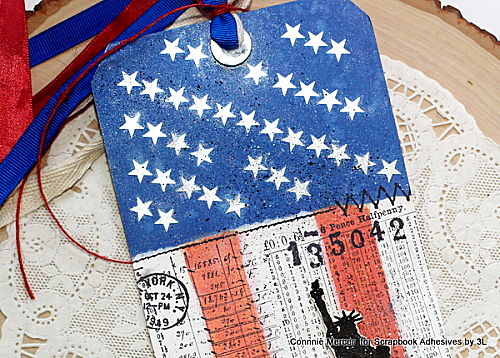
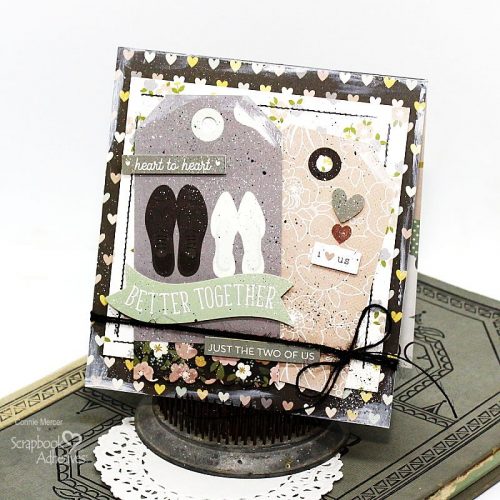
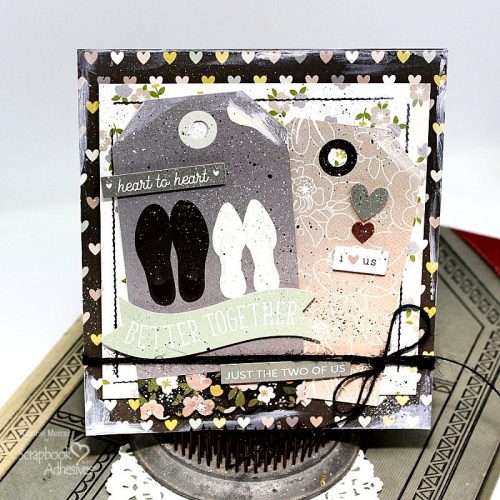
Hi, Connie here with an “I Love Us” wedding card using pattern paper by Simple Stories and my favorite product, Crafty Foam Tape. I use it on everything I create. I love to adhere to the card front when attaching to the card base. It leaves such a clean look with some dimension.
As you can tell I put a little “messy” on it. You can keep it clean or distress it, either way, you will come away with a great-looking card.
I started this card project by laying out products that I wanted to create with. Most of the time that is my starting place. I do all the prep work like trimming the tags, punching tag holes, and sizing paper. I am then ready to design.
Assembling the Card
1. I used a stamp border to add a faux stitch line around the card front. The lines were masked off to get a clean stitch line, no over stamping. 2. I then added the Crafty Foam Tape 108′ to the back of the card front and adhered to the card base. 3. I used the E-Z Runner Grand Refillable Dispenser to adhere the brown tag and then overlapped the grey tag using the Crafty Foam Tape 108′ to add dimension to the card front. 4. The E-Z Runner Hearts Refillable Dispenser was used with Perfect Pearls to create a small heart above the sticker. The embellishments were added using 3D Foam Squares White Mix and 3D Foam Strips White (another favorite adhesive of mine) to the card front. I distressed the edges using acrylic beige and black paint.
I hope you enjoy making cards and giving them to friends and family! Thanks for stopping by! Connie Mercer
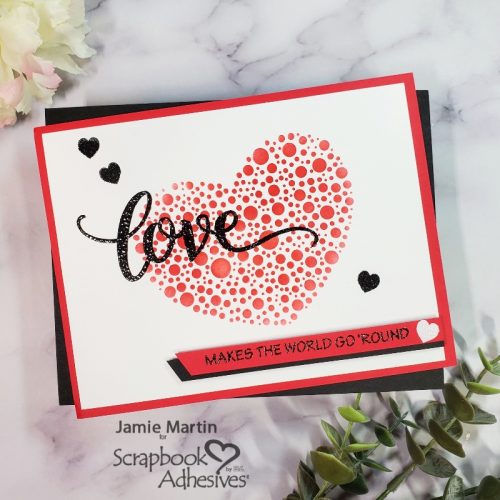
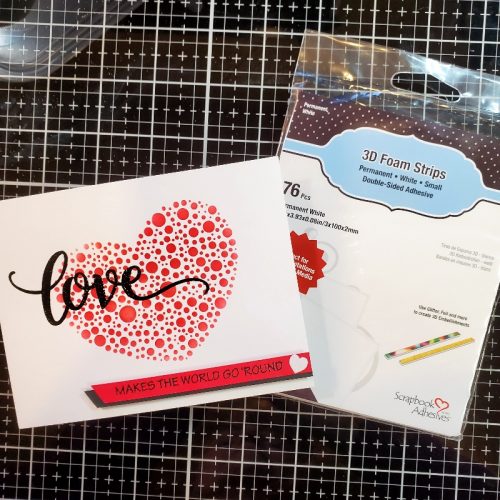
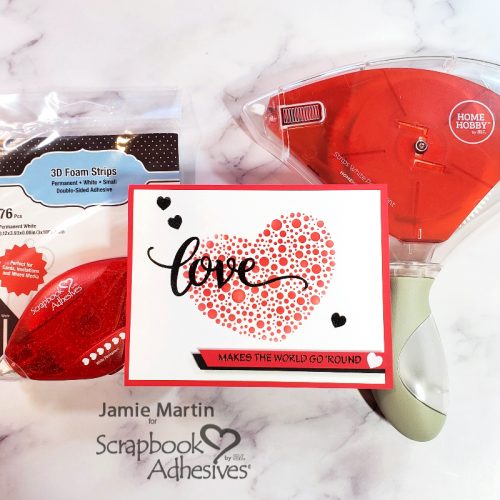
Hi and happy February 1st! Jamie here with you today and I have a wonderful stenciled heart Valentine’s Day card with sweet heart accents.
For Valentines Day I give out more cards than just to my husband, I also give one to my mom and kids. I want everyone to know that I love them even though I tell them every time I talk to them.
Stenciled Heart Panel
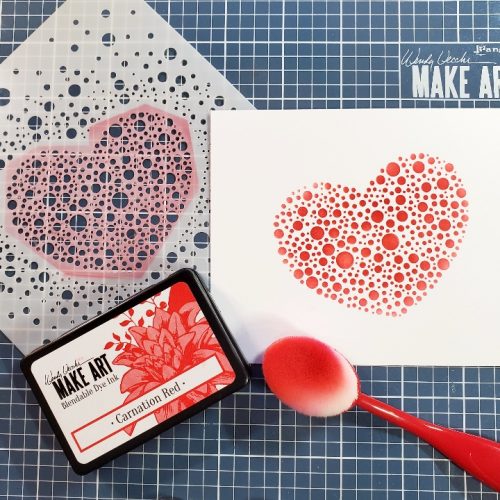
To make my card, I used a stencil and red ink to add a heart to the center of a white cardstock panel.
Create the Sentiments
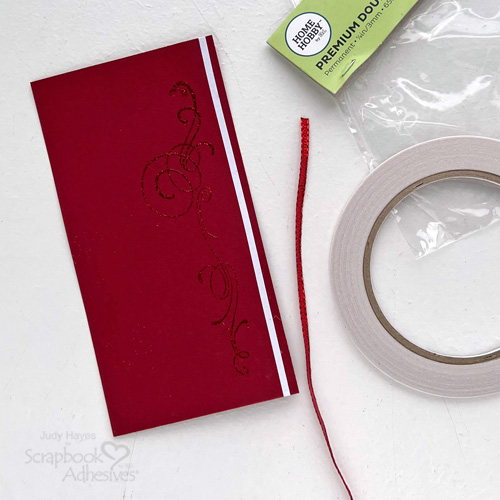
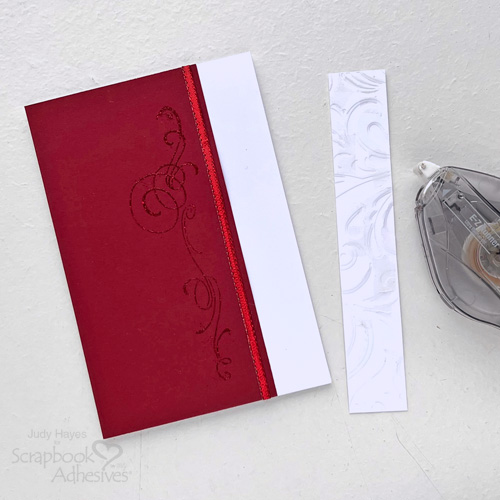
I then stamped the sentiment on a strip of red cardstock with VersaMark ink and embossed it with clear embossing powder. This was then layered onto a strip of black cardstock with Double-Sided Tape Runner Strips Permanent 150ft and a 3D Foam Strips was placed on the back to pop it up.
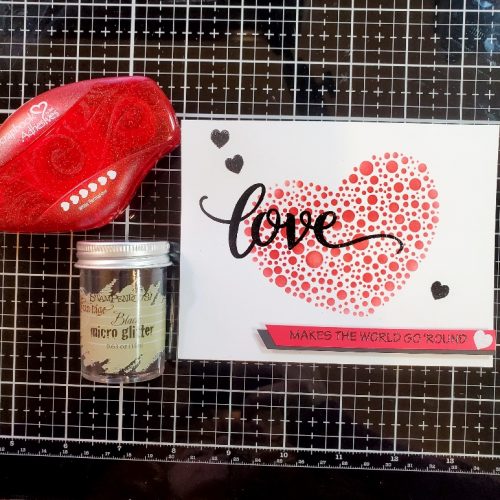
The sentiment was then popped up on the bottom of the panel and a heart from the E-Z Runner® Hearts Refillable Dispenser was placed on the right end of the sentiment strip. Crystal Micro Glitter was then sprinkled on top of the heart and the excess was shaken off. “Love” was then stamped over the stenciled heart with black ink and embossed with clear embossing powder.
Add E-Z Runner® Hearts
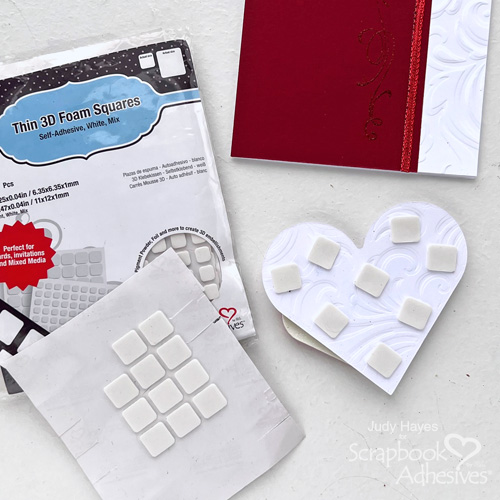
Apply three more hearts from the E-Z Runner® Hearts Refillable Dispenser on the card panel. Note: I used a craft knife to place the hearts from the dispenser to the panel. Cover the hearts with black glitter, press to secure, and tap off the excess.
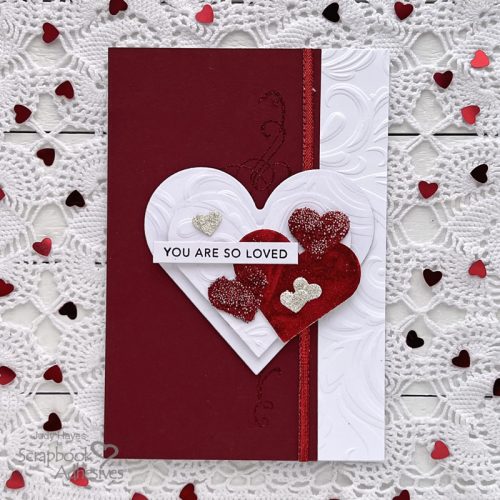
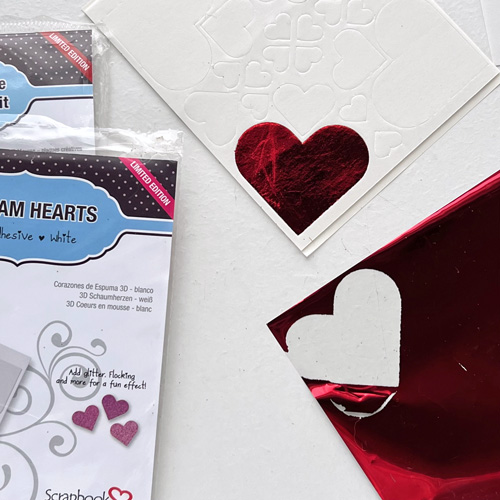
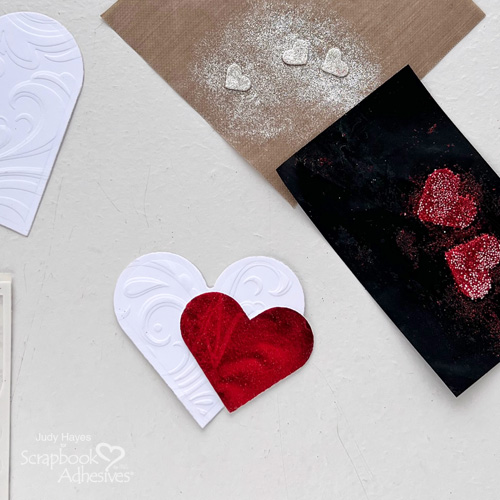
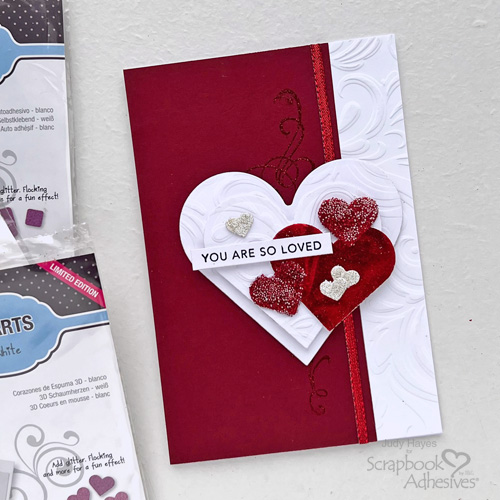
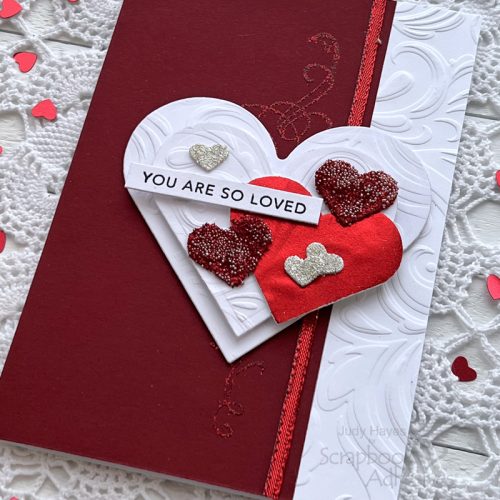
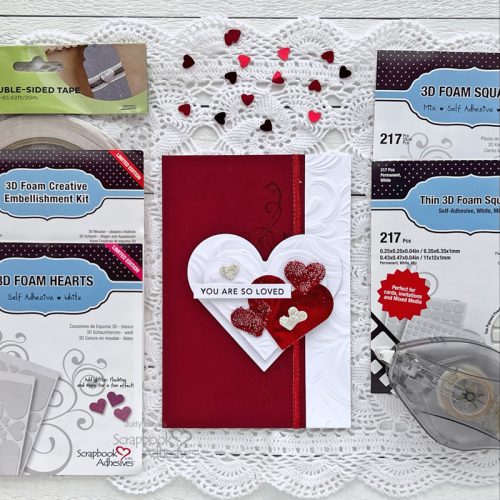
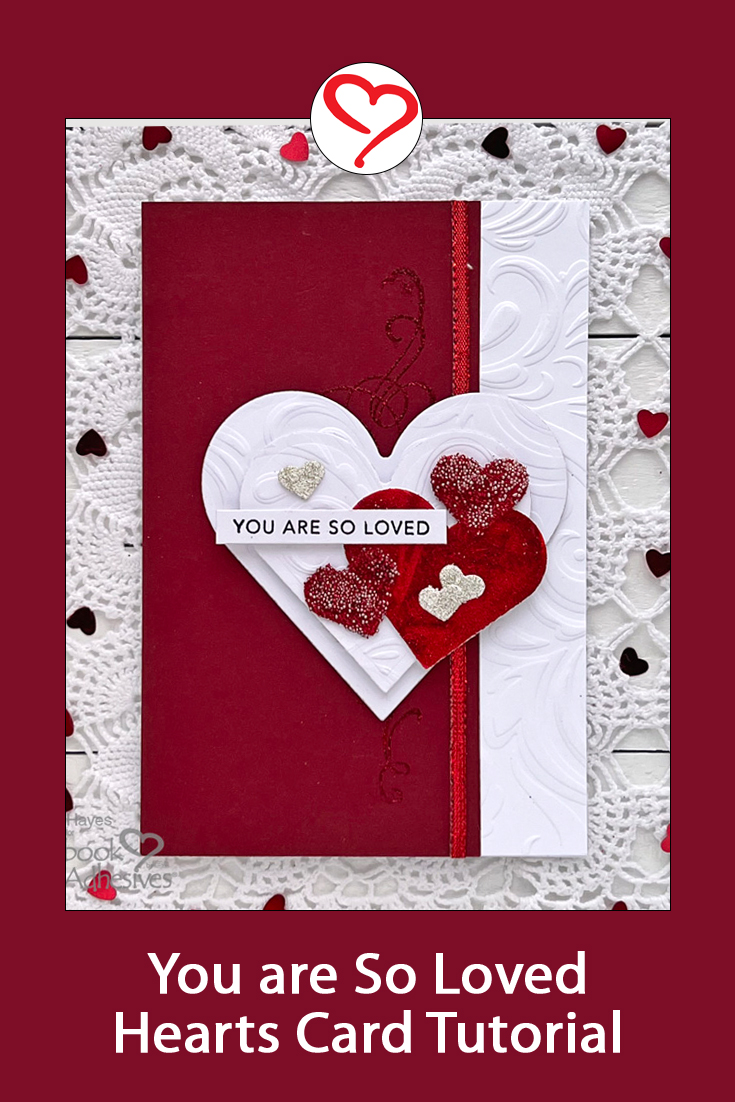
Hello crafty friends! Here it is almost February and that brings Valentine’s Day. I’ve put together a pretty card with 3D foam hearts, foil, microbeads, embossing powder, embossed hearts, and more. There’s plenty of time to make this You are So Loved Hearts card for someone special!
Wear Your Adhesive on the Outside with Hearts
Are you familiar with Wear Your Adhesive on the Outside technique? It is bringing your adhesives from between layers of paper to showcase them as embellishments. In this case, simply remove the liner from a large heart, place a sheet of red foil from 3D Foam Creative Embellishment Kit with Foil over the heart (color side UP), rub and peel the foil sheet off. That’s it!
How to Use 3D Foam Shapes Video
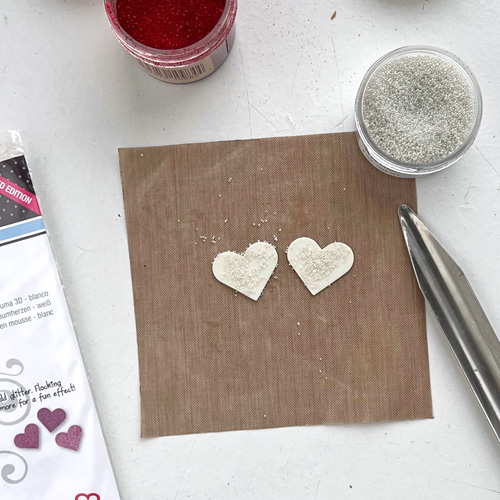
Try with Microbeads
Take two medium 3D Foam Hearts and place them on a non-stick craft mat. Remove the liner and randomly sprinkle pearl microbeads over each heart. Make sure to press them into the foam to secure. Remove excess beads.
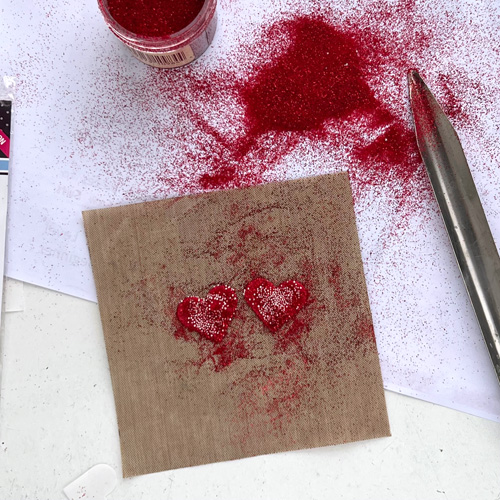
Let’s Heat Emboss
Sprinkle red tinsel embossing powder over hearts, press to secure, remove excess, and heat with a heating tool to emboss. Designer’s Tip: while hearts are still warm, sprinkle more embossing powder on them, and heat to emboss for depth in color.
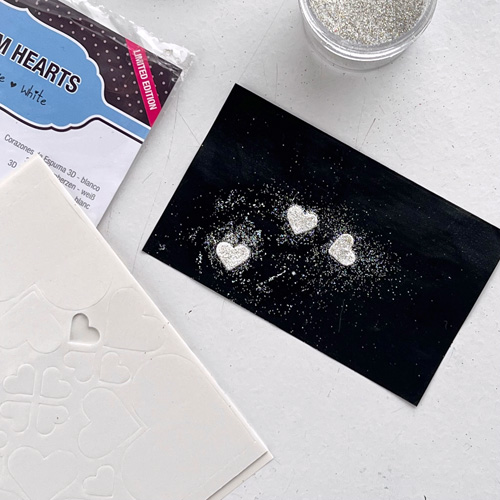
For the three small hearts, repeat the above steps but use white sparkle embossing powder.
Embossing Accents
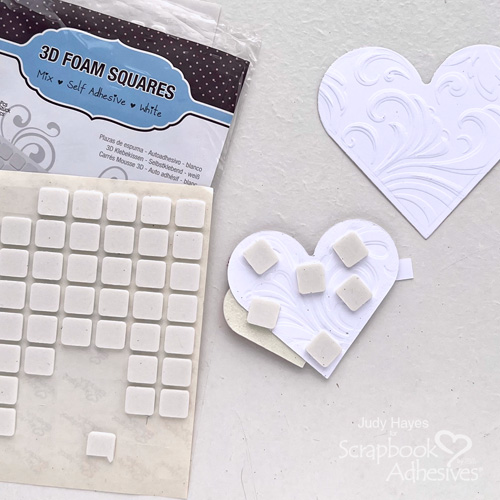
Cut a piece of heavy white cardstock 4.5 x 6.5 inches. Use a die-cutting machine and Swirls embossing folder to emboss paper. Cut off a 1-inch strip along one long edge. Next, die-cut a 2.75-inch heart and a 3.5-inch heart from the embossed cardstock.
Sentiment
Stamp a greeting with black ink on white cardstock and heat emboss with clear embossing powder. Die-cut a greeting strip. Trim points off ends.
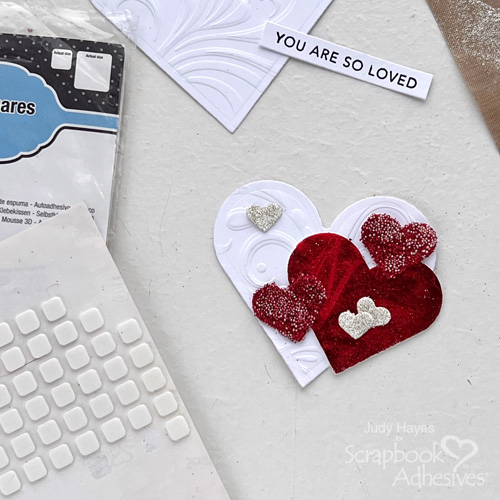
Assemble the Hearts
Place the smaller embossed white paper heart on the work surface. Remove the foiled heart from 3D Foam Sheet and place it on the right edge of the white heart. Turn it over and apply powder to the sticky part of the foiled heart that extends beyond the white heart.
Place medium red tinsel heart lapping over foil heart at bottom left. Remove other red tinsel hearts from non-stick sheet, turn over and place 2 small Thin 3D Foam Squares White Mix near the top edge of the heart. Remove liners and then place heart lapping over foil heart at top right.
Place 2 small white sparkle hearts lapping each other on foil heart. Place the other white sparkle heart at the top left on the embossed white heart.
On back of greeting strip, place small 3D Foam Square at left end and one or two small Thin 3D Foam Squares White Mix at the other end. This will keep greeting strip level where it laps over foiled heart. Remove liners and place greeting on heart
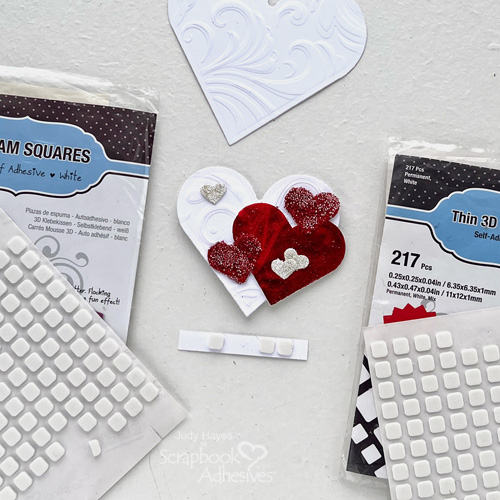
Turn over heart with greeting and place large 3D Foam Squares White on back. Peel liners and fasten it to large white embossed heart.
Prepare Red Panel
Cut 3.25 x 6.25 inch dark red cardstock.
Ink swirl stamp with embossing ink and stamp parallel to long side of red panel. Cover with red tinsel embossing power, remove excess and heat emboss with heat tool.
Form side fold 4.25 x 6.25 inch card from white cardstock. Use E-Z Runner® Ultra Strong Refillable Dispenser to apply adhesive to back of red panel. Fasten to card front along fold edge.
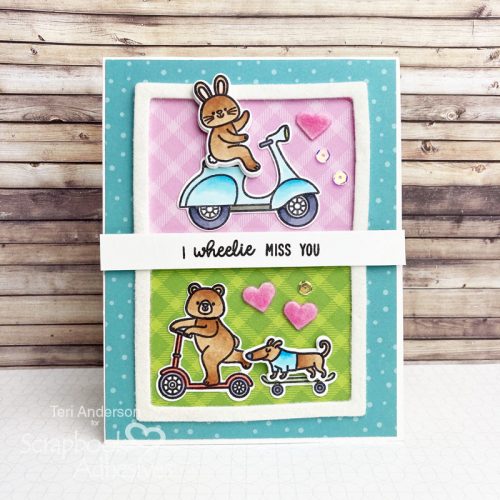
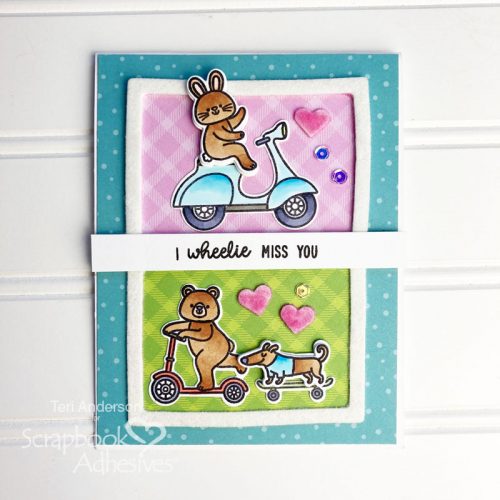
Hi, all! Is the Pandemic keeping you from seeing your friends and loved ones as much as you would like? Teri here with a card to send one of those special people you’ve been missing!
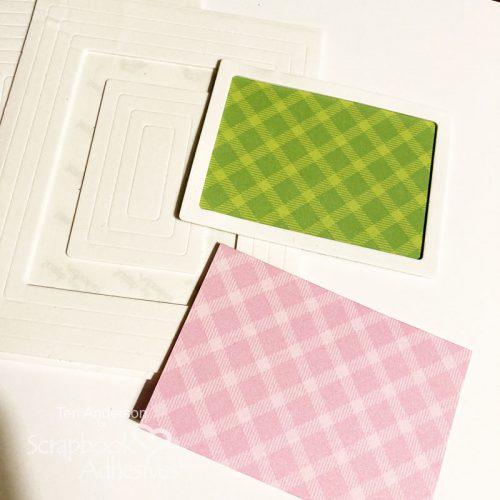
Prep the Wheelie Card Front
Start by mounting two 3D Foam Frames to patterned paper. Make sure the frames will fit the size of the card you want to create.
Wear your adhesive on the outside by applying flock to each of the frames. Make sure to thoroughly burnish the flock onto the frames with your fingers to ensure no sticky parts are left exposed.
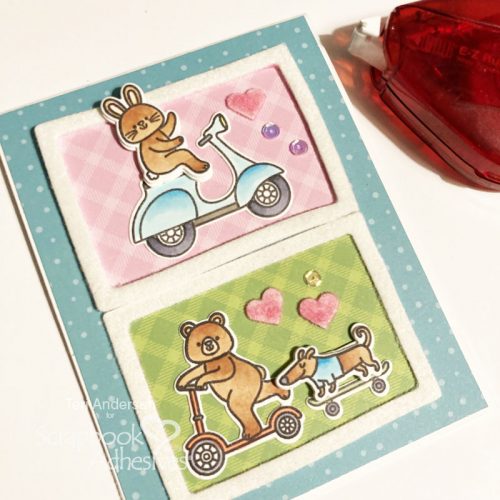
Stamp, Color & Cut
Stamp, color, and die-cut a couple of cute critters, a skateboard, and a scooter. Be sure to die-cut a couple extra blank dogs and bunnies. Adhere some of your images on your framed patterned paper. Stack up the extra dies behind your stamped dog and bunny and mount them to your frames with the E-Z Runner® Petite Permanent Dots Refillable Dispenser. The stacking will give the critters extra dimension.
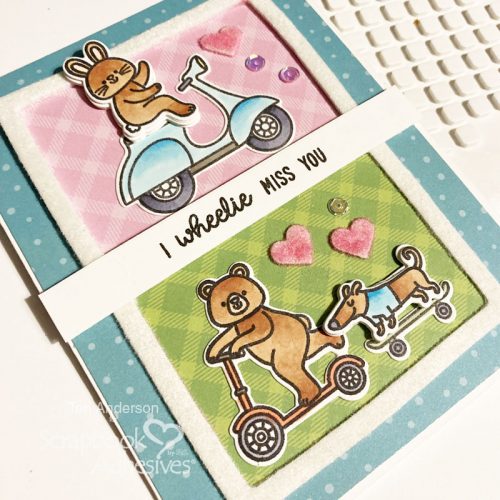
Stamp a sentiment on a strip of cardstock to fit across the card. Adhere the sentiment to the card by applying adhesive completely across it, overlapping the frames. Use 3D Foam Squares at the ends of the sentiment strip where there is nothing underneath it.
Don’t have stamps like mine? That’s OK! Use the card as an inspiration and switch out the images and sentiment for stamps you do have!
Thanks for stopping by today! I hope you are inspired to create a card such as my Wheelie Miss You Card to send a missed someone!
Other White Cardstock: Neenah Paper; Stamps and Dies: Sunny Studio (Critters on the Go Stamps and Dies); Patterned Paper: Sunny Studio Stamps (All is Bright Paper Pack); Ink Pad: Ranger Ink; Markers: Copic; Sequins: Pretty Pink Posh; Flock: Stampendous
Hi and Happy New Year, I hope everyone is ready to have a crafty 2022!! Jamie here with you today and I have a floral card with a “floating strips” background.
Create the Floating Strips
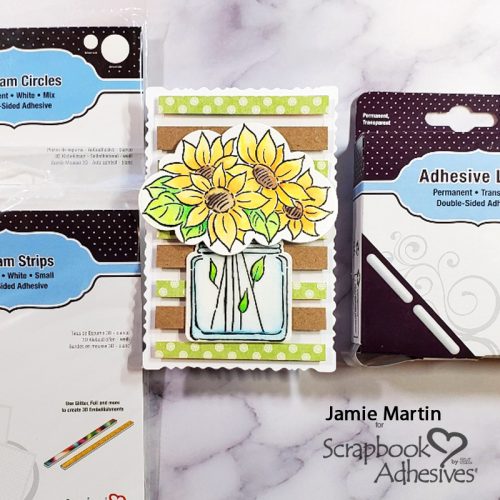
To make the “floating strips” background, I die-cut acetate. Next, kraft cardstock and decorative paper were cut into strips. Then place Adhesive Lines on the back of the strips and place the strips on the acetate.
Turn the acetate over and place 3D Foam Strips on the backside of the paper strips and set aside.
Embellishing the Card Front
Place 3D Foam Circles on the back of the Flowers to pop it up.
Die-cut white cardstock using the rugged edge die from the same set. Remove the liners from the 3D Foam Strips and mount it to the white die-cut panel. Assemble the card with the E-Z Runner® Permanent Strips.