Tag Archives: E-Z Dots Permanent Refillable
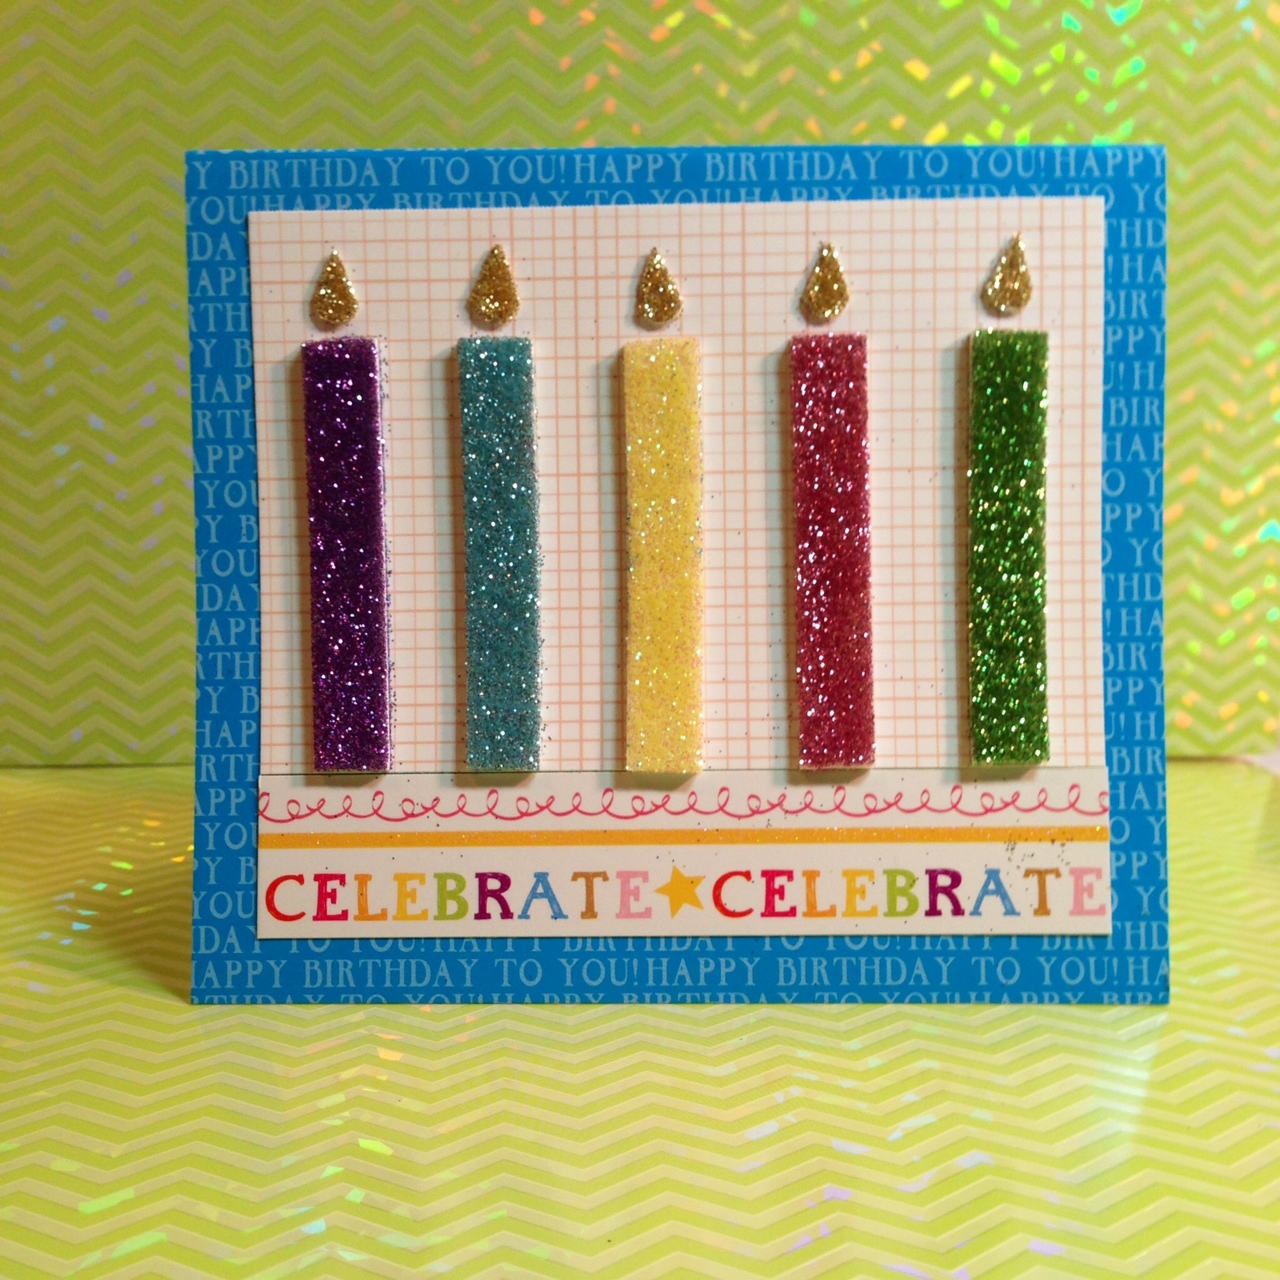
A Birthday Card With Glitter
Hello Everyone! It’s Kelly Klapstein here to share a cute birthday card with you. On January 5, we celebrated my daughter’s 17th birthday, so I wanted to make a card for the special occasion that had plenty of sparkle. Every … Continue reading
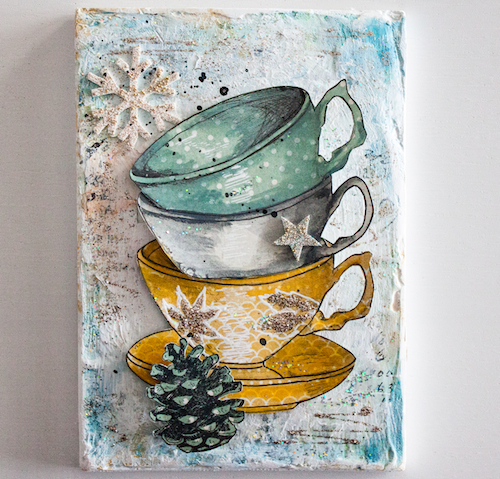
Winter Decoration
Hi there, it’s Stephanie here today with a little canvas as winter decoration. The basic is a canvas surface in a form of a hexagon from Cosmo Cricket. I added another patterned paper hexagon on it and put it … Continue reading
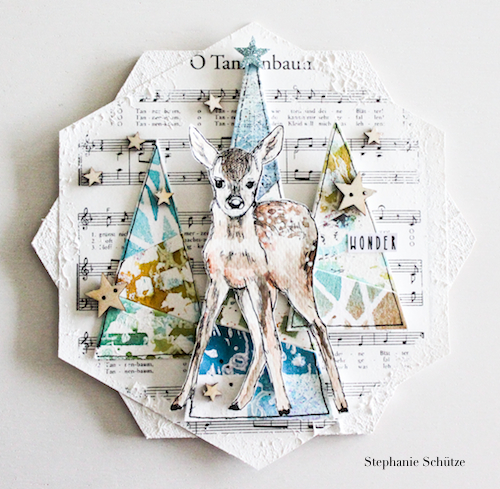
Plaster Tablet – Winter Decoration
Hi there, it’s Stephanie here today with a lovely winter decoration. It’s a little plaster tablet for the wall or to stand up. For my motive I used paper from Basic Grey and the tea cup stamp from the “The … Continue reading
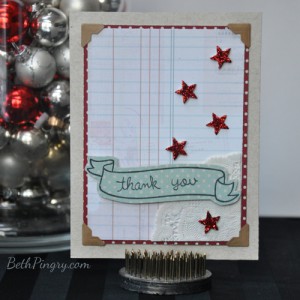
Lawn Fawn Blog Hop Day 1 – Thank You Card
Today is Day 1 of our Blog Hop with the fabulous Lawn Fawn! My card today combines several fun adhesives and two stamp sets! I wasn’t really trying to make a holiday card, but I think the colors work, with … Continue reading
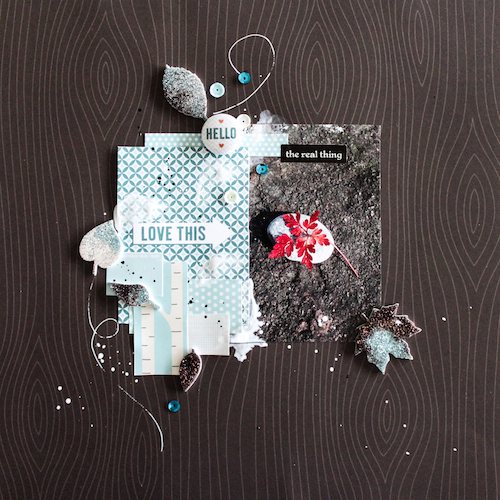
Layout Hello
Hi there, it’s Stephanie here today and I want to share a layout I made with the wonderful Lawn Fawn paper collection “Into the Woods”. I also used some awesome 3D Foam Leaves Designer Shapes from Scrapbook Adhesives by 3L®. … Continue reading
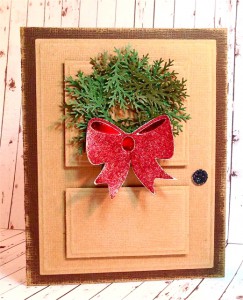
A Christmas Wreath Card
Hello everyone! It’s Kelly Klapstein here today, and I’m going to show you how I made this beautiful bow on my Christmas card. The bow is one of the many wonderful designer shapes included in the 3D Foam Christmas Mix, … Continue reading
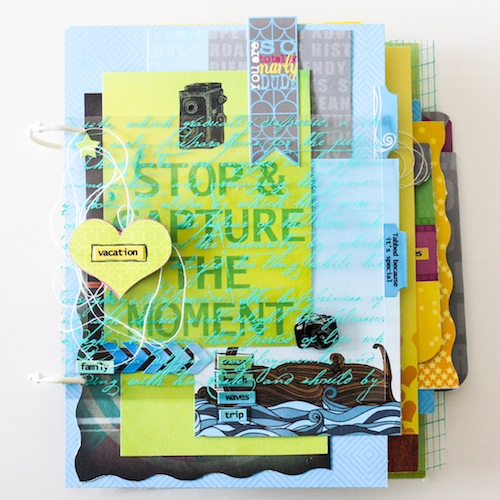
Vacation Mini Album
Hi there, It’s Stephanie here today with a Mini Album . I created some envelopes and folder with the paper that I get in in a lot of photos and memories. Now it’s time to fill this Mini Album … Continue reading
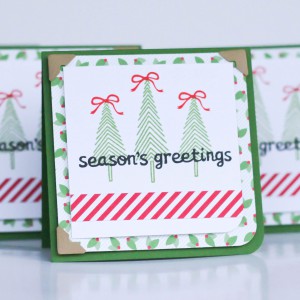
Season’s Greetings Card Set
Latisha here with you today. I am sharing how to make a cute gift card set using a few basic supplies. First, I gathered my materials. The four card bases, are created from a single sheet of 12×12 paper. So … Continue reading
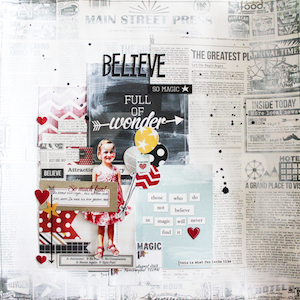
Blog Hop with Simple Stories – Layout Believe
Hi there! It’s Stephanie! Today we have the second day of the blog hop from Scrapbook Adhesives by 3L and Simple Stories. I made a layout with the fabulous paper collection “Say Cheese”. The collection comes with lot’s of wonderful … Continue reading
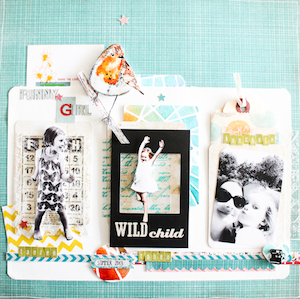
Layout – Funny Girl
Hi there! I want to share a layout with you I made for the Scrapbook Adhesives by 3L® DT. This is a layout about my daughter and our summer with three different photos and stories behind it. Here is a … Continue reading