You are in our US store • Switch to Europe store

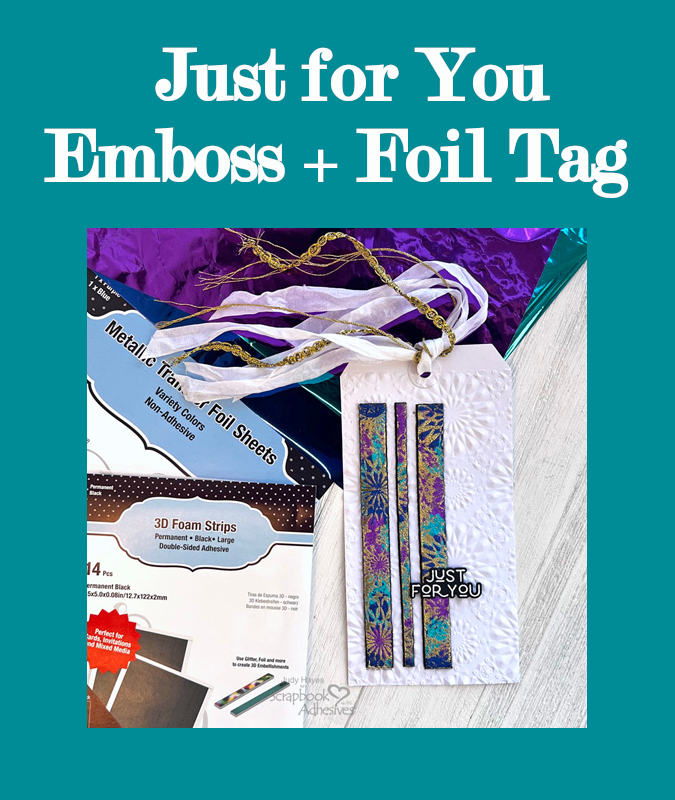
Just for You Emboss + Foil Tag

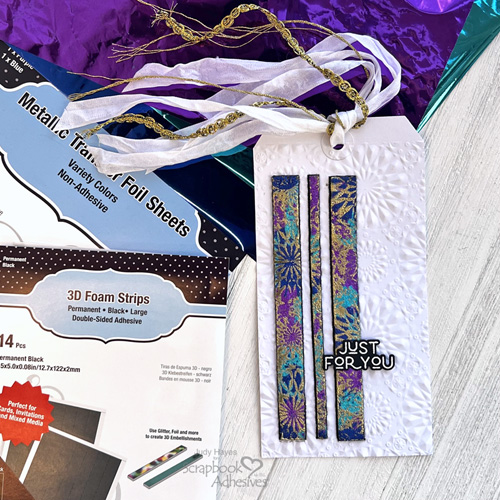
Hi, Judy here today! This pretty Just for You Emboss + Foil Tag features the Wear Your Adhesive on the Outside Technique. I used 3D Foam Strips Large Black, embossed with the tag and then foiled from Metallic Transfer Foil Sheets Variety Colors. Gold embossing powder is rubbed into the recessed areas of the embossed design and heat embossed. The effect is so pretty! What do you think? Let me show you how!
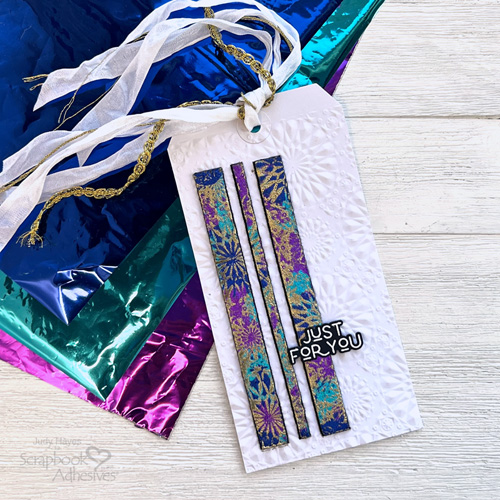
Just for You Emboss + Foil Tag by Judy Hayes for Scrapbook Adhesives by 3L

3D Foam Strips and Emboss Designs

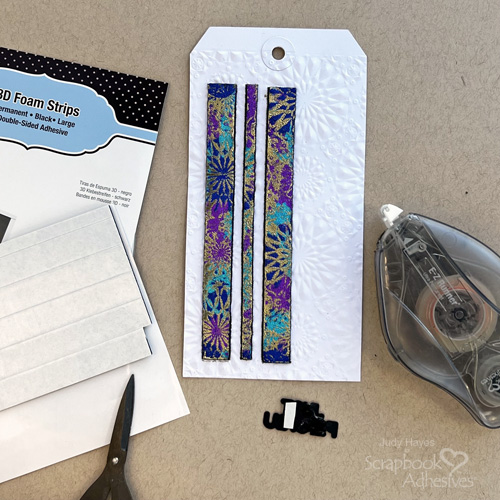
Along left edge of tag, apply one 3D Foam Strips Large Black, then a narrow strip from edge of 3D Foam Strips Large Black and another full size 3D Foam Strips Large Black. Allow narrow gap between each strip. Place the tag in the Kaleidoscope embossing folder and run it through a die cutting machine.
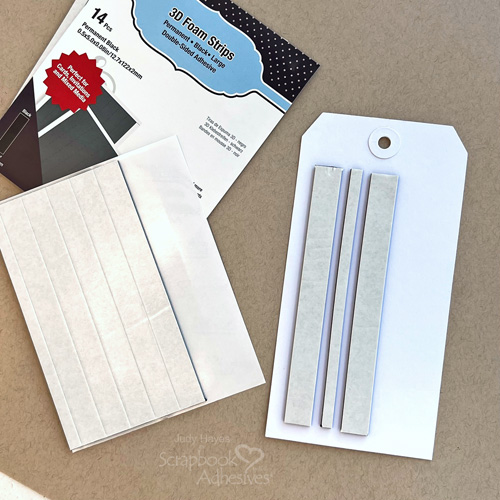
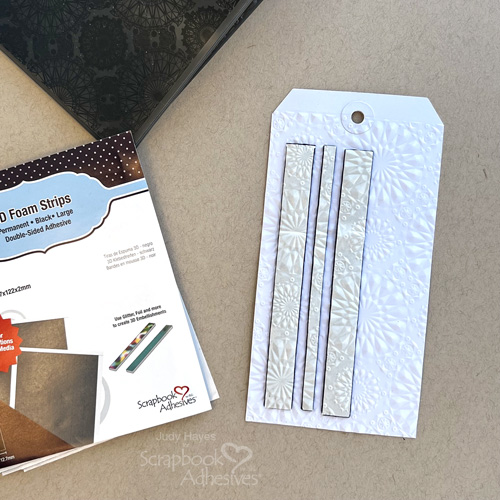
Wear Your Adhesive on the Outside with 3D Foam Strips LG

Peel liners from the foam strips. Use purple, blue and turquoise foils from the Metallic Transfer Foil Sheets Variety Colors and lightly press foils randomly to the foam strips. Do not press foil into recesses of embossed pattern. Repeat until you get your desired look.
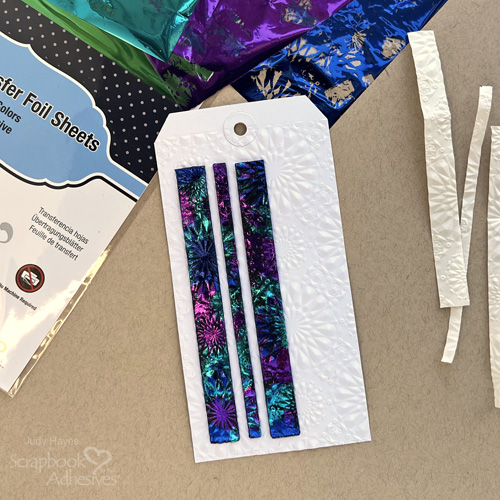
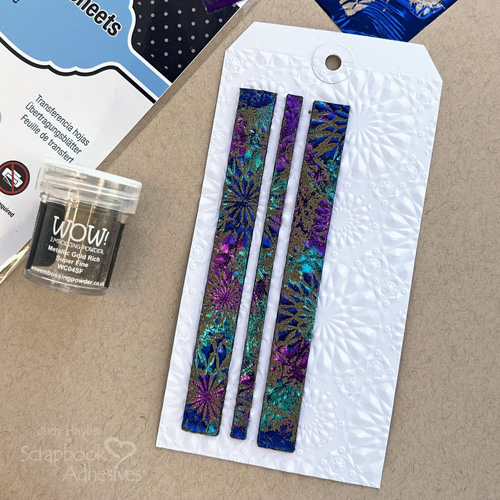
Cover the foam strips with gold embossing powder and rub powder into the grooves to secure. Then shake off excess. Make sure to rub the embossing powder off the foils. Use a heat tool to melt the powder. Note the foil will react to heat and have that cool grainy look.

The Greeting

Stamp the greeting on black cardstock with the Versamark ink, cover with white embossing powder, remove excess and use heat tool to emboss. Use coordinating die and die cutting machine to cut out greeting.
Just for You Emboss + Foil Tag by Judy Hayes for Scrapbook Adhesives by 3L

Cut small piece of 3D Foam Strips Black and place on back of greeting on end that extends over tag. To other end, apply adhesive with E-Z Runner® Ultra Strong Refillable Dispenser. Peel liner and fasten greeting to tag.

Add Ribbons

Thread and tie several ribbons (or seam binding) with gold floss and gold trim to tag.
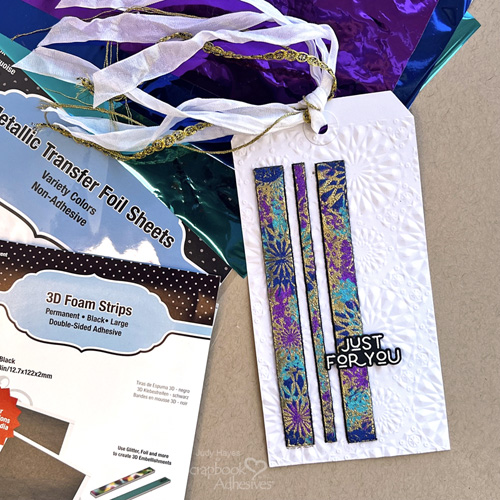
I hope you enjoy this Just for You Emboss + Foil tag! Give these ideas a try on your next papercrafting project.

Thanks for visiting!
Judy Hayes

Creative Time: 20 mins
Skill Level: Beginner

Materials Needed:
Scrapbook Adhesives by 3L®

3D Foam Strips Large Black

E-Z Runner® Ultra Strong Refillable Dispenser

Metallic Transfer Foil Sheets Variety Colors

Other: Stamp and Die: Taylored Expressions (All Together – Occasions); Ink: Tsukineko (Versamark); Embossing Powder: Wow! Embossing Powder (Metallic Gold Rich), Ranger Ink (White); Embossing Folder: Sizzix (Tim Holtz Kaleidoscope); Black Cardstock; #8 White Tag; Ribbons, Seam Binding, Gold Thread, Gold Trim

Click Preferred Retailers List

Save to Pinterest!
Just for You Emboss + Foil Tag by Judy Hayes for Scrapbook Adhesives by 3L Pinterest

Visit our Website and Blog!
Sign up for our Newsletter so you never miss a contest or giveaway!

instagram purple icon facebook icon purple pinterest purple icon twitter purple icon YouTube icon blog subscription purple icon

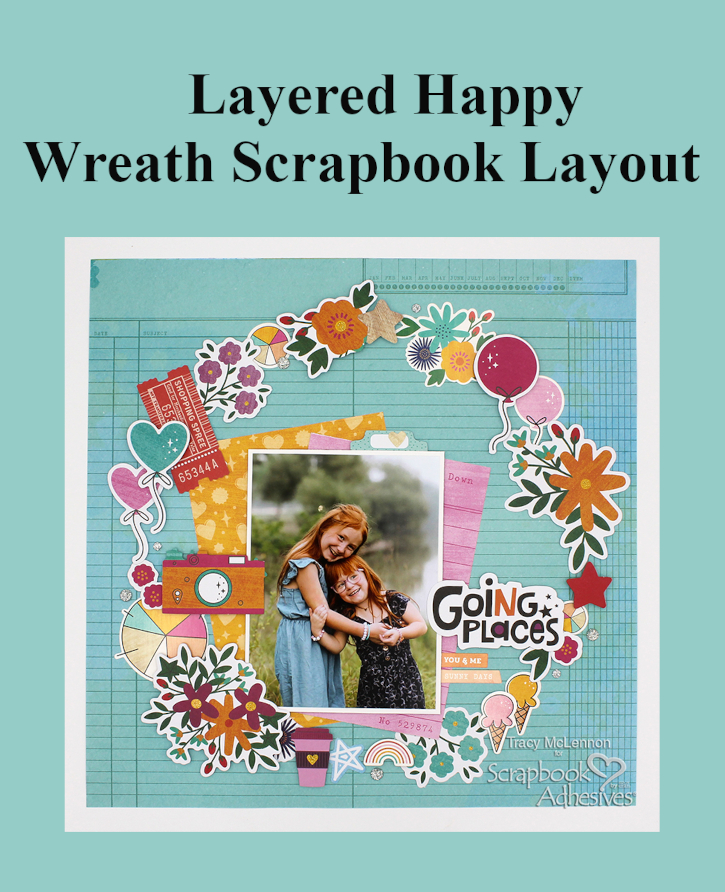
Layered Happy Wreath Layout

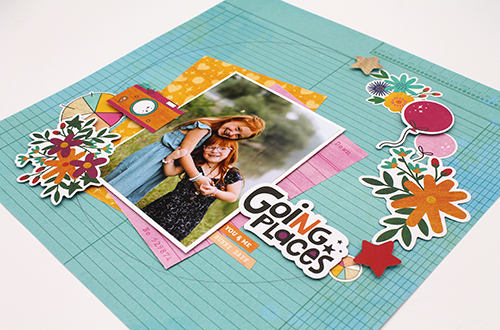
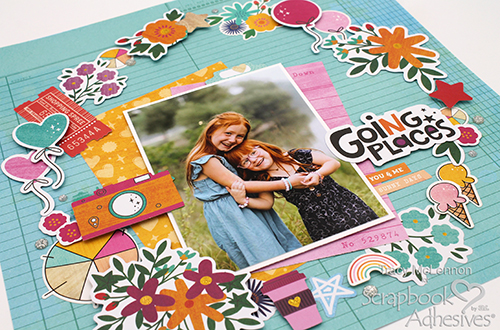
Hello scrappy friends! Tracy here, and today I have a fun Layered Happy Wreath Layout to share. It’s full of happy flowers, balloons, ice cream and more! Here are all of the details on how I created it.

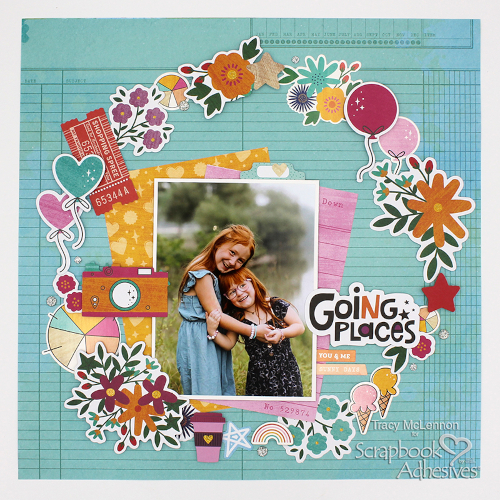
Layered Happy Wreath Layout by Tracy McLennon for Scrapbook Adhesives by 3L

Let’s Get Crafty and Make a Layered Happy Wreath!

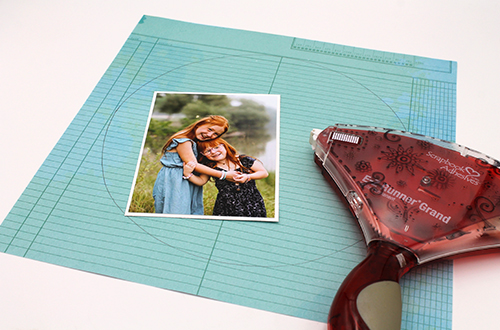
Trace a circle onto the background patterned paper to guide you in created the layered wreath layout. Mat the photo in white cardstock and adhere together using the E-Z Runner® Grand Permanent Strips Refillable Dispenser.

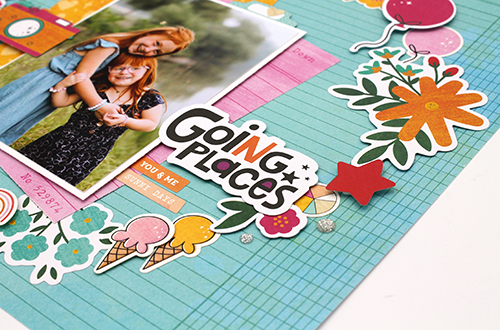
Layered Happy Wreath Layout by Tracy McLennon for Scrapbook Adhesives by 3L

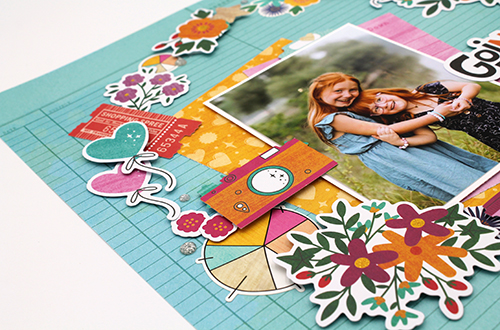
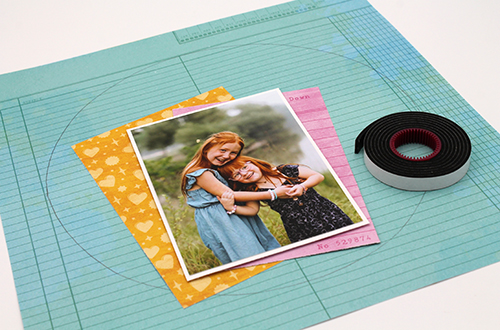
Adhere some pieces of patterned paper to the background using the E-Z Runner® Grand Permanent Strips Refillable Dispenser, this creates a nice base for your matted photo. Add the matted photo to the layout using Crafty Foam Tape Black.

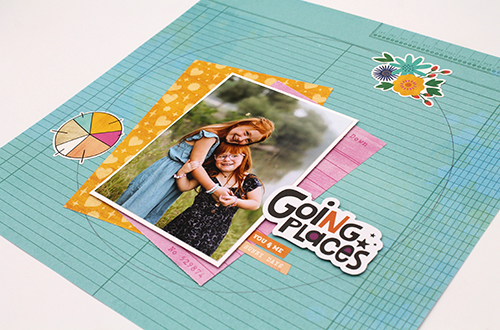
Start by adding some coordinating cardstock stickers around the circle. This is the beginning of the layered wreath layout. Adhere the title sentiment to the layout using Crafty Foam Tape Black.

Now you can start adding more embellishments to create the wreath using a combination of Thin 3D Foam Squares Black Mix and 3D Foam Squares White Mix. This will create dimension between the embellishment layers.

Continue to fill all spaces around the circle using stickers and embellishments. I also chose to add some gems around the embellishment clusters.

Thanks for stopping by!
Tracy

Creative Time: 60 mins
Skill Level: Intermediate

Materials Needed:
Scrapbook Adhesives by 3L:
E-Z Runner® Grand Permanent Strips Refillable Dispenser
Crafty Foam Tape Black
Thin 3D Foam Squares Black Mix
3D Foam Squares White Mix

Other: Shimelle Collection; White Cardstock; Gems

Save to Pinterest!

Layered Happy Wreath Layout by Tracy McLennon for Scrapbook Adhesives by 3L Pinterest

Visit our Website and Blog!
Sign up for our Newsletter so you never miss a contest or giveaway!

instagram purple icon facebook icon purple pinterest purple icon twitter purple icon YouTube icon blog subscription purple icon

Sending Holiday Cheer

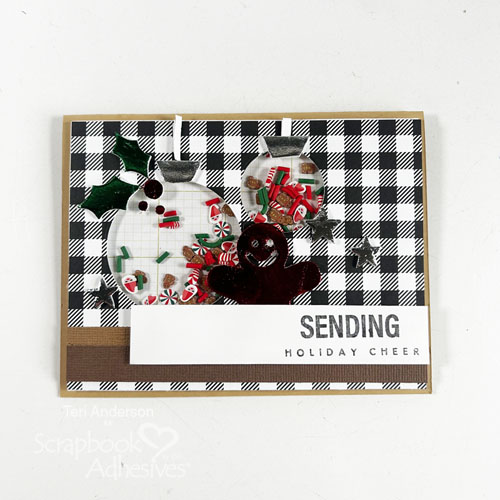
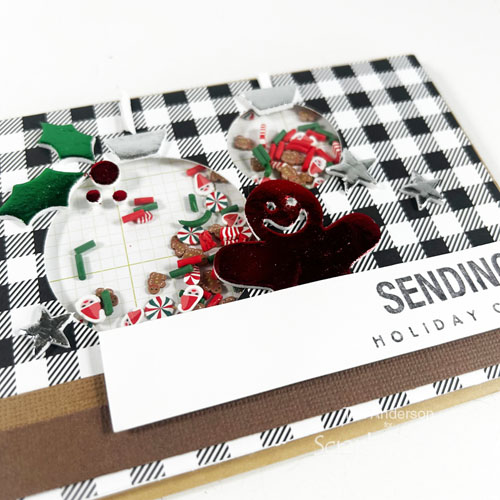
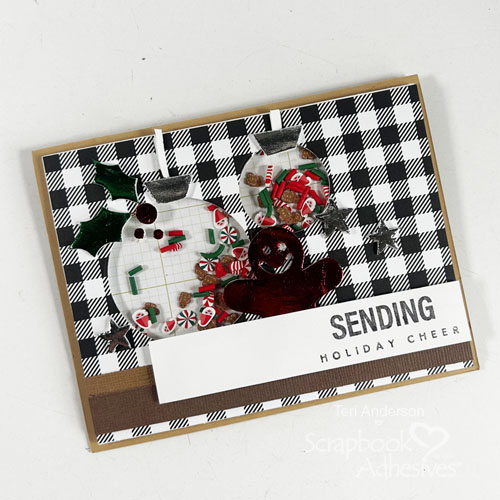
Hi, friends! It’s never too early to get started on your Christmas cards. Teri here with a fun “Christmas in July” card. This Sending Holiday Cheer Card features two shaker windows and a variety of 3D Foam Shapes.

Sending Holiday Cheer Card by Teri Anderson for Scrapbook Adhesives by 3L

Create the Shaker Windows

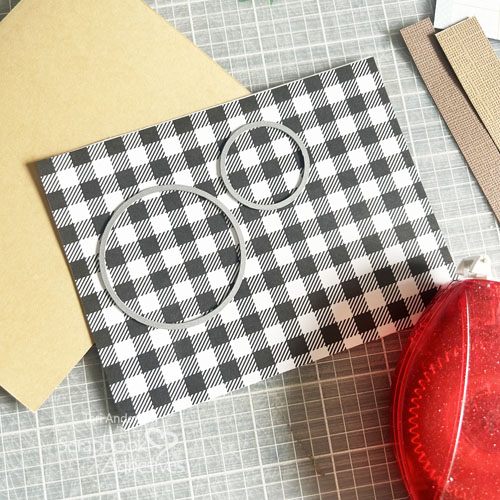
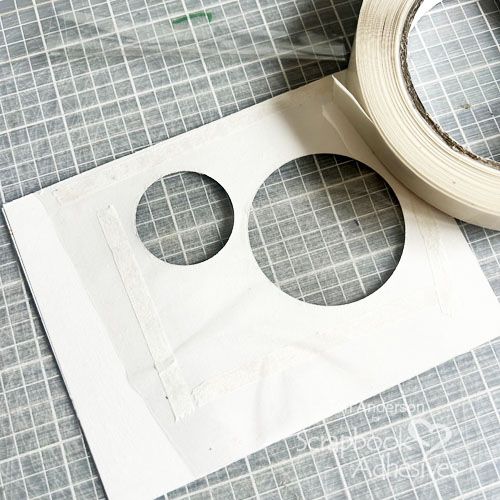
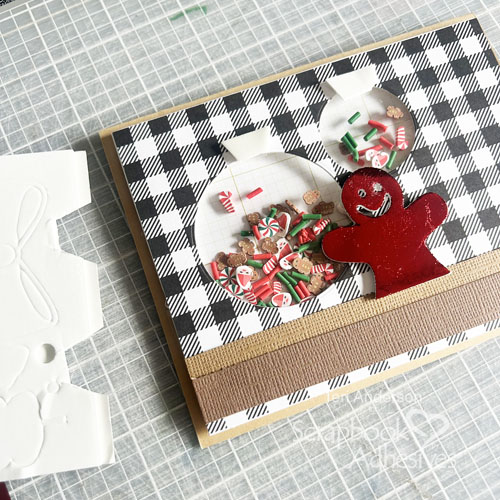
Start by creating a notecard from cardstock. You’ll also want to make a shaker window by adhering a panel of patterned paper to cardstock. Set two circle dies on the panel. Run them through your die-cutting machine to make two shaker windows. Flip the panel over and a piece of clear plastic film over the window opening.

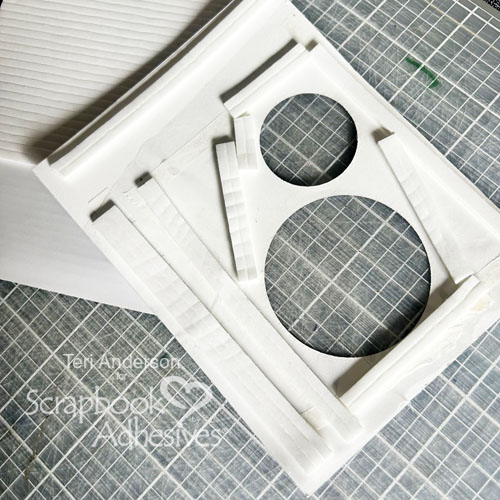
Take several 3D Foam Strips and adhere them to the back of your shaker panel. Be sure to make sure they are tight and connect around your shaker windows. This will help so your shaker bits will not get out.

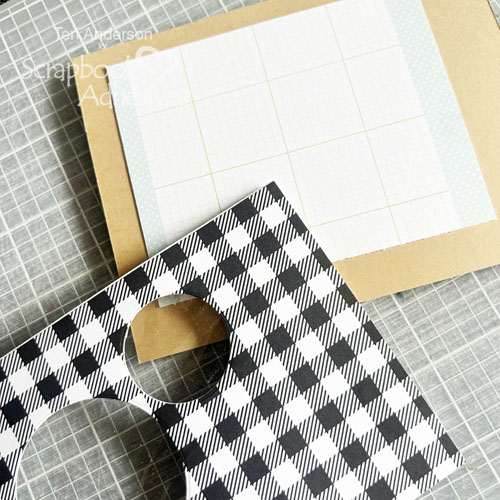
Adhere a piece of patterned paper onto your notecard. If you are using a small piece of paper, make sure it appears through the shaker windows. Set some shaker bits on your card, and adhere the shaker window panel onto it.

Decorate with Cardstock and 3D Foam Shapes

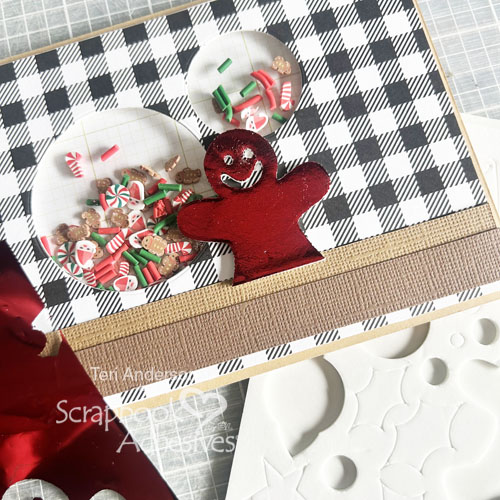
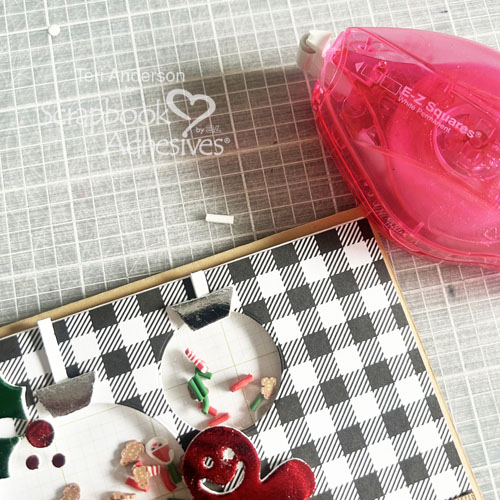
Add a couple strips of cardstock to your card. Decorate it with 3D Foam Shapes. Add stars and a gingerbread man. If the shapes are too big for your card, cut them down. Create ornament toppers for your shaker windows by cutting up some of your leftover 3D Foam. Add some holly leaves to your card as well.

You can make hangers for your ornaments by simply cutting strips of cardstock and adhering them to your card. I didn’t have my Dual Tip Glue Pen at my desk so I improvised by taking a square from the E-Z Square Refillable Dispenser and rolling it up to adhere. It worked well.

Sending Holiday Cheer Card by Teri Anderson for Scrapbook Adhesives by 3L

Add a Sentiment

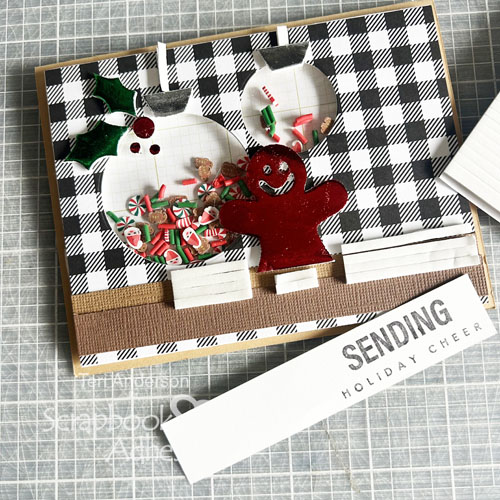
Stamp a sentiment on a strip of cardstock. Adhere 3D Foam Strips to your card and mount your sentiment strip on top.

Sending Holiday Cheer Card by Teri Anderson for Scrapbook Adhesives by 3L

That’s all for today! I hope you enjoyed today’s Sending Holiday Cheer Card tutorial and are inspired to get a jump on making some holiday cards of your own!

Happy Creating!

Teri Anderson

Creative Time: 60 minutes

Skill Level: Intermediate

Materials needed:

Scrapbook Adhesives by 3L®:

3D Foam Strips and 3D Foam Holiday Embellishment Kit with Foil

E-Z Squares® Refillable Dispenser

Crafty Power Tape Polybag 81ft

Other: Cardstock: Neenah (White and Kraft), Doodlebug Design (Farmhouse Cardstock 12×12 Paper Pack); Patterned Paper: Doodlebug Design (Farmhouse Collection); Dies: Waffle Flower (Circle Set); Stamps: Concord & 9th (Kristina Werner Sending Trio Stamp Set); Black Ink Pad: Ranger Ink; Sequins: Simon Says Stamp!; Shaker Bits: Michael’s Arts and Crafts; Clear Packing Film

Save to Pinterest!

Sending Holiday Cheer Card by Teri Anderson for Scrapbook Adhesives by 3L Pinterest

Visit our Website and Blog!
Sign up for our Newsletter so you never miss a contest or giveaway!

instagram purple icon facebook icon purple pinterest purple icon twitter purple icon YouTube icon blog subscription purple icon

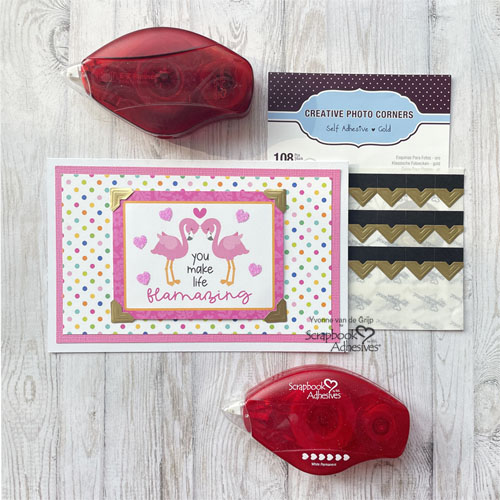
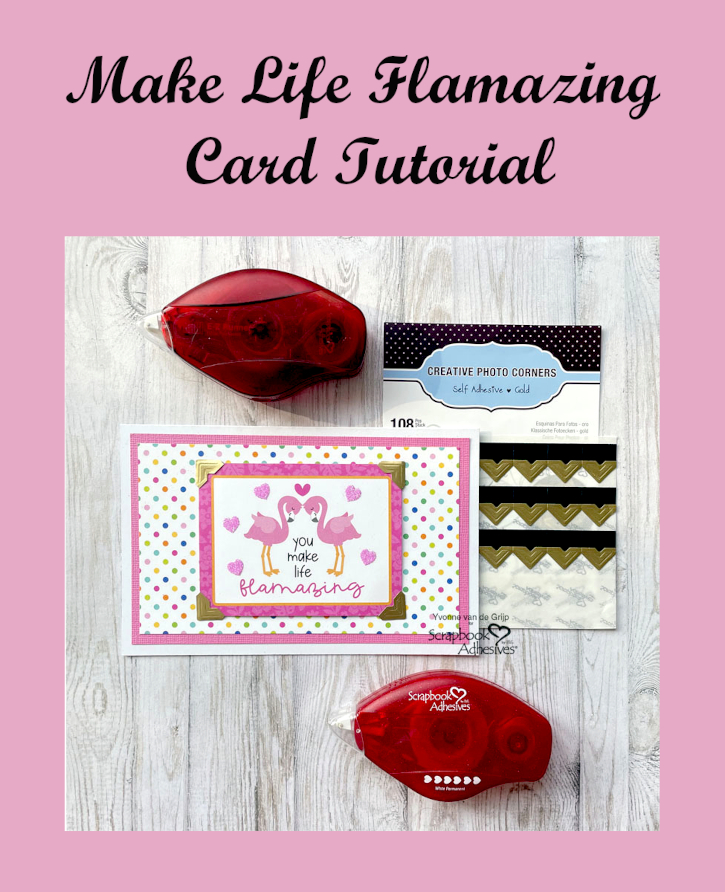
Make Life Flamazing Card

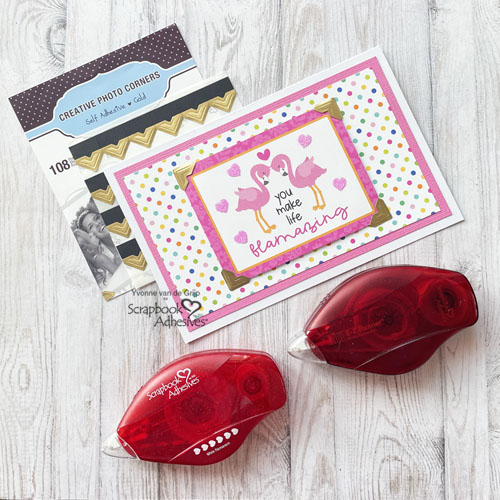
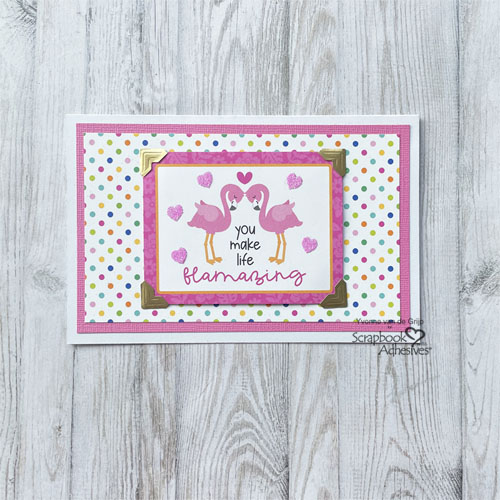
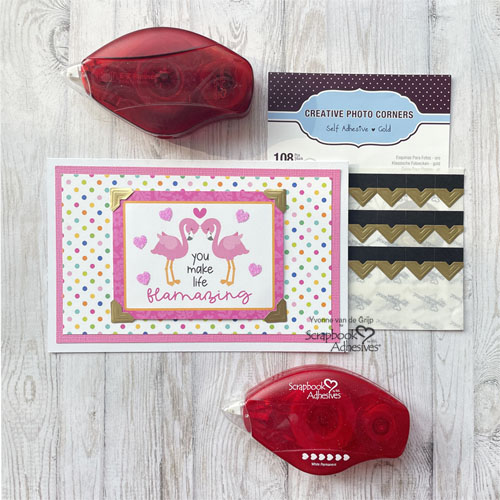
Hi everyone, Yvonne here with a happy and layered Make Life Flamazing Card! It is quick and easy to create so it’s perfect for beginner card makers.

Make Life Flamazing Card by Yvonne van de Grijp for Scrapbook Adhesives by 3L

For my card I used the technique called Wear Your Adhesive on the Outside to add a little sparkle. I would love to share with you how I made it. Shall we get started?

Make Life Flamazing Card Base

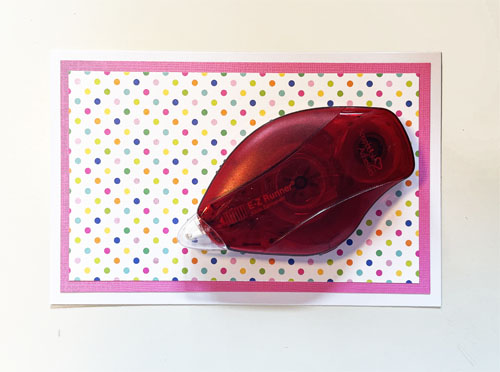
Start by folding a piece of white cardstock into a card. Then adhere a panel of pink cardstock upon the Layered Flamingo Card using the E-Z Runner® Permanent Strips Refillable Dispenser as your adhesive.

Make Life Flamazing Card by Yvonne van de Grijp for Scrapbook Adhesives by 3L

Then adhere a dotted card panel upon, again using the E-Z Runner® Permanent Strips Refillable Dispenser as your adhesive.

Flamingo image

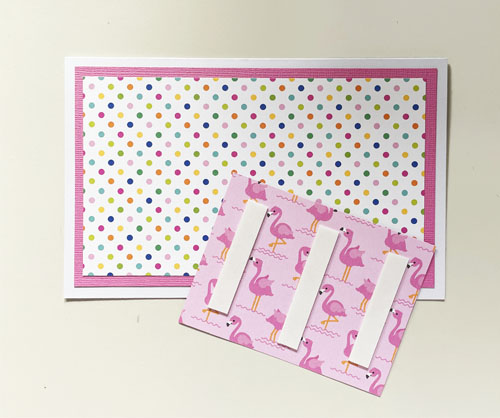
First cut out the flamingo image from patterend paper and the adhere it tot he card base using Crafty Foam Tape 108ft as your adhesive. Make sure you  adhere the Crafty Foam Tape 108ft about 1/4″ from the corners.

Make Life Flamazing Card by Yvonne van de Grijp for Scrapbook Adhesives by 3L

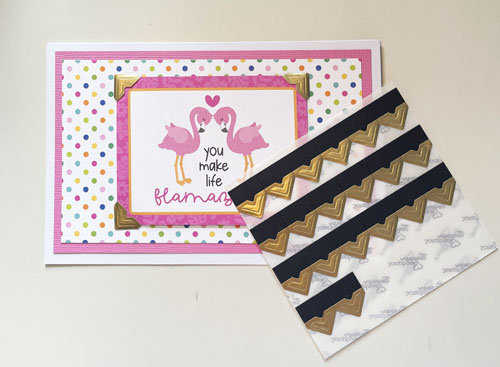
Then carefully tuck Creative Photo Corners Gold behind the corners of the image and adhere to the dotted card panel of the Layered Flamingo Card.

Make Life Flamazing Card by Yvonne van de Grijp for Scrapbook Adhesives by 3L

Wear Your Adhesive on the Outside

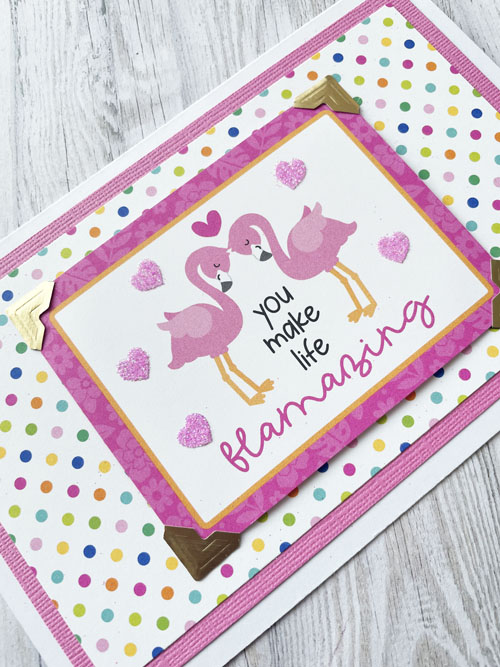
For a fun effect on my card I used the technique called Wear Your Adhsive on the Outside. First adhere some E-Z Runner® Hearts Refillable Dispenser onto the Flamingo panel. I like to use tweezers to adhere the hearts for precise positioning. Then sprinkle some pink glitter upon the hearts and rub the glitter for secure fastening. Tap off any excess glitter.

Make Life Flamazing Card by Yvonne van de Grijp for Scrapbook Adhesives by 3L

And voilá your Layered Flamingo Card is ready to bring a smile to someone’s face. I hope you enjoyed this tutorial and wish you happy crafting!

Yvonne van de Grijp

Creative Time: 20 minutes

Skill Level: Beginner

Materials needed:

Scrapbook Adhesives by 3L®:

E-Z Runner® Permanent Strips Refillable Dispenser

Crafty Foam Tape 108ft

E-Z Runner® Hearts Refillable Dispenser

Creative Photo Corners Gold

Other: Cardstock (doodlebug design inc.™: Summer Fun solid assortment paper Pack; Summer Fun Chit Chat™); Glitter (Pink); Paper Trimmer; Scissors; Tweezers

Save to Pinterest!

Make Life Flamazing Card by Yvonne van de Grijp for Scrapbook Adhesives by 3L Pinterest

Visit our Website and Blog!
Sign up for our Newsletter so you never miss a contest or giveaway!

instagram purple icon facebook icon purple pinterest purple icon twitter purple icon YouTube icon blog subscription purple icon

Let Freedom Ring Layout

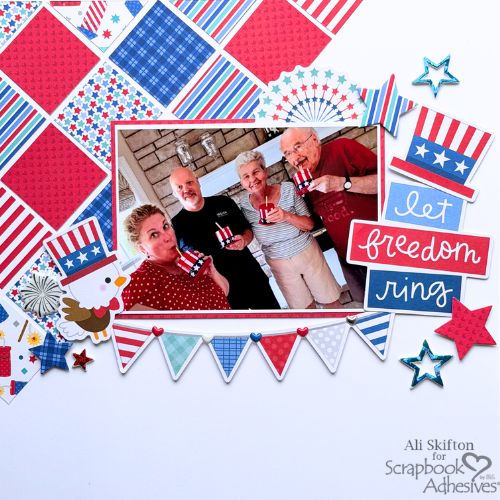
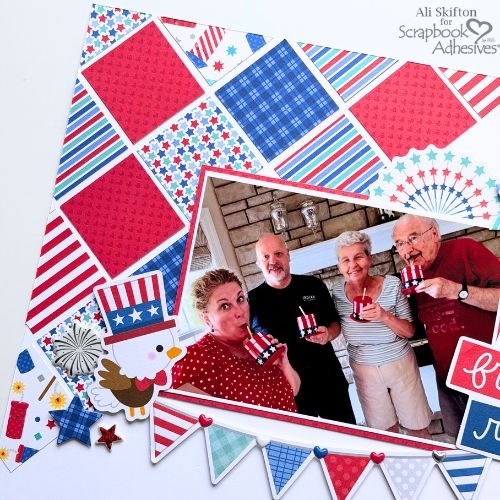
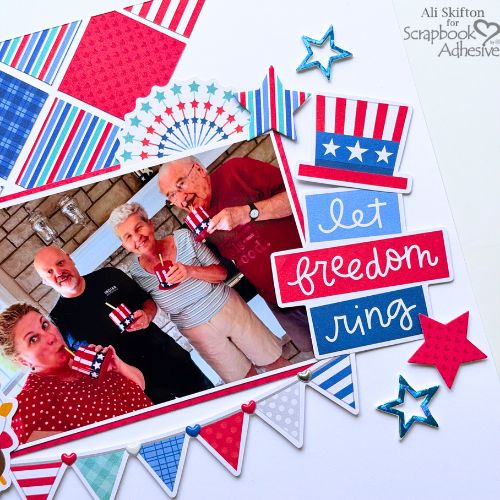
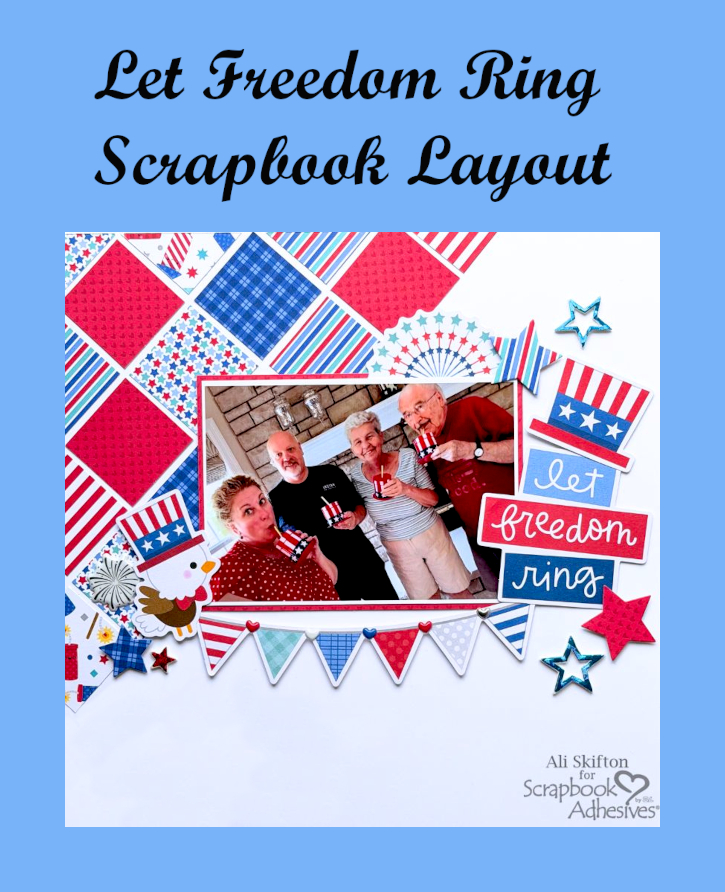
Hi, Ali (FunAdventuresWithAli) here! Happy 4th of July! Today, I’m sharing a festive Let Freedom Ring Layout. With this layout, I am featuring the Wear Your Adhesive on the Outside technique using Metallic Transfer Foil Sheets in Holographic Colors and 3D Foam Stars. The adorable Doodlebug Fourth of July collection was the perfect choice for this patriotic project!

Let Freedom Ring Layout by Ali Skifton for Scrapbook Adhesives by 3L

Let Freedom Ring Design

The Fourth of July is one of my favorite holidays. Every year, we celebrate with my parents by enjoying a cookout, relaxing together, sharing drinks, and ending the evening with a spectacular fireworks display. It’s a wonderful family tradition, and I wanted to create a special layout just for them.

Let Freedom Ring Layout by Ali Skifton for Scrapbook Adhesives by 3L

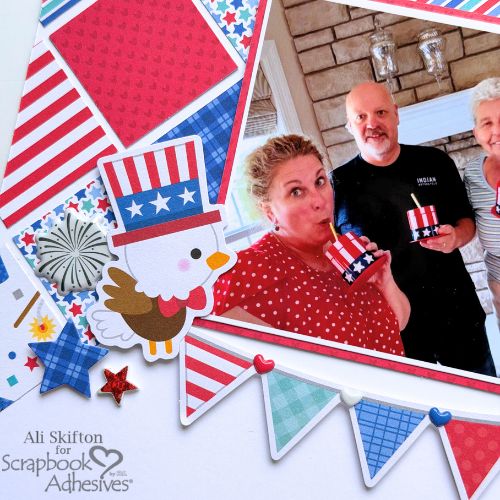
To begin, I cut squares from several patterned papers and layered them in the upper left corner of my layout using my favorite E-Z Runner® Permanent Strips Dispenser. Next, I added dimension with Crafty Foam Tape White 108ft, popping up fun embellishments including the banner, Uncle Sam eagle, title, and Uncle Sam hat.

Wear Your Adhesive on the Outside with 3D Foam Stars

My favorite part of this project is definitely the stars—because nothing says Fourth of July like sparkling stars and fireworks! I used 3D Foam Stars along with Metallic Transfer Foil Sheets in Celebrate Colors to create custom embellishments that perfectly coordinated with the layout.

Let Freedom Ring Layout by Ali Skifton for Scrapbook Adhesives by 3L

Creating foiled stars is quick and easy:

• Place the 3D Foam Stars where you would like them on your project.
• Remove the top liner from a star.
• Lay a piece of Metallic Transfer Foil Sheets in Celebrate Colors over the adhesive (color side facing up).
• Gently rub the foil to transfer the color, then peel it away to reveal the shine.
• Repeat with additional colors such as blue, gold, and silver for a fun fireworks-inspired look.

Let Freedom Ring Layout by Ali Skifton for Scrapbook Adhesives by 3L

The foil transfers beautifully onto the stars, creating gorgeous shiny embellishments in less than a minute. They look just like little fireworks bursting right off the page!

Thank you for stopping by today. Wishing everyone a safe, happy, and joy-filled Fourth of July filled with family, friends, fireworks, and lots of crafty fun!

Thanks for visiting!
Ali Skifton (FunAdventuresWithAli)

Creative Time: 90 mins
Skill Level: Intermediate

Materials Needed:
Scrapbook Adhesives by 3L®

E-Z Runner® Permanent Strips Dispenser

Crafty Foam Tape White 108ft.

3D Foam Stars

Metallic Transfer Foil Sheets in Celebrate Colors

Other: Doodlebug Design

Click Preferred Retailers List

Save to Pinterest!

Let Freedom Ring Layout by Ali Skifton for Scrapbook Adhesives by 3L Pinterest

Visit our Website and Blog!
Sign up for our Newsletter so you never miss a contest or giveaway!

instagram purple icon facebook icon purple pinterest purple icon twitter purple icon YouTube icon blog subscription purple icon

Tropical Happy Birthday Tag

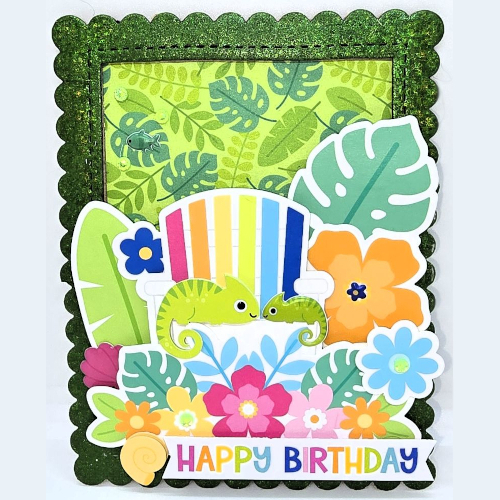
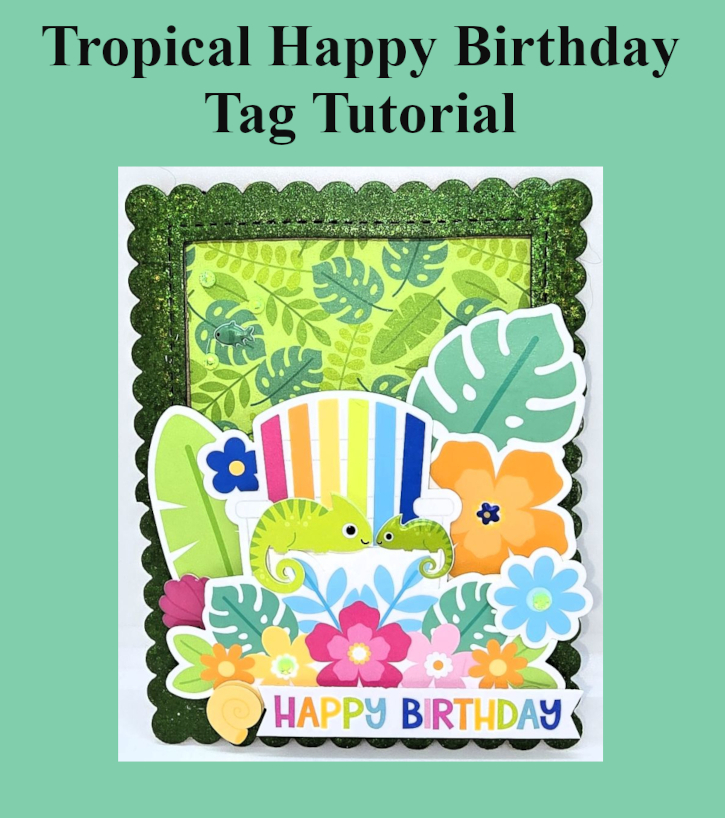
It’s Kristin here. If you love adding shine, and dimension to your paper crafting projects, you’ll love this Tropical Happy Birthday Tag. Together, they create a colorful birthday tag full of eye-catching dimension.

Tropical Happy Birthday Tag by Kristin Rizzo for Scrapbook Adhesives by 3L

Tropical Happy Birthday Tag Base

One of my favorite things about the 3D Foam Creative Sheets Mix is the ability to create custom dimensional embellishments. For this birthday tag, I die cut a scalloped frame with it and it cuts like butah! It allows me to turn this die shape into a raised embellishment that adds instant depth to my project.

Tropical Happy Birthday Tag by Kristin Rizzo for Scrapbook Adhesives by 3L

Wear Your Adhesive on the Outside with Metallic Transfer Foil

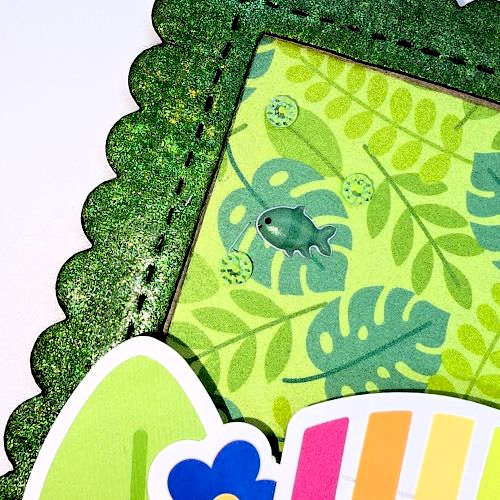
Remove the top liner of the scalloped frame and applied green foil from the Metallic Transfer Foil Sheets Celebrate Colors. Remember to place the foil color side facing you. The foil adhered to the exposed adhesive to create a smooth, shiny finish that coordinates well with the Doodlebug Summer Fun Collection. Reapply the foil in missed areas.

Tropical Happy Birthday Tag by Kristin Rizzo for Scrapbook Adhesives by 3L

The Metallic Transfer Foil Sheets Celebrate Colors are an easy way to add elegant shine and vibrant color. The green foil transformed my simple scalloped circle into a standout focal element while having a dimensional effect.

Creating Extra Dimension with Foam

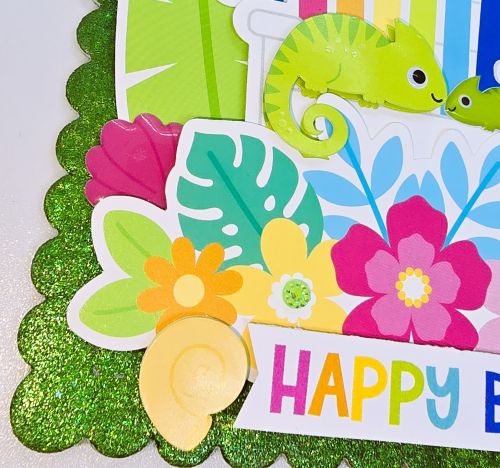
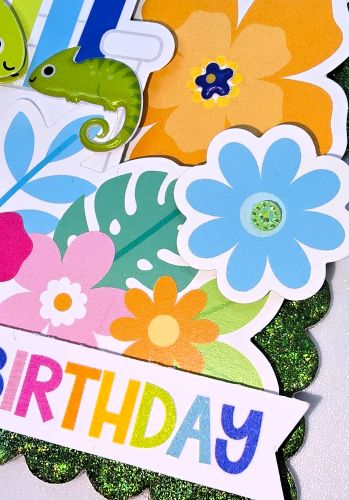
To increase the dimensional effect even more, I used the 3D Foam Strips. I doubled them to create extra height behind several design elements on the birthday tag. Layering the foam strips added visual interest and helped separate the various pieces of the design. This simple technique creates a professional layered look that makes focal images and embellishments stand out.

Tropical Happy Birthday Tag by Kristin Rizzo for Scrapbook Adhesives by 3L

The bright colors and playful summer theme paired perfectly with the foiled scalloped circle and dimensional layers to create a super fun Tropical Happy Birthday Tag! Hope you give this idea a try.

Happy scrapping & thank you for visiting! 💕✂️
Kristin Rizzo

Creative Time: 60 mins
Skill Level: Intermediate

Materials Needed:
Scrapbook Adhesives by 3L®

E-Z Runner® Grand Permanent Strips Refillable Dispenser

3D Foam Creative Sheets Mix and 3D Foam Strips

Metallic Transfer Foil Sheets Celebrate Colors

Other: Patterned Paper & Embellishments: Doodlebug Design (Summer Fun Collection); Dies: Scrapbook.com

Click Preferred Retailers List

Save to Pinterest!

Tropical Happy Birthday Tag by Kristin Rizzo for Scrapbook Adhesives by 3L Pinterest

Visit our Website and Blog!
Sign up for our Newsletter so you never miss a contest or giveaway!

instagram purple icon facebook icon purple pinterest purple icon twitter purple icon YouTube icon blog subscription purple icon

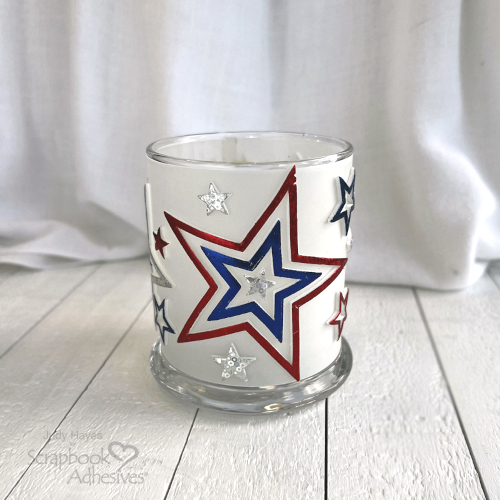
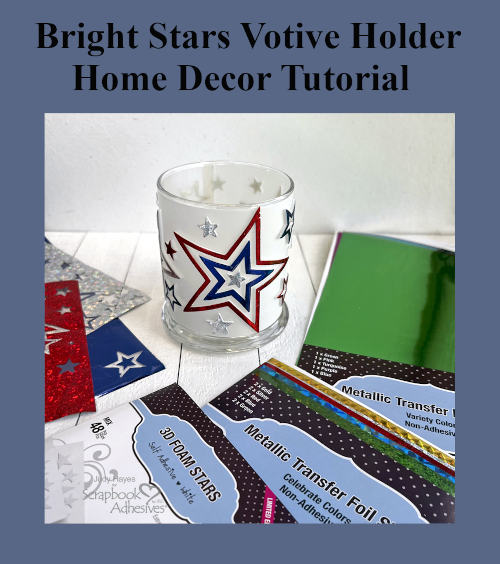
Bright Stars Votive Holder

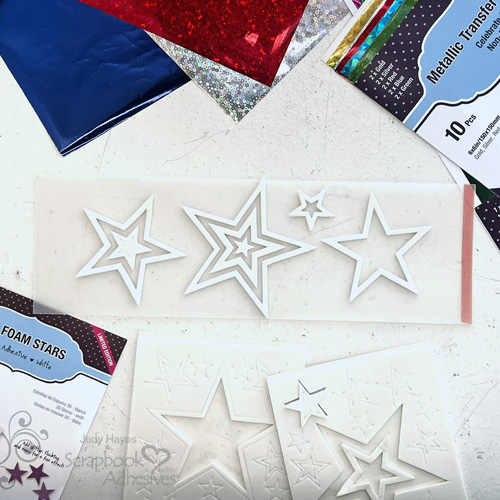
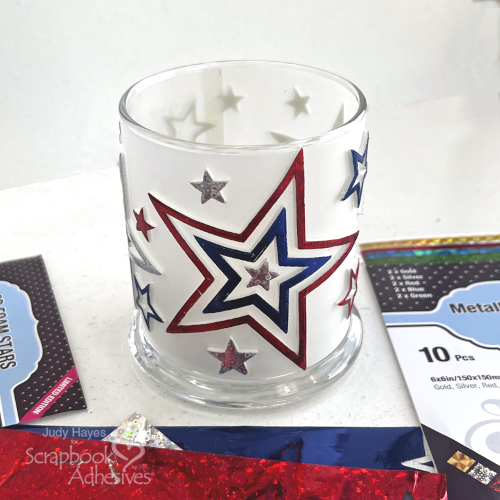
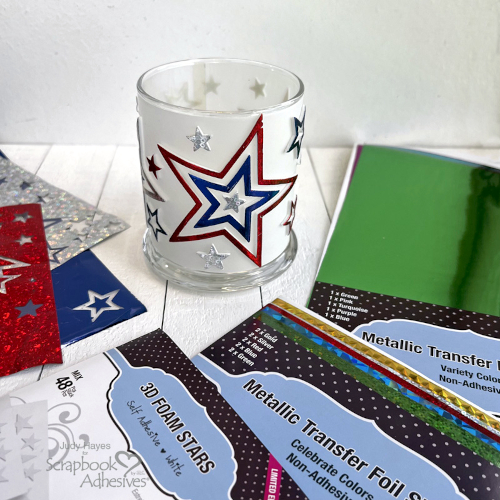
Hi, Judy here today! I have a Bright Stars Votive Holder project to share just in time for the 4th of July. It’s quite easy to make with 3D Foam Stars, Metallic Transfer Foil Sheets Variety Colors, and Metallic Transfer Foil Sheets Celebrate Colors and a clear glass candle holder. During the day the stars shine brightly and at night, simply add a battery votive for a soft glow that will show through the open stars. It’s a fun home decor accent!

Bright Stars Votive Holder by Judy Hayes for Scrapbook Adhesives by 3L

Bright Stars Vellum Base

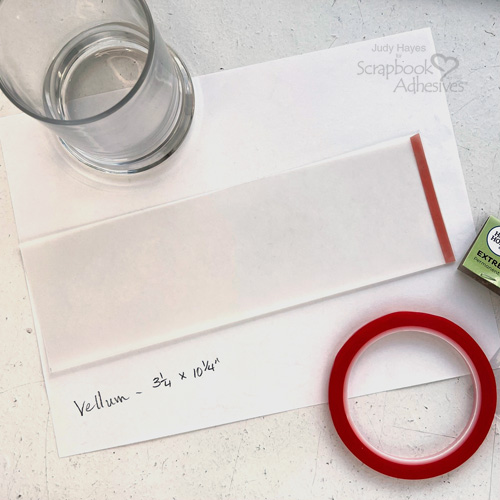
The votive holder measures 3.25 tall x 10″ around if you’re measuring for a vellum wrap. So, I cut a piece of vellum at 3.25 x 10.5″. I marked where the ends lap with pencil and cut it 0.25″ beyond the mark to determine the cut. Apply strip of Extreme Double-Sided Tape 1/4in to the back of one end of the vellum

Bright Stars Votive Holder by Judy Hayes for Scrapbook Adhesives by 3L

Bright Stars Placement

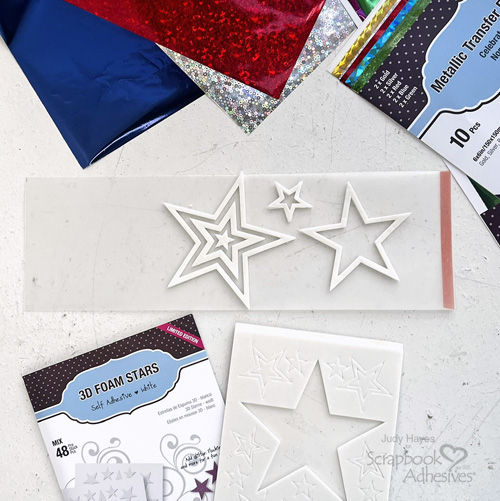
Place vellum face up on work surface to add stars from 3D Foam Stars. Carefully loosen each point of largest star and peel off entire star. Place star lightly at angle near center of vellum band. Use needle tool to lift points of 2nd star and then carefully lift it off. Place that star on vellum to one side of large star. Again working with large star, lift points of 4th star (one next to center star), peel it away and place on vellum between large stars.

From second sheet of 3D Foam Stars, lift points of 2nd from largest star, remove entire star and place lightly on other side of large center star. Carefully lift points of inner 2nd star, remove and place back on 3D Foam Stars sheet. Remove one of the larger 2 piece stars and place in center of star on other side of center star (right side).

Wear Your Adhesive on the Outside with 3D Foam Stars

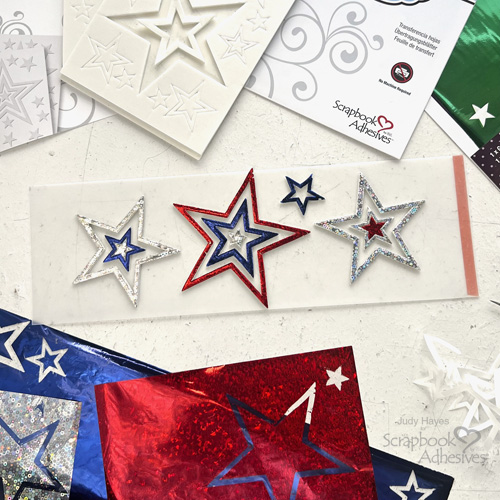
Remove the liner from the largest star, cover with red foil from the Transfer Foil Sheets Celebrate Colors (color side facing you) over the exposed adhesive. Gently press the foil and peel to reveal the color. Reapply the foil in missed areas.

Bright Stars Votive Holder by Judy Hayes for Scrapbook Adhesives by 3L

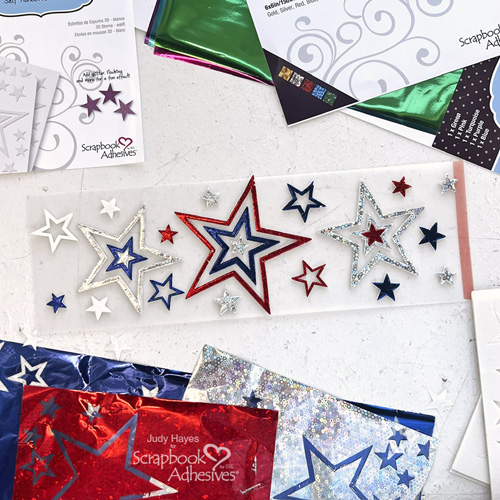
Repeat the foiling steps with the blue foil from Metallic Transfer Foil Sheets Variety Colors and with silver foil from Transfer Foil Sheets Celebrate Colors as shown in the images until you get the desired color design.

Bright Stars Votive Holder by Judy Hayes for Scrapbook Adhesives by 3L

Assemble the Bright Stars Votive Holder

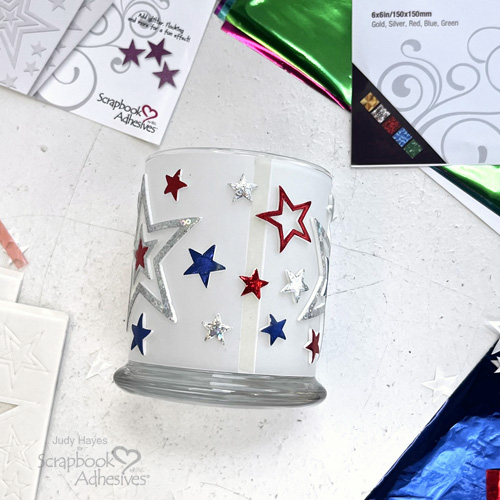
Remove liner from Extreme Double-Sided Tape 1/4in at end of vellum, wrap it snuggly around candle holder and press ends together.

Bright Stars Votive Holder by Judy Hayes for Scrapbook Adhesives by 3L

Add more stars as desired to fill spaces especialy near seam, peel liners and cover with foils.

Insert Votive Light

Turn on battery votive light and place in candle holder.

Enjoy your Bright Stars Votive Holder! Even in dark the light will show through open stars.

Thanks for visiting!
Judy Hayes

Creative Time: 30 mins
Skill Level: Intermediate

Materials Needed:
Scrapbook Adhesives by 3L®

3D Foam Stars

Metallic Transfer Foil Sheets Variety Colors and Metallic Transfer Foil Sheets Celebrate Colors

HomeHobby™ by 3L

Extreme Double-Sided Tape 1/4in

Other: White Vellum, Clear Glass Candle Holder with straight sides (Dollar Tree), Battery Votive Candle

Click Preferred Retailers List

Save to Pinterest!

Bright Stars Votive Holder by Judy Hayes for Scrapbook Adhesives by 3L Pinterest

Visit our Website and Blog!
Sign up for our Newsletter so you never miss a contest or giveaway!
instagram purple icon facebook icon purple pinterest purple icon twitter purple icon YouTube icon blog subscription purple icon

Chocolate Bar Card

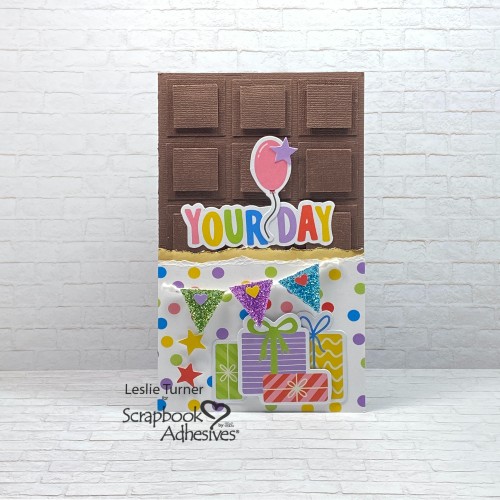
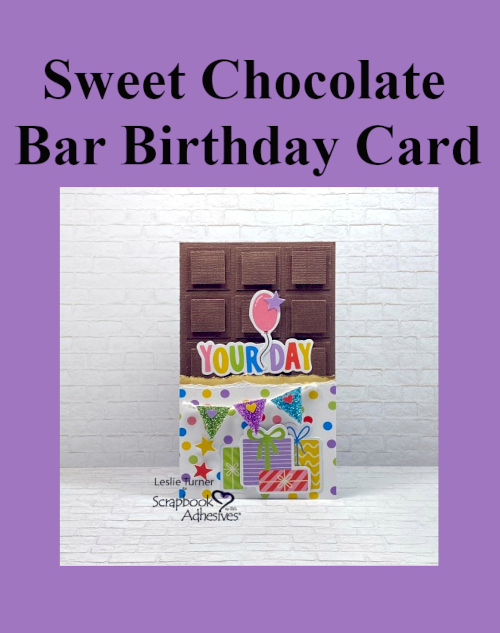
Hey everybody, happy weekend! I hope you have plans to do something fun! Do you have kids or grands with an upcoming birthday? If so, I have the sweetest birthday card to share… pun intended! Leslie here with a tutorial for making a Chocolate Bar Card – an oldie but goodie and one of my favorites. I used cardstock, birthday papers and die cut pieces in my stash, and quite a few Scrapbook Adhesives products. It’s a great mini slimline size, so let me show you how to make this!

Chocolate Bar Card by Leslie Turner for Scrapbook Adhesives by 3L

Cut Card Base & Layers

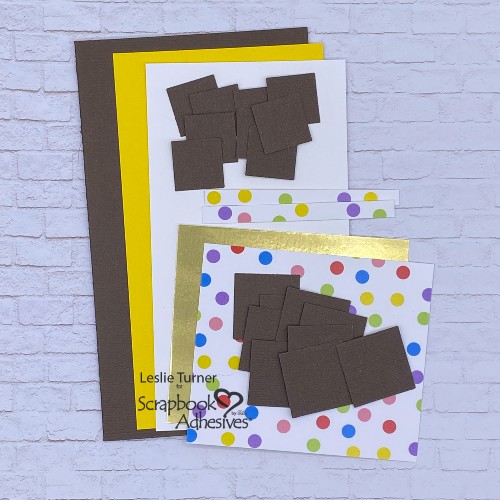
BROWN CARDSTOCK:
Card base: 6″ x 7″, scored at 3-1/2″ on long side. This makes a 3-1/2″ x 6″ size mini slimline that fits perfectly into a #6-3/4 business size envelope.
Chocolate bar pieces: Punch nine 1″ squares and eighteen 3/4″ squares.

YELLOW CARDSTOCK:
Inside layering panel: 3-1/8″ x 5-5/8″.

WHITE CARDSTOCK:
Inside sentiment panel: 3″ x 5-1/2″.

GOLD FOIL CARDSTOCK:
Front inner wrapper: 3-1/2″ x 3-1/2″ with approximately 1/2″ torn off the top (tear away from you).

PATTERNED PAPER:
Front outer wrapper: 3-1/8″ x 3-1/2″ with approximately 1/2″ torn off the top (tear toward you).
Inside embellishing strips: Approximately 1/4″ x 2-15/16″ (cut two).

Chocolate Bar Card by Leslie Turner for Scrapbook Adhesives by 3L

Adhere Layers

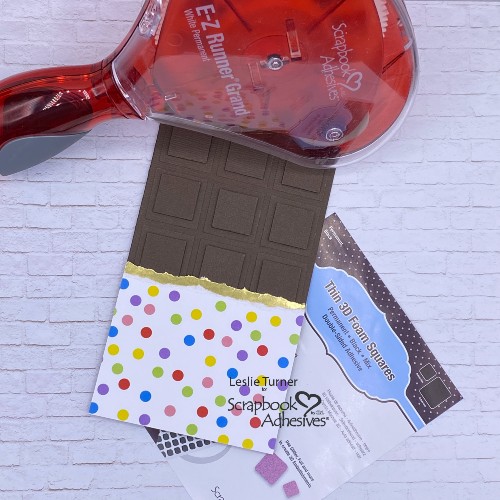
First, build the chocolate bar. Use the E-Z Runner® Grand Permanent Strips Refillable Dispenser to adhere the nine 1″ squares to the top of the card. You’ll want about 1/8″ distance from the edges and 1/8″ between the squares. Next, glue pairs of the 3/4″ squares together with Dual Tip Glue Pen to make a total of nine. Apply one Thin 3D Foam Squares Black Mix to the back of each square. Then adhere them to the 1″ squares on the card front. Yum, that chocolate bar is looking good!

Additionally, adhere the torn patterned paper to the torn gold foil cardstock using the E-Z Runner® Grand Permanent Strips Refillable Dispenser. Affix this piece to the card front with Thin 3D Foam Squares Black Mix. That wrapper looks pretty authentic, doesn’t it?!

Chocolate Bar Card by Leslie Turner for Scrapbook Adhesives by 3L

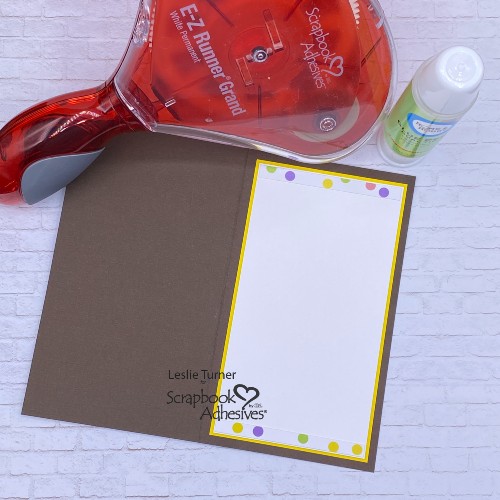
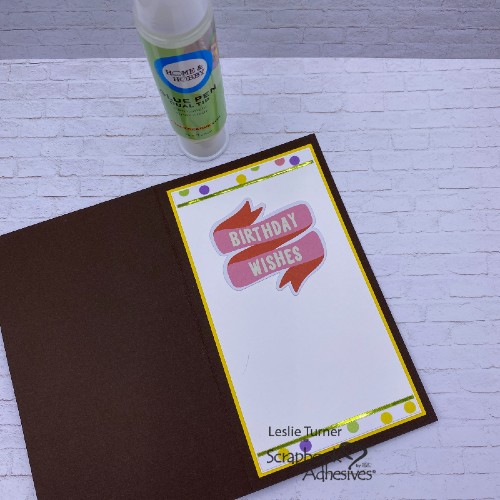
Now let’s work on the inside. Use the E-Z Runner® Grand Permanent Strips Refillable Dispenser to adhere the white and yellow panels together. Then adhere them to the inside of the card base. Grab the Dual Tip Glue Pen and adhere the embellishing strips across the top and bottom of the white panel.

Chocolate Bar Card by Leslie Turner for Scrapbook Adhesives by 3L

Embellish Chocolate Bar Card Front

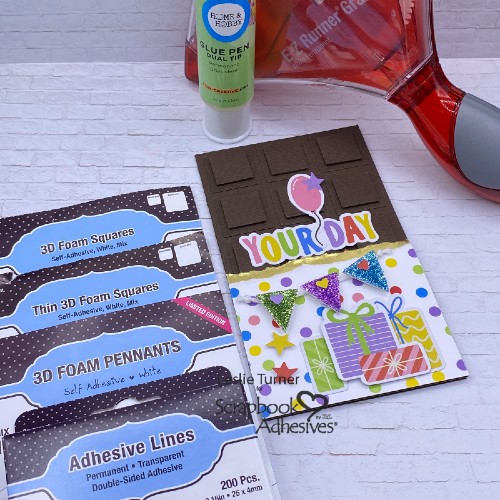
So let’s create the banner using the ‘Wear Your Adhesive on the Outside’ technique. With green, purple and blue glitter along with the 3D Foam Pennants. For additional stability, I stuck the pennants to white cardstock and trimmed around the edges. Remove the liner from one pennant and sprinkle glitter over it. Press with your finger to secure and then tap off the excess. Repeat the glitter steps on the remaining pennants. Apply Adhesive Lines to the top of the pennants and affix them to a length of white twine with knotted ends. Also apply a 3D Foam Squares White Mix to the back of each pennant and add them to the card front.

Afterwards, add an assortment of die cut pieces using 3D Foam Squares White Mix and Thin 3D Foam Squares White Mix. The different thicknesses of the foam squares adds different levels of dimension. Pull out the Dual Tip Glue Pen again and glue a few more die cuts flat (without dimension).

Chocolate Bar Card by Leslie Turner for Scrapbook Adhesives by 3L

Complete Chocolate Bar Card

To complete the card, adhere another die cut piece (sentiment) to the inside panel using the Dual Tip Glue Pen. As a final touch, I added narrow green pinstripe peel-off stickers to the panel for a little interest.

Chocolate Bar Card by Leslie Turner for Scrapbook Adhesives by 3L

Thanks for visiting!
Leslie

Creative Time: 45 mins
Skill Level: Intermediate

Materials Needed:
Scrapbook Adhesives by 3L®
E-Z Runner® Grand Permanent Strips Refillable Dispenser
Thin 3D Foam Squares Black Mix
3D Foam Pennants
Adhesive Lines
3D Foam Squares White Mix
Thin 3D Foam Squares White Mix

HomeHobby™ by 3L
Dual Tip Glue Pen

Other: Cardstock/Paper: CutCardStock Vanilla Bean Brown, Bright Gold Foil, and Lessebo Sunflower Yellow cardstock; Neenah Classic Crest Solar White cardstock, Keep It Simple Paper Crafts Happy Birthday Paper and Die Cut Pieces
Dies/Punches: EK Success 1″ and 3/4″ Square Punches, Stampin’ Up Cookie Cutter Punch (tiny hearts)
Accessories: Fiskars 12″ ProCision Rotary Bypass Paper Trimmer, Making Memories Green, Purple and Blue Glitter, Doodlebug Design Lily White Doodle Twine, Love From Lizi Green Pinstripe Peel-Off Stickers

Click Preferred Retailers List

Save to Pinterest!

Chocolate Bar Card by Leslie Turner for Scrapbook Adhesives by 3L Pinterest

Visit our Website and Blog!
Sign up for our Newsletter so you never miss a contest or giveaway!
instagram purple icon facebook icon purple pinterest purple icon twitter purple icon YouTube icon blog subscription purple icon

Hey There Card

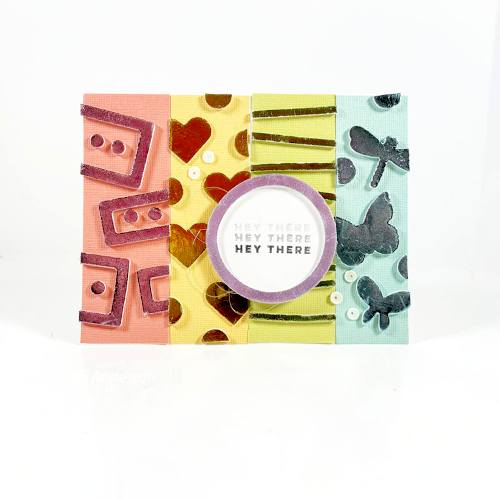
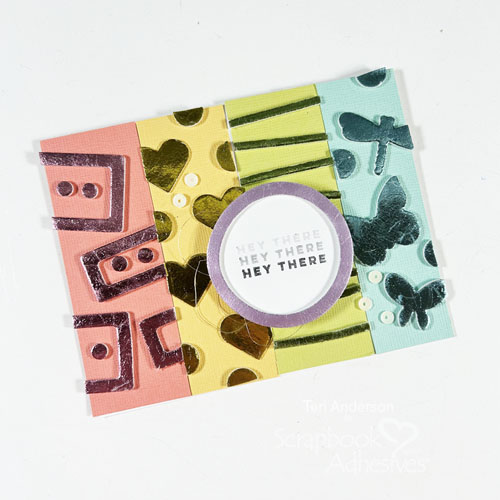
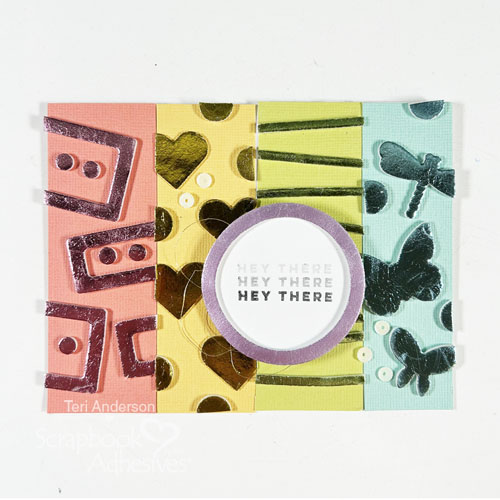
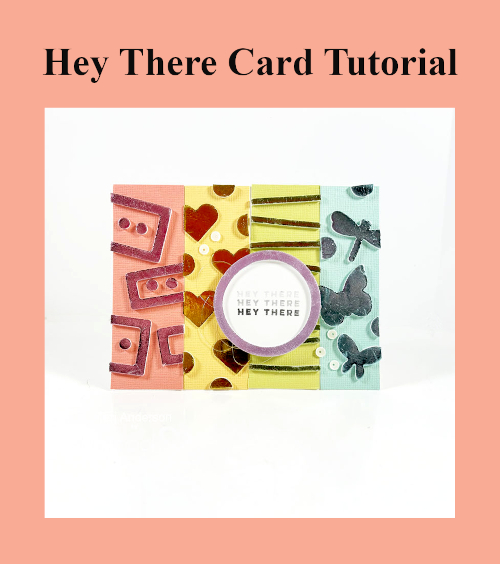
Hi, friends! Do you love color? Teri here with a fun way to embrace all things color related by making a tone-on-tone Hey There Card with cardstock and 3D Foam Shapes with Metallic Transfer Foil Sheets Pastel.

Hey There Card by Teri Anderson for  Scrapbook Adhesives by 3L

Not only is this a fun way to play with color when making cards, but it’s also a wonderful way to add a little bit of glitz and dimension!

Pick Out Cardstock and Metallic Transfer Foil

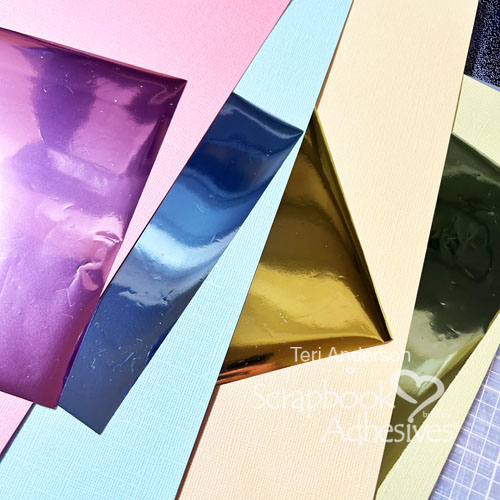
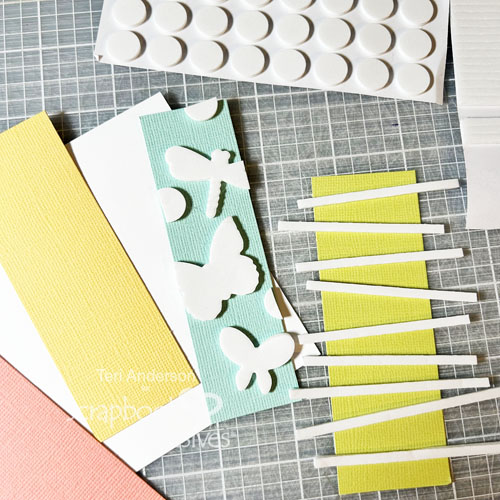
Start by pulling out a few sheets of Metallic Transfer Foil Sheets Pastel. Match them the best you can to cardstock. It’s OK if they aren’t an exact match. Just try go with something close in tone.

Hey There Card by Teri Anderson for  Scrapbook Adhesives by 3L

Create a notecard from white cardstock. Cut your other pieces of cardstock into strips to fit on it.

Add 3D Foam Shapes

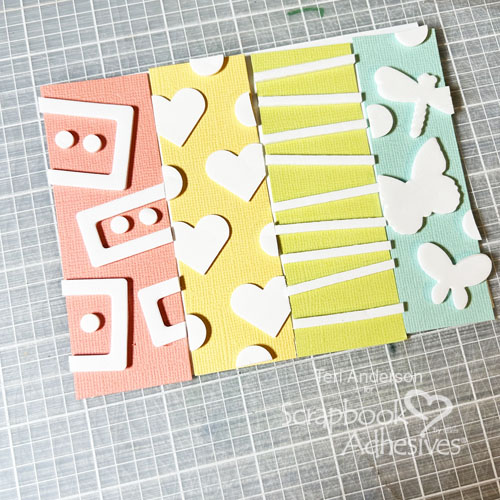
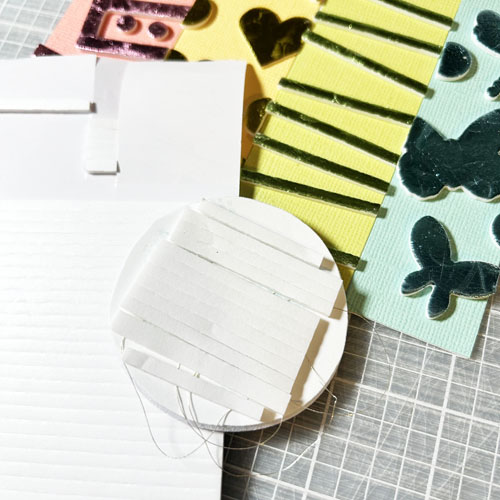
Take each strip and randomly apply 3D Foam Shapes onto each strip. You can use the same shapes, or you can mix it up by using a variety of them. I used a combination of 3D Foam Strips, 3D Foam Circles White Mix, 3D Foam Hearts, and 3D Foam Frames. Trim off any pieces that go off the edge.

Take your transfer foil and apply it to the shapes on each corresponding piece of cardstock. Make sure you apply the foil to one shape at a time. I find that works a bit better than doing it all at once.

Adhere your cardstock strips onto your card. Trim the card is necessary.

Create a Sentiment

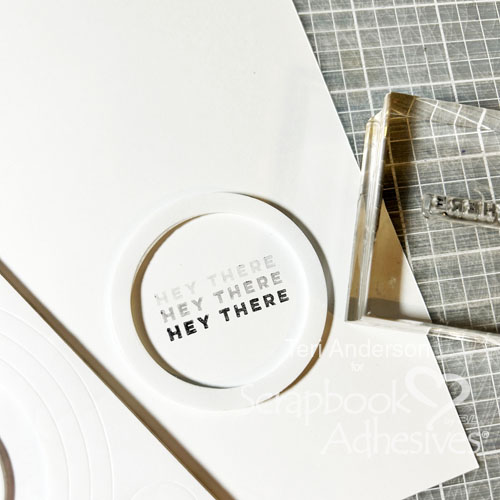
Stamp a sentiment onto a piece of white cardstock. Place a 3D Foam Circle Frame around the sentiment. Apply transfer foil to it. Trim the excess with your scissors.

Hey There Card by Teri Anderson for  Scrapbook Adhesives by 3L

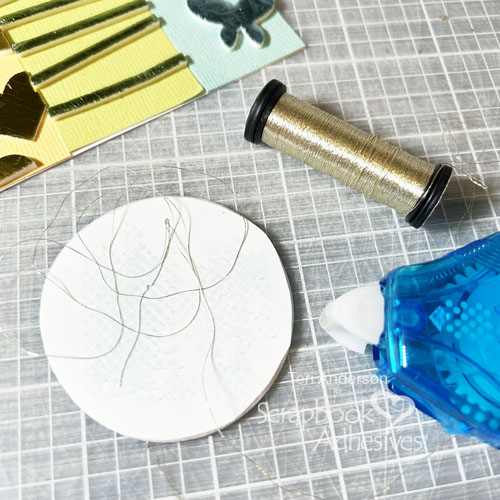
Apply adhesive to the back of your circle. Randomly arrange metallic thread on the circle so loops peek out from the sides. Add several 3D Foam Strips to the circle and mount it to the card.

Complete the card by adding some sequins, gems or small embellishments to it.

I hope you enjoyed today’s tutorial and are inspired to make a tone-on-tone card with Metallic Transfer Foil Sheets of your own!

Happy Creating!

Teri Anderson

Creative Time: 60 minutes

Skill Level: Beginner

Materials needed:

Scrapbook Adhesives by 3L®:

3D Foam Strips, 3D Foam Circles White Mix, 3D Foam Hearts, 3D Foam Frames and 3D Foam Circle Frames White

E-Z Runner® Permanent Strips Refillable Dispenser

E-Z Runner® Petite Dots Permanent Refillable Dispenser

Adhesive Dots Micro

Metallic Transfer Foil Sheets Pastel Colors

Other: Cardstock: Neenah (White), Doodlebug Design (Farmhouse Cardstock 12×12 Paper Pack); Stamp: Hero Arts (Hello Friend Stamp Set); Black Ink Pad: Ranger Ink; Sequins: Simon Says Stamp!; Metallic Thread: Krenik

Save to Pinterest!

Hey There Card by Teri Anderson for  Scrapbook Adhesives by 3L Pinterest

Visit our Website and Blog!
Sign up for our Newsletter so you never miss a contest or giveaway!
instagram purple icon facebook icon purple pinterest purple icon twitter purple icon YouTube icon blog subscription purple icon

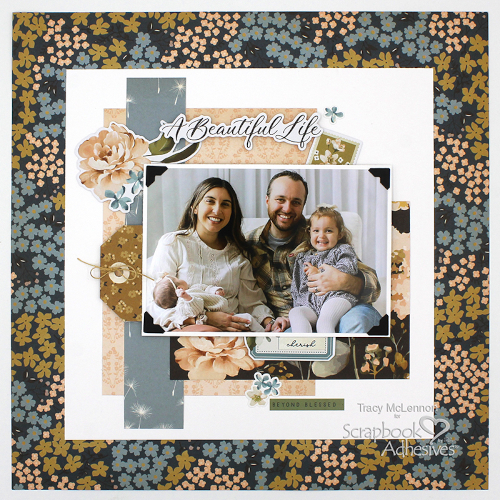
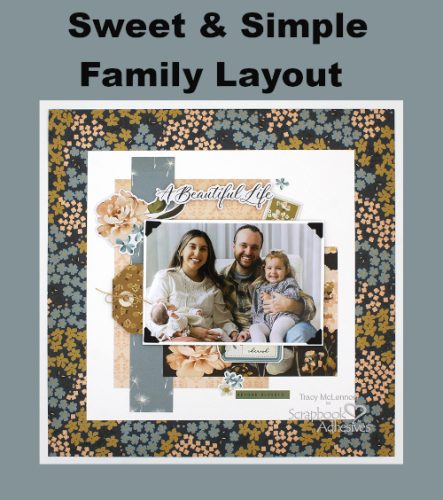
Sweet and Simple Family Layout

Hello crafty friends! Tracy here and today I have a Sweet and Simple Family Layout to share which I created in just a few easy steps. Here are all of the details.

Sweet and Simple Family Layout by Tracy McLennon for Scrapbook Adhesives by 3L

Let’s Get Started!

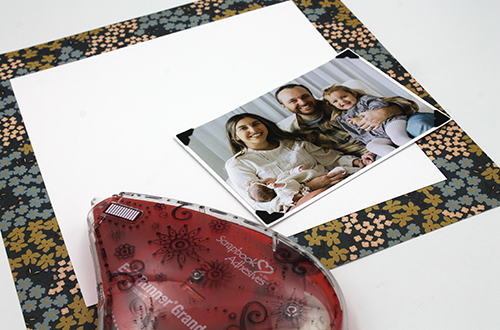
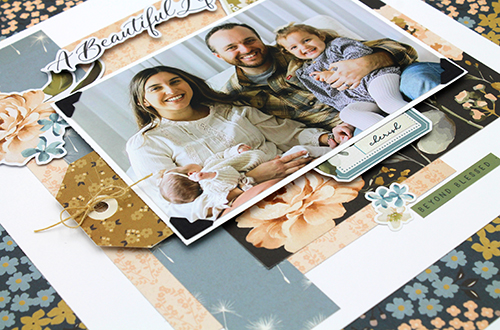
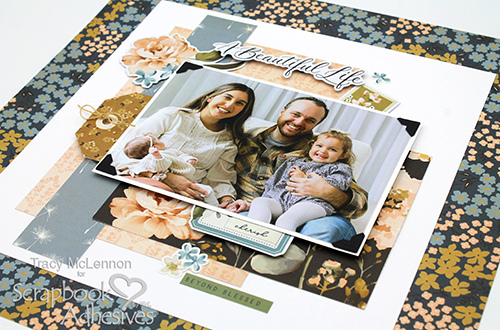
First step was to choose the patterned paper background and then I cut a piece of 9.25″ square white cardstock. Adhere these layers together using the E-Z Runner® Grand Refillable Dispenser. Next cut a white cardstock mat for the 4×6 photo, and secure with Creative Photo Corners Black. Set aside for now.

Sweet and Simple Family Layout by Tracy McLennon for Scrapbook Adhesives by 3L

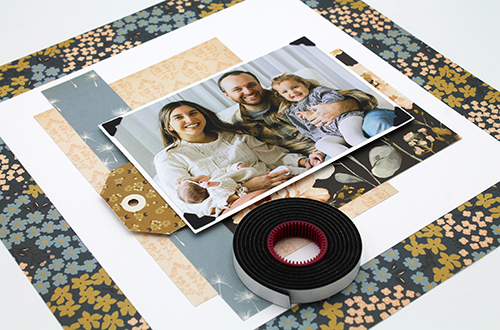
Cut a few pieces of patterned paper for the layered background. Adhere them to the layered background using the E-Z Runner® Grand Refillable Dispenser. This is the base for this simple family layout. Add the matted 4×6 photo now using Crafty Foam Tape Black. At this time I also added the patterned tag to the left hand side of the matted photo, again using Crafty Foam Tape Black.

Sweet and Simple Family Layout by Tracy McLennon for Scrapbook Adhesives by 3L

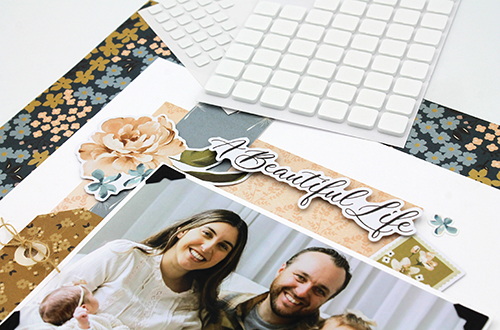
Start adding coordinating embellishments around the matted photo. Some are adhered straight to the background. Others are added using a combination of Thin 3D Foam Squares White Mix and 3D Foam Squares White Mix.

Sweet and Simple Family Layout by Tracy McLennon for Scrapbook Adhesives by 3L

Add a burlap string bow to the tag. As well as more embellishments around the matted photo.

Thanks so much for stopping by!
Tracy

Creative Time: 45 minutes
Skill Level: Beginner

Materials needed:
Scrapbook Adhesives by 3L®:
Thin 3D Foam Squares White Mix
3D Foam Squares White Mix
Crafty Foam Tape Black
E-Z Runner® Grand Refillable Dispenser
Creative Photo Corners Black

Other: Simple Stories: Remember Collection; White Cardstock; Natural Burlap String

Click Preferred Retailers List

Save to Pinterest!

Sweet and Simple Family Layout by Tracy McLennon for Scrapbook Adhesives by 3L Pinterest

Visit our Website and Blog!
Sign up for our Newsletter so you never miss a contest or giveaway!
instagram purple icon facebook icon purple pinterest purple icon twitter purple icon YouTube icon blog subscription purple icon