
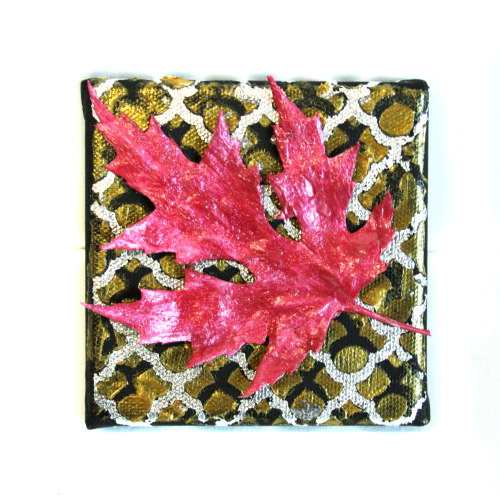
Hello blog readers! It’s Angela hosting today and I’m sharing a layered masking technique featuring the highly versatile Scrapbook Adhesives by 3L® Adhesive Sheets – 4×6“. Here’s the finished project. The photo tutorial follows. Enjoy!
 Tutorial
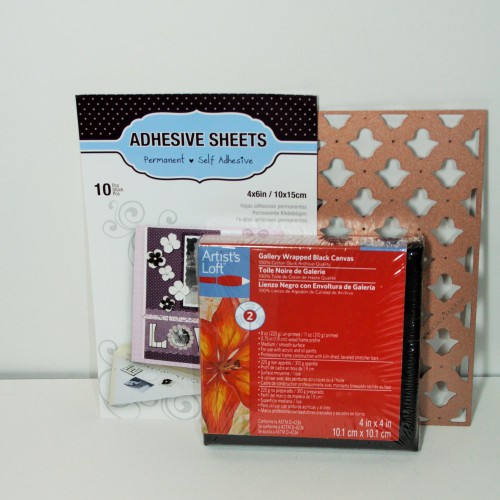
1. Gather a small canvas, your Adhesive Sheets and a die. Open dies with lots of negative space work best.
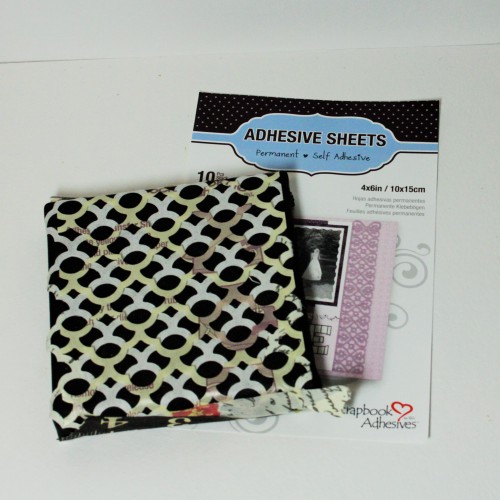
2. Cut the Adhesive Sheet with the die. Peel away the yellow backing in one piece (Do NOT Discard) and adhere the Adhesive Sheet to the canvas.
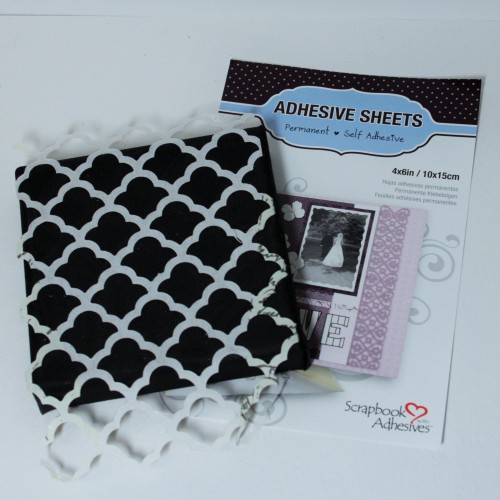 3. Place the die cut yellow backing piece from Step 2 over the die cut Adhesive Sheet on the canvas. Tape into place.
4. Fill the open spaces with a wet media of your choice. I used a gold embossing paste.
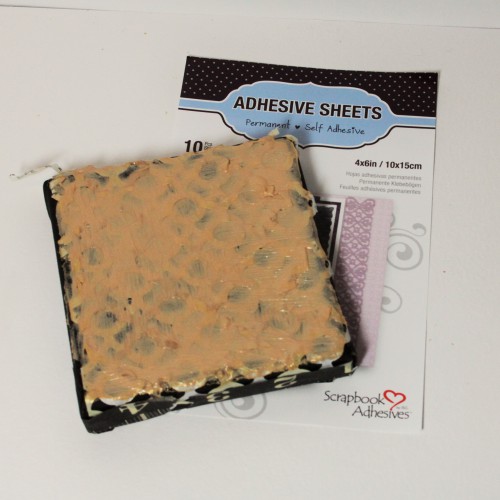
5. Remove the yellow backing mask and then the white sheet on the die cut adhesive. Do this when the piece is still wet.
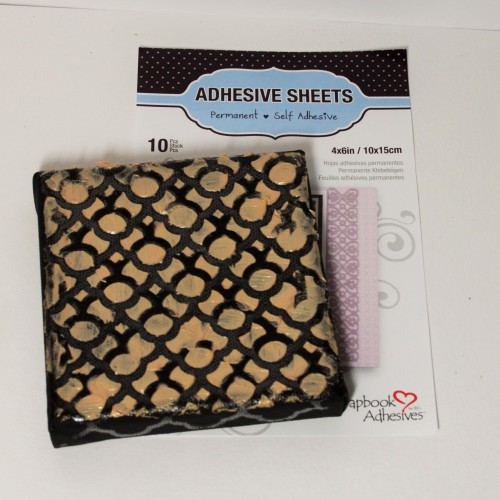
6. Let dry. Don’t worry about the exposed adhesive, it will remain sticky. I left my project out overnight without any problems.
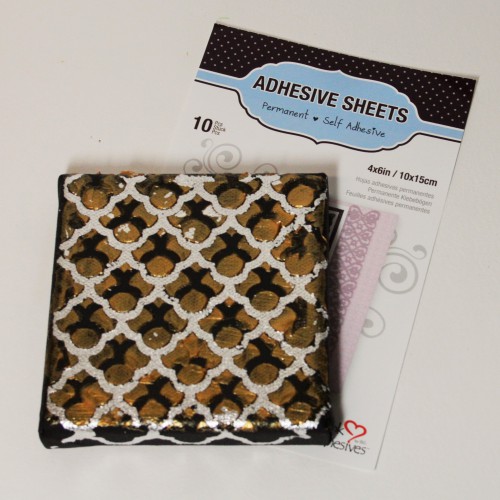
7. After the wet media has completely dried, cover the exposed adhesive with a dry media of your choice. I used silver leafing, but glitter or embossing powder would work equally well.
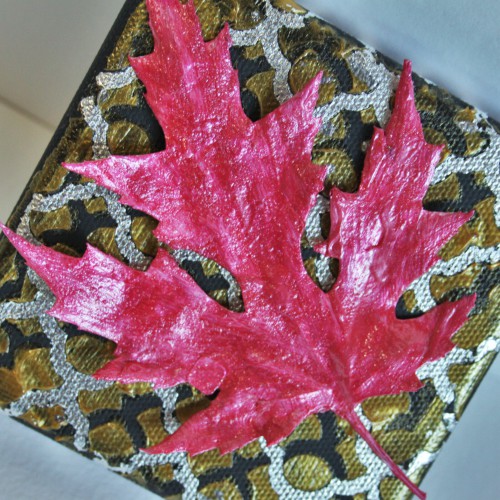
8. Embellish the canvas according to your preference. I painted a maple leaf with bright pink paint and adhered to the canvas with 3D Foam Squares – Black, Small. Here’s a close up view of the final project.
Thanks for stopping by today.
Angela
Scrapbook Adhesives by 3L® Supplies Used: Adhesive Sheets 4×6″, 3D Foam Squares Black, Small
Other Supplies Used: Spellbinders Paper Arts die and die cut machine, Wendy Vecchi gold embossing paste, Martha Stewart for EK Success silver leafing, Art Anthology paint, Artist’s Loft black mini art canvas
By Deborah S September 22, 2014 - 11:40 am
What a gorgeous project I love the silver leaving what a great multi medium project thank!
By Janet Castle September 23, 2014 - 11:17 am
Lovely canvas…..love what you did with the double embossing paste…cool look!!!!
By Christine Kosmak October 4, 2014 - 7:19 pm
Oh dear, after seeing this project I now want to go and make some of my own, and maybe some to give as gifts!!! More things on my wish list!!!! TFS