
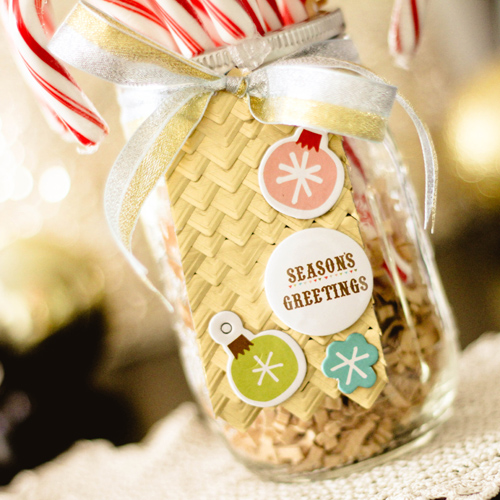
Hello there, it’s Latisha. So, a few weeks ago or so, I received my Design Team box, and included in the box was a ton, and I mean a ton of Scrapbook Adhesives by 3L® Gold Creative Photo Corners. I really couldn’t believe my eyes, and seriously wondered what I could possible do with them. Well folks, I layered the gold Photo Corners onto a tag, and I have to say, I’m really digging the results.
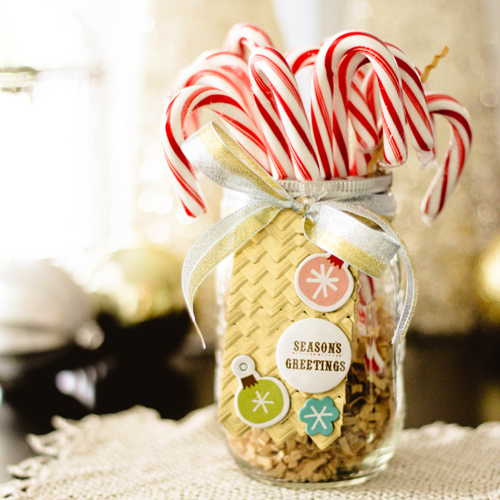
First, die cut a tag using scrap paper (because it was going to be covered). Then starting at the bottom of the tag, make layers in a straight line using the Gold Creative Photo Corners. Continue until the tag is completely covered, then trim around the tag using super sharp scissors. To embellish the tag I used flair along with some buttons, an adhered them using 3D Foam Squares.
I’ll be attaching this to a mason jar. You can fill the jar with some kraft filler and then add the candy canes to pop out of the top of the jar.
Attach the tag to the jar by simply wrapping the ribbon around the jar, bringing the tails through the hole of the tag, and tying a bow. I plan on putting this out on a coffee table, or even my island counter as a fun Christmas decoration.
- Creative Time: 15 Minutes
- Skill Level: Beginner
Materials Used:
- Gold Creative Photo Corners
- 3D Foam Squares White Regular
- Fancy Pants Designs Flair (Oh Deer! Collection)
- Fancy Pants Designs buttons (Oh Deer Collection)
- May Arts ribbon
- Mason jar
See several other examples of Creative Photo Corners used for Texture on this blog post:
By Margie Higuchi December 12, 2014 - 10:29 am
Just WOW, Latisha!! LOVIN’ the textured effect 🙂