
Today I am excited to be featuring Scrapbook Adhesives by 3L® adorable 3D Foam Easter Shapes set, 3D Foam Squares – Black, Regular, Pigment Powder – Brown and Pink, Adhesives Sheets – 4 x 6″ and E-Z Runner® Permanent Strips – Refillable adhesive to create this sweet Happy Easter card.
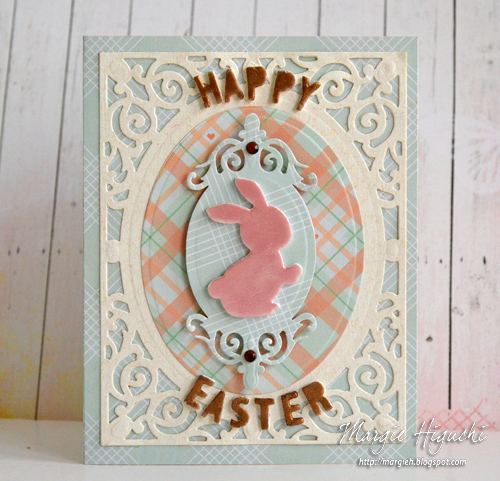
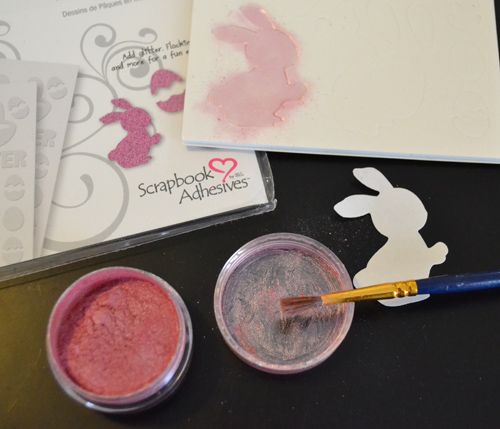
With the 3D Foam Easter Shapes set, I took off the liner from the Bunny shape and brushed lightly the Pigment Powder – Pink on the sticky surface. Love the shimmer and light color it gave the shape.
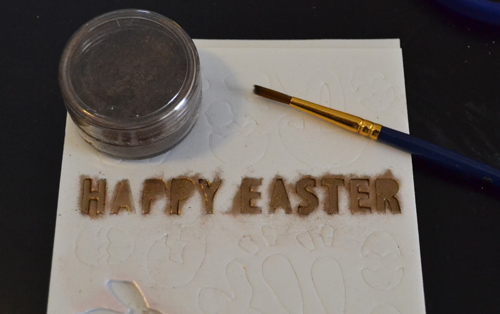
Then I repeated the same process with the “Happy Easter” sentiment with Pigment Powder – Brown.
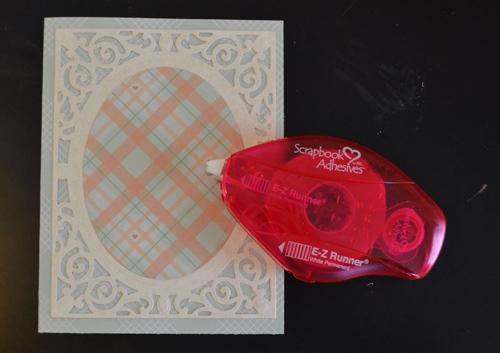
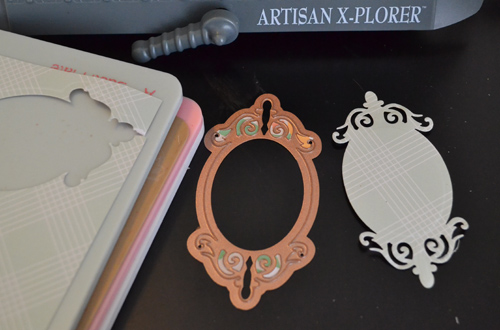
After creating an A2 (4¼ x 5½”) size card base out of patterned paper, I started working on the card panel by using A2 Filigree Delight die set. I used the Adhesive Sheets – 4×6″ sheet for the Frame die cut and for the Oval die cut, I used E-Z Runner® Permanent Strips – Refillable adhesive.

To highlight the Bunny shape, I used the Tag die cut to frame the shape and used 3D Foam Squares – Black, Regular to make it pop.
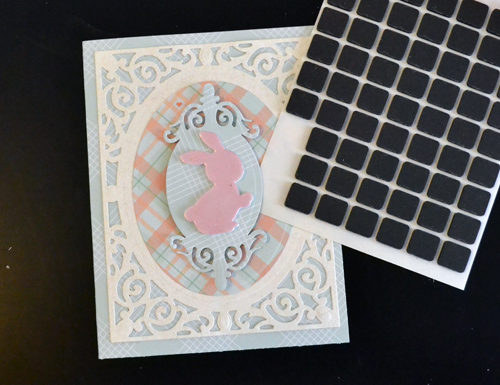
Assemble all the pieces and add “Happy Easter” to the card. Finished the card with two brown gems and it’s ready to send! Here’s another look…
Supplies:
Scrapbook Adhesives by 3L®: Pigment Powder – Pink and Brown, E-Z Runner® Permanent Strips – Refillable, Adhesive Sheets – 4×6″, 3D Foam Easter Shapes and 3D Foam Squares – Black, Regular
Die: Spellbinders® Paper Arts (S5-177 A2 Filigree Delight)
Patterned Paper: Chickaniddy (Date Night Collection)
Cardstock: WorldWin Papers (Canvas)
Gems: Want2Scrap©
Happy (early) Easter 🙂
MargieH
By Leslie Webster March 18, 2015 - 11:01 am
Sweet card, love the idea of using Pigment Powders on the foam.
By Kimberly March 25, 2015 - 3:16 am
So adorable! Love that bunny!