
Hello everybody! Asia King here and today I am sharing a card that was inspired by a project created by my super talented teammate Angela Ploegman. Angela made this awesome Chic Treat Bag using gold leaf and Adhesive Sheets. I loved the textured shimmer so I wanted to try gold leafing, too! I happened to have some clear acrylic pieces to hand so I thought I would try to apply the gold leaf to an acrylic sheet.
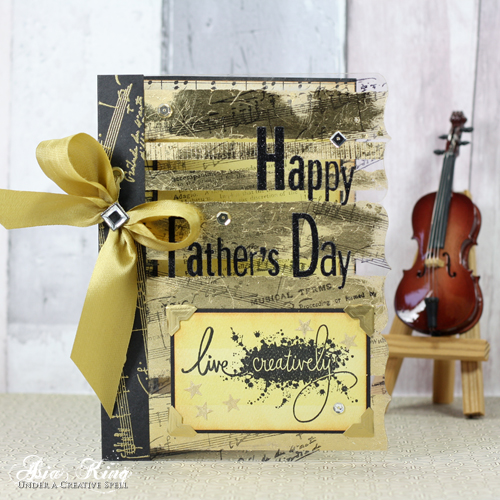
So here’s the result of my efforts and a full tutorial for my card. Let’s begin!
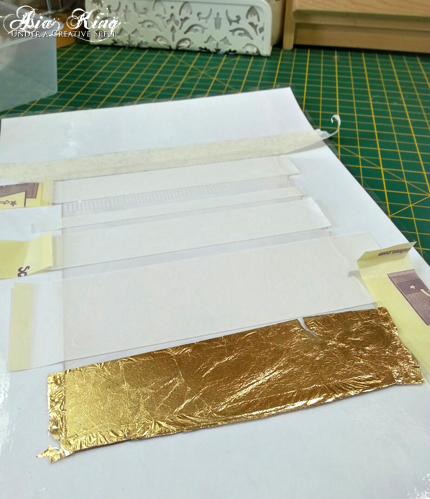
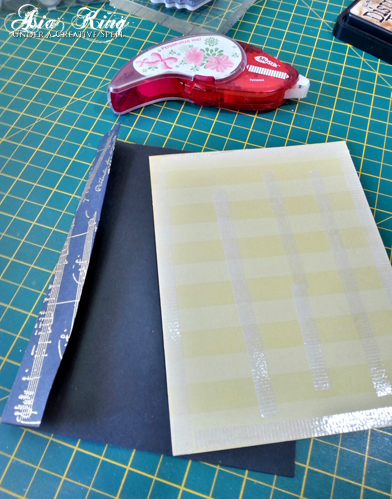
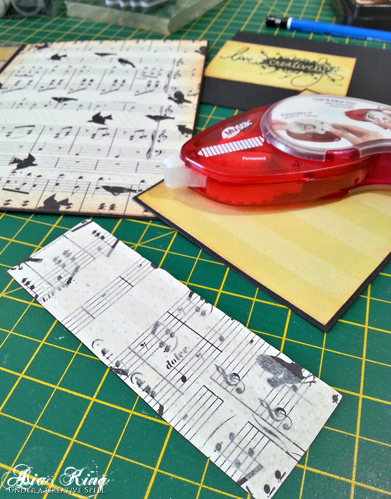
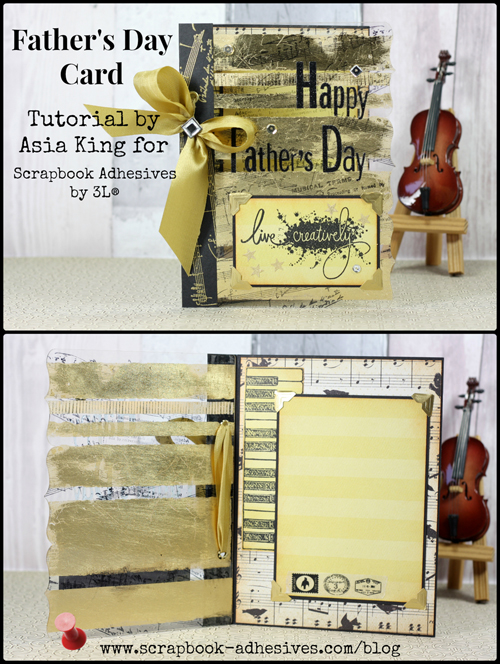
1. Cut several strips of Adhesive Sheets in varying widths. Arrange them loosely on the acrylic sheet to make sure you are happy with the layout.
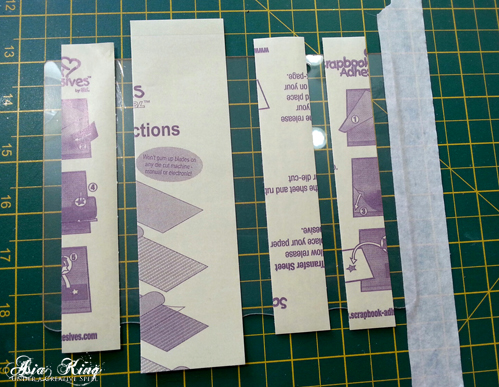
2. Peel off the yellow backing and apply the adhesive to the acrylic sheet. Take a break between the strips, if required :).
3. Fill in any remaining gaps with MyStik® Permanent Strips for added texture.
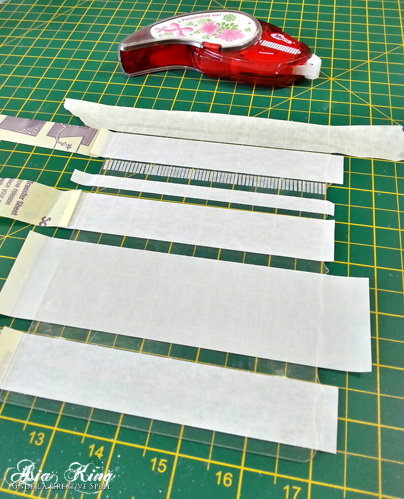
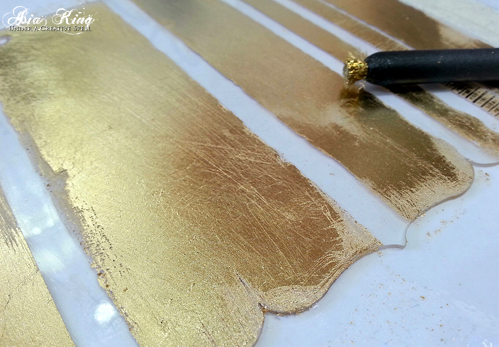
4. Remove the white protective sheet from the adhesive and apply gold leafing in sections.
5. Using a metal distressing tool add random tears and scratches for a distressed, worn look.
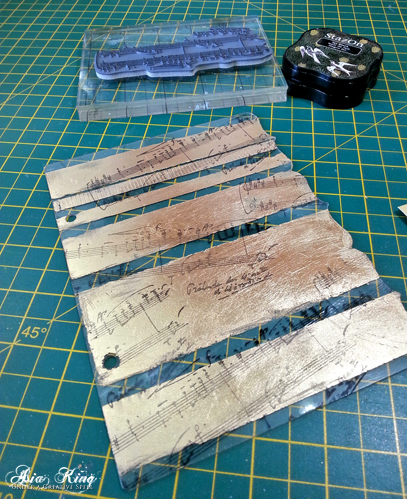
6. Stamp the music themed background images with black StazOn ink directly onto the acrylic piece and gold leafing.
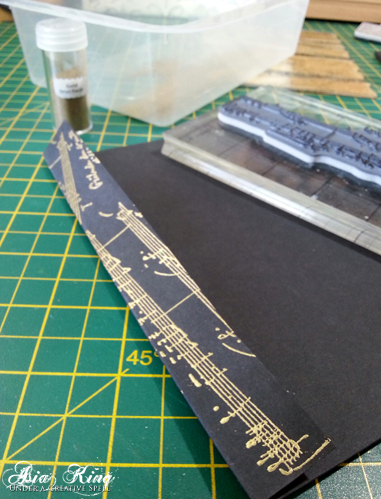
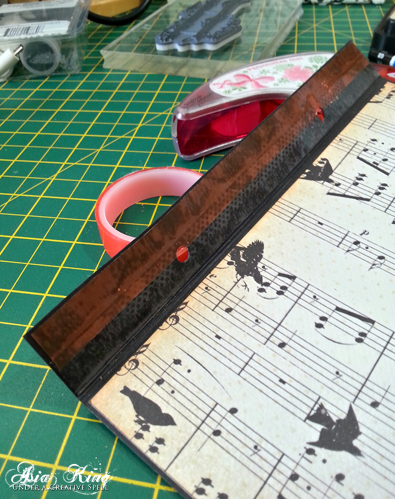
7. Using your acrylic piece as a guide, trim a piece of black card stock as tall as the acrylic piece and 3/4 inch wider than the acrylic. Score along the card to create a 3/4 inch fold as shown. This will become your card’s insert/base.
To embellish the fold, stamp music notes with clear embossing ink and heat emboss it in gold.
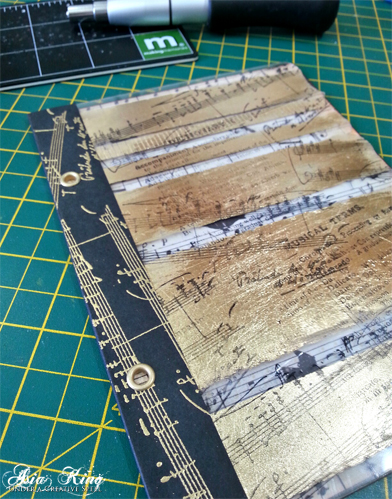
8. Trim the patterned paper to fit within the card base and adhere using MyStik® Permanent Strips.
9. Wrap the fold around the acrylic front and secure it using Extreme Double-Sided Tape 1/2″.
10. Punch a couple of holes and inert two gold eye lets.
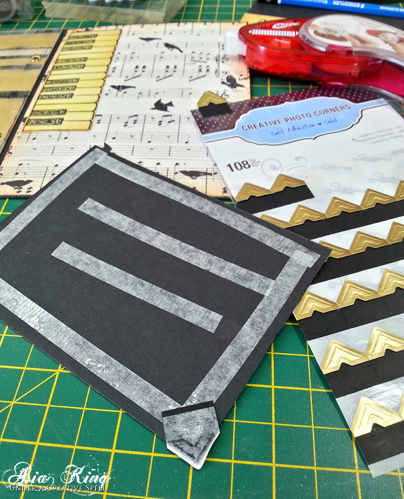
11. Stamp additional images onto the pattern paper, ink the edges and mat with black cardstock.
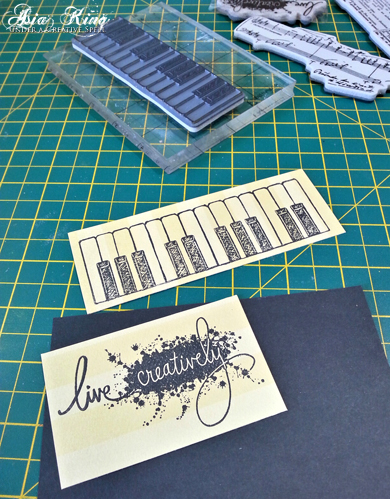
12. Adhere the elements with MyStik® Permanent Strips.
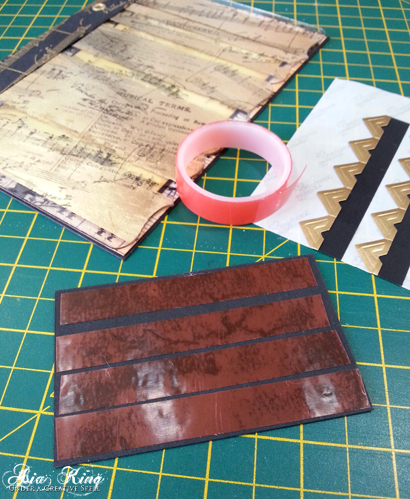
 13. Embellish the paper panels with Gold Creative Photo Corners.
14. Secure the sentiment panel to the acrylic front with Extreme Double-Sided Tape 1/2″.
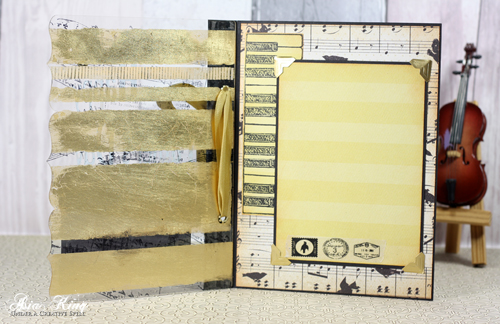
15. Add a few stars and cover them with left over gold leafing. Finish the card with a ribbon, glitter alpha stickers and sequins.
And here are some close ups of the finished card.


I hope you enjoyed today’s tutorial. Don’t forget to bookmark it/pin it for future reference!
Supplies I used:
Adhesive Sheets, MyStik® Permanent Strips, Extreme Double-Sided Tape 1/2″ from HomeHobby by 3L®, Gold Creative Photo Corners
Other supplies used:
- Papers – Authentique Song 12×12″ (Harmony collection)
- Stamps: Stampendous Mixed Media Cling Rubber Musical Motif, Cling Live Creatively
- Embossing powder – Stampendous Gold Detail Embossing Powder
- Inks: Jet Black StazOn Mini (Tsukineko), Tea Dye Distress Ink (Ranger Ink), clear embossing ink
- Acrylic sheet – from Clear Scraps Mixable Lovely 5.75 x 7 Album
- Ribbon – May Arts
- Alpha Stickers – K&Co
- Gold leafing
Have a fabulously creative week!
Big crafty hugs

By Ros Crawford May 15, 2015 - 4:52 am
This is absolutely stunning!! I need to get some of that foil!
By Asia King May 15, 2015 - 9:00 am
Thank you so much Ros!