
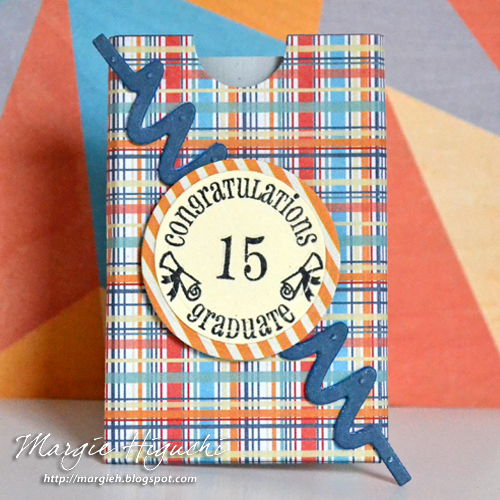
Did you know you can easily cut our 3D Foam Creative Sheets with a wafer thin die?! Let me show you how I created a fun dimensional accent on my gift card holder for an upcoming graduate. Can you believe it’s that time of the year?!
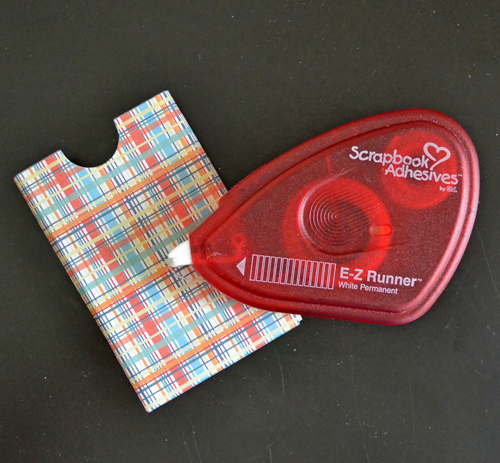
Let’s assemble the holder. I used a die template to cut out a pocket, scored and adhered it with E-Z Runner® Permanent Strips.

For the accent piece, I cut a strip of the 3D Foam Creative Sheets because I only needed just enough for the die template. With about the same size patterned paper, I place over the 3D Foam piece. The die was placed last and then cut/embossed through my manual die cutting machine.
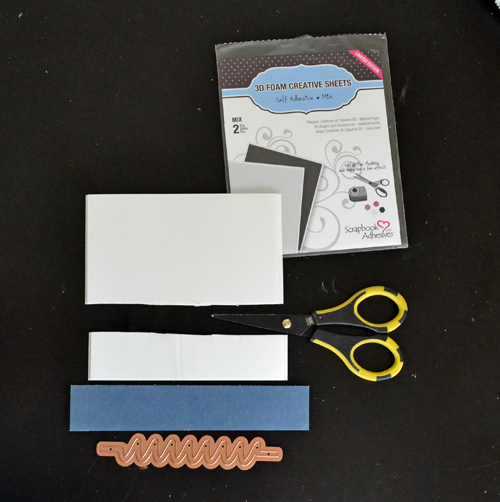
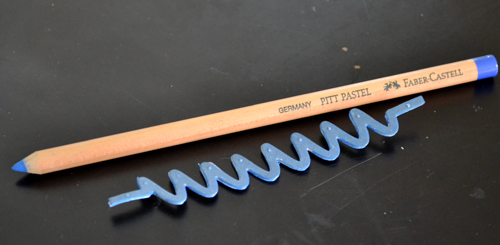
To finish the edges, I colored it using a pastel pencil that had a similar tone of blue. I placed the foam die cut diagonally on the front of holder by removing the back liner.
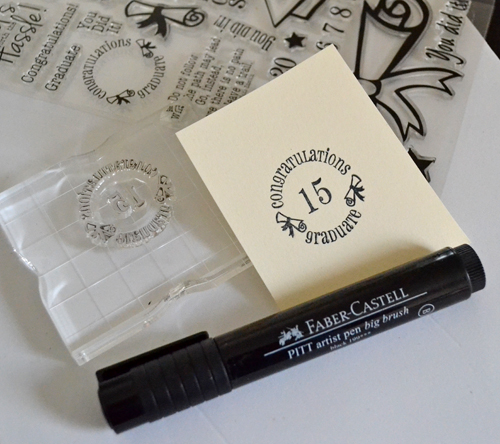
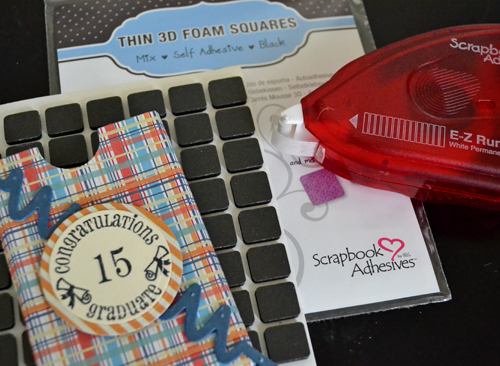
Next I stamped the sentiment onto cream cardstock, placed a circle die over it and cut/embossed. It needed a mat to dress it up a bit so I adhere a larger sized circle die cut with E-Z Runner® Permanent Strips. Then I applied 3D Foam Squares – Black, Regular on the back of the stamped circle. Adhere over the accent piece.
Insert the gift card and it’s ready to be given!
Supplies List:
Scrapbook Adhesives by 3L®: 3D Foam Creative Sheets, E-Z Runner® Permanent Strips and 3D Foam Squares – Black, Regular
Patterned Paper: Authentique Papers (Playful Collection)
Cardstock: Darice/Core’dinations ColorCore Cardstock (Cream)
Die: A Jillian Vance Design ({die}signer Pocket) and Spelbinders® Creative Arts (S4-114 Standard Circles LG, S4-116 Standard Circles SM and SCD-014 Embellish It)
Stamp: A Jillian Vance Design (Con{GRAD}ulations Stamp Set – retired)
Colors: Faber-Castell® Design Memory Craft® (Pastel Pencil #145 and Pitt Artist Pen Big Brush Black)
Other: Gift Card
For more graduation themed inspiration, visit graduation projects by Scrapbook Adhesives by 3L!
As always, thank you for visiting!
MargieH
By Stefanie May 21, 2015 - 4:10 pm
You always make it look so easy! I’m all thumbs with crafty things!