
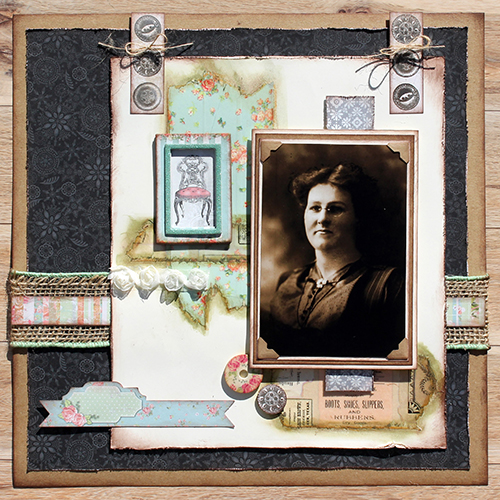
Today I am sharing a heritage scrapbook layout with a fun way to use Premium Double-Sided Tape 1in Permanent. I love scrapbooking vintage or heritage photos. I’m fortunate to have huge collections of photos from both sides of my family. Documenting the time before my parents’ generation is just so very important to me.
Creating my Heritage Scrapbook Page
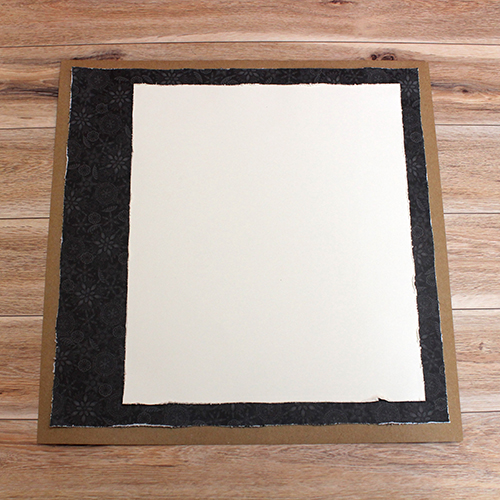
Start by creating the layered background with patterned paper, kraft and cream cardstock. Then distress the edges of these layers to create some vintage texture but do not adhere the cream cardstock to the background yet.
Instructions from the Step Out Images
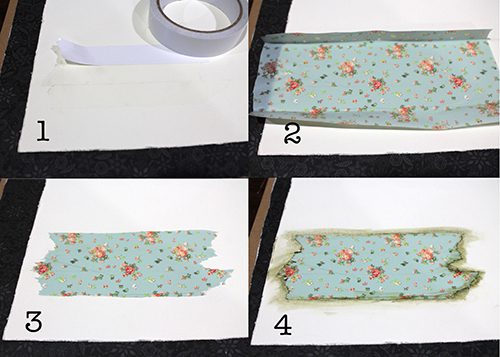
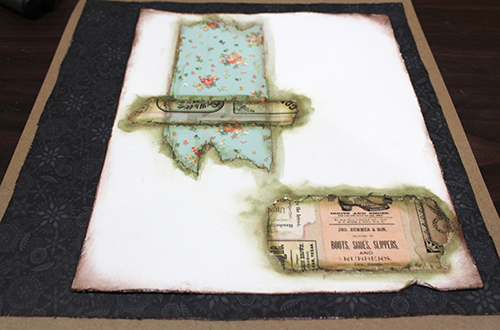
- On the cream cardstock layer, add strips of Premium Double-Sided Tape 1in with ends torn and not cut.
- Add patterned tissue paper on top of the taped section.
- Tear off tissue paper that does not adhere to the tape.
- Using watercolour crayons, add colour around the edges of torn tissue paper. Then with a water brush blend the colour.
Add a single strip of the Premium Double-Sided Tape 1in over the section that I just completed, as well as another section in the bottom right-hand corner of the cream cardstock.

Next, add a brown toned tissue paper to both of these sections, and tear off excess tissue. Again I added colour to the edges using watercolour crayons and blended the colour using a water brush.
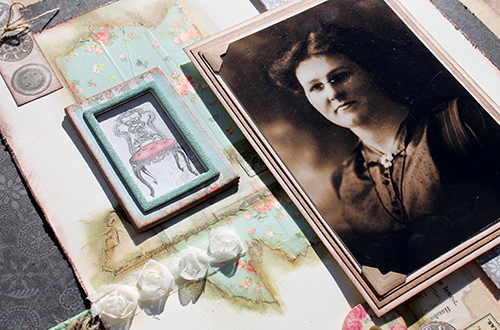
Then add the burlap ribbon and the strip of patterned paper that is on top of the burlap ribbon by using Extreme Double-Sided Tape 1/8in. Burlap is notoriously hard to adhere to anything, but the Extreme Double-Sided Tape has you covered.

Adhere the cream cardstock layer to the background layers with 3D Foam Squares because you can bring the layer to the same level as the burlap ribbon underneath.

By adding lots of layers including patterned paper, embellishments and rosette ribbon, I bring dimension which means I use a lot of my favorite 3D Foam Squares!
I triple matted my photo and accent with Creative Photo Corners Kraft, then adhered it to the layout using two stacks of 3D Foam Squares. Not only do these Creative Photo Corners Kraft match this layout perfectly, but they also give that fabulous vintage feel to the photo.
Thanks so much for stopping by!
Tracy McLennon
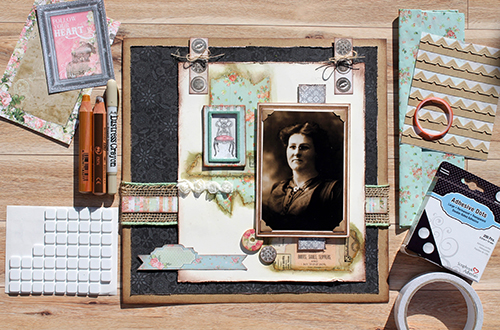
Scrapbook Adhesives by 3L®:
3D Foam Squares White Mix
Premium Double-Sided Tape 1in Permanent
Extreme Double-Sided Tape 1/8″
Creative Photo Corners Kraft
E-Z Runner® Grand Refillable Dispenser
Other:
Cardstock (Kraft, Cream), Ranger Distress Crayons, BoBunny Soiree Collection, Burlap Ribbon, Rosette Ribbon, Buttons
By Marjorie Dumontier October 24, 2017 - 6:40 am
This is a beautiful layout !!