
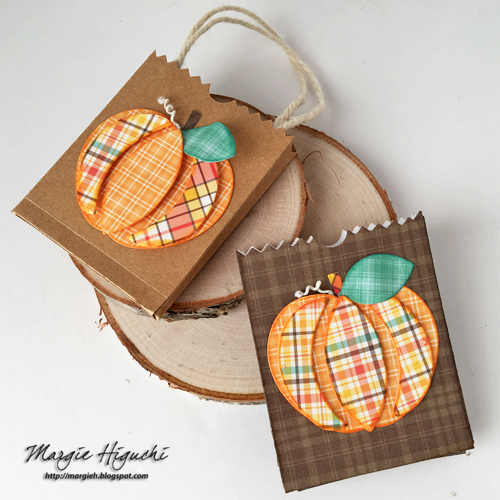
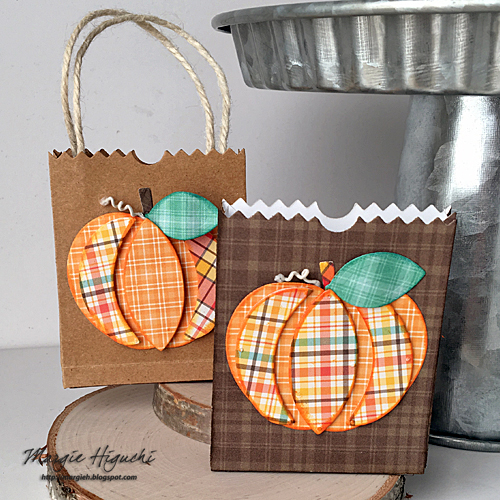
Fall is in the air and I had PUMPKIN on my mind so I pulled out 3D Foam Creative Sheets and my stash of etched dies from Spellbinders’ Market Fresh Collection to create my dimensional pumpkin bags!
Assemble these fun + sweet bags.
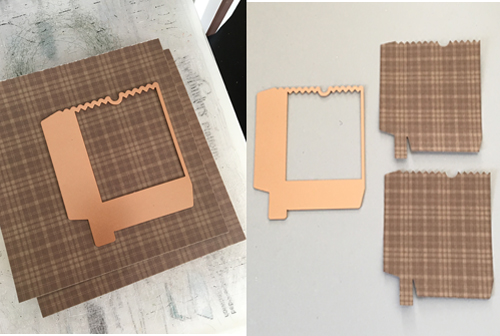
1. Cut two bag shapes with my manual die-cutting machine. If you are using patterned papers, make sure both cuts have patterns going the same way. I stacked my two papers together and cut…less confusion! LOL!
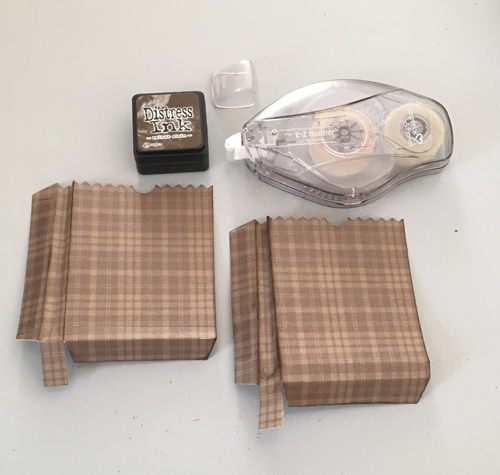
2. Next, let’s assemble the box. After scoring the folds, I inked the edges with Distress Ink in Walnut Stain and then adhered the tabs together with E-Z Runner® Ultra Refillable Dispenser…great for paper construction 🙂
Paper piecing pumpkins.
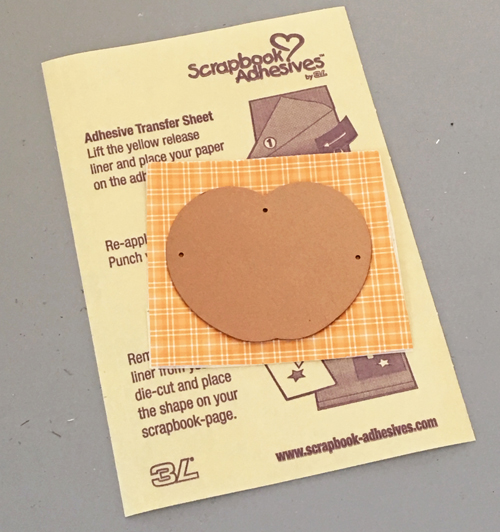
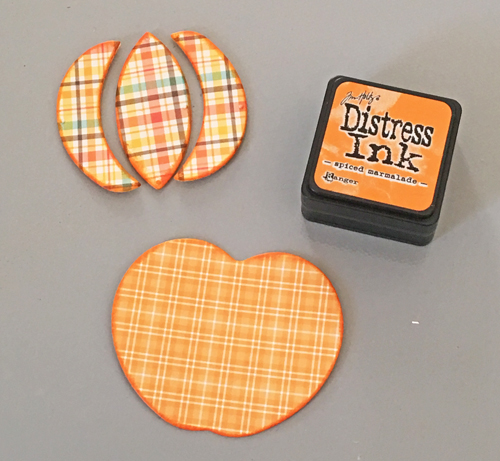
1. Cover your patterned paper with Adhesive Sheet 4 x 6″ and trim excess using your etched die as a guide. Die-cut patterned paper with Apple a Day Etched Dies Pumpkin Front Die. Set aside.
2. For the pumpkin sides, I wanted dimension so I grabbed a scrap piece of patterned paper and covered with 3D Foam Creative Sheets. Die-cut with Apple a Day Etched Dies Pumpkin Side Die twice and Apple/Pumpkin Center Die once.

3. Ink all of the die cut edges with Distress Ink in Spiced Marmalade. Then peel the bottom liner off and place on top of the Pumpkin Front die cut to make your dimensional pumpkin.
Making pumpkin details.
1. Using leftovers from the Adhesive Sheet 4 x 6″, adhere a piece of patterned scrap to cut your Apple a Day Etched Dies Stem Die. From the same set, cut Leaf Die from patterned paper, and ink the edges with Distress Ink in Spruce. Using a covered wire, I created a vine accent by wrapping around a paintbrush handle.
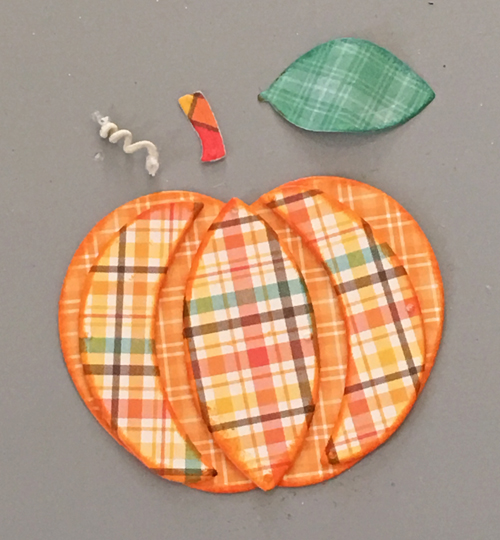
2. Adhere all on bag front in the following order:
- Peel off the bottom liner of the stem (using the pumpkin front die cut as a guide) and adhere.
- With a Dodz Adhesive Dots Mini, secure the vine accent down.
- Peel off the bottom liner of the pumpkin front die cut and center to the bag.
- Tuck the leaf die cut into the Dodz Adhesive Dots Mini, and then add an adhesive dot to the tip of leaf and press to adhere.
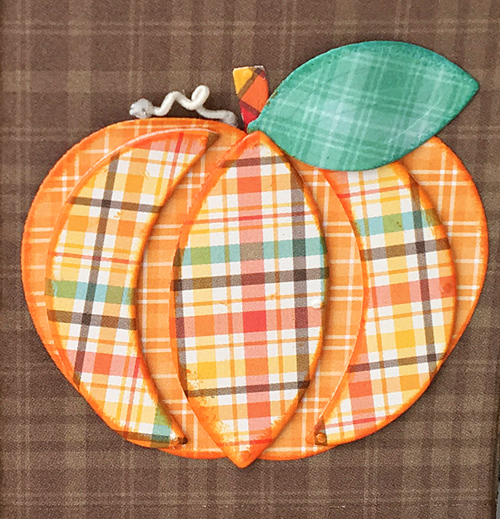
Here’s another look at the finished bags…
Do you have a fall themed project? Share link in comments – would love to see + visit!
Thanks for stopping by!
Margie Higuchi
Scrapbook Adhesives by 3L® Supplies:
E-Z Runner® Ultra Refillable Dispenser
Adhesive Sheet 4 x 6″
3D Foam Creative Sheets
Dodz Adhesive Dots Mini
Others:
Etched Dies: Spellbinders Paper Arts® (Apple a Day Etched Dies from the Market Fresh Collection by Debi Adams, Bag It n Tag It Etched Dies from the Market Fresh Collection by Debi Adams, and PL-001 Spellbinders® Platinum™ Die Cutting and Embossing Machine
Patterned Paper: Lawn Fawn (Perfectly Plaid Fall Collection)
Ink: Ranger Inks (Distress Ink)
Covered Wire: Prima Marketing Inc.
By Connie Mercer October 22, 2017 - 12:53 pm
So cool! I need to get some of these!
By Kirsty Vittetoe October 22, 2017 - 1:10 pm
Oh wow, fabulous!
By Marjorie Dumontier October 24, 2017 - 6:41 am
These bags are so cute and perfect for the season !