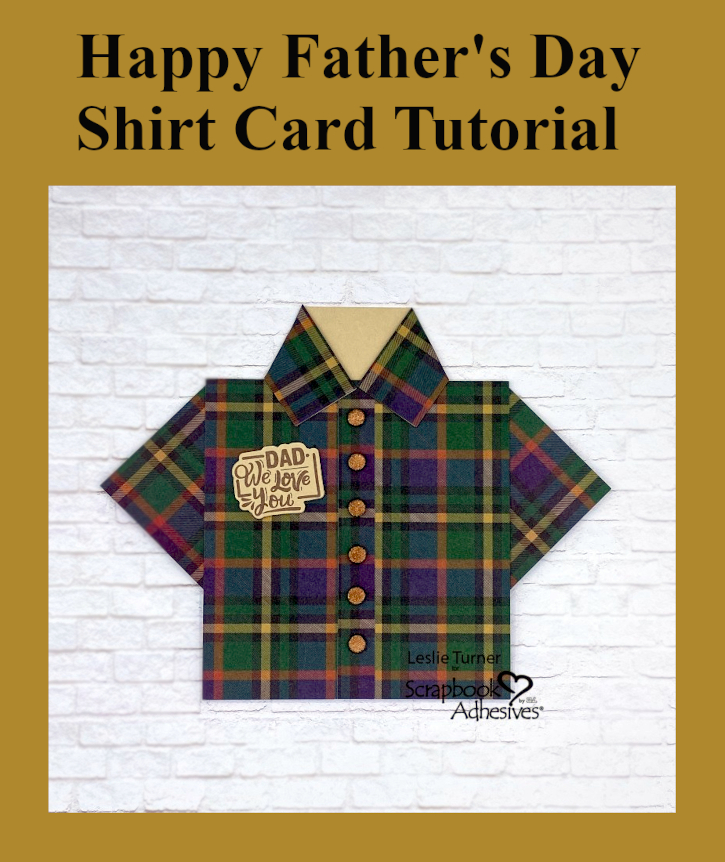
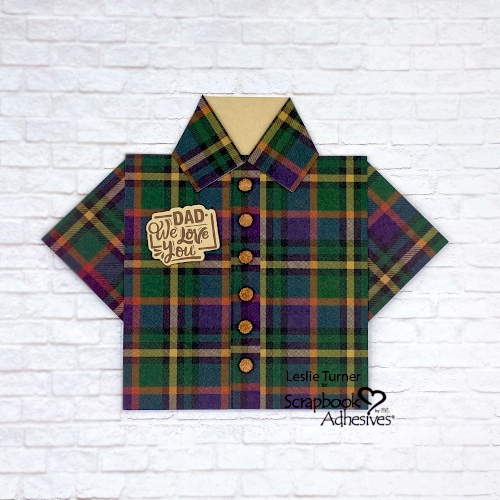
Hi friends, happy Hump Day – I hope you’re having a nice week! Do you have any Father’s Day card ideas in mind? It’ll be here in a few weeks and I have a fun Father’s Day shirt card tutorial for you. Leslie here, sharing my own design that I came up with last year, and I’ve made quite a few of them. So many, in fact, that my blog readers probably groan when they see another one, lol! But that’s okay… THIS one showcases our unique Wear Your Adhesive on the Outside technique. See those super cute buttons?! Let’s get started!
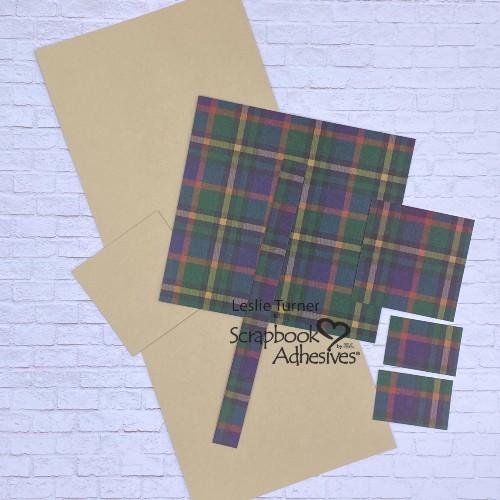
Cut the Card Base & Layers
KRAFT CARDSTOCK:
Card base: 4-1/4″ x 10″, scored at 4-1/2″
Sleeves: 2-1/8″ x 2-1/8″ square (will be cut in half diagonally)
PLAID PATTERNED PAPER:
Shirt front: 4-1/4″ x 4-1/2″
Sleeves: 2-1/8″ x 2-1/8″ square (will be cut in half diagonally)
Collar: 1″ x 1-1/2″ (cut two)
Placket: 1/2″ x 6″
Create the Collar
Fold the card base on the score line. You’ll notice the back flap is 1″ higher than the front flap. Place a piece of low-tack tape vertically down the center of the card base. Then make two pencil marks vertically at the 2-1/8″ point and connect them with a line.
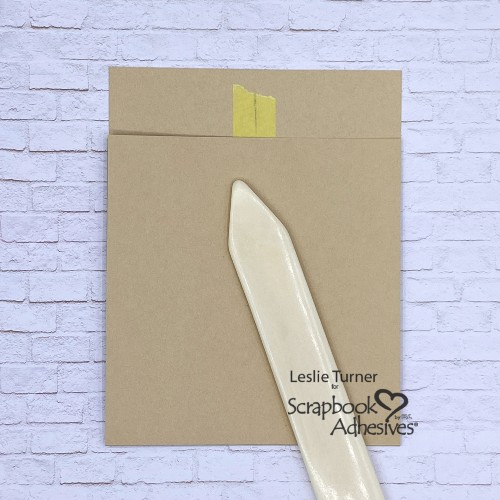
Unfold the card base and place it in your trimmer with the long edge across the top. The low-tack tape should be on your left. Measure 1″ inward from the left edge and make a 7/8″ cut downward from the top edge. Rotate the card base and repeat on the other side. These narrow flaps will form the collar on your Father’s Day shirt card.
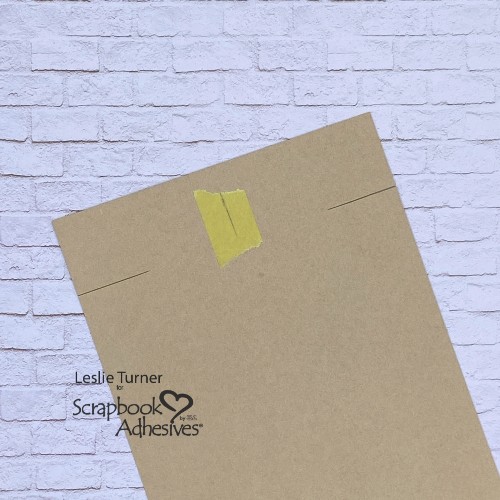
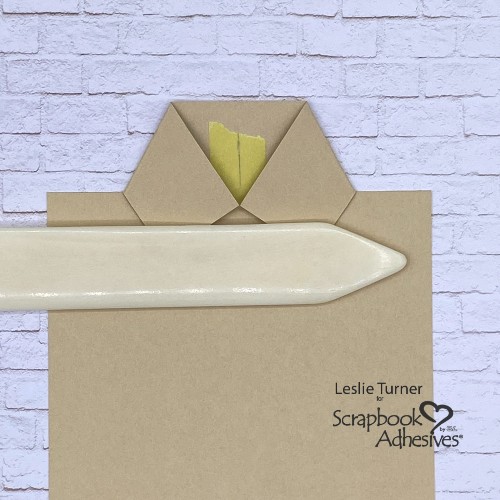
Carefully fold each narrow flap inward at an angle. The points on each flap should meet in the middle at the pencil line on the low-tack tape. Remove the tape.
Adhere the Layers
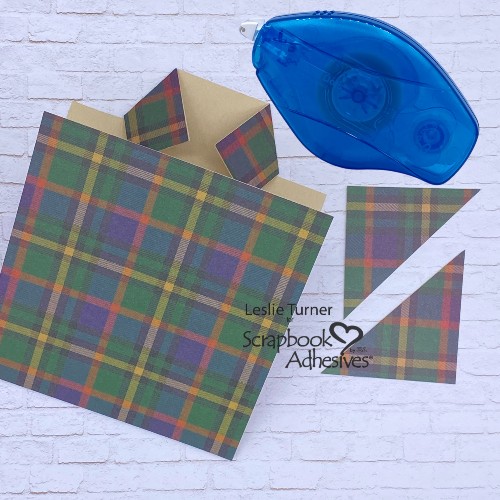
Firstly, adhere the patterned paper layer to the front of the Father’s Day shirt card base. I used the E-Z Dots® Permanent Refillable Dispenser for these steps.
Secondly, adhere the two collar pieces to each side of the collar and trim off the angled edges.
Thirdly, adhere the patterned paper square to the kraft cardstock square, and then cut in half diagonally.
Attach the Sleeves
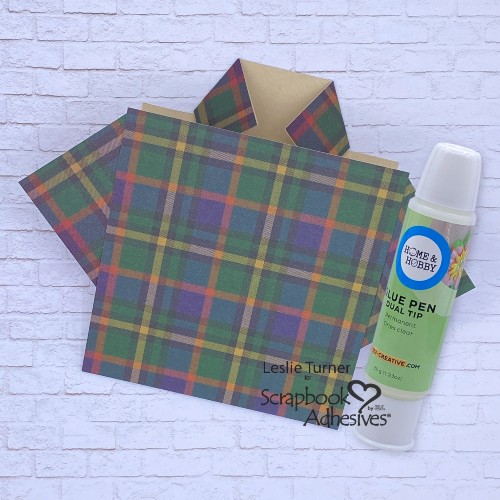
Apply a very thin line of glue from the Dual Tip Glue Pen to the long edge of each sleeve piece. Open the card and glue one sleeve to each side of the lower portion of the card base. You only need to go inward about 1/8″, and be sure to line up the points with the bottom edge. When you fold the card back up, the front should now look like this.
Finish the Collar & Add Placket/Buttons
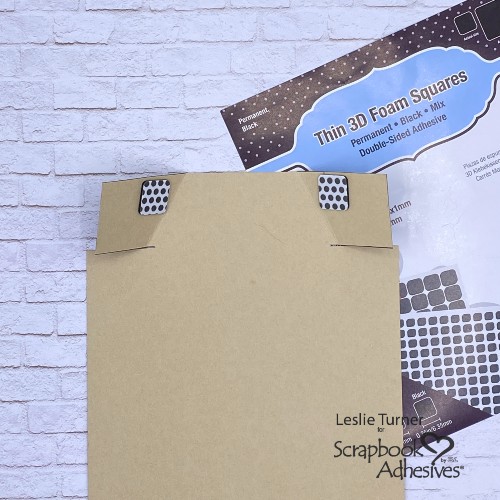
Add Thin 3D Foam Squares Black Mix to the inside of the collar flaps. Be mindful of the placement before adhering the flaps down so they don’t show. Line them up with the top edge and place them close to the fold line but don’t impede the fold line. Having these in place will help keep the card closed once assembly is complete.
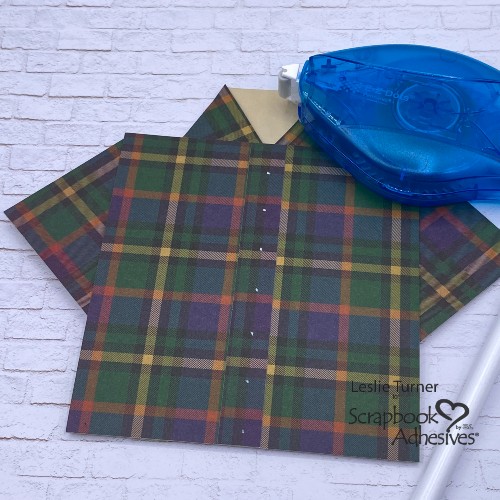
Once again using the E-Z Dots® Permanent Refillable Dispenser, add the placket down the center front. Trim off any excess at the bottom. With a ruler and white charcoal pencil, mark where you want your buttons to be placed. Made seven dots on mine but ended up rubbing off the bottom one. Designer tip: Just in case you decide to change the placement of your buttons, don’t use ink.
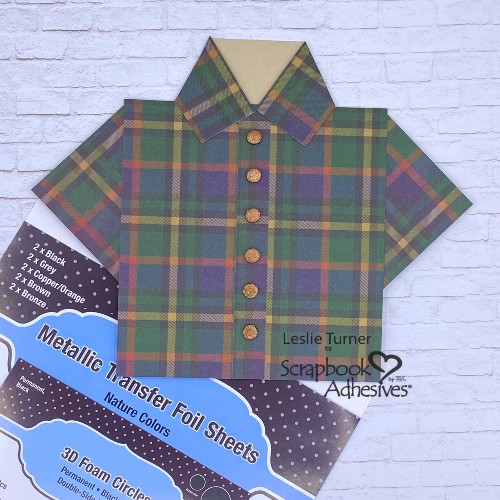
Let’s employ the Wear Your Adhesive on the Outside technique – my new favorite! Bronze foil from the Metallic Transfer Foil Sheets Nature Colors and 3D Foam Circles Black Mix worked great! Simply remove the liner from the circles and press the foil (color side up) onto them. Makes for some pretty buttons on this spiffy Father’s Day shirt card!
Add Sentiments & Complete Father’s Day Shirt Card
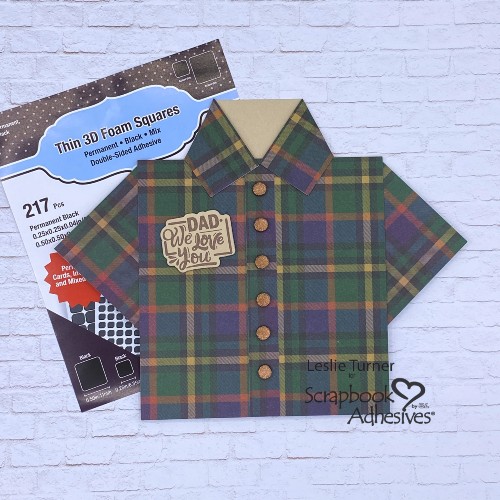
Front: Adhere a stamped and die cut sentiment with Thin 3D Foam Squares Black Mix.
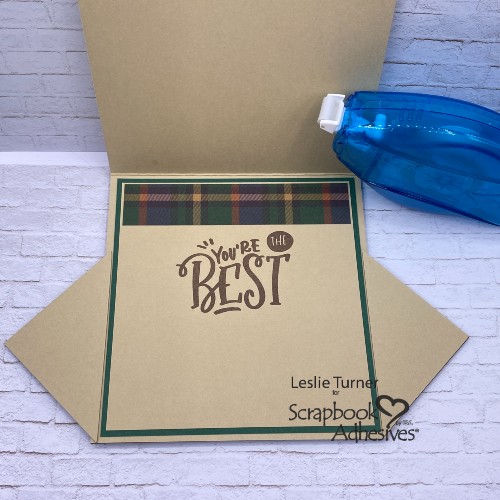
Inside: Add a sentiment panel layered with kraft and dark green cardstock. Assemble with E-Z Dots® Permanent Refillable Dispenser. Embellish with a strip of the patterned paper used for the shirt, and stamp a sentiment. Voila – your awesome Father’s Day shirt card is finished!
Thanks for visiting!
Leslie
Creative Time: 30 mins
Skill Level: Intermediate
Materials Needed:
Scrapbook Adhesives by 3L®
E-Z Dots® Permanent Refillable Dispenser
Thin 3D Foam Squares Black Mix
Metallic Transfer Foil Sheets Nature Colors
3D Foam Circles Black Mix
HomeHobby™ by 3L
Dual Tip Glue Pen
Other: Cardstock/Paper: CutCardStock Sandcastle and Lessebo Hunter Green cardstock, Craft Consortium Tartan 6×6 Double-Sided Paper Pad
Stamps: Brutus Monroe Remote King and Super Sentimental Stamp Sets
Ink: Catherine Pooler Over Coffee Ink
Dies/Punches: Brutus Monroe Remote King Die Set
Accessories: Fiskars 12″ ProCision Rotary Bypass Paper Trimmer, Mini MISTI, Big Shot
Click Preferred Retailers List
Save to Pinterest!