
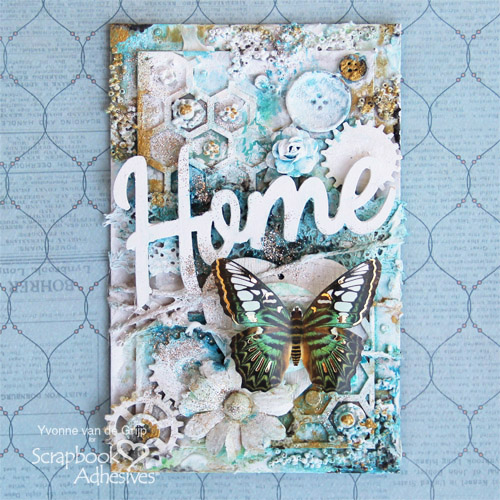
Mixed media art is about adhering many layers. Scrapbook Adhesives by 3L® has all the adhesives you need to assemble your mixed media artwork! Hello everyone, Yvonne here sharing how to make a Home mixed media artwork on chipboard.
Are you ready to create your own piece of artwork? Let’s get started!
Building the Layers of a Home
Mount a rectangle piece of chipboard onto a slightly larger piece of chipboard using Extreme Double-Sided Tape 1/8in.
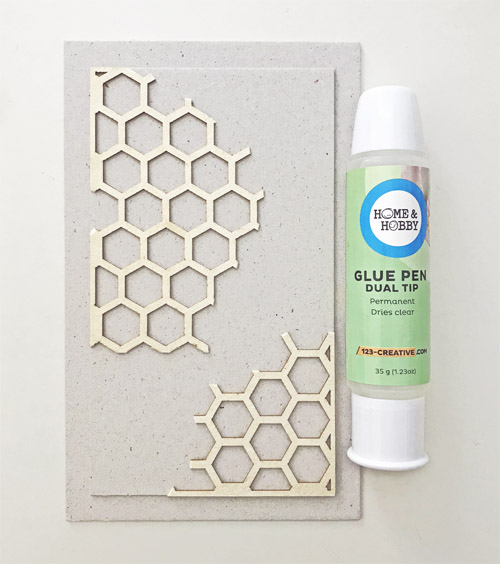
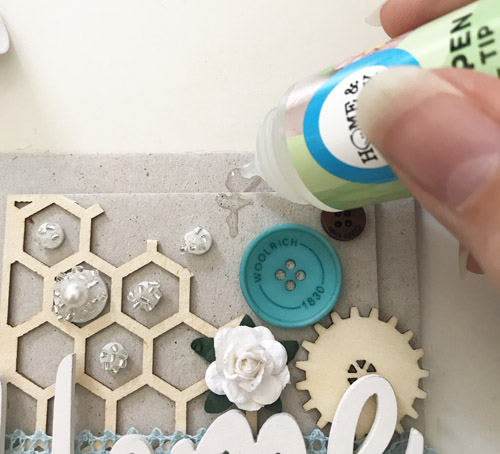
Glue pieces of honeycomb-shaped laser cuts onto the two corners of the smaller chipboard as shown below using the Dual Tip Glue Pen.
Place ribbon across the center of the base also using the Dual Tip Glue Pen
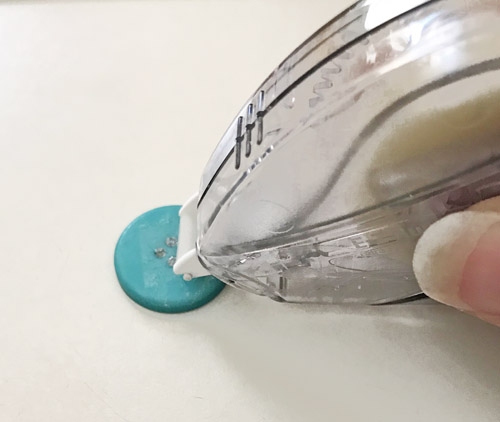
Adhere the buttons, flowers, wooden heart and gears with the E-Z Runner® Ultra Strong Refillable Dispenser
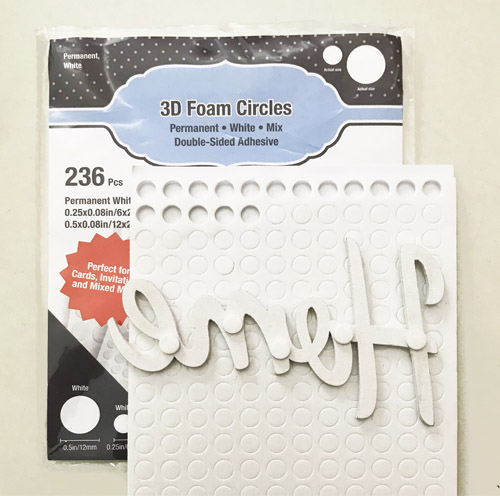
Adhere the wooden word element, Home, onto the base using 3D Foam Circles White Mix for dimension.
Next, randomly place 3D Foam Circles in spaces in between the honeycomb designs, pull off the liner and sprinkle small beads on top. Push the beads into the circles to secure.

Use the Dual Tip Glue Pen to pool glue onto the outer parts of the chipboard and sprinkle tiny beads on top and let dry (or use a heat tool to speed up drying time).
Wrap twine around the base, below Home, three times and knot the end.
Adding color:
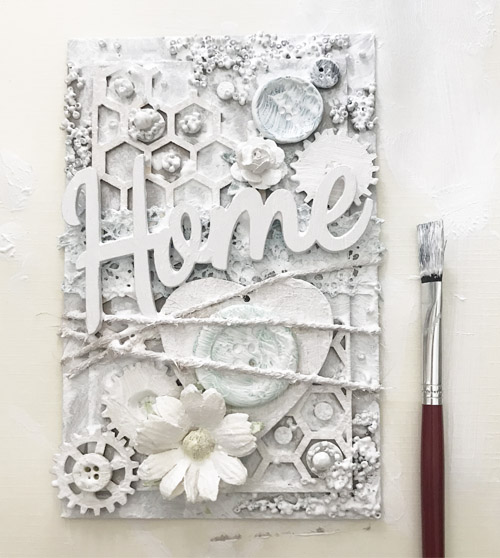
You have finished the base of your Mixed Media Artwork. Let the real magic begin ?
Apply gesso to the collage for a good foundation to paint on. Dry thoroughly before starting.
Add accents using metallic acrylic paint. Use a water mister to help spread the paint. Make sure to turn your artwork so the paint runs into all the nooks and crannies of the layers.
Use a paper towel to remove any excess paint and also to dab extra paint into the details.
I kept the Home wooden element a crisp white to make it stand out from all the colors.
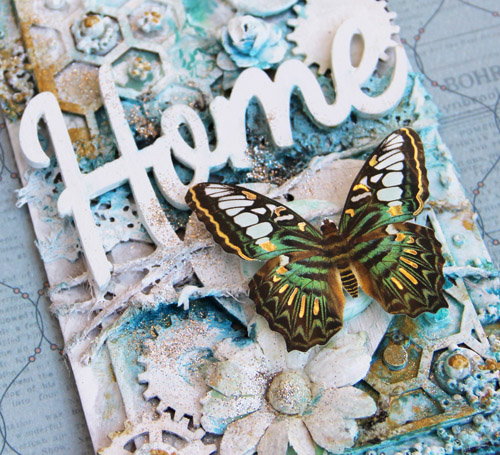
Randomly sprinkle glitter while your artwork is still wet so it sticks to the paint. Let dry again.
For the finishing touch to the collage, adhere the butterfly image with 3D Foam Circles White Mix. Tip: slightly bend the butterfly wings to make it more dimensional.
I hope you enjoyed the instructions and wish you lots of fun creating your own mixed media piece of artwork!
Happy crafting,
Yvonne
- Creative Time: 90 minutes
- Skill Level: Advanced
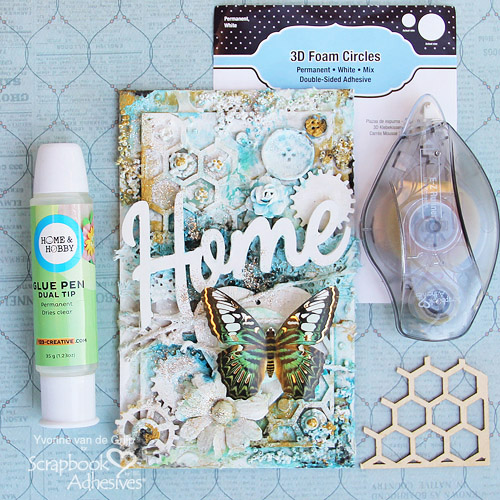
Materials needed:
Scrapbook Adhesives by 3L®:
3D Foam Circles White Mix
E-Z Runner® Ultra Strong Refillable Dispenser
HomeHobby by 3L®:
Extreme Double-Sided Tape 1/8in
Dual Tip Glue Pen
Others:
Chipboard, embellishments (laser cut honeycomb, wooden heart, gears and home element, buttons, beads, flowers, twine, gesso, acrylic paint, mister, paintbrush, paper towel, scissors