
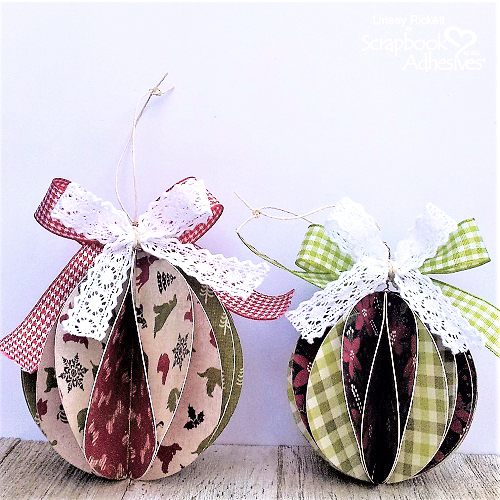
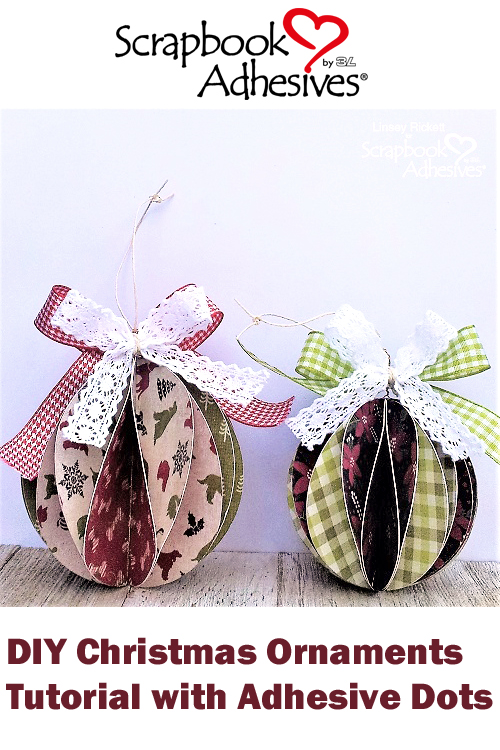
DIY Christmas ornaments are easy and fun to make! With the holiday season just about upon us, it’s that time of year for making handmade gifts! These ornaments will bring a bounty of cheer and joy to all!
Hello friends, Linsey here today sharing this simple DIY craft that is fun for the whole family! I was inspired by ornaments I’ve seen online. So grab the kids and let’s get to making!
Let’s Make Christmas Ornaments
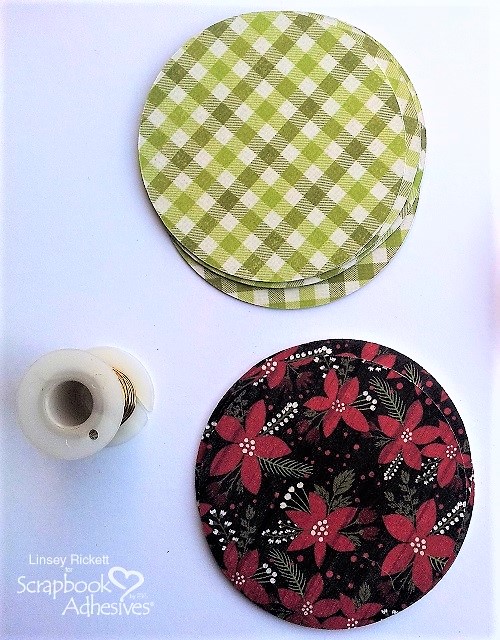
- Cut 12 circles out of cardstock/patterned paper in whatever size you want your ornaments to be. I made a 3″ bauble and a 2 1/2″ bauble, thus 12 3″ circles and 12 2 1/2″ circles were cut. This can be done with a cutting machine, punches or by simply tracing and cutting circles by hand.
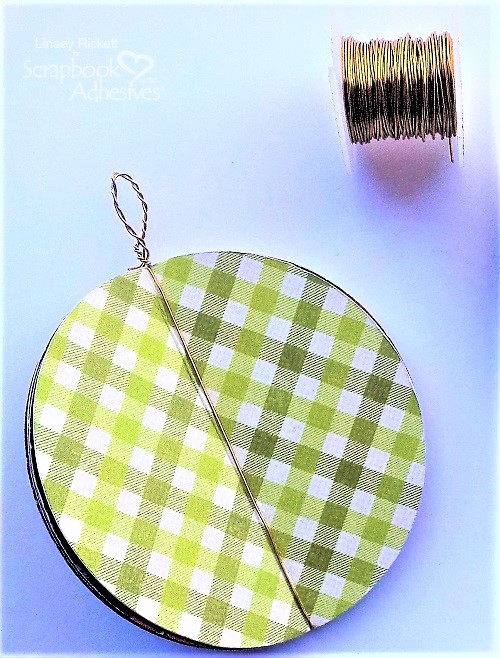
2. Fold all the circles in half and stack them on top of each other. Here are some tips for getting a symmetric-looking color distribution on the final bauble:
- If using 3 colors A B C, then stack them in the order of ABBCCAABBCCA.
- With 2 colors A B, then stack them in the order ABBAABBAABBA.
- If using a single type of card, but double-sided, then alternate “heads up” and “tails up”.
3. Wrap a length of wire all the way around the stack so that it runs along the fold. Twist the ends together to secure. If you don’t have wire, you can also just staple the stack together, once at the top and once at the bottom, so that the staple sits right on the fold.
Forming the DIY Christmas Ornaments
4. Stick a Medium Adhesive Dot onto a circle, about 1/4 of the way from the bottom. Fold the facing flaps together and press to secure the bond.
5. On the next circle along, stick a Medium Adhesive Dot about 1/4 of the way from the top. Continue like this all the way around, alternating high and low adhesive dots.
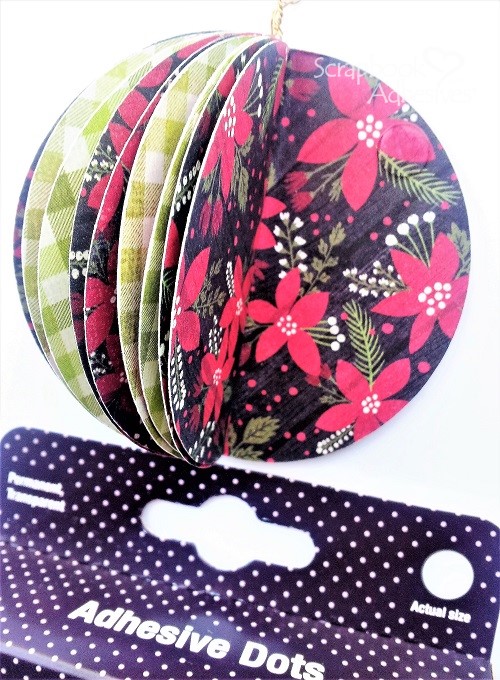
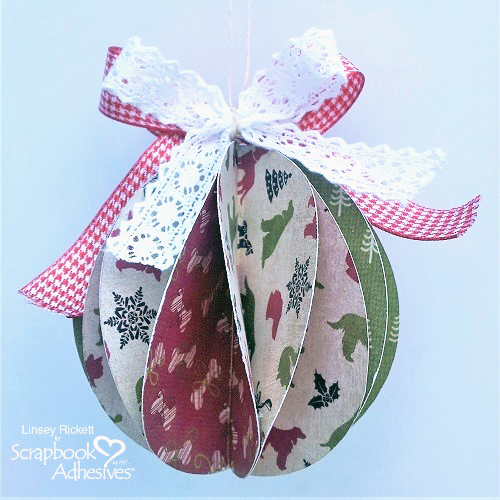
6. Once you’ve glued all the adjacent flaps together, this is what the finished bauble looks like.
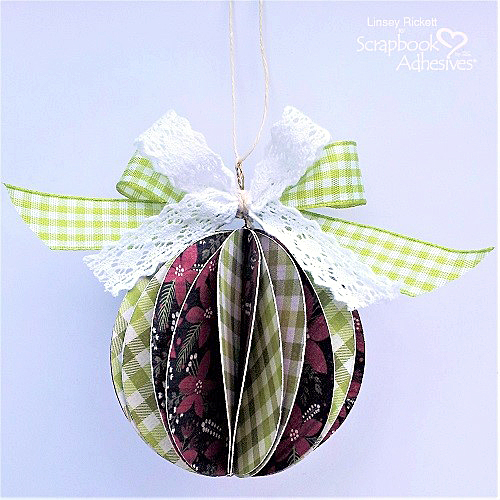
Attach a pretty ribbon and loop for hanging on your tree or give as a gift!
Thanks so much for visiting today! I’ve enjoyed sharing my DIY Christmas ornaments and hope that you feel inspired to make a few of your own this holiday season!
Until next time, happy crafting!
Linsey
Creative Time: 45 minutes
Level: Beginner
Materials Needed:
Scrapbook Adhesives by 3L®:
Adhesive Dots Medium
Other: Patterned Paper: Authentique Paper (Nostalgia Collection Kit); Cricut machine; Thin crafting wire; Ribbon: Really Reasonable Ribbon (5/8″ Plaid Houndstooth Red and White, 5/8″ Plaid Celery Green, and Delicate White Crochet Lace)
Pin It!
Visit our Website and Blog!
Sign up for our Newsletter so you never miss a contest or giveaway!


