
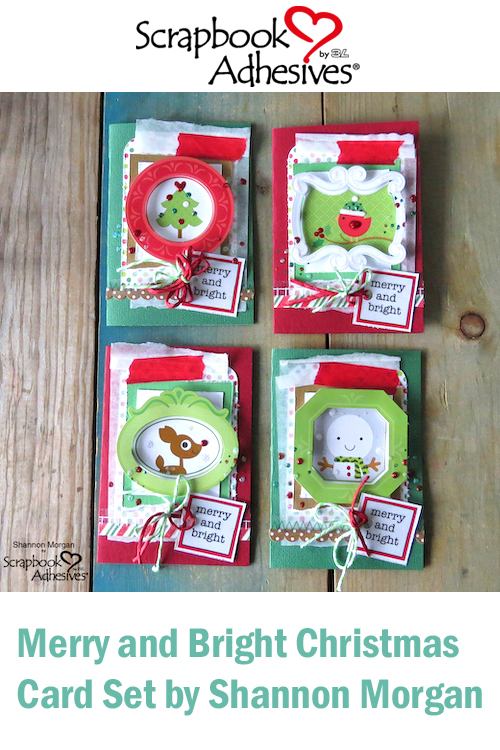
Make Merry and Bright themed holiday cards in a snap! Wait, what? That’s right, holiday cards in a snap! I am going to show you how to create a quick set of 4 cards here. I think by following this simple step by step, you can kick out a bunch of cards, just in time for mailing!

A Merry and Bright Start to Cardmaking!
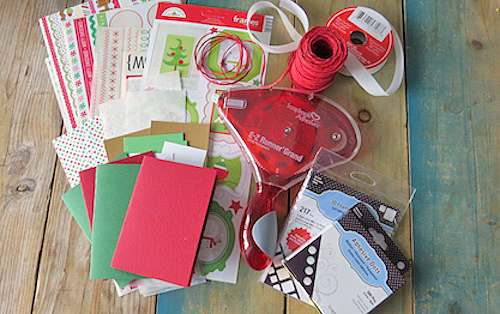
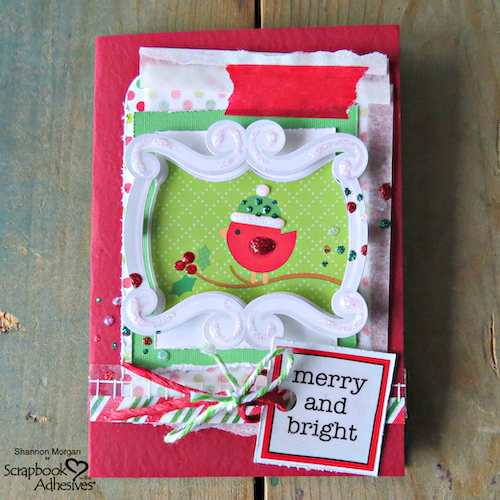
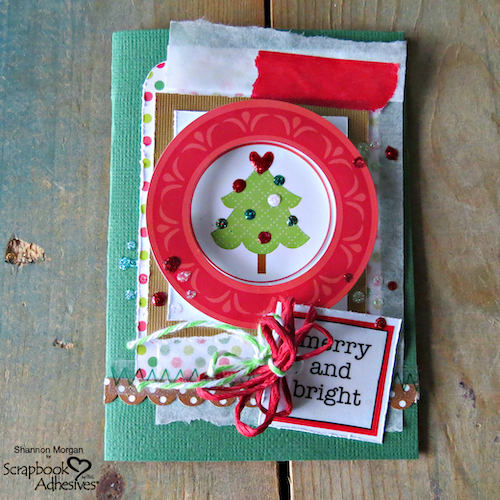
I began with gathering supplies. I gathered cardstock, some patterned paper, stickers, twine, and adhesives. The cardstock bases measure 3.5″X5″. The key with most of my cards is they build off layers. The cardstock base is the beginning layer. I created a step by step photo for you to help with easy assembly.
Step by Step Instructions:
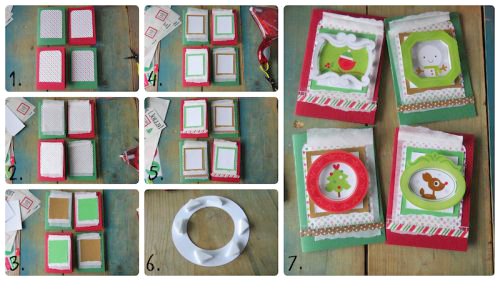
- Begin with adding the patterned paper to the cardstock base. I cut mine to roughly 2.75 x 4.5″ and distressed the edges. (To do this, I used an open pair of scissors and scraped the edges of the patterned paper.)
- The next layer that I added, is tracing paper, clearly, it adds such a delicate touch. It can be perfectly imperfect and lend a layer that becomes ethereal.
- By adding another layer of cardstock I am helping in the visual interest of these cards, certainly lending to the fun feel of the card set.
- I added a cute little border to the card. I did this with some coordinating stickers with an adhesive dot at both ends. Adhesive Dots Medium were the size I used to accomplish this step. After adding the border, I added an additional cardstock layer (white smooth cardstock).
- I’m adding an extra little “oomph” with a stitch layer. (This is actually a sticker, but..no one needs to know this.)
- Using 3D Foam Squares, I am creating some much-needed height to the frames pictured above. Not only did I use foam squares but I stacked them just to make sure those frames jumped off the card.
- Almost done, my cards are almost done! I will be adding a few little things, like the “merry and bright” sticker at the bottom, using Adhesive Dots Medium to do so.
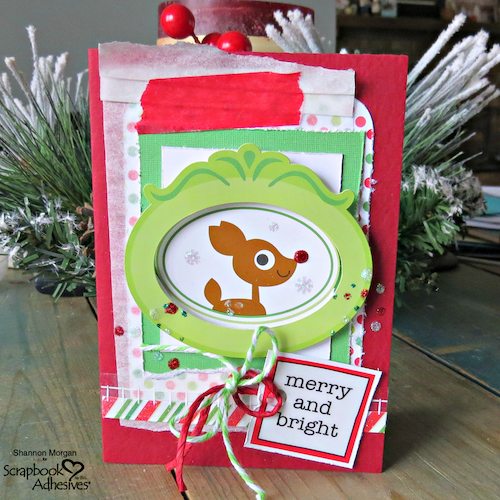
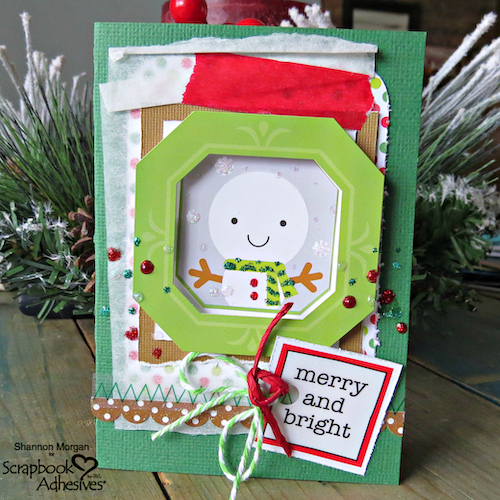
Holiday Card Up Close!
Thank you for letting me share them with you and hope that these will inspire you to start holiday cardmaking if you haven’t already!
Shannon
Creative Time: 60 Minutes
Skill Level: Beginner
Materials needed:
Scrapbook Adhesives by 3L®:
E-Z Runner® Grand Refillable Dispenser
Adhesive Dots Medium
3D Foam Squares White Small
Other Materials: Doodlebug Design (Patterned Papers); SRM Stickers (Sentiments); Cardstock; Glitter Glue; Twine
Pin It!
Visit our Website and Blog!
Sign up for our Newsletter so you never miss a contest or giveaway!


By Amy Tsuruta November 15, 2018 - 6:31 am
Shannon, these are ADORABLE
By Beverly Jordan November 15, 2018 - 10:08 pm
Cuteness overload!! Such fabulous layered Christmas cards and love how you popped up the frames and balanced out all the elements! Gorgeously done!