
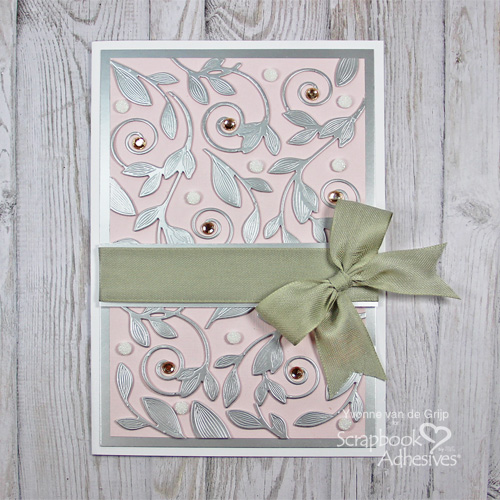
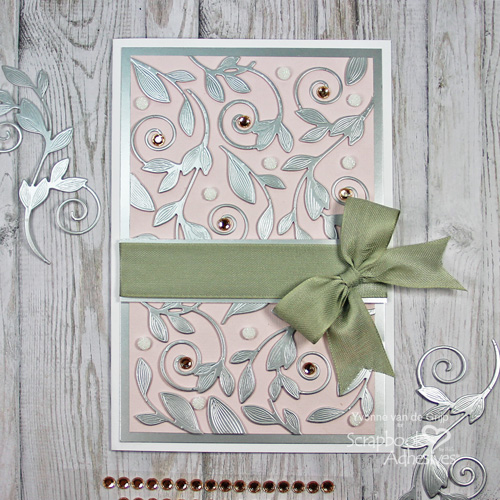
Hi everyone, Yvonne here with a dimensional romantic flourished card tutorial. Thin 3D Foam Squares are a super easy way to add a subtle layered effect to your card. Come on and let me show you how using great products from Scrapbook Adhesives by 3L®.
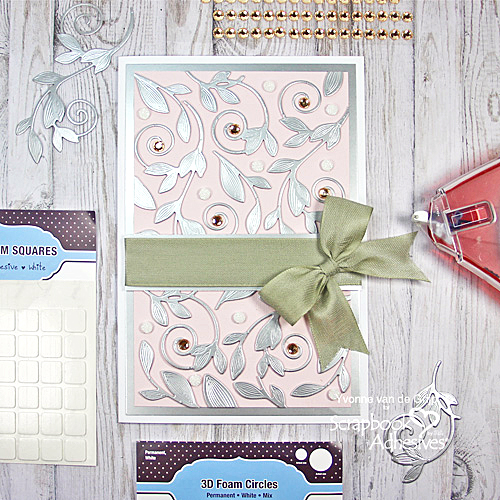
Romantic Flourished Card Tutorial
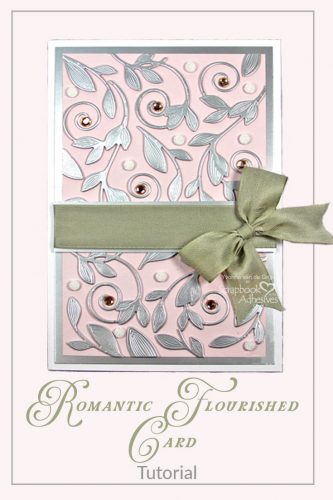
Make a white card base and adhere upon a slightly smaller rectangle piece of silver cardstock using the E-Z Runner® Grand Refillable Dispenser.
For the card panel, trim a piece of soft pink cardstock to a slightly smaller size than the silver cardstock mat. Now for the fun part, to embellish the card panel!
Embellish the Flourish Card Panel
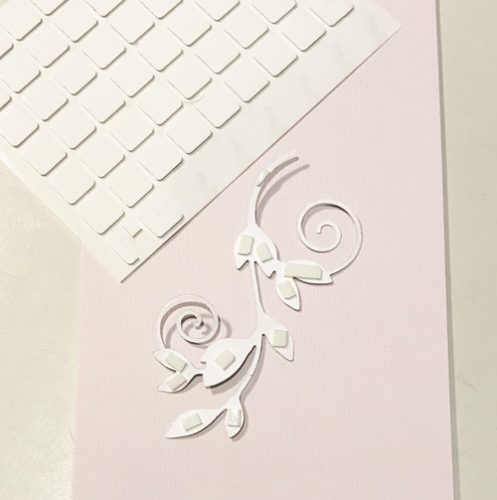
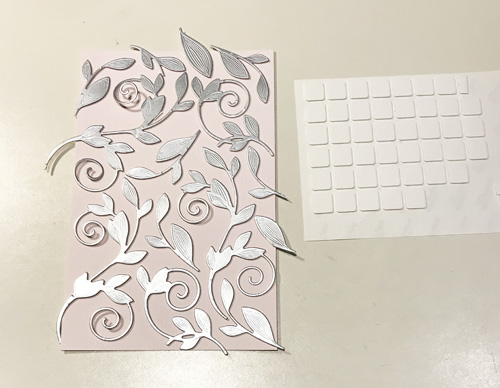
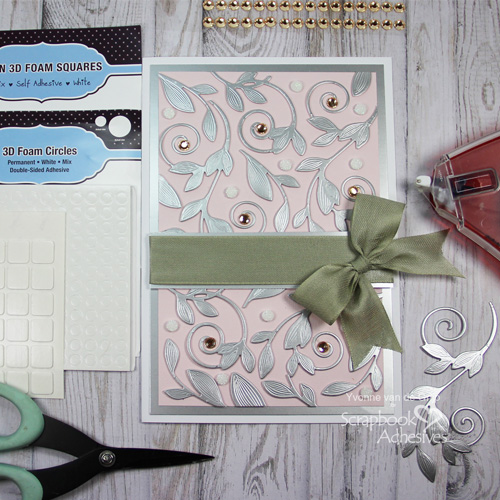
Die-cut and emboss several flourishes from silver cardstock. Apply Thin 3D Foam Squares White Mix to the back of the flourishes.
Designer Note: use a craft knife or scissors to cut the Thin 3D Foam Squares White Mix into strips to add on the stems of the flourishes. Adhere the flourishes to the pink card panel and cut the excess with scissors.
Using the E-Z Runner® Grand Refillable Dispenser, secure the card panel to the card base.
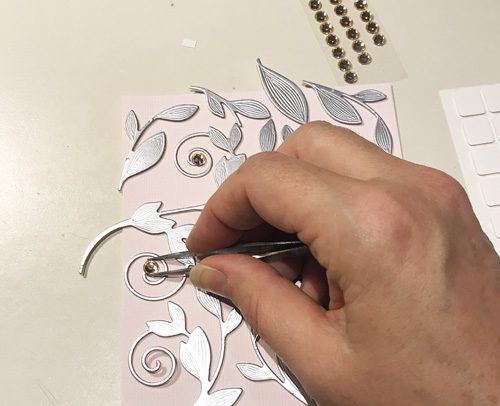
For more sparkle to the flourish die cuts, I adhered rhinestones to the card which also help to hold down the delicate vine pieces to the panel.
Wear Your Adhesive on the Outside
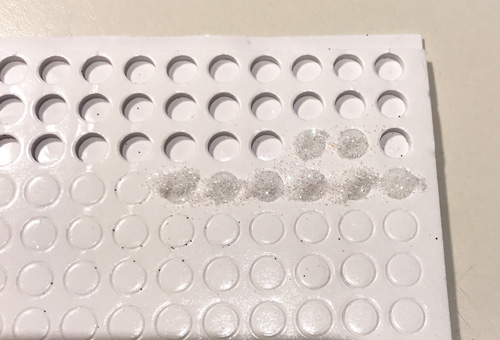
Make glittered circle accents by removing the top liners of 3D Foam Circles White Mix in the small size and sprinkle + rub with white glitter. After tapping off the excess, adhere them on to the card. This technique is known as “Wear Your Adhesive on the Outside“.
Finishing the Card
Cut a piece of silver cardstock to a size slightly wider than the ribbon you want to use on your card. Wrap the ribbon around the silver cardstock and adhere the ends to the back using the E-Z Runner® Grand Refillable Dispenser. Affix to the panel horizontally onto the card. Then add a bow to the ribbon with an Adhesive Dots Large.
Designer’s Tip: If you want to emphasize a special occasion, adhere a sentiment-banner onto the ribbon band.
And voila…your romantic flourished card is ready. I hope you enjoyed the tutorial and wish you happy crafting!
Yvonne van de Grijp
Creative Time: 40 minutes
Skill Level: Intermediate
Materials needed:
Scrapbook Adhesives by 3L®
Thin 3D Foam Squares White Mix
3D Foam Circles White Mix
E-Z Runner® Grand Refillable Dispenser
Adhesive Dots Large
Other
Etched Dies and Die Cutting Machine: Spellbinders® Paper Arts (Victorian Garden Romantic Vines); White, Pink, and Silver Cardstock; Rhinestones; Ribbon; Glitter; Paper Trimmer; Bone Folder
Love It! Save It to Pinterest!
Visit our Website and Blog!
Sign up for our Newsletter so you never miss a contest or giveaway!


By Andre M. January 5, 2020 - 12:12 pm
Gorgeous and elegant card! Thanks for sharing this inspiration with these fun products.
By TracyM #6773 January 6, 2020 - 11:51 pm
ABSOLUTELY GORGEOUS – WOW!