
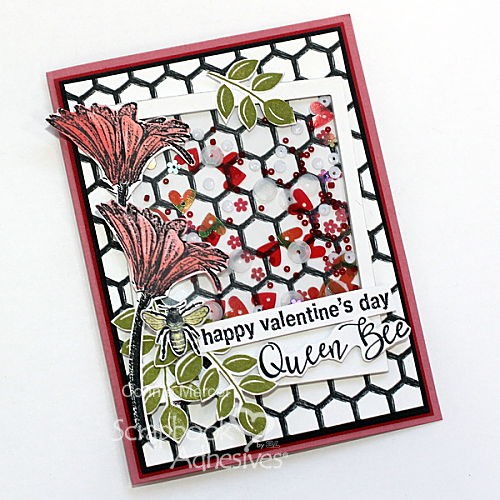
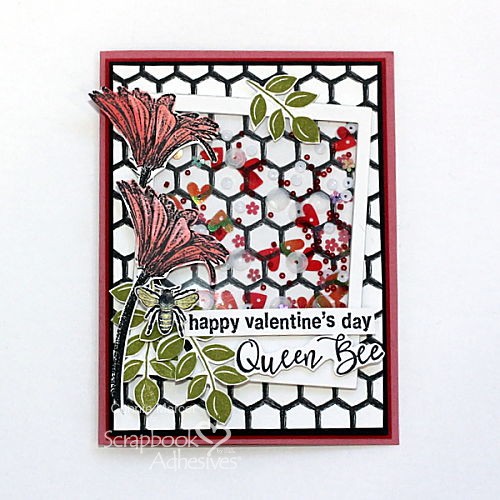
Hi, Connie here with a wonderful Queen Bee shaker card constructed from scratch. Using the Crafty Foam Tape and a sheet of acetate (snagged some packaging), you’re set to go! Let me show you how.
Queen Bee Shaker Card Prep
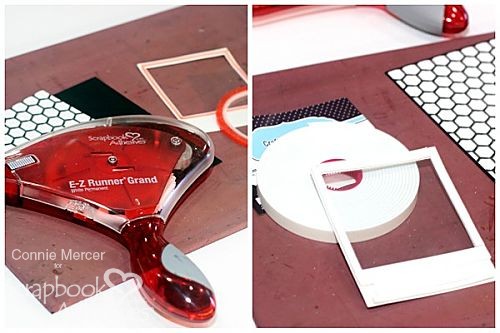
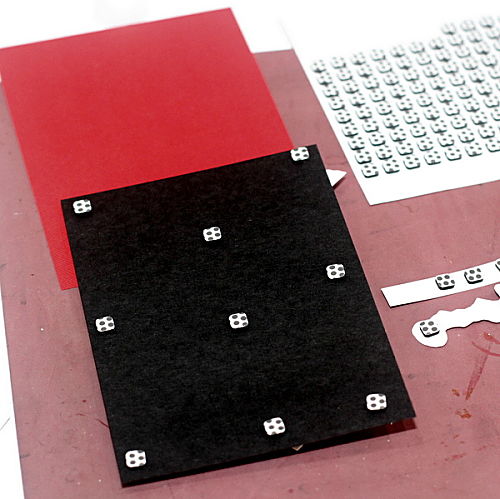
Stamps are a major part of my embellishing the card front. Starting with the background to the detailed elements which are stamped, colored and trimmed are done and ready to go. Double-mat the background card front with black cardstock secured with the E-Z Runner® Grand Permanent Strips. Set aside the elements for now.
Making the Shaker Feature
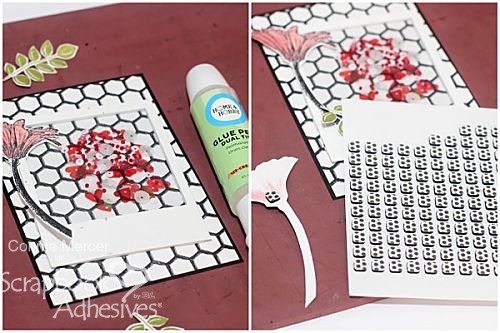
Die-cut a Polaroid Frame to create the shaker front. Cut the acetate to cover the window frame. Flip the frame to its back to apply Extreme Double-Sided Tape 1/8″ around the frame. Take off the liner and place the acetate down. Attach the Crafty Foam Tape to the edges of the frame. Next, sprinkle in a mix of sequins and beads in the middle of the card front. Remove the backing from the Crafty Foam Tape on the frame and place it over the sequin grouping. Press down to secure and complete!!
The Embellishment Cluster
Collect the stamped elements created earlier and place them around the framed shaker to decide on the placement of pretties. The Dual Tip Glue Pen is great to secure them as well as the 3D Foam Squares to lift up the elements for dimension.
For more height, adhere the card front to a folded card base with 3D Foam Squares to complete the Queen Bee shaker card.
Thanks for stopping by~
Connie Mercer
Creative Time: 60 minutes
Skill Level: Intermediate
Materials needed:
Scrapbook Adhesives by 3L®
E-Z Runner® Grand Permanent Strips Refillable Dispenser
Crafty Foam Tape in White
3D Foam Squares Black Small
HomeHobby™ by 3L
Extreme Double-Sided Tape 1/8″
Dual Tip Glue Pen
Other
Ink: Ranger Ink (Archival and Distress Oxide); Stamps: Darkroom Door; Sequin: Buttons Galore & More; Craft Die: Sizzix (Polaroid Die); Acetate
Save It for Pinterest!
Visit our Website and Blog!
Sign up for our Newsletter so you never miss a contest or giveaway!


