
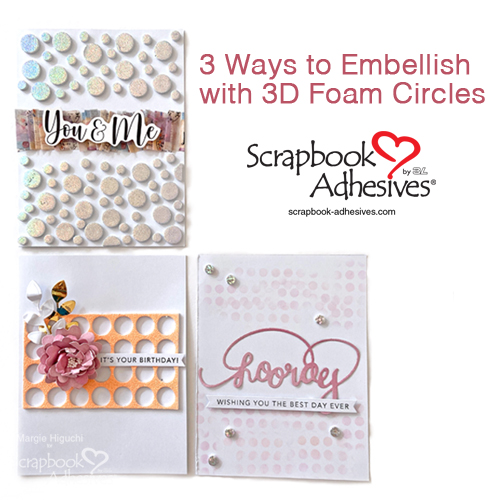
How do you stretch your stash of 3D Foam Circles? I found at least three ways to embellish them and created three A2-sized card fronts/bases. Let me show you how in a video tutorial I shared with a virtual craft retreat last week.
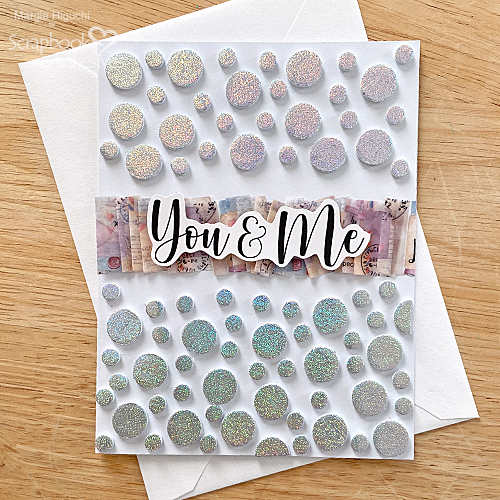
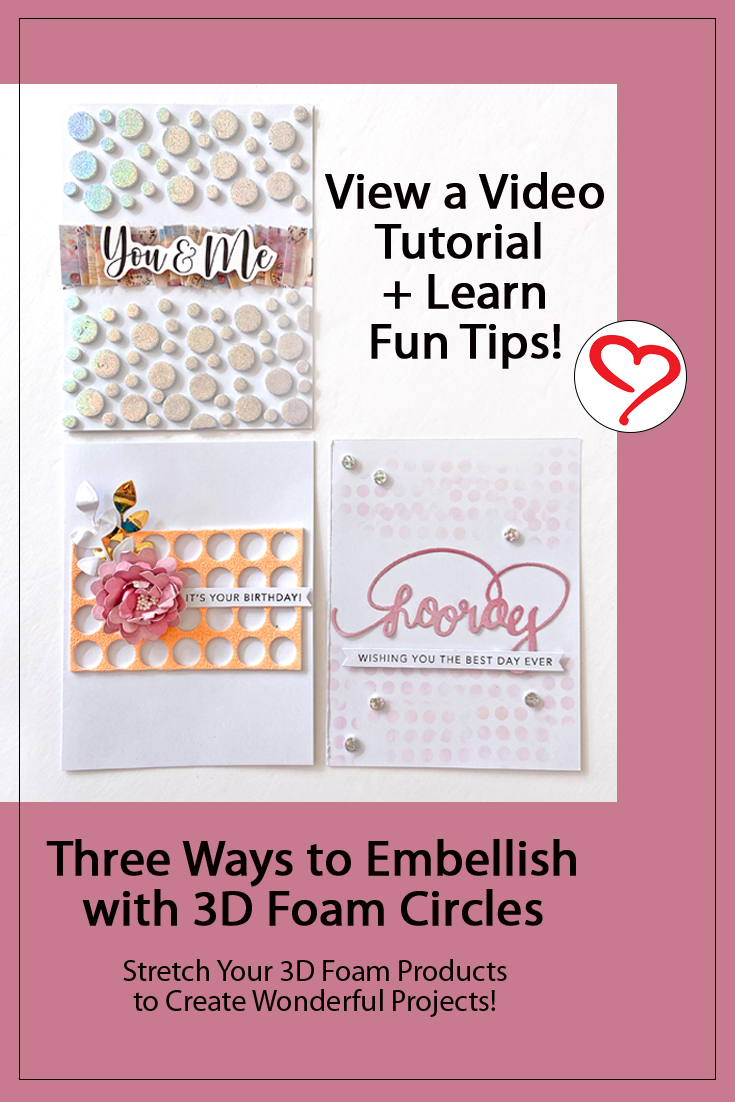
Dotted & Foiled You & Me Card
Embellish your card front by covering the top and bottom of a card base with a combination of 3D Foam Circles White in regular and small sizes. Leaving the center open for the sentiment.
Designer’s Hint: Pleat a wide-width washi tape to create a ruffled background behind a sentiment die-cut. Adhere the sentiment with 3D Foam Circles White for a strong hold.
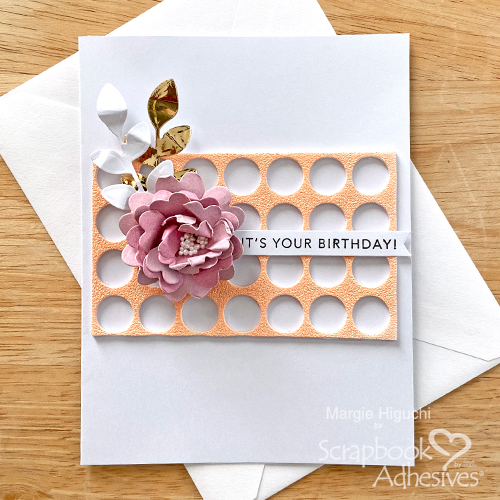
Heat Embossed It’s Your Birthday Card
Cut in half a negative 3D Foam Circles White Regular sheet. Center on a card front, remove the top liner and pour embossing powder on top. Tap off excess and melt with a heating tool. Note the heat does not change the shape of the foam sheet. LOVE IT! Using Adhesive Dots Medium and Micro, adhere the leaf die cuts, layered flower, and a stamped sentiment.
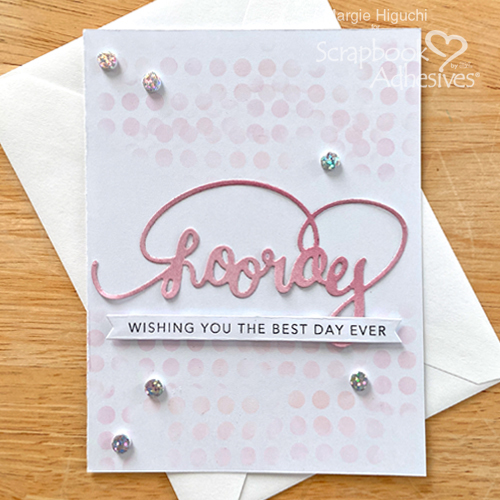
Stenciled Hooray Card
What do you have left? Yes! I used the leftover liner as a stencil! Taking the card design from the first card, I stencil through the 3D Foam Circles White in small size with Distress Oxide in Milled Lavender. Then added 3D Foam Circles White Small and Metallic Transfer Foil Sheets Holographic (Silver Fine Glitter). Centered my sentiment die cut which was applied with Adhesive Sheet for edge-to-edge coverage on the back. Then added the sentiment strip with 3D Foam Circles White Small behind it.
View the 3 Way Embellish with 3D Foam Circles Video!
I hope you enjoyed this post and try these ideas when you use your 3D Foam Products! Share with us by linking your post under comments – I would love to see it!
Thanks for stopping in!
Margie Higuchi
Materials Needed:
Scrapbook Adhesives by 3L®
3D Foam Circles White
Adhesive Dots Micro and Medium
Adhesive Sheet 4 x 6in.
Metallic Transfer Foil Sheets Holographic
Dual Tip Glue Pen by HomeHobby™ by 3L
Others
Patterned Papers, Washi Tape and You & Me Die Cut: Kawaii Paper Goods (Subscription Box #3) Craft Dies: Spellbinders Paper Arts (S4-867 Cinch and Go Flowers III by Becca Feeken and S4-575 Hip Hip Hooray by Debi Adams); Stamps & Craft Die Set: Taylored Expressions (Simple Strips Background – Birthday Stamps and Simple Strips Die); Prills: Dress My Craft (Flower Pearls – Snow White); Inks: Ranger Ink (Distress Oxide in Milled Lavender) and Nuvo (Hybrid Ink in Black Shadow); White and Gold Mirror Cardstock
Save It to Pinterest!
Visit our Website and Blog!
Sign up for our Newsletter so you never miss a contest or giveaway!


By Verna Angerhofer March 25, 2021 - 10:52 am
Thanks for the tips on how we can make use of our 3D foam circles. I really liked the idea of a stencil.