
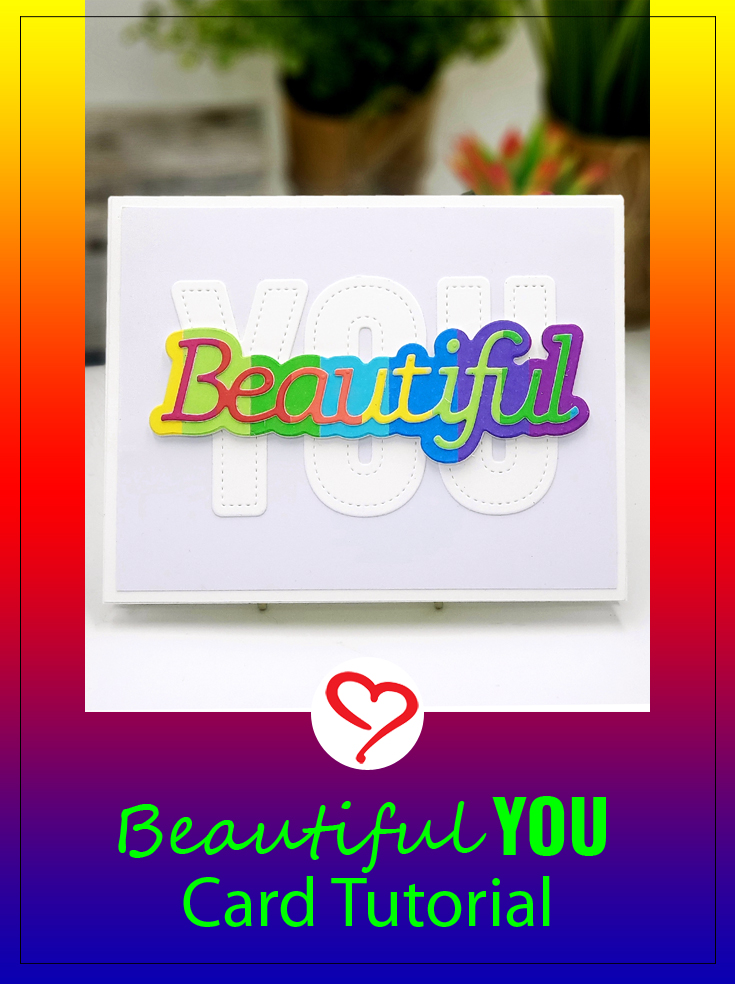
Hello crafty friends, I am sharing this simply stated Beautiful YOU card. June is Pride Month and this card was inspired by one of my college friends whom I admire for his strength and grace. He is a beautiful person and I am his ally. I chose a bright cardstock pack in rainbow colors to create a rainbow stripe cardstock for the sentiment. I hope you enjoy the tutorial!
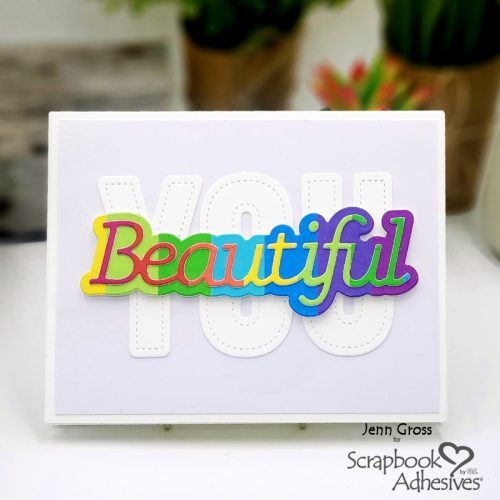
Beautiful YOU Rainbow Colors

Let’s start with the rainbow portion of the sentiment. First, you’ll need ten 4.25 x 5.5-inch pieces of colored cardstock in rainbow colors (image A).
I’ll be using the Adhesive Sheets 12 x 12 in. to put together the rainbow background in image B. These sheets are so easy to use. Simply lift the liner off the sheet, add it to the back of your cardstock, burnish the adhesive to transfer for an edge-to-edge coverage (think sticker). There are also two other adhesive sheets sizes: 6 x 12 in. and 4 x 6 in.
In step C, I cut the colored cardstock into .75-inch strips. For a card panel, cut a piece of white cardstock to 7.5 x 5.5-inches as shown in image D.
Adhesive Sheets Usage
See a quick video on How to Use Adhesive Sheets below.
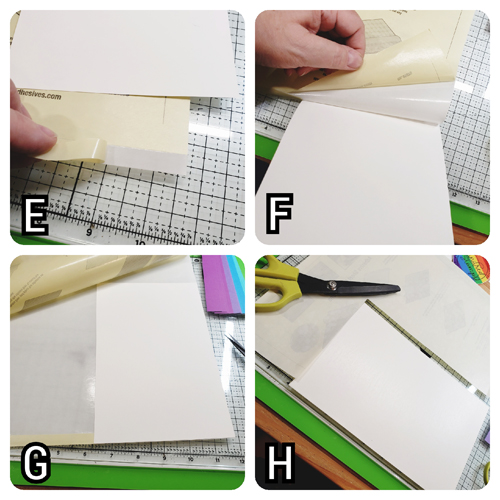
Take the card panel from step D to apply the Adhesive Sheet 12 x 12 in. to its back. In image E, remove the lower strip of release paper exposing the sticky area and in F, place the card panel on it (in the corner area would help line it up).
Gently burnish the back to transfer the adhesive (see image G) and trim off the excess (image H). Use the leftover adhesive sheet for another project.
Creating the Rainbow Background
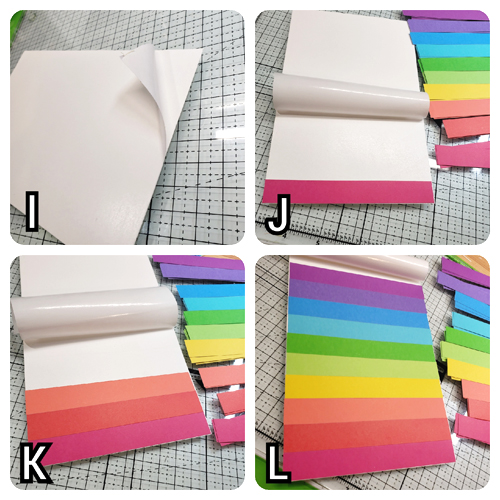
Now to start our Beautiful sentiment background! Peel back the liner from your card panel but not too much. Determine which color goes first – I did rainbow order (image I).
Next, in images J, K and L, start placing the strips of colored cardstock down onto the exposed sticky cardstock. Make sure the edges of each color strip touches the one before, lining up the edges together. Once all ten color strips are attached the sheet is complete.
Die-cutting Details
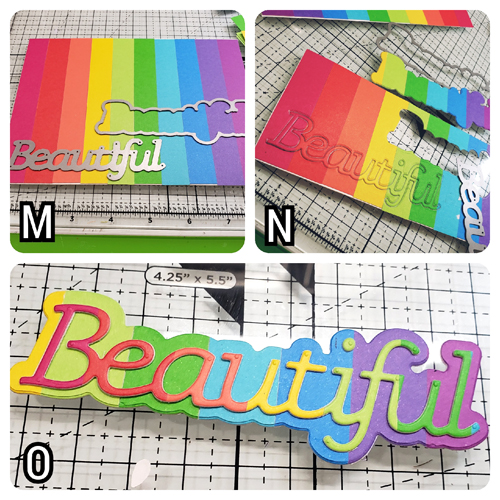
In M, I used the Beautiful word and outline die set. Position the word starting on the red stripe and the outline starting on the yellow strip. Secure with washi tape before die-cutting. Image N shows after the dies and paper are cut. Then adhere the word die to the outline die as shown in O.
Creating YOU Sentiment
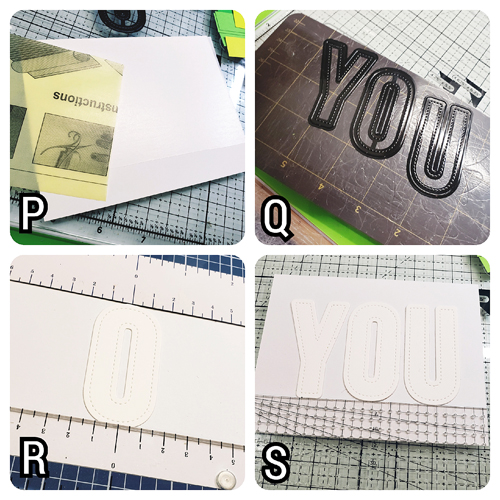
Apply a piece of Adhesive Sheet to the back of a 4.25 x 5.5-inch white cardstock (P). Next, die-cut the letters Y O U with the 3″ Stitched Letter dies from white cardstock in step P.
On a 4 x 5.25-inch very light grey cardstock card panel, center the Y O U letters. As shown in R, use a ruler to line up the O in the center first and remove the release paper to stick it into place.
Then in step S, line up Y and U on each side of O to finish spelling YOU. Remove the release paper and attach the letters to the card front.
Assembling Beautiful YOU Card
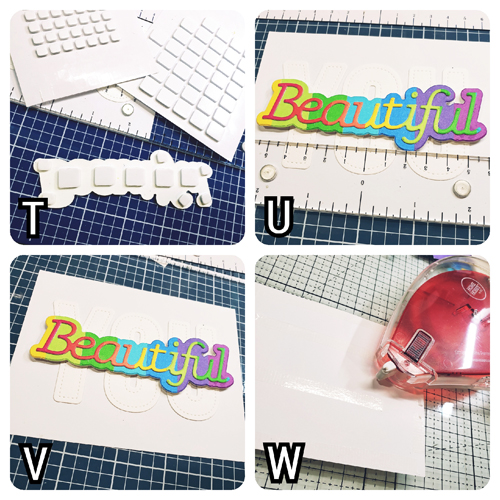
In T, use a combination of the 3D Foam Squares White Mix, add them to the back of the die cut word Beautiful. Use a ruler to center the die cut word Beautiful over the word YOU on the card front. Remove the release paper from the 3D Foam Squares and attach it to the card front (steps U + V).
Lastly, turn the card front over and apply the E-Z Runner Grand Permanent Strips to the back side. Attach the card front to an A2-sized (4.25 x 5.5-inches) white card base to finish the card.
I hope you enjoyed the Beautiful YOU card tutorial.
Be Creative ~ Stay Inspired
Jenn Gross
Skill Level: Intermediate
Creative Time: 40 Minutes
Materials Needed:
Scrapbook Adhesives by 3L®
Adhesive Sheets 12 x 12 in.
3D Foam Squares White Mix
E-Z Runner® Grand Permanent Strips
Other:
Craft Dies: Simon Says Stamps (Beautiful word die) and Diamond Press (3″ Stitched Alphabet dies); Cardstock: Park Lane
Save it to Pinterest!
Visit our Website and Blog!
Sign up for our Newsletter so you never miss a contest or giveaway!


