
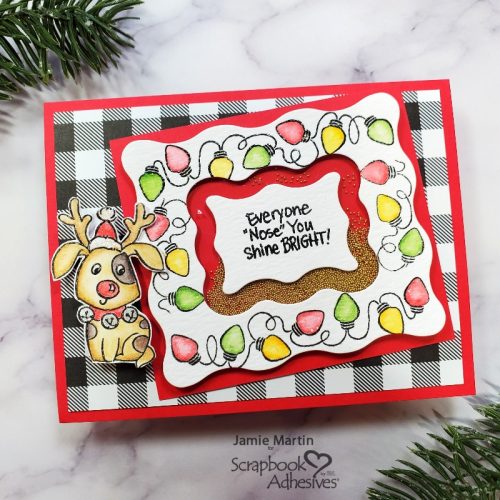
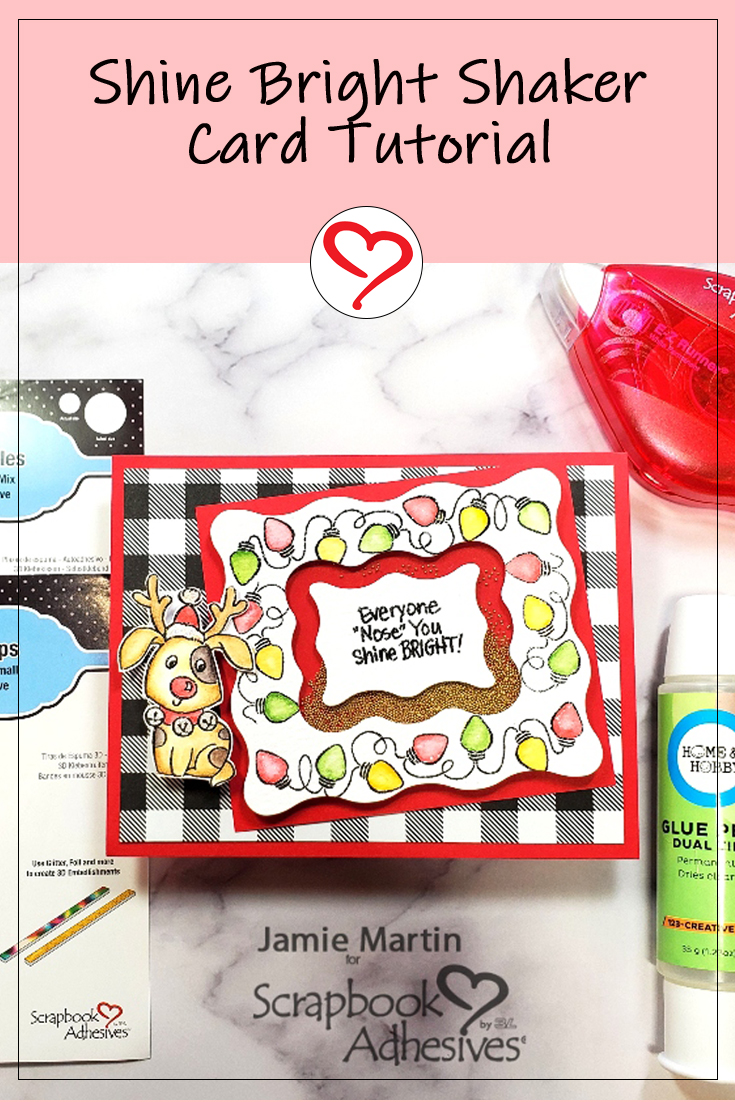
Happy November 1st, if you haven’t started on your Christmas cards, now’s the time! Jamie here with you today and I have a Christmas shaker card that will hopefully inspire you to get started.
Christmas Shaker Card Basics
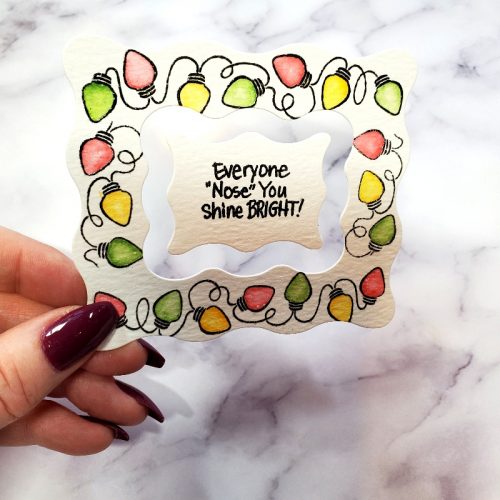
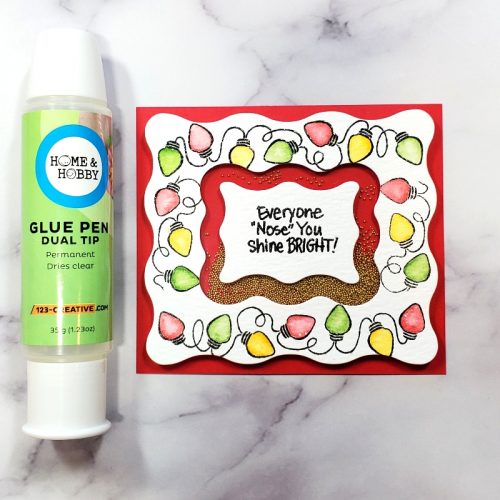
To make the shaker portion of the card, die-cut watercolor paper using the Pop Frame Die Set. Stamp the lights from the Bright Nose Frame Perfectly Clear Stamps with Black Onyx VersaFine Ink and emboss it with clear embossing powder. Watercolor the lights with Inktense Pencils. Die-cut the center of the frame from watercolor paper then stamp and emboss the sentiment.
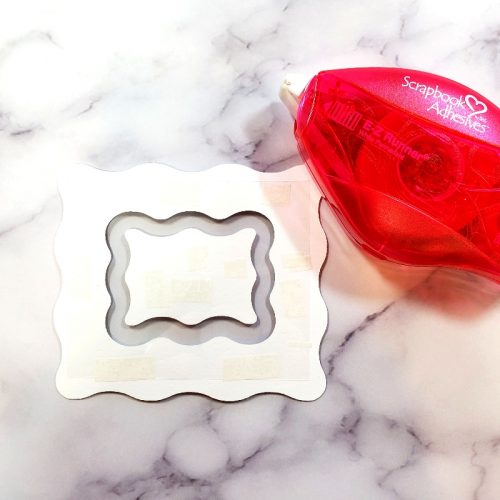
Use the E-Z Runner® Permanent Strips Refillable Dispenser to apply adhesive around the back of the frame. Place a square of acetate over the adhesive. Turn the frame over and use the same adhesive on the back of the sentiment and place it in the center of the frame on the acetate.
Shaker Steps
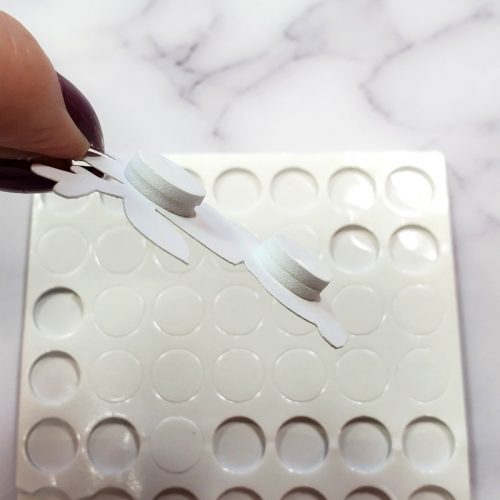
Turn the frame over with the backside facing up and place 3D Foam Strips around the frame making sure the edges touch so that the shaker bits don’t fall out. Now place the 3D Foam Strips around the edges of the sentiment piece. This is done so you will need fewer shaker bits to fill the shaker.
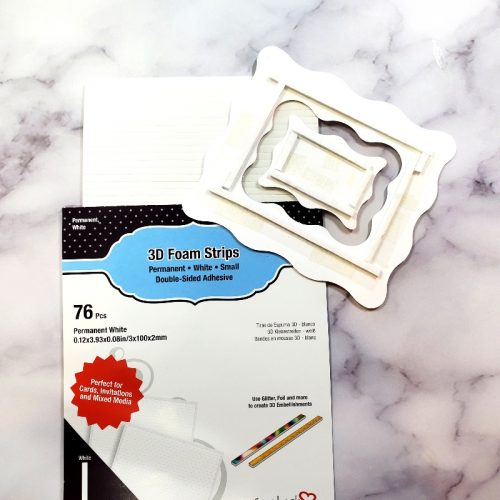
Now here’s a trick to assemble your shaker piece, place your shaker bits around the edge of the frame in between the 3D Foam Strips but not in the very center behind the sentiment. Hold your piece securely and remove the paper backing from the foam. Place a square of red cardstock that is smaller from the frame, on top of the foam and give it a rub. Now you can turn your shaker piece over and glue it with Dual Tip Glue Pen to a slightly larger red cardstock panel and you will be able to get it perfectly centered.
Assemblying the Card
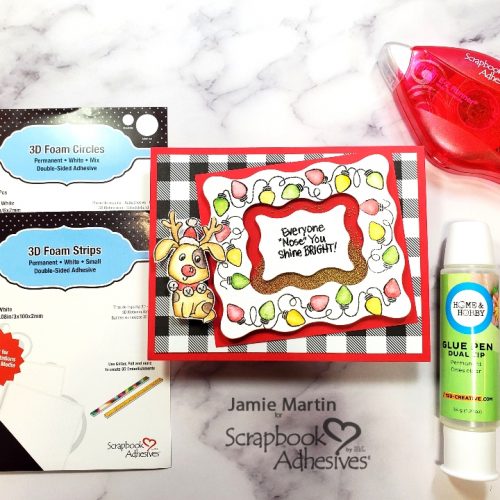
Layer black and white decorative paper to a red card using the E-Z Runner® Permanent Strips Refillable Dispenser.

After the dog has been stamped, colored and cut out, place two of the larger circles from the 3D Foam Circles White Mix. Remove the paper carrier and place another large foam circle on top of the first. This will make the dog taller than the shaker.
Now glue the shaker panel diagonally to the card using the Dual Tip Glue Pen and pop up the dog.
Skill Level: Advanced
Creative Time: 45 minutes
Materials Needed:
Scrapbook Adhesives by 3L®
3D Foam Strips
E-Z Runner® Permanent Strips Refillable Dispenser
3D Foam Circles White Mix
HomeHobby™ by 3L
Dual Tip Glue Pen
Save to Pinterest!
Visit our Website and Blog!
Sign up for our Newsletter so you never miss a contest or giveaway!


