
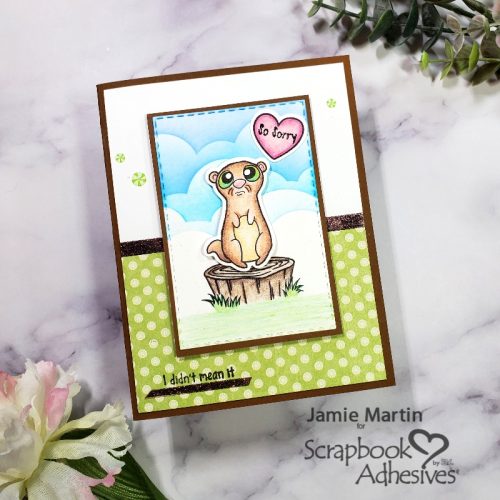
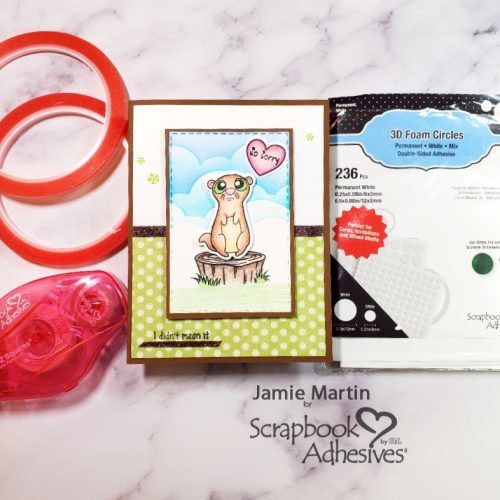
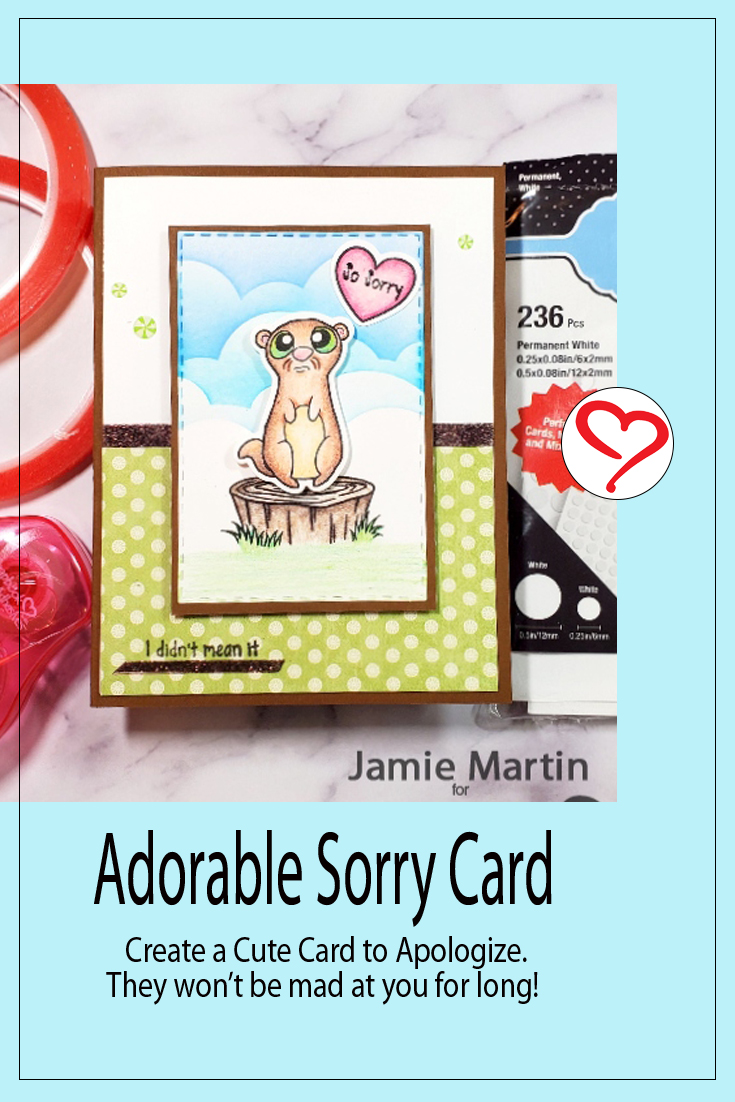
Do you ever say or do something that you regret? I’m guessing you do and what better way to apologize with an adorable sorry card. It’s sure to put a smile on a person’s face, right? Jamie here with you today with a tutorial on how my card was made.
Sorry Card Background
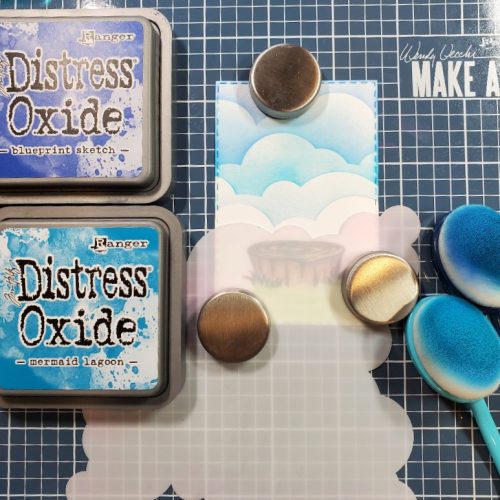
Die-cut a white cardstock with a rectangle die. Stamp the tree stump from the Adorable Otters Set with Onyx Black VersaFine Ink. Then color with Prisma Colored Pencils. Next, stencil the clouds on the top portion of the rectangle with blue Distress Oxide Inks using a Cloud Stencil from Rubbernecker Stamps.
Lift a Stamped Element
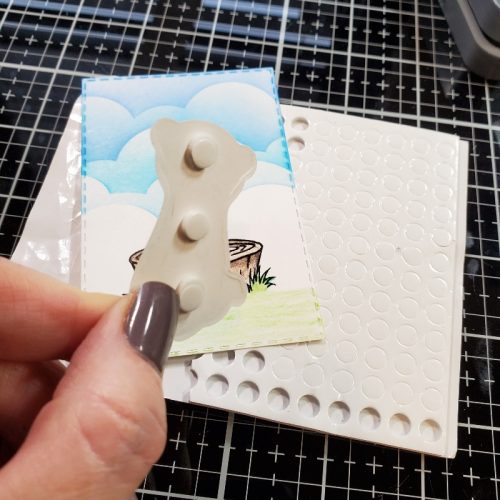
After the otter has been stamped, colored, and cut out, place 3D Foam Circles White Mix on the back. You want to make sure that you put enough 3D Foam Circles on the back to ensure that the image doesn’t sag.
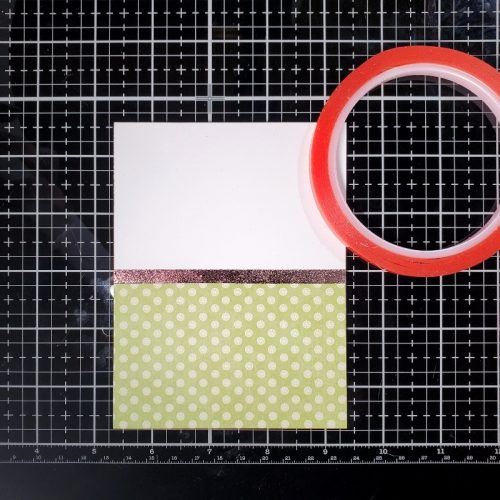
Make a Card Panel
Cover about half of a 4″ x 5 1/4″ white cardstock panel with decorative paper using E-Z Squares®. Next, place a strip of Extreme Double-Sided Tape 1/4″ on top of where the decorative paper and cardstock meet.
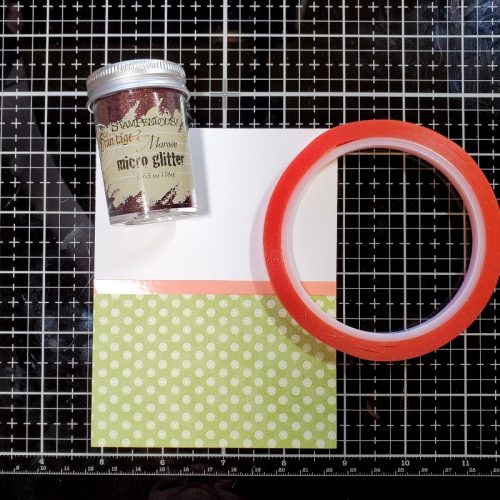
Remove the red tape liner and sprinkle Maroon Micro Glitter on the tape. Rub the glitter into the tape to secure. Tap off the excess.
Assemble the Sorry Card
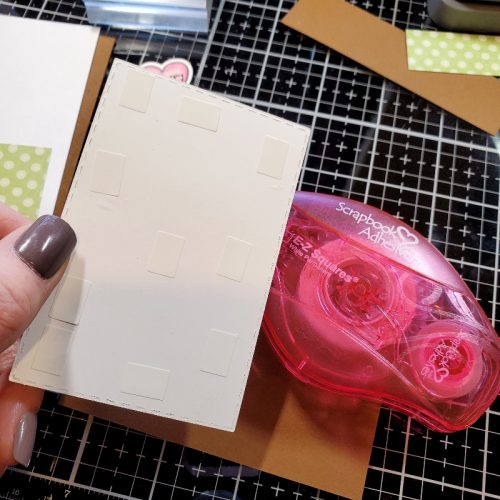
Place E-Z Squares® on the back of the otter panel and mount it to a slightly larger brown cardstock panel.
Pop up the panel on the card using the 3D Foam Circles in small size.

Stamp the sentiment below the otter on the decorative paper with black ink. Place a strip of Extreme Double-Sided Tape 1/8″ below the sentiment and add glitter, this tape is thinner than the one used on the white cardstock.
Skill Level: Intermediate
Creative Time: 35 minutes
Materials Needed:
Scrapbook Adhesives by 3L®
E-Z Squares® Refillable Dispenser
3D Foam Circles Permanent White Mix
HomeHobby™ by 3L
Extreme Double-Sided Tape 1/4″
Extreme Double-Sided Tape 1/8″
Plus
Stamps- Whimsy Stamps
Glitter- Stampendous
Epoxy Dots- Queen & Company
Inks- Ranger, Distress Oxides
Save to Pinterest!
Visit our Website and Blog!
Sign up for our Newsletter so you never miss a contest or giveaway!


