
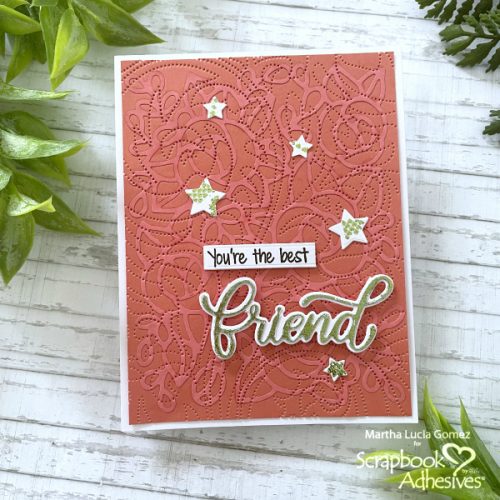
Hello there, Martha Lucia here with a fun and easy technique to add texture to your cards without tons of dimension!. Let me share this Faux Texture Friendship Card with the directions.
Add Faux Texture
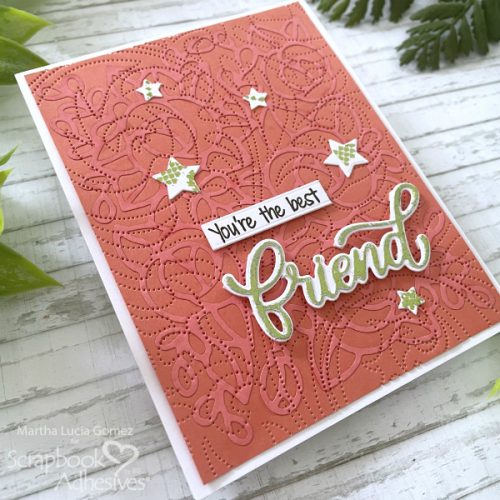
First, I die cut the Modern Bloom Die onto the lighter color of card stock. Then, I pasted it directly over a second layer using the Dual Tip Glue Pen.
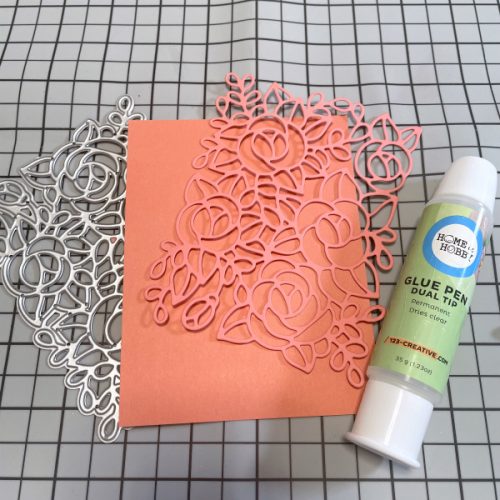
I added a thin coat of the Dual Tip Glue Pen on the back of the die cut layer and pressed softly over the darker layer. I let the adhesive dry for a few seconds before continuing with the texturing process.
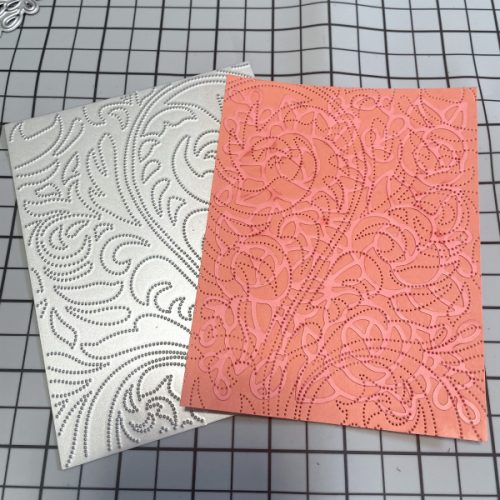
Then, with a detailed cover die, the Dotted Swirls Debossing Cover Die, I added the second texture to the decorated layer. For it, I just passed the entire piece through my die-cut machine to create the dotted effect.
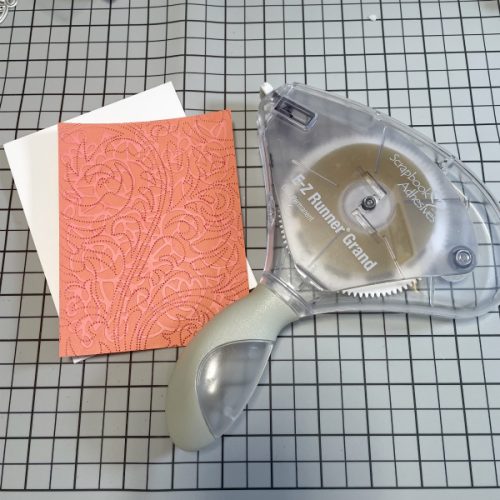
With the E-Z Runner Grand Ultra Strong Refillable Dispenser, I pasted the textured layer directly over a white smooth card base.
Wear Your Adhesive on the Outside with Foil
To embellish the card, I opted to Wear Your Adhesive on the Outside technique using the green pastel foil from the Metallic Transfer Foil Sheets Pastel Colors with the Adhesive Sheets 4×6 Inch.
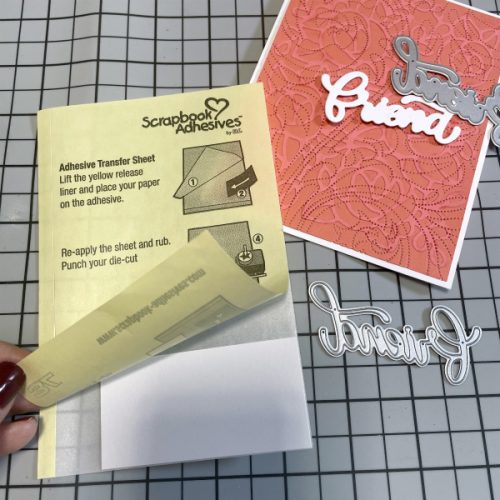
I put a small piece of white smooth cardstock onto the Adhesive Sheet 4×6 inch, following the simple instructions printed on the liner of the sheet.
View How to Use Adhesive Sheets Video
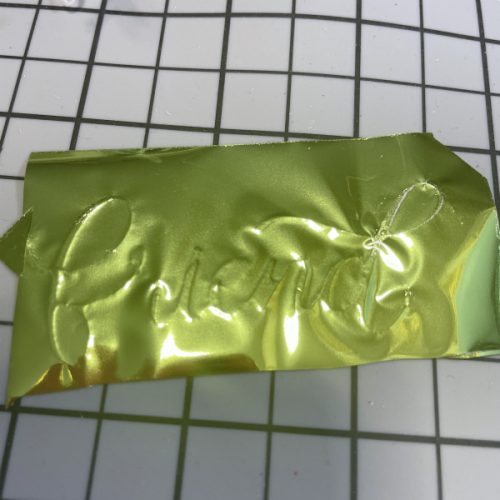
I die cut the word friend making sure the adhesive part is on the top of the word. Then, I removed the liner to expose the adhesive, and with the foil color UP with the green foil from the Metallic Transfer Foil Sheets Pastel Colors, gently rub to transfer the color into the word.
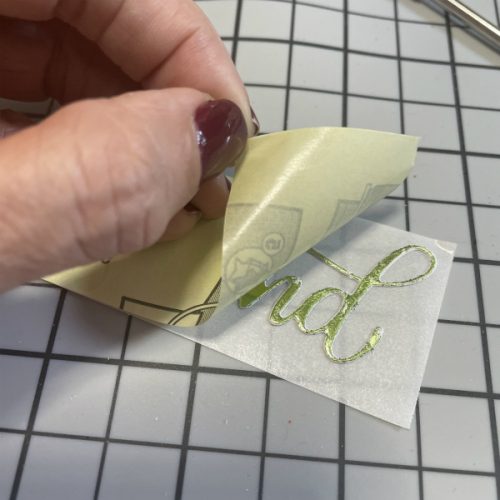
Additionally, I used Adhesive Sheets 4×6 inch to adhere the foiled word to the shadow shape. I just needed to turn out the word and repeat the process following the instructions of the Adhesive Sheets 4×6 inch.
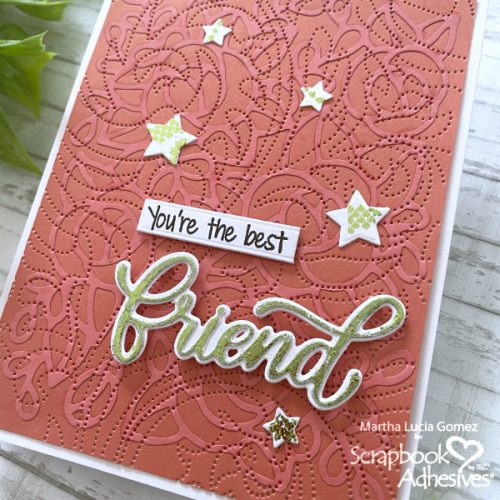
To place the layered word to the decorated card base, I used 3D Foam Squares Micro White.

I stamped a sentiment on a strip of white cardstock and adhere it with 3D Foam Squares Micro White. Also, die-cut a few different stars and randomly roll the E-Z Runner Petite Permanent Dots Refillable Dispenser on top. Then foil them with the same green color from the Metallic Transfer Foil Sheets Pastel Colors.

Here is a close-up look of the faux texture on the card and how the foil added an extraordinary touch!
Thank you so much for stopping by and checking out my Faux Textured Friendship Card Tutorial. See you soon with more inspiration!
Skill Level: Intermediate
Creative Time: 25 minutes
Materials Needed:
Scrapbook Adhesives by 3L®
Metallic Transfer Foil Sheets Pastel Colors
Adhesive Sheets 4×6 inch
Dual Tip Glue Pen by HomeHobby™ by 3L
E-Z Runner Grand Ultra Strong Refillable Dispenser
3D Foam Square Micro White
E-Z Runner Petite Permanent Dots Refillable Dispenser
Other:
Modern Bloom Die by Pink Fresh Studio. Dotted Swirls Debossing Cover Die by Altenew. Mothers Day Love Clear Stamp Set and White Smooth Cardstock by Joy Clair Designs. VersaFine Pigment Ink Onix Black. Friend Shadow Wafer Die by Simon Says Stamp.
Save to Pinterest!
Visit our Website and Blog!
Sign up for our Newsletter so you never miss a contest or giveaway!


