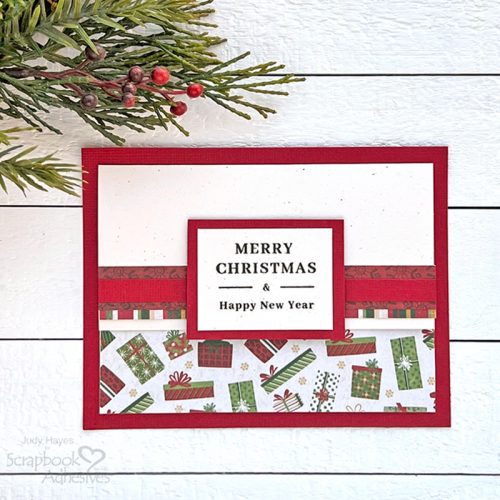
Hello everyone! It’s the time of year that I decide to make a few gift card holders for some extra gifts. This year I came up with this easy-to-make Christmas Holiday Gift Card Holder. The card holder has a pocket inside for a gift card or cash. It’s a good project for leftover pieces of holiday paper. It only takes a few minutes to put together!
Cut Papers for the Holiday Gift Card Holder
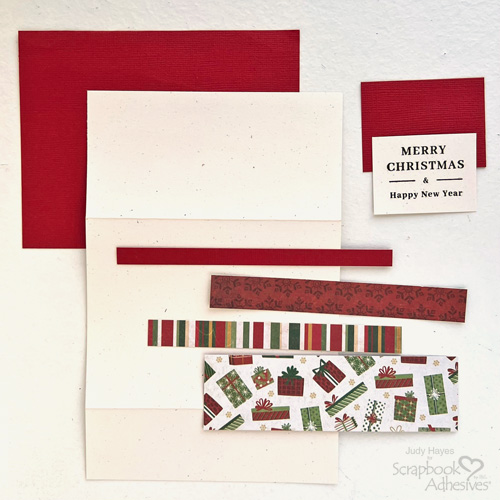
Let’s start with cutting the papers needed for the project.
- Red Cardstock: 5.5 x 4.25 inches, 2.375 x 1.75 inches, and 0.375 x 5 inches
- Cream Cardstock: 5 x 7.75 inches, and 1.5 x 2 inches
- Packages Paper: 1.5 x 5 inches
- Stripe Paper: 0.75 x 5 inches
- Red Patterned Paper: 0.75 x 5 inches
Score & Fold
On 5 x 7.75-inch cream cardstock, score at 2.5 inches and 6.25 inches from one short end. Fold each score line and press with a bone folder. The short flap will be the pocket and the longer one is the top flap.
Stamp a Verse
Stamp verse with Forest Moss ink on cream cardstock piece. Use E-Z Runner® Ultra Strong Refillable Dispenser to apply adhesive to the back and attach it to the red mat.
Make the Pocket
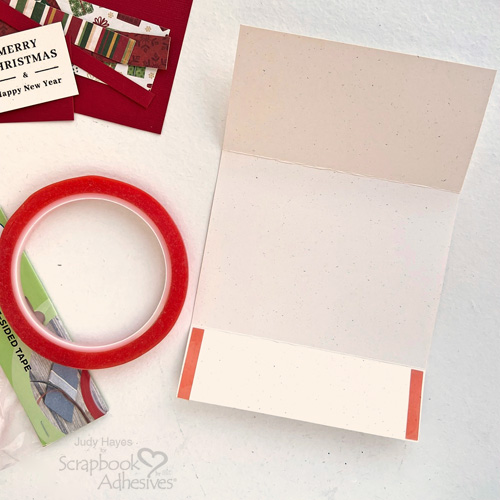
Apply Extreme Double-Sided Tape 1/4in at each end of the pocket along side edges, remove liners, fold the pocket up and press into place.
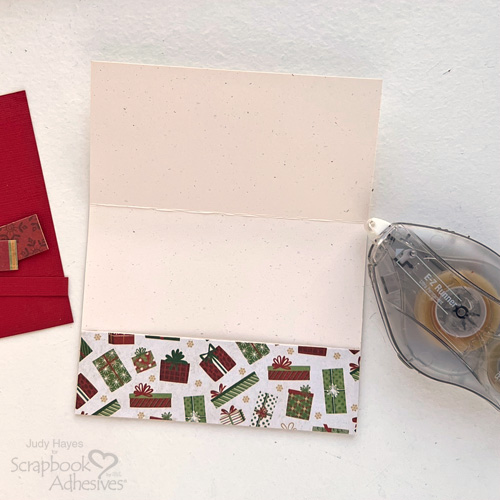
Apply adhesive with E-Z Runner® Ultra Strong Refillable Dispenser to the back of the patterned package paper and secure it over the pocket.
Layer the Strips
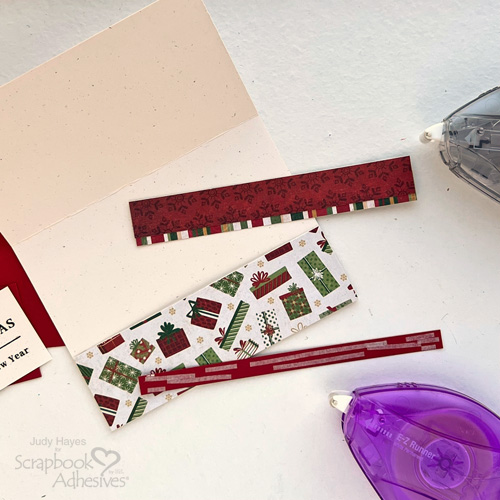
To the back of the red patterned paper, apply adhesive along one long edge with E-Z Runner® Ultra Strong Refillable Dispenser and place it over striped paper allowing about a 0.125-inch reveal.
Next, use the E-Z Runner® Micro Refillable Dispenser to apply the adhesive to the back of the red strip. Secure it over the patterned red paper.
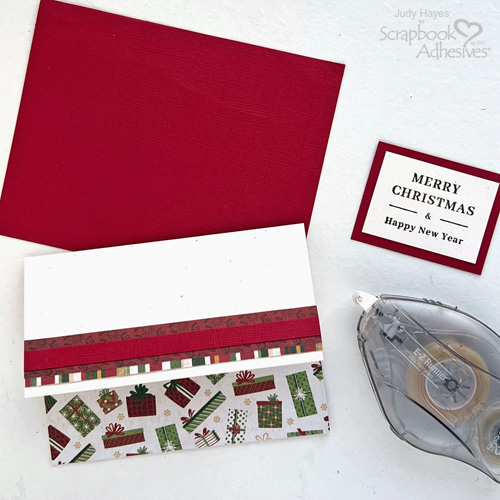
Apply adhesive on the back of the assembled band with the E-Z Runner® Ultra Strong Refillable Dispenser and place it across the top flap of the card.
Assemble the Holiday Gift Card Holder
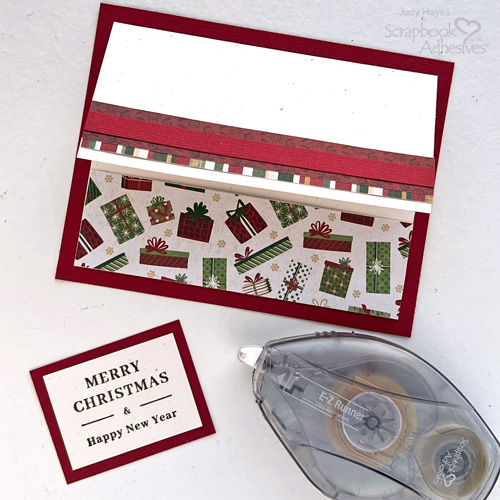
Now for the fun part, assembly! On the back of the pocket card, apply E-Z Runner® Ultra Strong Refillable Dispenser along all of the edges. Center the card on the red cardstock and press into place.
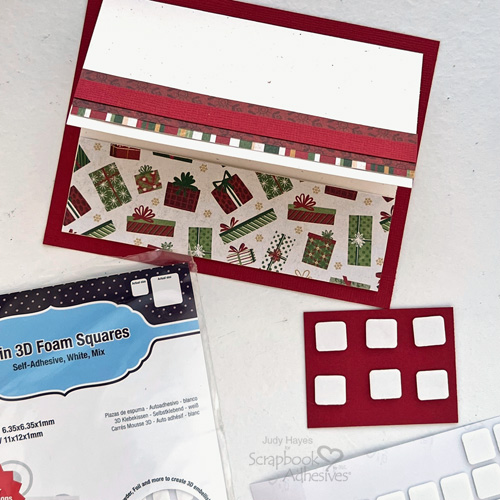
Add a few regular sizes of the Thin 3D Foam Squares White Mix on the back of the matted verse keeping it slightly above the bottom edge. Peel the liners off and place the verse over the band on the card front, allowing the bottom edge to extend below the flap edge.
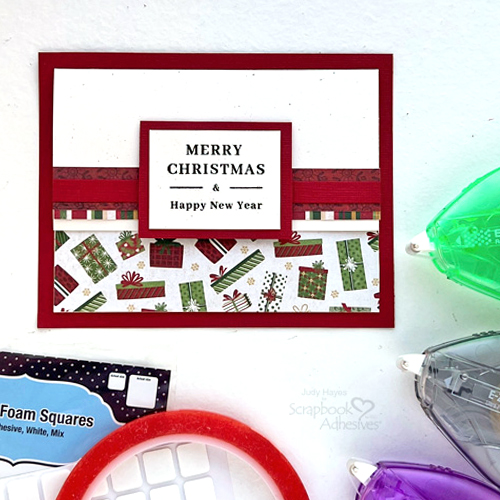
If desired, stamp a verse inside. To keep the card closed, apply a small amount of E-Z Dots® Repositionable Refillable Dispenser to the back of the flap and press closed. The card will easily open as the adhesive is not permanent. Another option is to use the Adhesive Dots Large Repositionable!
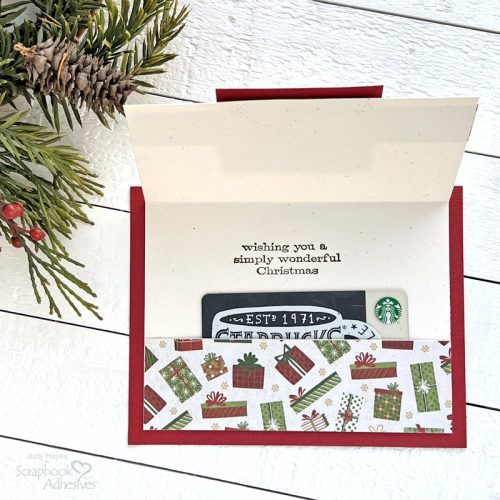
All that’s left is to tuck in a gift card! Change up the patterned papers, stamps, and cardstock colors to create this gift card holder for another occasion.
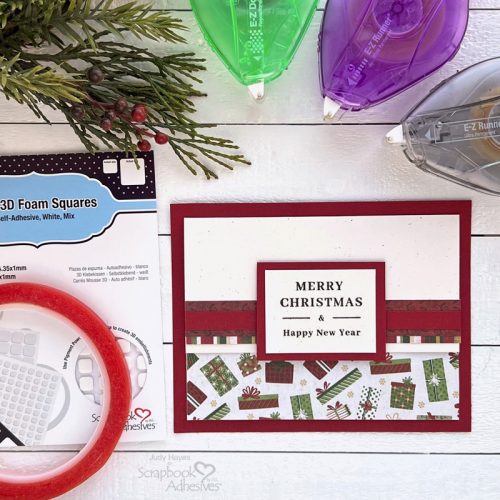
Thanks for Visiting!
Judy Hayes
Creative Time: 20 mins
Skill Level: Beginner
Materials Needed:
Scrapbook Adhesives by 3L®
E-Z Runner® Ultra Strong Refillable Dispenser, E-Z Runner® Micro Refillable Dispenser and E-Z Dots® Repositionable Refillable Dispenser
Thin 3D Foam Squares White Mix
Home Hobby by 3L®
Extreme Double-Sided Tape 1/4in
Other: Gina K Designs (Two Step Holiday Mini), PhotoPlay Paper Co. (Christmas Memories Collection – Under the Tree, Nutcracker), Ranger Ink Distress Ink (Forest Moss), Cardstock (Red, Birch)
Save to Pinterest!
Visit our Website and Blog!
Sign up for our Newsletter so you never miss a contest or giveaway!


