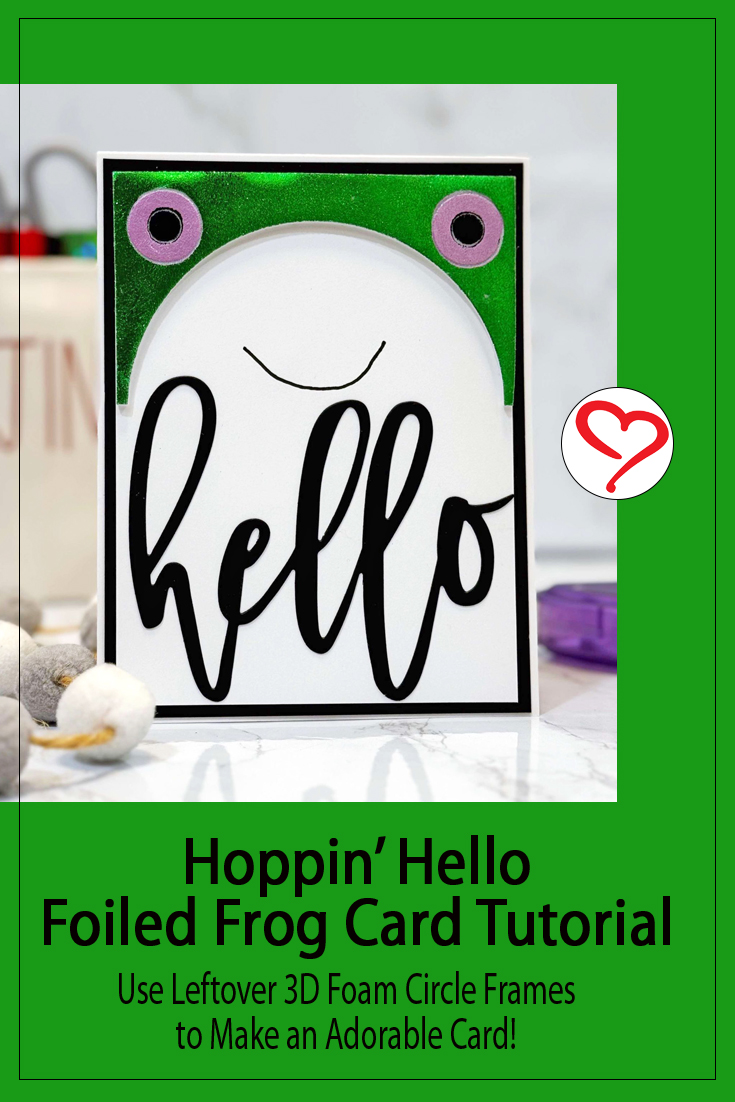
Hi, Jingle here today and I have a super fun card idea to share with you today! How do we feel about foiling a frog? I feel like it’s a good thing in this case with my Hoppin’ Hello Foiled Frog Card, and I think you are going to love it!
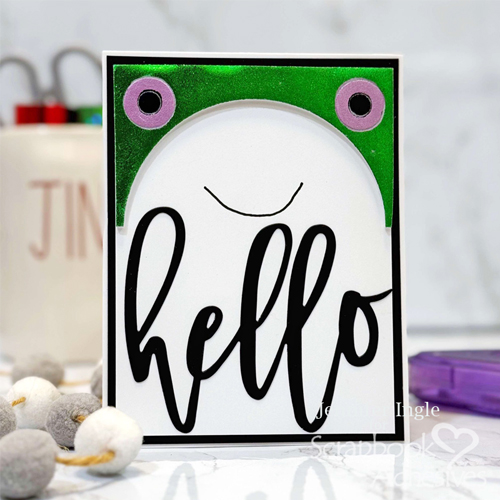
Foiled Frog Design Inspiration
Who knew the leftover pieces from my package of 3D Foam Circle Frames would turn into the most adorable frog ever?! After creating a recent card, Hooray Rainbow Card actually, I had a bit left over and all my eyes could see was a cute little frog face. I simply HAD to pull out some foil to bring it to life!
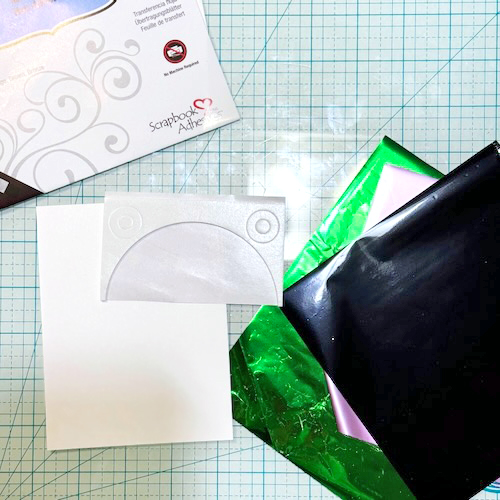
Wear Your Adhesives on the Outside with 3D Foam Circle Frames
I pulled out the 3D Foam Circle Frames, the Metallic Transfer Foil Sheets Variety Colors, the Metallic Transfer Foil Sheets Pastel Colors, and the Metallic Transfer Foil Sheets Nature Colors, along with a simple white cardstock panel to get started. Using the leftovers from my rainbow project, I began foiling!
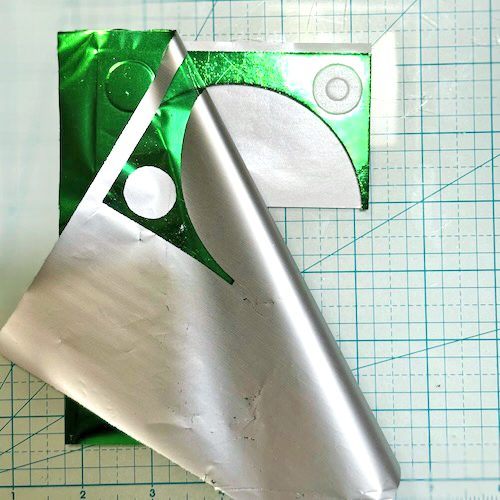
I began with the green foil, covering the bulk of the piece with the green to become the head of the frog. I left the release paper over the circle bits, as I wanted to add additional colors (pale purple and black) for those. I then did each eye area individually.
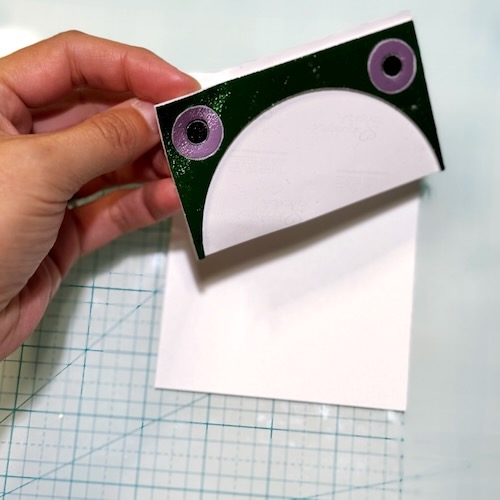
Creating the Card Front Panel
After adding the foil to each piece, I gently lifted the entire ‘frog head’ all together from the release paper. This allowed me to simply align the head onto the top of the cardstock panel and stick right on! Easy peasy, folks!
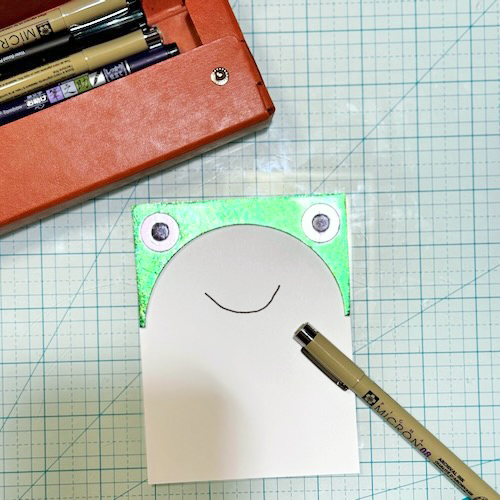
This next big might be the trickiest part for some of you! It was for me, but I’ll offer some tips of you don’t have confidence with a pen. I used a wider-tipped black pen to add the mouth of the frog. If you don’t love the hand drawn look or don’t feel confident with it, you can mask half of a circle outline stamp to create a similar look. You may even have a ‘smile’ stamp in your stash that you can use! It is totally up to you.
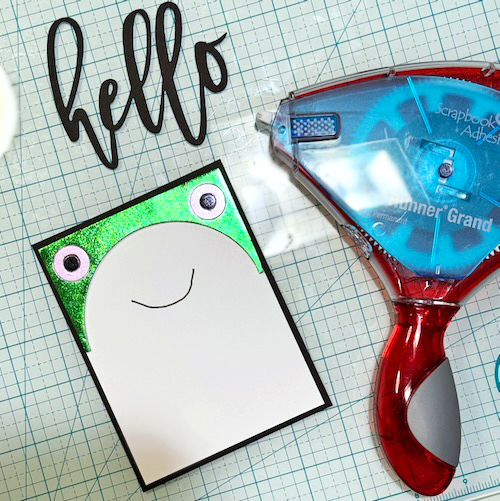
Layering the Layers
After adding the mouth, I mounted the panel onto a black panel, and then onto a white card base, adding some depth to the look. My E-Z Runner® Grand Permanent Dots Refillable Dispenser is my go-to for panels, as you get a strong hold and can easily apply full coverage.
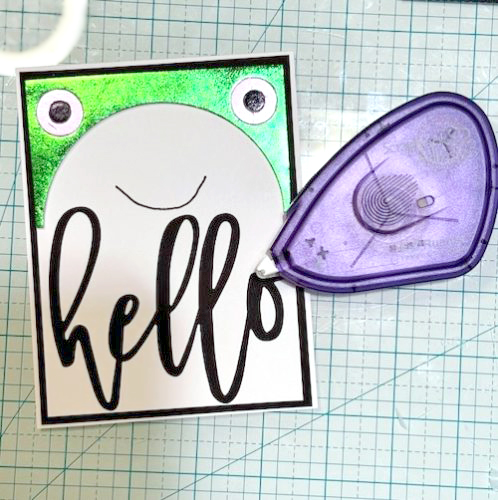
Adding the Sentiment
Finally, I used my E-Z Runner® Permanent Fine Adhesive Dispenser to adhere the Hello sentiment to the card. I chose a nice large sentiment to keep with the playful feel of the frog. You could also choose to go with a fun pun like Hoppy Birthday or something along those lines.
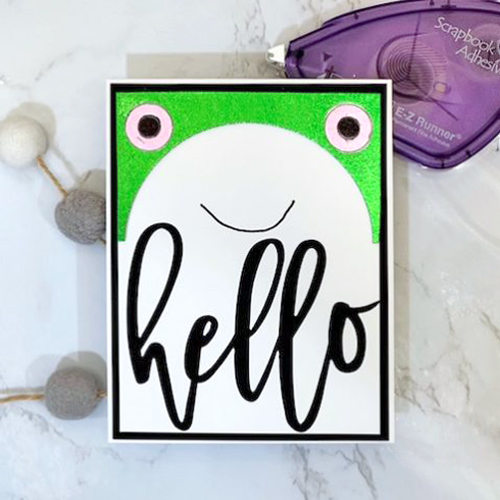
This is a SUPER fun card to create and I hope you give it a try! Remember, sometimes those little leftovers don’t belong in the bin. They belong on a Hoppin’ Hello Foiled Frog Card! Sometimes a design will JUMP right out at you! Happy Creating!
Thanks for stopping by!
Jennifer Ingle (aka Jingle)
Creative Time: 20 mins
Skill Level: Beginner
Materials Needed:
Scrapbook Adhesives by 3L®
E-Z Runner® Permanent Fine Adhesive Dispenser (aka Vellum Runner), E-Z Runner® Grand Permanent Dots Refillable Dispenser, 3D Foam Circle Frames White, Metallic Transfer Foil Sheets Variety Colors, Metallic Transfer Foil Sheets Pastel Colors, Metallic Transfer Foil Sheets Nature Colors
Other: Craft Dies: Waffle Flower Crafts (Hello); Pen: Sakura (Micron 8mm Black); White and Black Cardstock
Click Preferred Retailers List
Save to Pinterest!
Visit our Website and Blog!
Sign up for our Newsletter so you never miss a contest or giveaway!


