
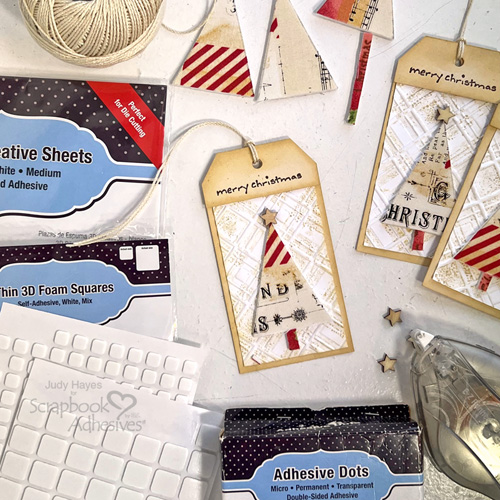
Hi, Judy here today! It’s coming down to crunch time for the holidays but still time to make a few Fabric Tree Christmas tags. These tags feature fabric trees made with 3D Foam Creative Sheets Medium White cut into triangles and covered with fabric. It only takes a small piece of holiday fabric and adds a unique look and texture. (The same technique can be used with patterned paper is place of the fabric.)

Tag and Tag Top
From Balsa cardstock, cut 2.25 x 4.25 inches piece for tag plus 1 x 2.25 inches piece for tag top. Cut angles at top of tag and punch hole. Align tag top piece on tag and cut angles and punch hole same as tag.
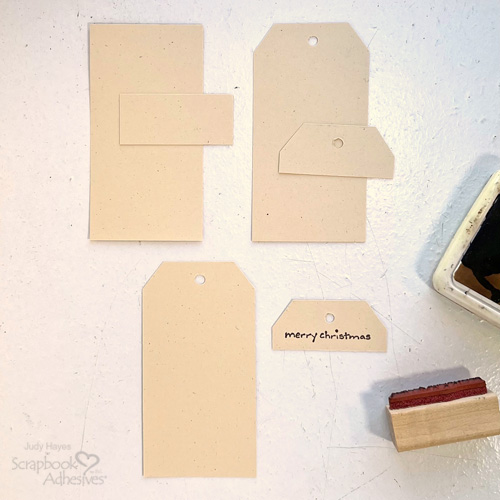
Stamp Merry Christmas with Distress Archival Ground Espresso ink on tag top piece.
With foam applicator and Distress Antique Linen ink rub ink around edges of tag ant tag top.
Embossed Background
Tap Distress Antique Linen ink on deboss side of Argyle Plaid embossing folder. Place piece of white cardstock in Argyle Plaid embossing folder and run through die cutting machine to emboss. Cut a piece 2 x 3.5 inches for each tag.

Use the E-Z Runner® Ultra Strong Refillable Dispenser to apply adhesive to the back of the embossed piece and attach it to the tag.
Attach the Tag Top

Place Thin 3D Foam Squares White Mix on the back to tag top, peel liners and fasten to the top of the tag.
Make Fabric Trees
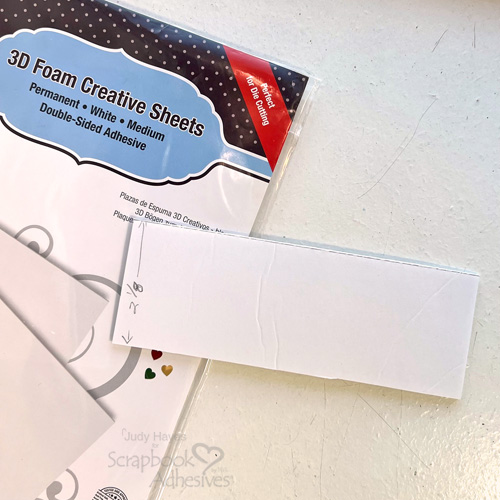
Cut a piece of 3D Foam Creative Sheets Medium White across the width (5.75 inches) x 2.125 inches. Peel off the liner and place the sticky side down on the back of the fabric. Trim fabric edges even with the 3D Foam Creative Sheet.
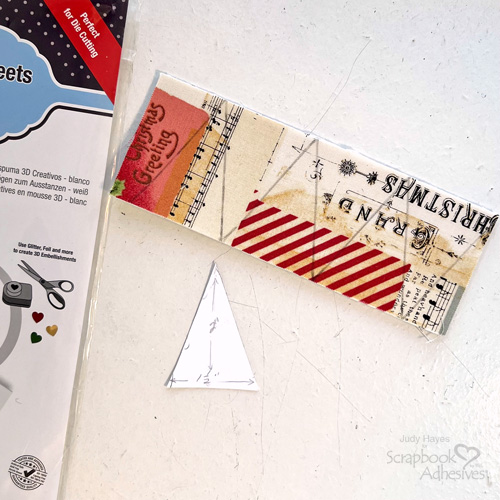
From a scrap of cardstock, cut a triangle 2.125 inches tall and 1.5 inches wide at the base. Align the triangle pattern bottom along the long side of the fabric-covered 3D Foam Creative Sheet and trace it with a pencil. Turn the triangle upside down, align it with the previous pencil line, and trace again. Repeat. This will make six trees. Cut along each pencil line. Keep scraps to cut a narrow strip for tree trunks.
Optional: To create more varied fabric designs on trees, cut two triangles vertically from the center bottom to the point. These can be mixed and put edges together to form a tree.
Fasten Tree to Tag
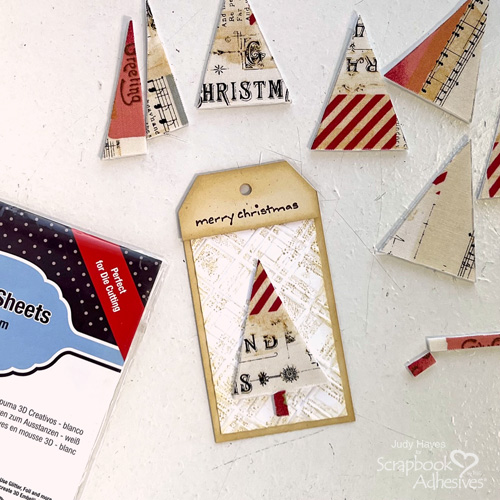
Peel liner from triangle tree and place on tag allowing space at bottom for tree trunk and at top for star. (If using split triangles, peel liners from 2 parts and put together on tag to form triangle tree.)

Cut a narrow strip from a scrap of fabric-covered 3D Foam Creative Sheet and a short piece from it for the tree trunk. Peel the liner and place it at the bottom of the tree on the tag.
Add Star and String
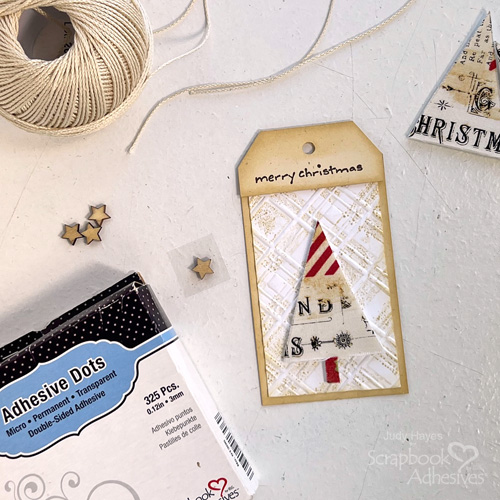
Place Adhesive Dots Micro on the back of a small wood star, peel away the liner, and fasten it at the top of the tree on the tag. Cut a piece of string and loop it through the tag’s opening.
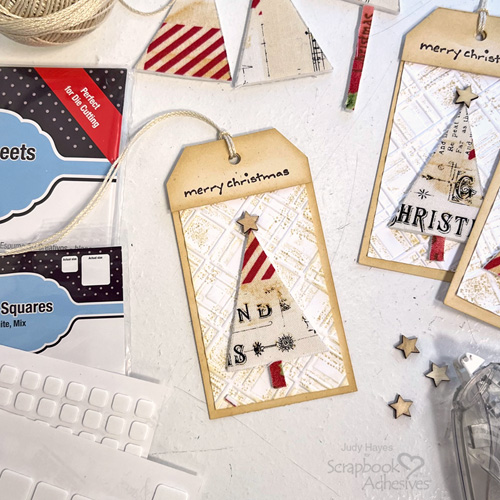
Repeat to make more tags.
Thanks for visiting!
Judy Hayes
Creative Time: 30 mins
Skill Level: Intermediate
Materials Needed:
Scrapbook Adhesives by 3L®
E-Z Runner® Ultra Strong Refillable Dispenser
Thin 3D Foam Squares White Mix
3D Foam Creative Sheets Medium White
Other: Stamp: Rubber Soul (Merry Christmas); Ink: Ranger Ink (Distress Antique Linen, Distress Archival Ground Espresso); Embossing Folder: Spellbinders Paper Arts (Argyle Plaid); Fabric: Tim Holtz Eclectic Elements Holidays Past (Holiday Collage); Balsa/Beige and White Cardstock; Small Wood Stars; Beige Cord
Click Preferred Retailers List
Save to Pinterest!

Visit our Website and Blog!
Sign up for our Newsletter so you never miss a contest or giveaway!


