
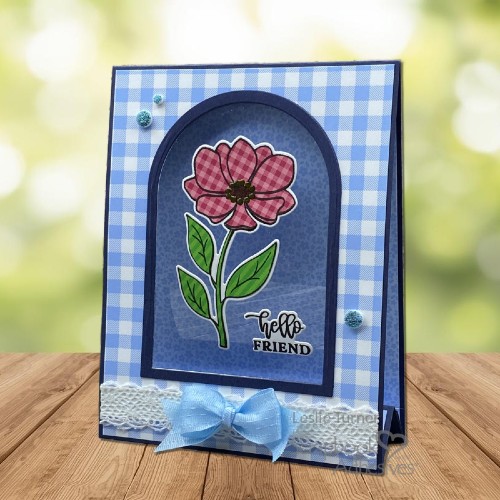
Hi everybody! Do you happen to be a fan of fun folds? Undeniably, I’d rather make a fun fold than a regular card! Leslie here, sharing a tutorial for making an accordion diorama card. This is an easy design that sure packs a punch!
Cut Diorama Card Base, Bridge & Layers
COLORED CARDSTOCK:
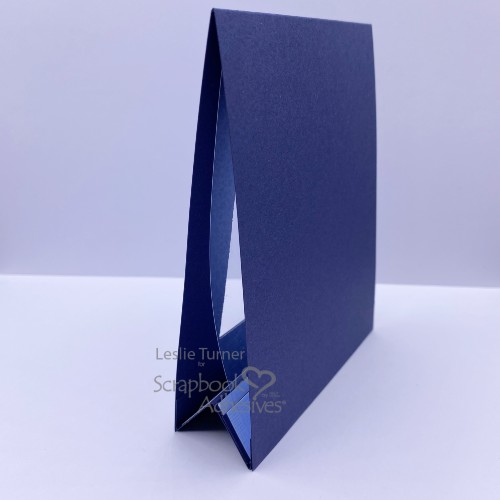
–Card base: 4-1/4″ x 11″, scored at 5-1/2″. Fold on the score lines and burnish with a bone folder.
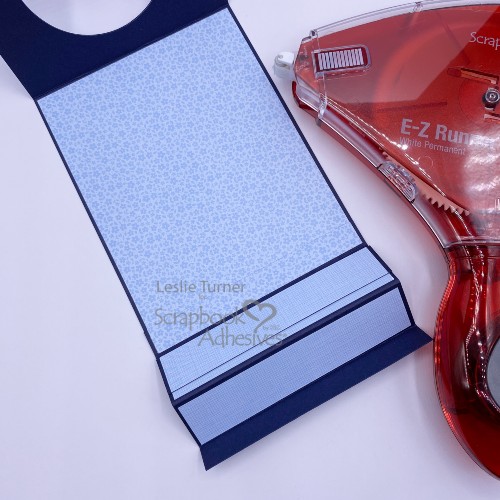
–Bottom bridge: 3″ x 4-1/4″, scored at 1/2″, 1-1/2″ and 2-1/2″. Valley-mountain-valley fold on the score lines and burnish with a bone folder.
–Pocket: 1-1/2″ x 4-1/4″, scored at 3/4″. This piece gets folded in half on the score line and burnished with a bone folder.
PATTERNED PAPER:
–Front and inside panels: 4-1/8″ x 5-3/8″ (cut two).
–Inside bridge panels: 7/8″ x 4-1/8″ (cut two).
–Pocket: 3/4″ x 4-1/8″.
–Back embellishing strip: 1/4″ x 4″.
ACETATE:
–Inside diorama: 3-3/4″ x 5-1/8″.
WHITE CARDSTOCK:
–Back sentiment panel: 4″ x 5-1/4″.

Adhere Layers & Create Pocket
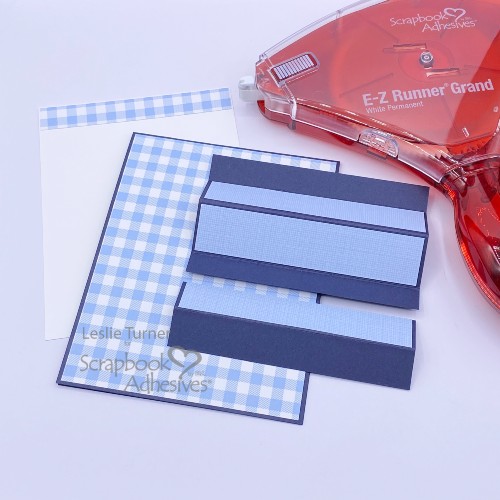
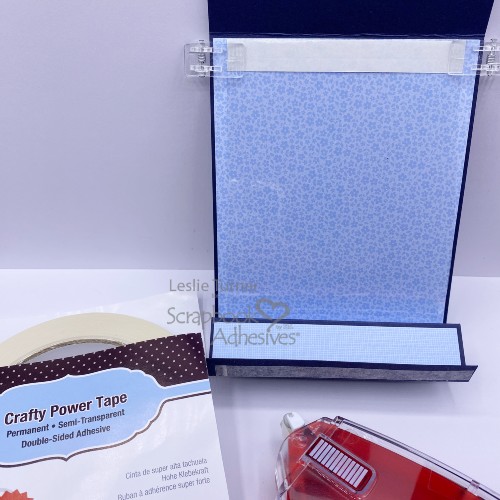
For best results, I love the E-Z Runner® Grand Permanent Strips Refillable Dispenser to adhere the patterned paper layers to the cardstock. Firstly, adhere the front panel to the card base. Next, adhere the two inside bridge panels to the bridge. Similarly, adhere the narrowest panel to the pocket. Additionally, adhere the back embellishing strip to the white cardstock back panel.
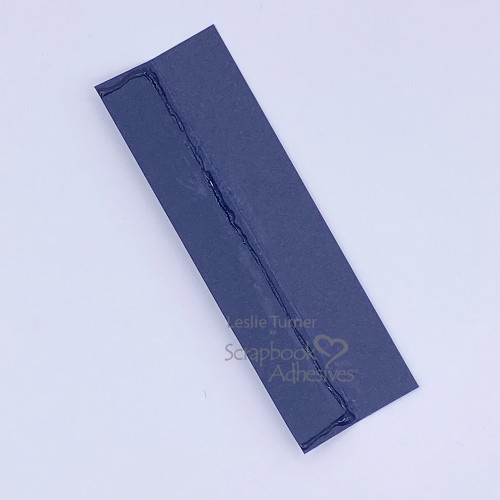
Now, using the Dual Tip Glue Pen, apply glue to the center and both ends of the pocket piece. Sit a weight on this piece to get good adhesion while it dries. Keep the top open as the acetate sheet will get tucked into this pocket. Afterwards, adhere the pocket to either side of the bridge, butting the bottom edge with the score line.
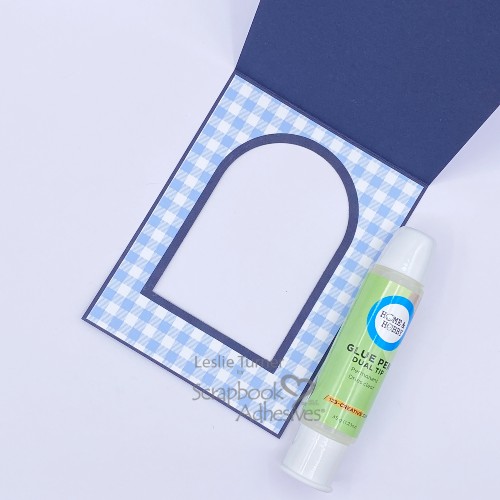
Cut Aperture & Add Frame for Diorama
Using your choice of shaped dies, cut an aperture through both layers on the front of the card base. Use the same die and one slightly larger to cut a frame for the opening. Glue it in place with the Dual Tip Glue Pen.
Assemble Card
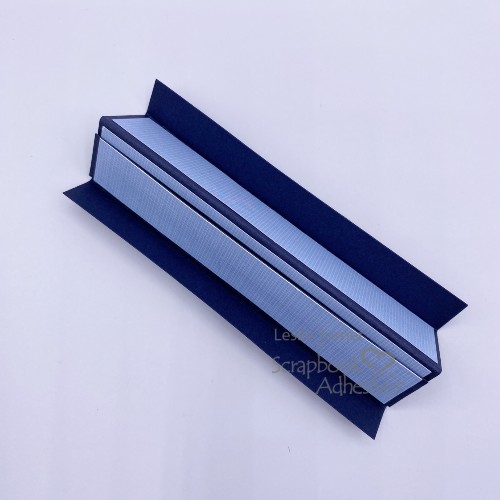
Start by adhering the bridge to the back flap of the card base using the E-Z Runner® Grand Permanent Strips. Ensure the pocket is facing the rear. Add the inside patterned paper panel to cover the bridge flap. I was interrupted by the doorbell, and when I went back to finish, I attached the panel before gluing the bridge. So I had to hide the flap with another piece of the patterned paper. Don’t do what Leslie did, lol!
Apply a strip of Crafty Power Tape to the top edge of the front side of the acetate. Line it up with the fold line and hold it in place with a couple of clips. Tuck the bottom of the acetate into the pocket. Remove the release paper from the tape and close the card to adhere the acetate to the back side of the front flap. Once again, using the E-Z Runner® Grand Permanent Strips, apply adhesive to the other flap on the bridge. Fold the bridge up and close the card to adhere it to the back side of the front flap.
Complete Accordion Diorama Card
Attach an image and sentiment to the acetate using an Adhesive Sheet. For embellishments, I used the Wear Your Adhesive on the Outside technique by using small and medium circles from the 3D Foam Christmas Shapes and the Metallic Transfer Foil Sheets Pastel Colors. Cover the circles with the foils (color side facing you) for shiny embellishments!
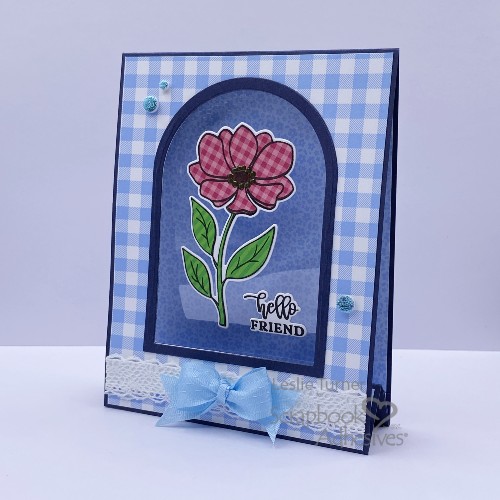
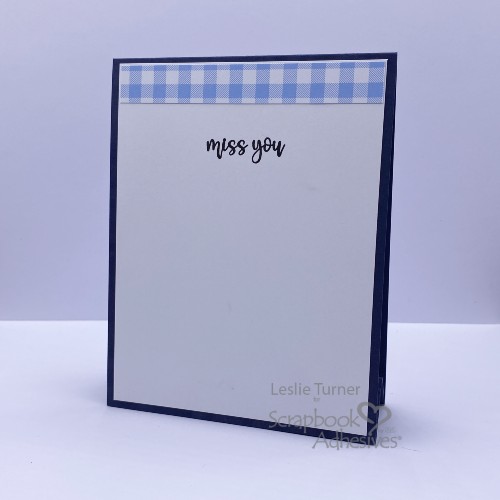
Also used two kinds of ribbon from my stash for an embellishment across the bottom, attaching with E-Z Dots® and Mounting Squares. The final step was stamping a sentiment on the back sentiment panel and using the E-Z Runner® Grand Permanent Strips to adhere it.
Thanks for visiting – we’ll see you next time!
Leslie
Creative Time: 45 mins
Skill Level: Intermediate
Materials Needed:
Scrapbook Adhesives by 3L®
E-Z Runner® Grand Permanent Strips Refillable Dispenser
Crafty Power Tape Polybag 81ft.
Adhesive Sheets 4 x 6in.
3D Foam Christmas Shapes
Metallic Transfer Foil Sheets Pastel Colors
E-Z Dots® Permanent Dispenser
Mounting Squares 250 White
HomeHobby™ by 3L
Dual Tip Glue Pen
Other:
Cardstock: CutCardStock Patriot Blue, Neenah Solar White
Paper: Doodlebug Design Rainbow Petite Prints (variety)
Acetate: Grafix Crystal Clear
Stamp & Die Bundle: Hero Arts Here For You
Ink: Versafine Onyx Black, assorted markers
Dies: Scrapbook.com Nested A2 Arches
Accessories: Mini MISTI, Big Shot, Ribbon and Lace, Bow Maker, Nuvo Crystal Drops
Click Preferred Retailers List
Save to Pinterest!

Visit our Website and Blog!
Sign up for our Newsletter so you never miss a contest or giveaway!


