
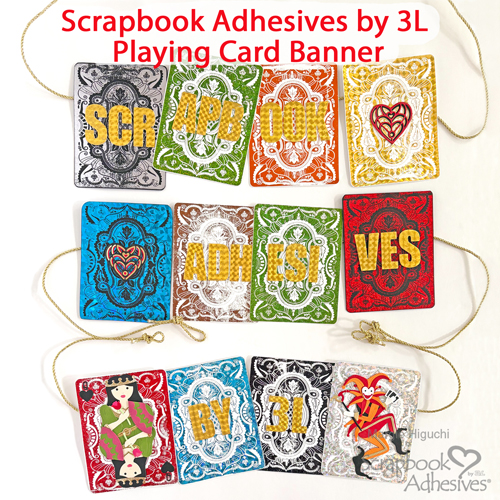
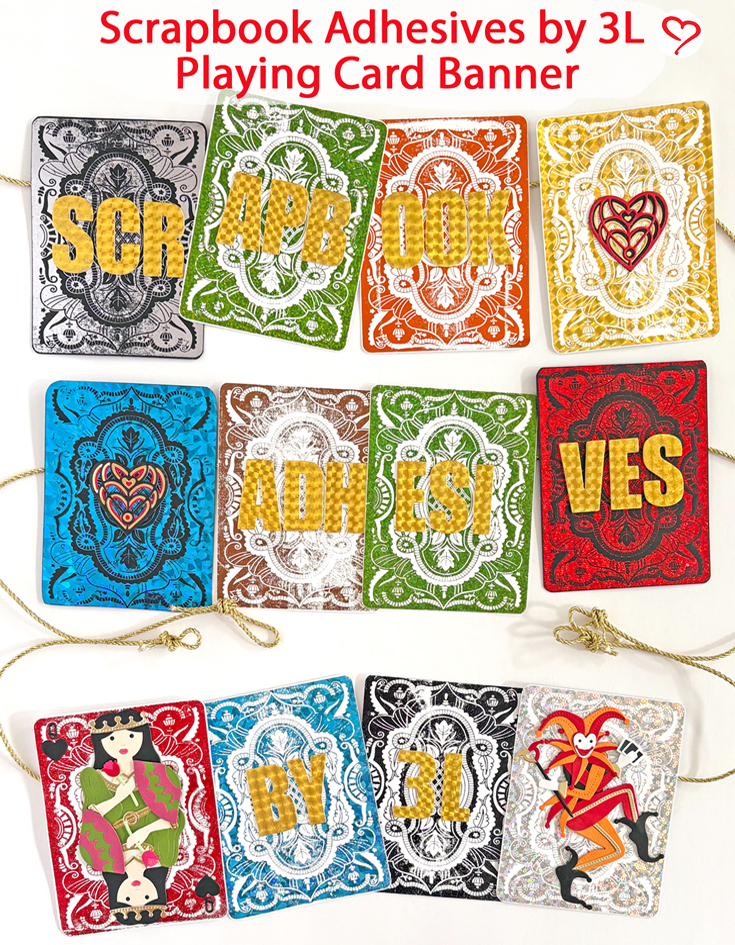
One of my favorite ways to create my projects is to use 3D Foam Creative Sheets and the Metallic Transfer Foil Sets. If you are a die-cutting crafter and you like shine and dimension, this Playing Card Banner project is for YOU! Hi, Margie here today! I am featuring a Wear Your Adhesive on the Outside technique to make it happen.
GIVEAWAY CLOSED!! Thank you for participating in the Scrapbook & Cards Today Magazine Partner Appreciation/Celebration Event!
GIVEAWAY ALERT! We are featured on Scrapbook & Cards Today Magazine’s Partner Appreciation today (8/15)! Read at the end of the post for details.
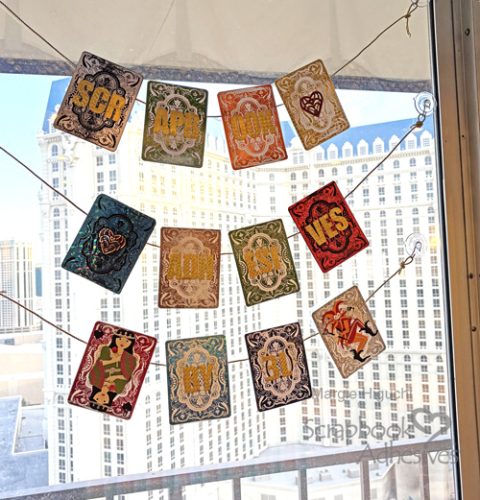
A couple of months ago, I had the opportunity to attend a trade-only event. Since the location was in Las Vegas, Nevada, I thought it would be SUPER FUN to create the company banner with a playing card theme (think Poker!).
Playing Card Banner Foundation
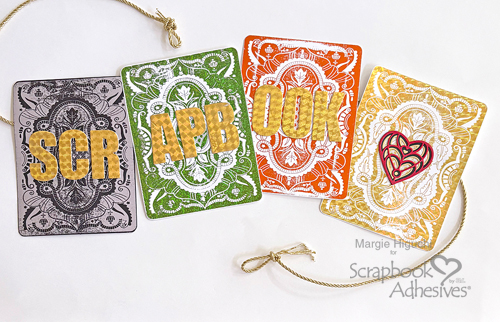
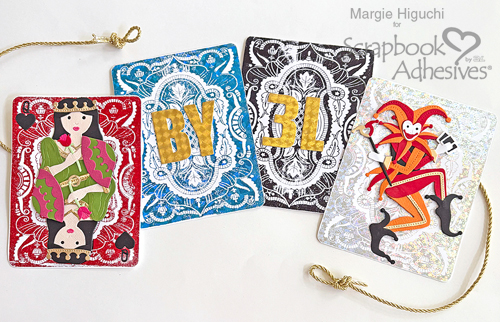
Cut a combination of 4.5 x 6-inch black and (mostly) white cardstock panels, a little larger than the Deluxe Deck Press Plate, and it’s easier to trim. Rather than letterpress the panels, I decided to foil them because we are talking about Vegas! LOL! Follow the directions on your hot plate foiling machine (I used the Spellbinders Glimmer Machine). Couldn’t make up my mind so I foiled a combination of Metallic Transfer Foil Sheets Nature Colors, and Metallic Transfer Foil Sheets Celebrate Colors.
Display it with Letters
For shiny and dimensional letters, I first die-cut alpha letters with the 3D Foam Creative Sheets Small White. Before placement of letters and accents, determine your banner panel designs…what colors go where. Then secure your letters and remove each top liner to place foils from a combination of Metallic Transfer Foil Sheets Nature Colors, and Metallic Transfer Foil Sheets Celebrate Colors.

With the color side facing you, put the foil down over the exposed adhesive and gently rub to transfer the color. Peel off to reveal the completed letter! Repeat the foiling step until done. Reapply foil in missed areas.
Try Your Hand with the Details
Die-cut the Q letter, heart, Queen, Joker, and layered hearts with various and appropriate color cardstock. I assembled them with the Dual Tip Glue Pen…loved how they turned out! Next, adhere them with the E-Z Runner® Grand Ultra Strong Refillable Dispenser for strong adhesion on a slick surface. For smaller accents, I used the Adhesive Dots Small and the Dual Tip Glue Pen.
On the back of each panel, I cut two 0.75 x 2.5-inch strips of white cardstock to make a loop to thread a gold cord through the panel. I secured them with E-Z Runner® Grand Ultra Strong Refillable Dispenser. Then, using six clear suction cups with hooks, I used the window behind our table to help decorate our booth. Sorry about the picture below…it was against the light.
I hope my Playing Card Banner project inspires you to create a unique and fun-themed banner!
Thanks for stopping by!
Margie Higuchi
Creative Time: 120 mins
Skill Level: Intermediate
Materials Needed:
Scrapbook Adhesives by 3L®
E-Z Runner® Grand Ultra Strong Refillable Dispenser
3D Foam Creative Sheets Small White
Metallic Transfer Foil Sheets Nature Colors and Metallic Transfer Foil Sheets Celebrate Colors,
HomeHobby™ by 3L
Other: Craft Dies: Spellbinders Paper Arts (Jack of All Trades Collection by Jaycee Gaspar) and The Ton Stamps (Bold Alpha Upper Coverplate Dies); Tones of Green, Tones of Pink, Red, Black, Cream, White + Gold Mirror Cardstock; Gold Cord Trim; Clear Suction Cups with Hooks
Click Preferred Retailers List
Save to Pinterest!
Scrapbook & Cards Today Partner Appreciation Giveaway!
We are excited to be featured today (8/15) by our friends! See other project inspiration based on the Wear Your Adhesive on the Outside technique. For a chance to enter our adhesive package, visit SCT Partner Appreciation with SAby3L Giveaway (ends next Wednesday, 8/20). Good Luck!
Visit our Website and Blog!
Sign up for our Newsletter so you never miss a contest or giveaway!


