
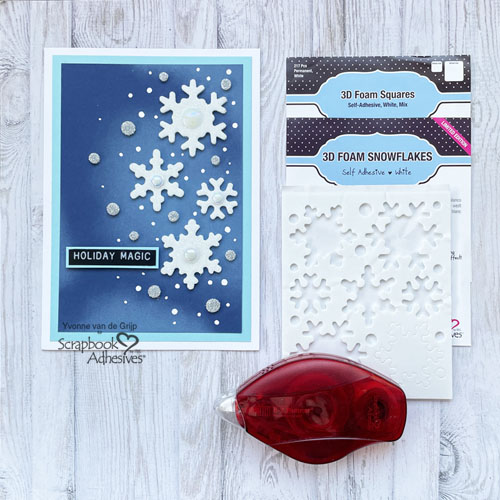
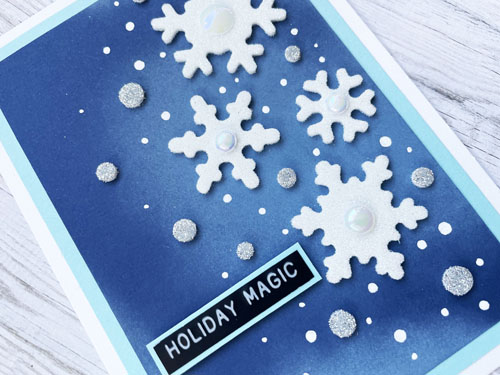
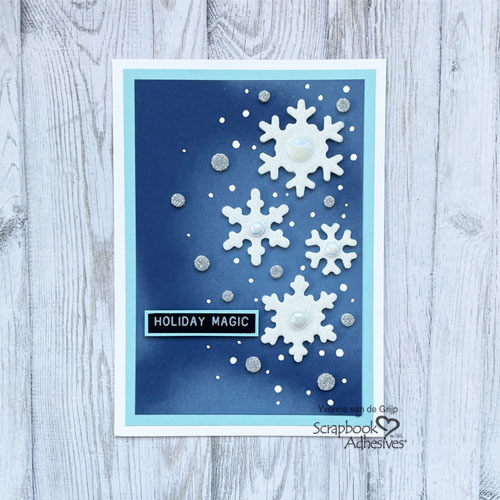
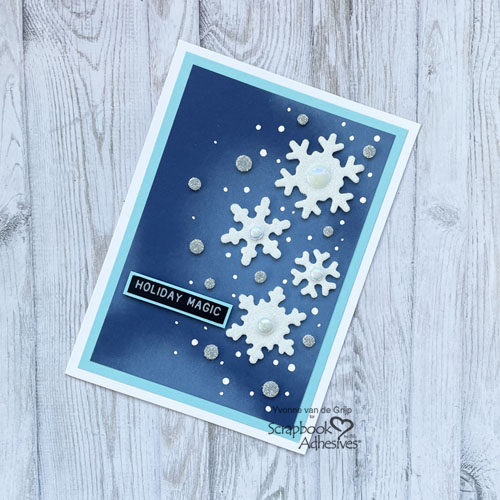
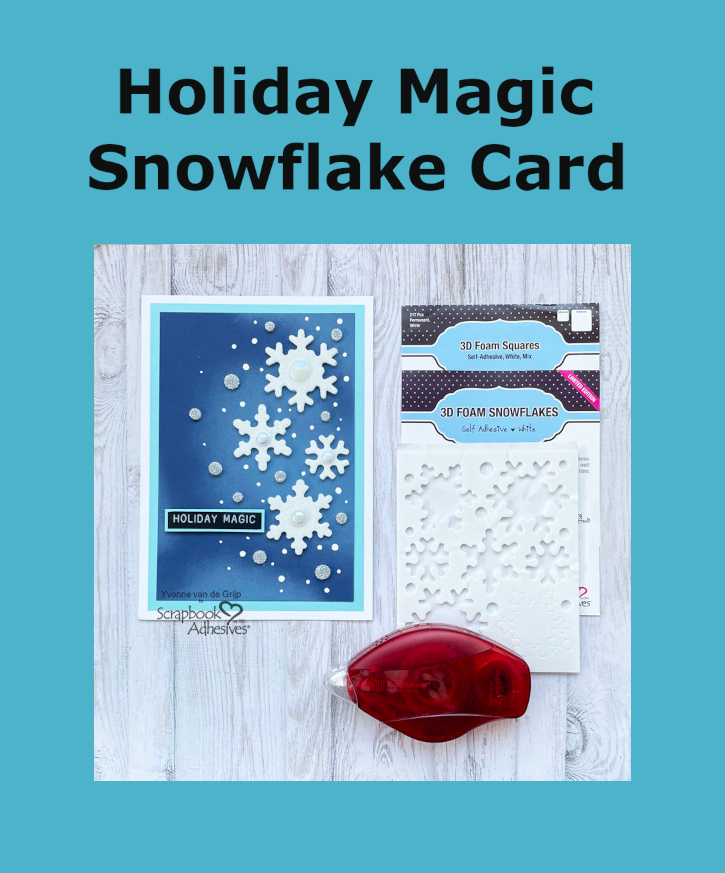
Hi everyone, Yvonne here with some seasonal inspoiration. With Christmas coming up in a few weeks, it’s time to get crafty and make Christmas cards. With 3D Foam Snowflakes it’s super easy to create a snowy scenery like this Holiday Magic Snowflake Card.
I would love to share how I made my card. Will you join me? Oh…and the fun thing is…this card is also suitable for beginner cardmakers!
Holiday Magic Top Card Panel
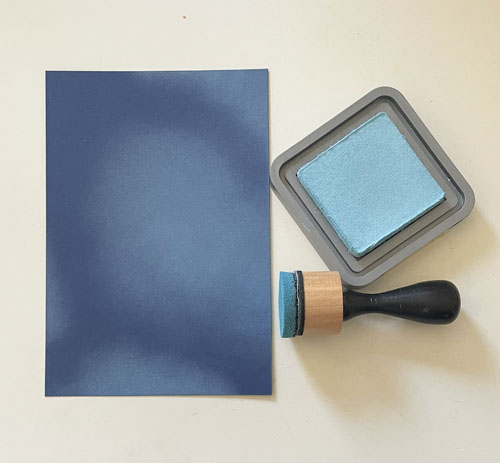
Trim a piece of dark blue cardstock to a rectangular size. Next, use a light blue chalky inkpad and blending tool to create an additional color effect on the panel. Mat the panel on a slight larger soft blue panel and lastly on a white card base, using the E-Z Runner® Permanent Strips Refillable Dispenser.
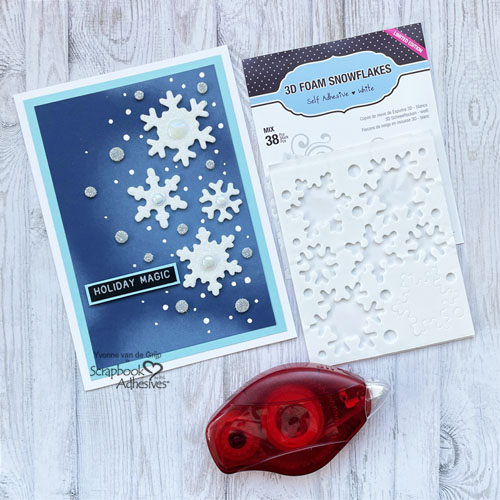
Wear Your Adhesive on the Outside with 3D Foam Snowflake
Place some 3D Foam Snowflakes on card front towards the right side as pictured (keep the top liner on for now) and surround the flakes with the foam dots (keeping the top liners on) . Grab some enamel dots that will fit in the centers of the snowflakes. Remove the liner of the snowflakes only to center the enamel dots.
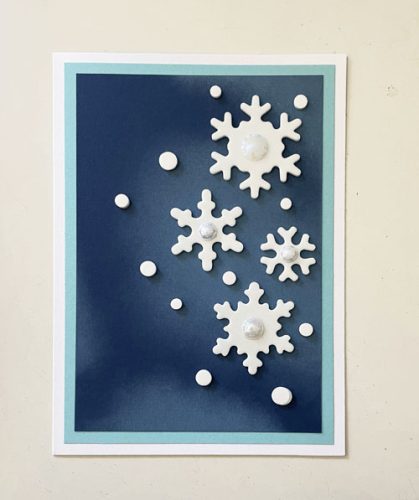
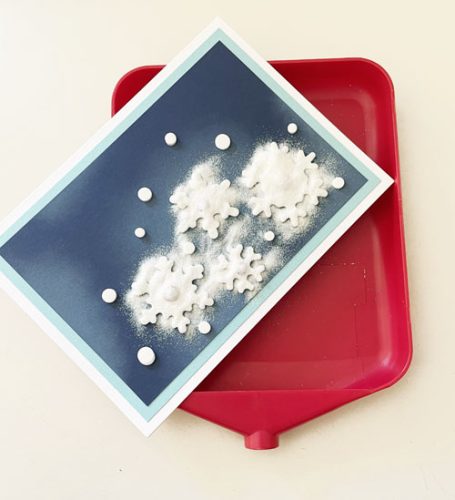
Cover the snowflake foam shapes with white glitter, rub/press the glitter in to secure, and tap off any excess. Remove the liner of the dots and repeat the glittering steps with silver glitter. The super easy technique is Wear Your Adhesive on the Outside – bring the adhesives out from layers to make them shine as embellishments!
Finishing Touches
For the finishing touches, draw tiny snowflake dots with a white pen. Place a sentiment sticker on a soft blue banner and adhere onto the card with 3D Foam Squares White Mix.
And Voilá, your Holiday Magic Snowflake Card is ready to be posted or gifted! I hope you enjoyed this simple tutorial and wish you happy holiday crafting!
Creative Time: 30 minutes
Skill Level: Beginner
Materials needed:
Scrapbook Adhesives by 3L®:
E-Z Runner® Permanent Strips Refillable Dispenser
Other: Cardstock (White, Dark Blue, Soft Blue); Sentiment Sticker (Tim Holtz® idea-lology®: Label Stickers: Christmas); Ink (Ranger Ink: Distress Oxide in Tumbled Glass); Glitter (White, Silver); Ink Blending Tool; Enamel Dots; Paper Trimmer; Scissors
Save to Pinterest!
Visit our Website and Blog!
Sign up for our Newsletter so you never miss a contest or giveaway!


