
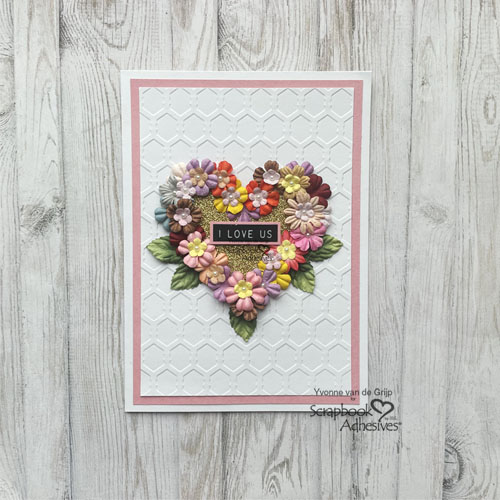
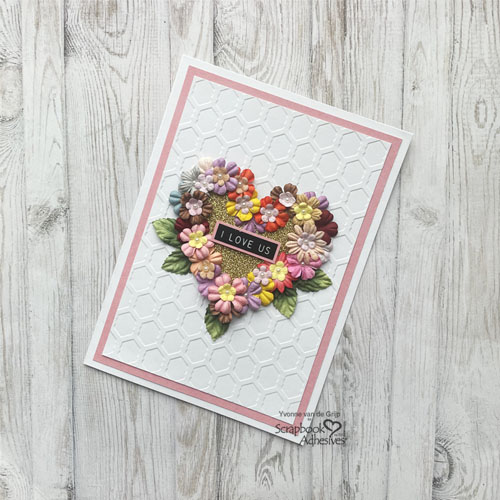
Hi everyone, Yvonne here with some Valentine’s Day inspiration. Hearts and flowers are a perfect combination to create this Flowered Heart Love Card! I would love for you to see my process in creating this whimsical focal point with lots of mulberry flowers! Wanna join me?

Prep the Card Panel
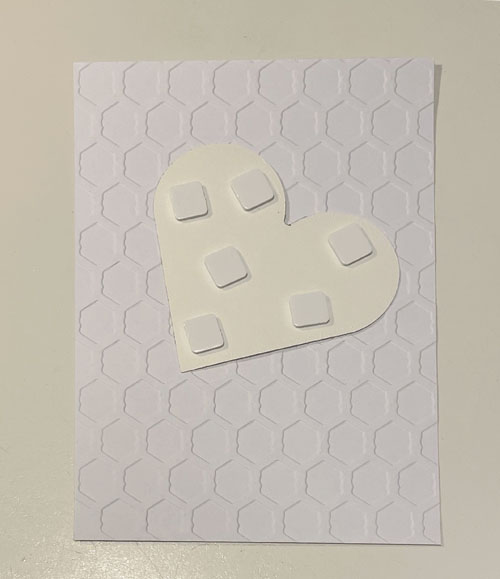
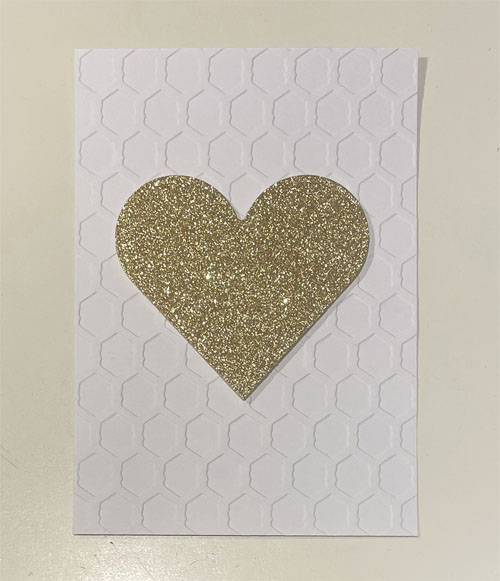
Emboss a piece of white cardstock with an embossing folder and trim it into a top card panel size. Die-cut a heart from gold glitter cardstock and adhere it to an embossed card panel. Pop up the shape with 3D Foam Squares White Mix.
Add Dimension and Texture
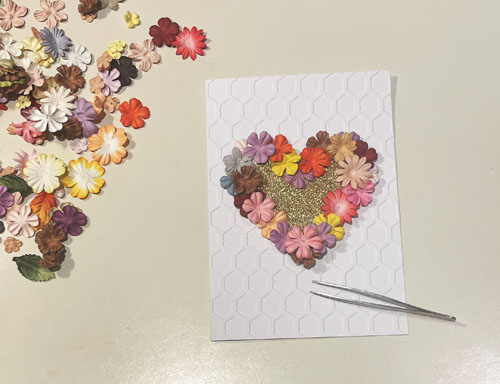
To give the heart more interest, I adhere mulberry flowers around its edge with Adhesive Dots Micro. Start by using slightly larger blooms and closer to the center, tuck in smaller blooms. Add in self-adhesive pearls in the centers to finish the look. Love it! Finally, place some mulberry leaves under the heart for an extra somthing.
Assemble the Card and Add Sentiment
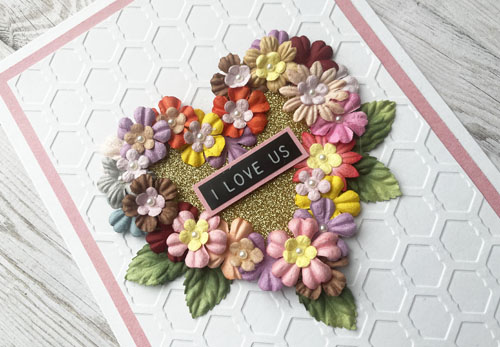
Mat the embellished top panel to a pink panel and then to a white card base with the E-Z Runner® Permanent Strips Refillable Dispenser. To finish, place a Label Sticker on a small pink banner and adhered it to the center of the heart with 3D Foam Squares White Mix to lift up and highlight the sentiment.
And voilá, your Flowered Heart Love Card is ready. Wishing you happy Valentine’s Day crafting!
Creative Time: 40 minutes
Skill Level: Intermediate
Materials needed:
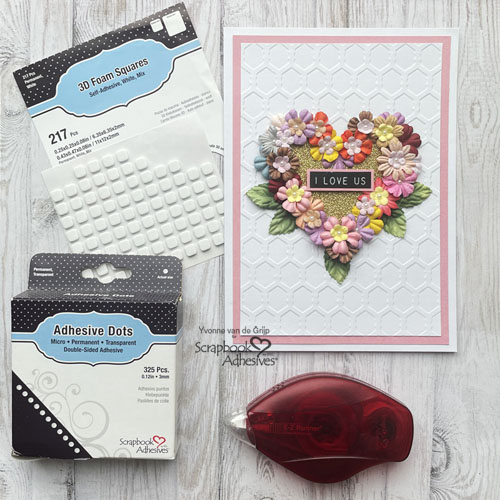
Scrapbook Adhesives by 3L®:
E-Z Runner® Permanent Strips Refillable Dispenser
Other: Craft Die and Machine: Spellbinders Paper Arts® (Classic Hearts Edged Dies and Platinum 6 Machine); Sentiment Sticker: idea-lology® (Label Stickers: Sentiments by Tim Holtz); Mulberry Flowers and Leaves; Self-Adhesive White Pearls; Paper Trimmer; Scissors; White, Pink, Gold Glittered Cardstock
Save to Pinterest!

Visit our Website and Blog!
Sign up for our Newsletter so you never miss a contest or giveaway!


