
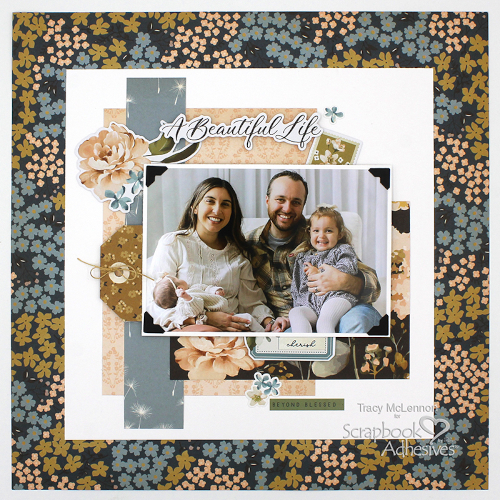
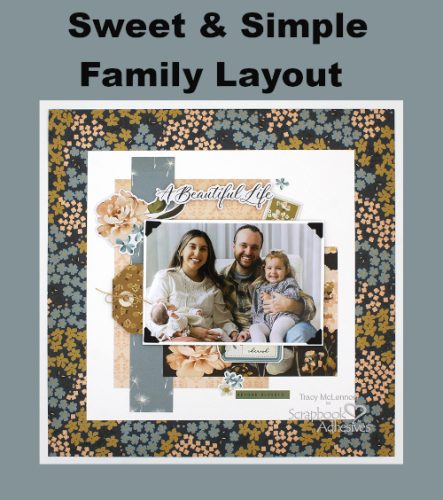
Hello crafty friends! Tracy here and today I have a Sweet and Simple Family Layout to share which I created in just a few easy steps. Here are all of the details.
Let’s Get Started!
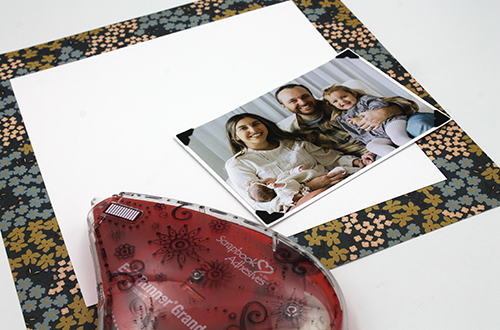
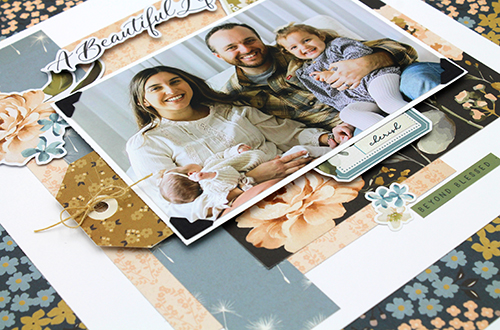
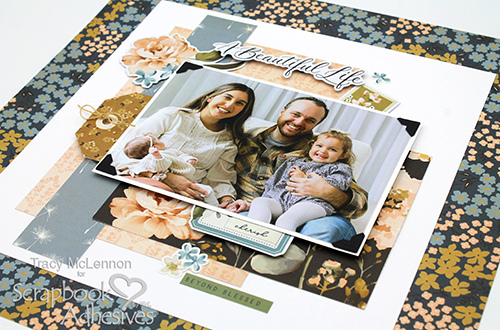
First step was to choose the patterned paper background and then I cut a piece of 9.25″ square white cardstock. Adhere these layers together using the E-Z Runner® Grand Refillable Dispenser. Next cut a white cardstock mat for the 4×6 photo, and secure with Creative Photo Corners Black. Set aside for now.
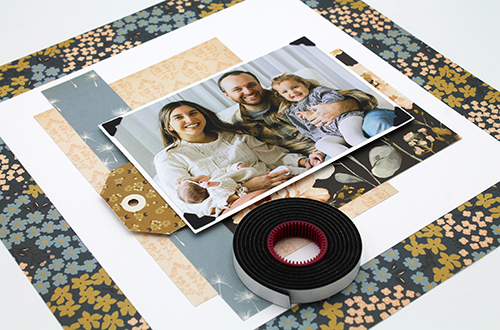
Cut a few pieces of patterned paper for the layered background. Adhere them to the layered background using the E-Z Runner® Grand Refillable Dispenser. This is the base for this simple family layout. Add the matted 4×6 photo now using Crafty Foam Tape Black. At this time I also added the patterned tag to the left hand side of the matted photo, again using Crafty Foam Tape Black.
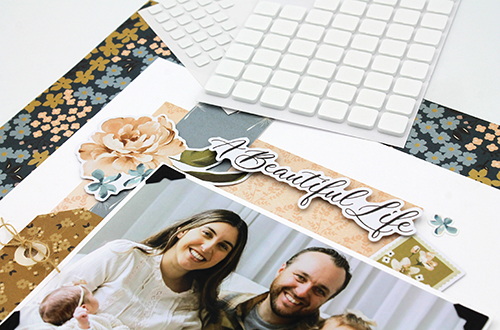
Start adding coordinating embellishments around the matted photo. Some are adhered straight to the background. Others are added using a combination of Thin 3D Foam Squares White Mix and 3D Foam Squares White Mix.
Add a burlap string bow to the tag. As well as more embellishments around the matted photo.
Thanks so much for stopping by!
Tracy
Creative Time: 45 minutes
Skill Level: Beginner
Materials needed:
Scrapbook Adhesives by 3L®:
Thin 3D Foam Squares White Mix
3D Foam Squares White Mix
Crafty Foam Tape Black
E-Z Runner® Grand Refillable Dispenser
Creative Photo Corners Black
Other: Simple Stories: Remember Collection; White Cardstock; Natural Burlap String
Click Preferred Retailers List
Save to Pinterest!
Visit our Website and Blog!
Sign up for our Newsletter so you never miss a contest or giveaway!


