
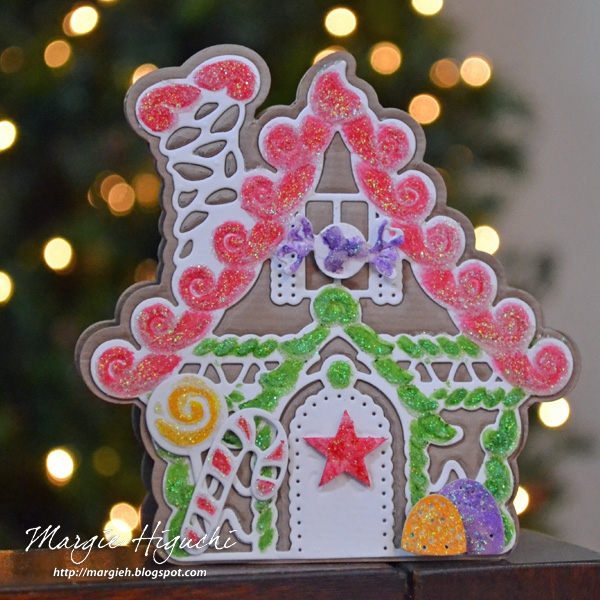
Hello everyone! Today I am very excited to share with you a shaped card that I’ve wanting to do for several weeks…needed the time to just sit down and do it. All these pieces were put together with Scrapbook Adhesives by 3L® products 🙂 What do you think?!
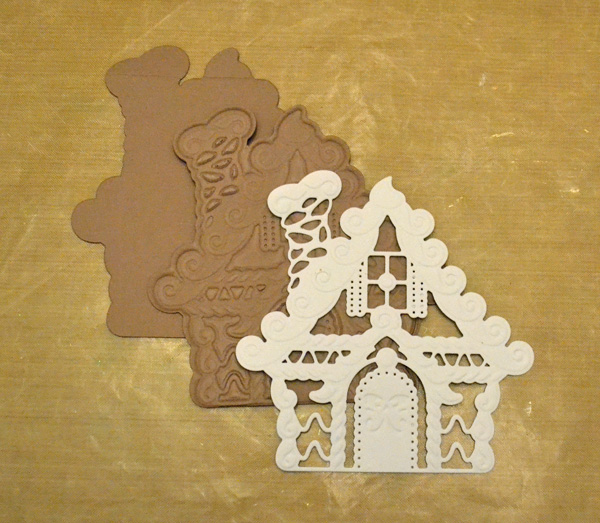
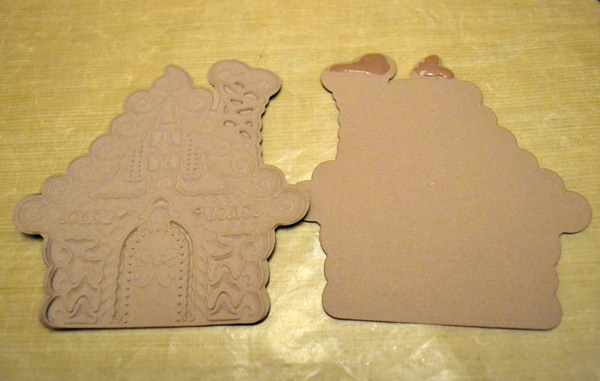
Let’s start with the card base. I die cut two of the Gingerbread House Border die (the silhouette of the house) with Kraft cardstock. One of the die cuts, I nested the Border die and the House die together on top and embossed only. Now it becomes the front of the card and it will embed another die cut.
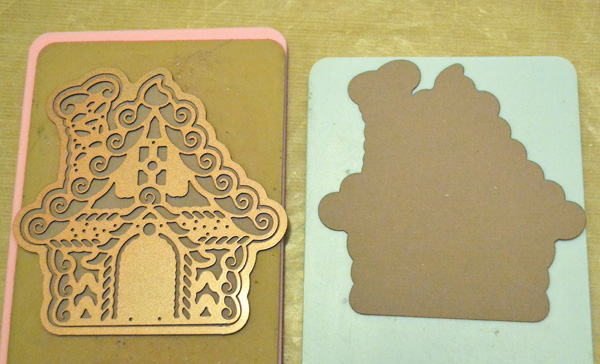
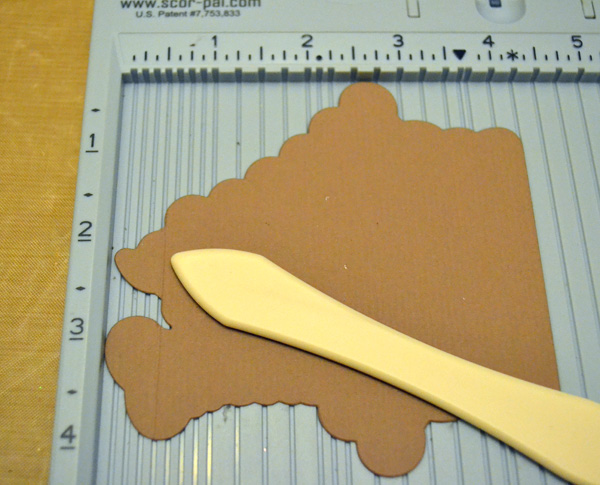
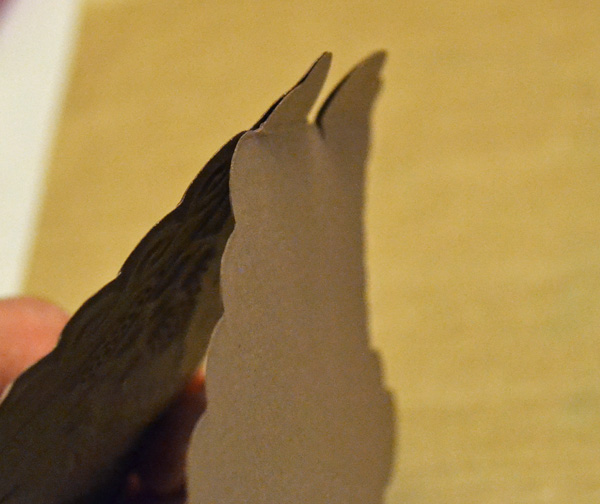
Scored part of the roof and chimney (about 1/2″ from top) of plain die cut. This will become the back of the card.
Cut and emboss the House die with white cardstock using my manual die cutting machine and taking out the die cut with my Tool ‘n One.
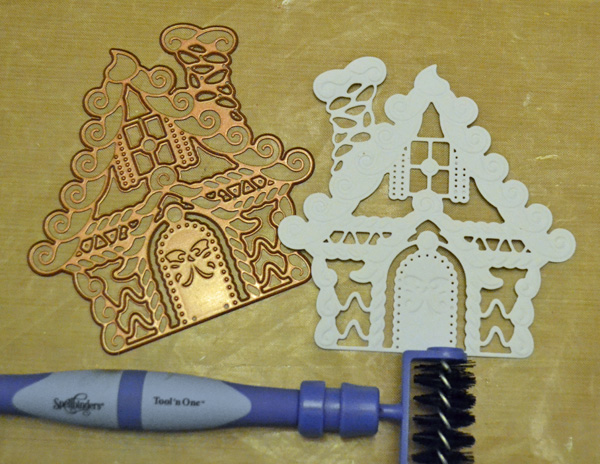
You will end up with these three house die cuts…
Apply Dual Tip Glue in the scored area and then marry the two die cuts until they become one shape.
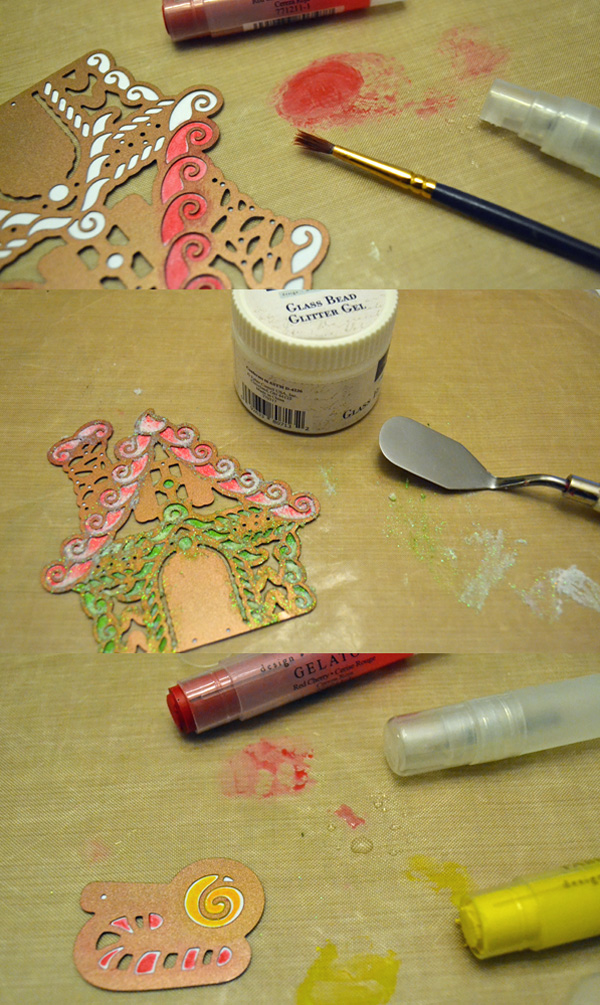
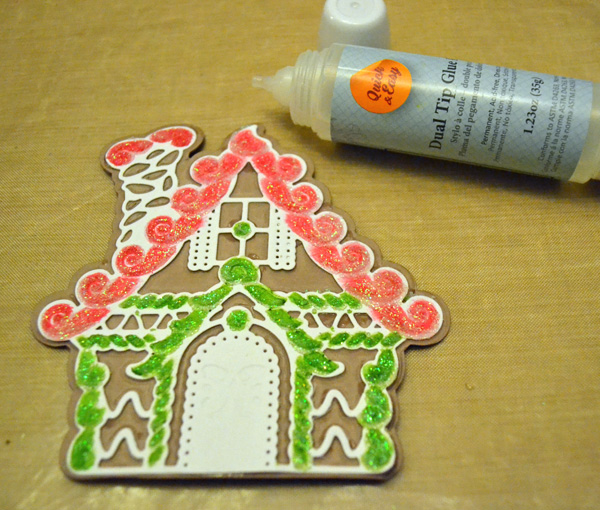
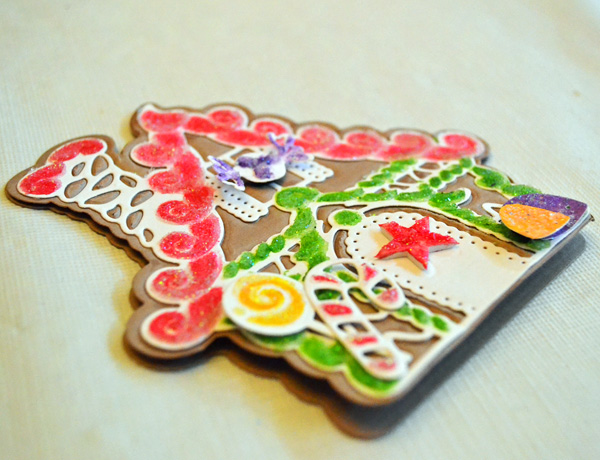
Put the white house die cut back into the House die template and use as a stencil. Color through the die with Gelatos®. Then cover with Glass Bead Glitter Gel for sparkle and dimension. Repeat the same process with the candy dies.
After drying (don’t forget to clean your die!), I applied Dual Tip Glue on the back and fitted into the embossed design which creates an embedded look – I love this technique! Then add the candy die cuts using a combination of Dual Tip Glue and 3D Foam Squares – Black, Small.
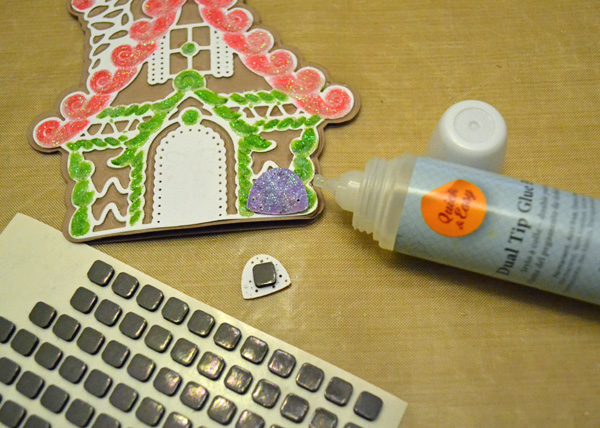
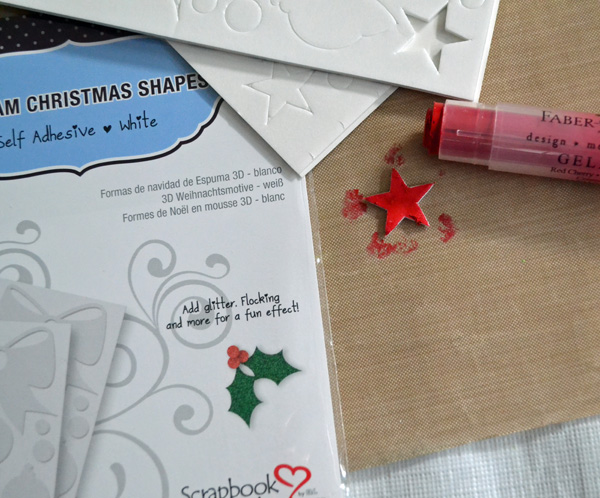
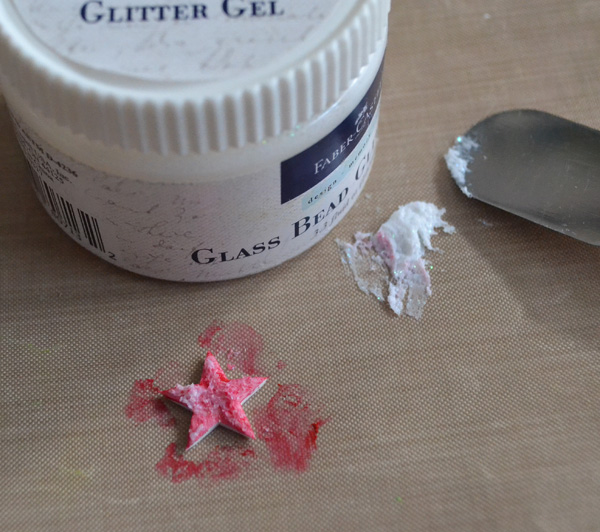
The front door needed something – it has an embossed bow design but I wanted something BOLD so I took the Star from the 3D Foam Christmas Shapes set and colored it with Red Cherry Gelatos®. After it dried, I covered it with Glass Bead Glitter Gel. Let dry.
Here’s another look…
Supplies List:
Scrapbook Adhesives by 3L®: Dual Tip Glue Pen, 3D Foam Squares – Black, Small and 3D Foam Christmas Shapes
Die: Spellbinders® Creative Arts (Gingerbread House); Coloring: Faber-Castell® Design Memory Craft® (15 ct. Gelatos® Bright Set and Glass Bead Glitter Gel); Other: Kraft Cardstock and White Cardstock
Thanks for stopping by!
Margie Higuchi
By Maribeth December 17, 2015 - 10:23 am
I love this idea!!! This is great! To late for this year’s cards, but I have a plan for next year!
By Margie Higuchi December 17, 2015 - 4:59 pm
Maribeth, you have a week before Christmas Eve! LOL!! Give it a try next year – so fun to create 🙂 Thanks for stopping by to comment!
By Catherine December 17, 2015 - 11:54 am
I thought this was a real gingerbread house at first. It is gorgeous. I think it is perfect.
By Margie Higuchi December 17, 2015 - 5:00 pm
Thank you for the SWEET words – heehee!! I love that you thought it was real <3 Happy Holidays to you and your family!
By steph December 17, 2015 - 12:32 pm
Adorable! I love it.
By Margie Higuchi December 17, 2015 - 5:01 pm
Hi Steph! Thanks for taking the time to comment – means a lot! Happy Holidays to you all xo
By Jean Bullock December 17, 2015 - 8:57 pm
You already know I love this card, Margie! Great tutorial!
By Margie Higuchi December 18, 2015 - 2:43 pm
Hi Jean! ALWAYS appreciate your kind words and support! Hope you and your family have a wonderful holiday season xo
By Marcene Gullickson January 18, 2016 - 2:54 am
I really liked your site. Thanks