
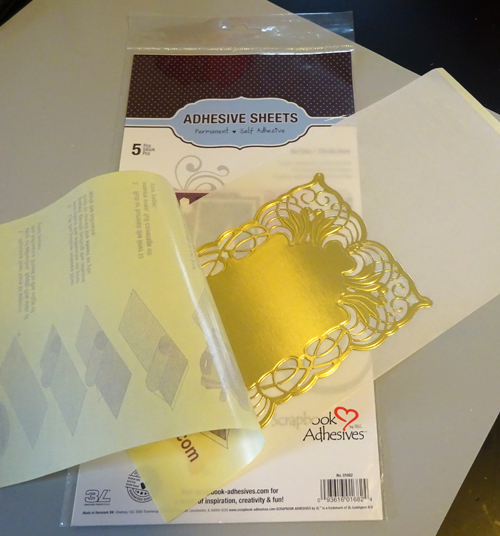
Hello~! With the new year approaching, I thought I’d share a sparkly and glittery new year card with you. I created a shaped card mainly put together with Adhesive Sheets – 6 x 12″ and touches of GOLD to welcome 2016 in style!
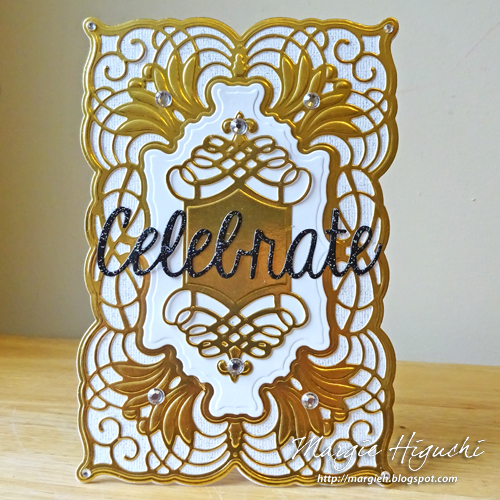
To be mail-friendly, I made it into one dimension – meaning that I did not add any of my favorite 3D Foam Squares to “pop up” the layers. It is a simple yet elegant card using the beautiful design of the die set and the stunning metallic foil and glitter cardstock, along with clear rhinestones.
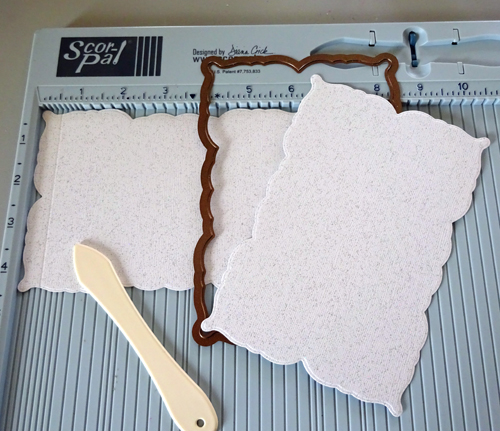
To create the shaped card base, I cut and embossed two of the border dies (Flourish Frame Die) with white glitter cardstock. Score ½” on the short side of one die cut.
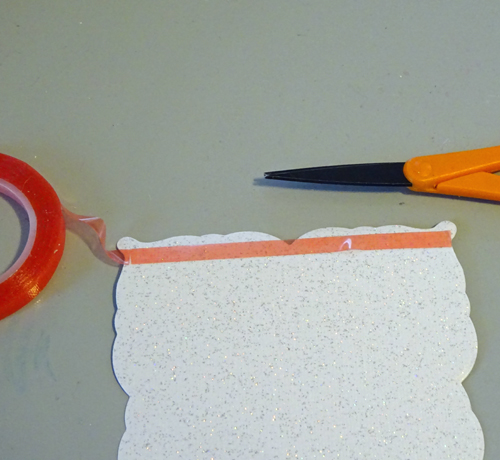
Apply Extreme Double-Sided Tape ¼” Permanent on the scored area, take liner off and match with the other die cut to form one shape. This is your card base. Set aside.
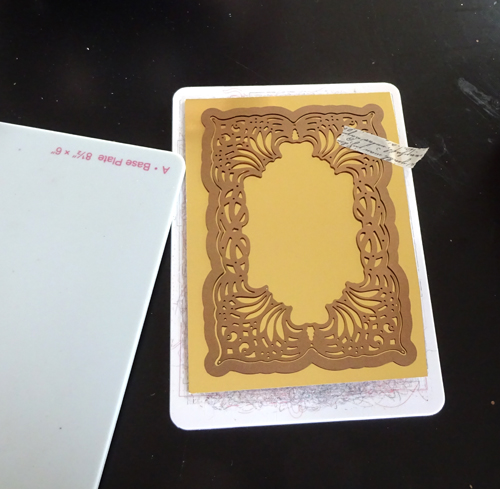
Nest the border die and the insert die (Decorative Frame Insert Die) together and secured with washi tape on top of metallic gold foil cardstock. Cut/emboss through the manual die cutting machine. Repeat with the other dies (Frame Insert and Large Tag Dies) in the set, using a combination of white cardstock and the gold foil cardstock.
To cover the entire intricate die cut, I used the Adhesive Sheets – 6 x 12″. Gently burnish the back with a bone folder and remove from liner. Place on top of the shaped card base for perfect placement. Apply Adhesive Sheets on the other die cuts with the same sheet.
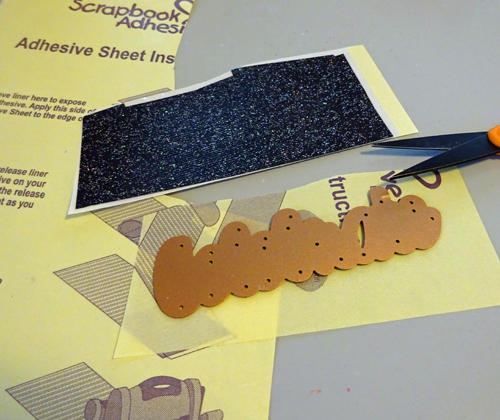
Using the same Adhesive Sheets – 6 x 12″, place a piece of black glitter cardstock (enough to fit the Celebrate Die). Cut/emboss with the manual die cutting machine. It will not leave any residue on the plates or the machine. LOVE!! Place across the card panel.
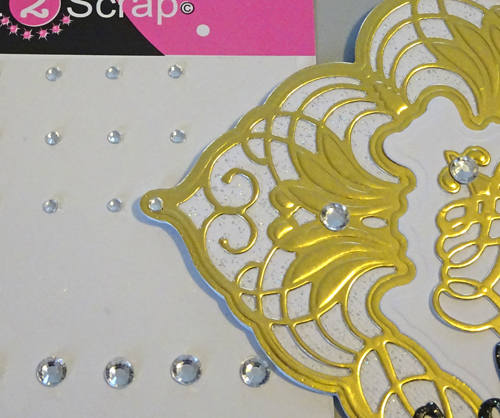
For the finishing touch, add clear rhinestones to the card panel and it’s ready to be given…
Wishing you a wonderful & creative 2016! Celebrate the new year with some inspiration by clicking New Year Projects and check it out!
Happy New Year!
Margie Higuchi
Supplies:
• Scrapbook Adhesives by 3L®: Adhesive Sheets 6 x 12″
• Home & Hobby by 3L®: Extreme Double-Sided Tape ¼ʺ Permanent
• Spellbinders® Creative Arts: S6-045 Cascading Grace and SCD-029 Fun Sentiments
• Core’dinations ColorCore Cardstock: White Glitter Cardstock and Black Glitter Cardstock
• WorldWin Papers®: Metallic Foil Cardstock – Gold
• Want2Scrap©: 72 Ct. Clear Rhinestones
• Scor-Pal: Scoring Board
• Washi Tape
By Maribeth December 29, 2015 - 2:29 pm
Great card I have to get some of these adhesive sheets. I love to use intricate dies but have difficulty adhering them to the card bases. Thank you for sharing such useful information, and a great looking card.
By Devy December 30, 2015 - 9:50 am
Absolutely stunning!!
By Teresa Doyle December 30, 2015 - 10:27 am
This card is so beautiful Margie! I need to get some of these adhesive sheets. Not sure if I can get them here or not but if not I will get my niece in the ‘States’ to mail me some! Our Michael’s never seem to have what I am looking for. I need more Copics but they have so few and never seem to get new colours in. So frustrating!
I hope you have a wonderful New Year!
By Deborah S January 4, 2016 - 9:41 am
This card is a stunning I can not stop looking at it! It’s a work of art. Have a happy and safe New Year.