
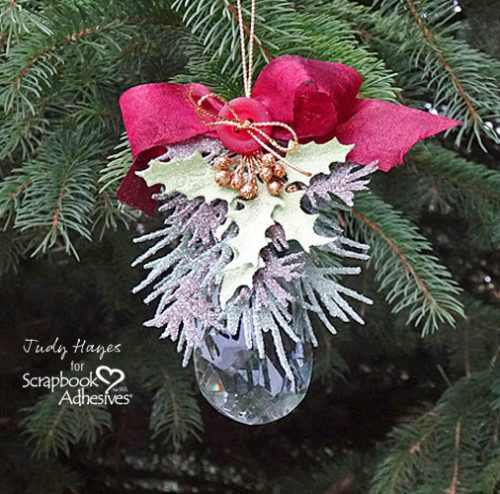
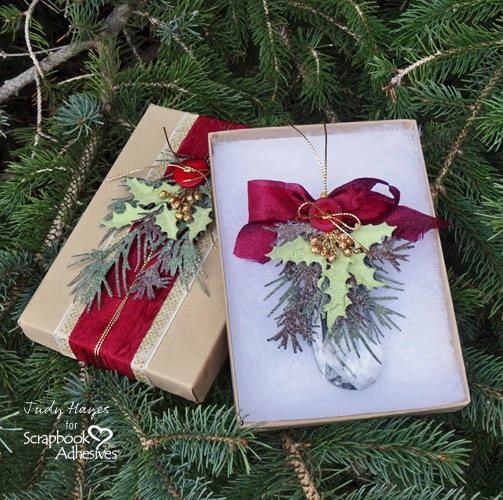
Welcome to the 2016 Handmade Holidays Blog Hop! We have a gorgeous Crystal Ornament and Gift Box project designed by Judy Hayes. Keep reading for all the instructions, and find links to more Handmade Holidays ideas below.

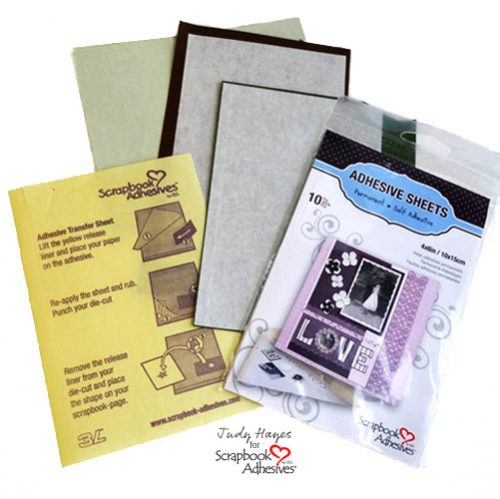
Judy used these Supplies to make her Crystal Ornament:
Scrapbook Adhesives by 3L®:
E-Z Runner® Ultra Refillable Dispenser • Adhesive Dots Small • Adhesive Dots Medium • Adhesive Dots 3D • Adhesive Sheets 4 x 6ʺ • E-Z Dots® Permanent Refillable Dispenser • 3D Foam Squares White Regular
Other:
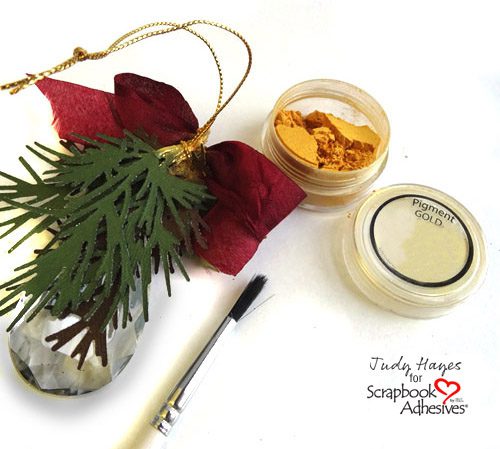
Clearsnap Colorbox Pigment Ink, Gold Embossing Powder, Buttons Galore & More buttons, Teardrop Crystal, Gold Flower Stamens, Gold Opaque Glitter, Gold Cord, Red Ribbon, Holiday Greens and Oval Dies, Cardstock: Dark Green, Light Green, Brown, Kraft, Art Medium, Organza Ribbon, Gold Pigment Powder
Ornament Tutorial:
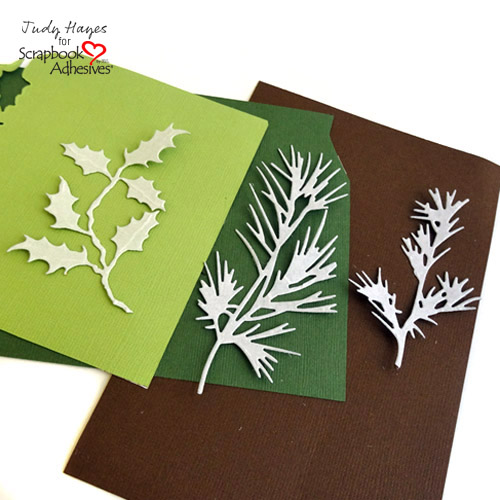
- Apply Adhesive Sheets 4 x 6ʺ to dark green, light green and brown cardstock.
- With the Adhesive Sheet liner side up, die cut different greenery from each color of cardstock.
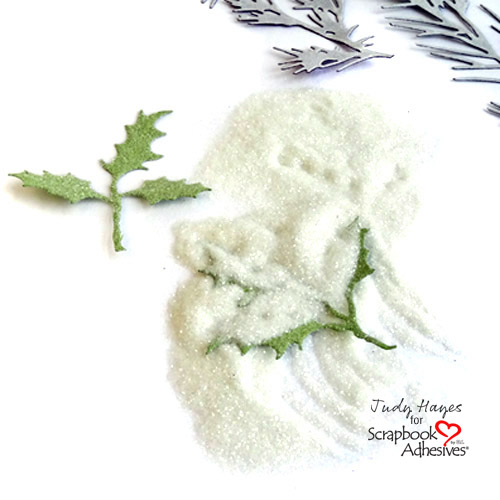
- Remove the liner of Adhesive Sheet, sprinkle exposed adhesive with glitter and press into adhesive. Then remove excess. Repeat for all greenery pieces.
- Fasten gold cord to tear drop crystal.
- Wrap Adhesive Dots Medium around end of greenery branch. Press onto cord above crystal. Cut greenery length as needed. Continue adding branches of greenery with Dodz Adhesive Dots Medium.
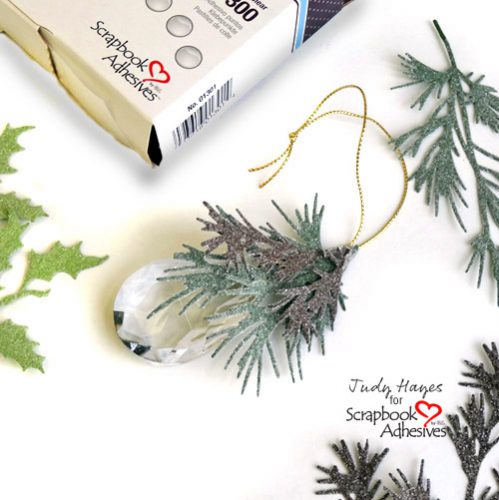
- Wrap 1 or 2 Adhesive Dots Medium around all greenery ends and cord.
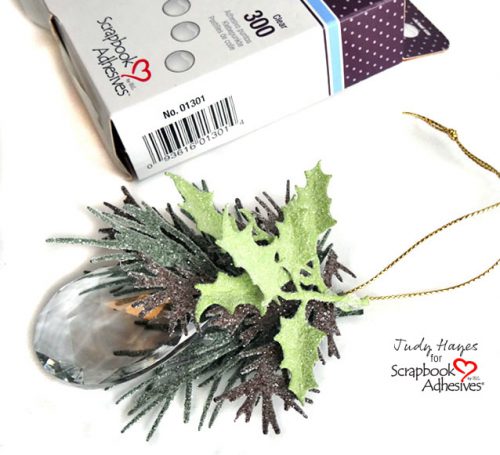
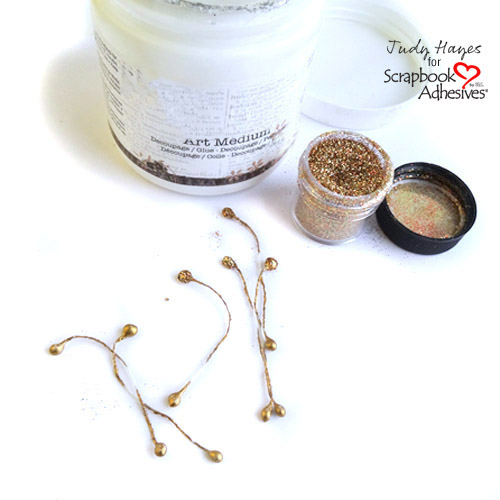
- Dip flower stamens in white glue. Sprinkle with gold glitter and allow to dry. Fasten it over greenery with Adhesive Dots Medium.
- Form bow and tie with cord. Fasten it to greenery with Adhesive Dots Medium.
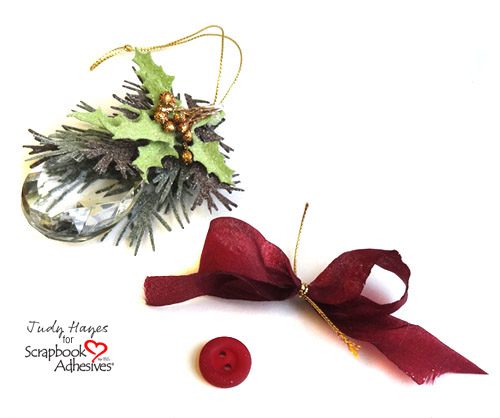
- Thread gold cord through one buttonhole then wrap cord around the greenery and ornament cord just below the bow. Thread cord through other buttonhole. Place Adhesive Dots Small on back of button then press the button in place over the bow. Next pull the cord snug, tie in a bow or knot, and trim cord ends.
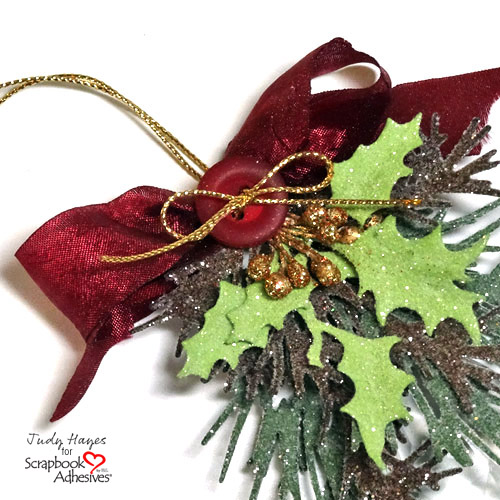
- On the back side of the ornament, brush gold pigment powder over exposed sticky areas of adhesive.
Gift Box Embellishment Tutorial:
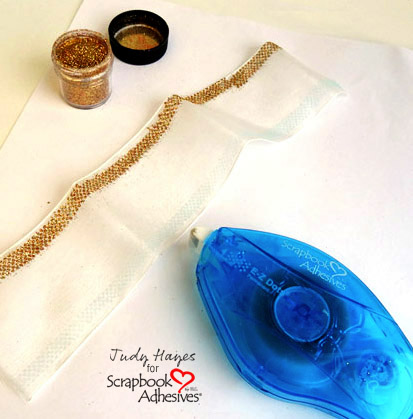
- Cut sheer organza ribbon to fit box top with extra to lap inside. Apply E-Z Dots® Permanent Refillable Dispenser along the edge of the ribbon. Sprinkle it with gold glitter, and remove excess. Now repeat along the other edge.
- Apply adhesive with E-Z Runner® Ultra Refillable Dispenser inside edge of box lid and press ribbon end over adhesive. Next wrap the ribbon over box top and attach it at other end with E-Z Runner® Ultra Refillable Dispenser
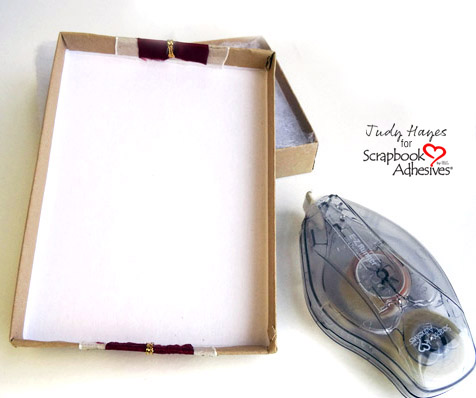
- Repeat Step 2 to fasten two lengths of dark red ribbon over sheer ribbon using E-Z Runner® Ultra Refillable Dispenser.
- Place 2 lengths of gold cord over dark red ribbon and fasten ends with E-Z Runner® Ultra Refillable Dispenser. Dust any exposed adhesive with Pigment Powder Gold.
- Repeat Ornament Steps 1-3 for greenery.
- Attach greenery stems to one Adhesive Dots 3D. Continue to fasten greenery with Adhesive Dots Medium. Fasten to box top.
- Again see Ornament Step 6 for flower stamens and then adhere them over greenery with Adhesive Dots Medium.
- Thread the gold cord through button, tie in a knot and trim ends. Adhere over the greenery with Adhesive Dots Medium.
- Dust gold pigment powder over any exposed visible adhesive.
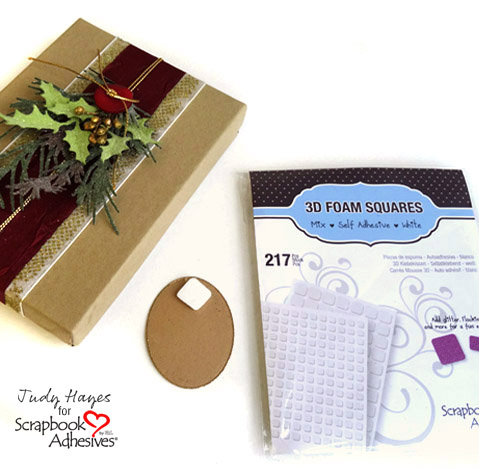
- Die cut an oval from Kraft cardstock and then stamp greeting with pigment ink. Next, heat emboss it with gold embossing powder, then apply ink to edge of oval and heat emboss with gold.
- Attach the oval tag to the box with 3D Foam Squares White Regular.
Pin this Project!
Are you ready for lots more creative handmade gift ideas and projects? Follow along on our blog hop! Simply click on each of the links below. Have fun and pin away!
Thanks to our Sponsors!
![]()
Thanks for supporting the sponsors for the Handmade Holiday Blog Hop
Scrapbook Adhesives by 3L® • Clearsnap • Hydrangea Hippo • Hepp’s Salt Co. • The Twinery • Stencil1 • Buttons Galore & More • DecoArt, Inc. • Walnut Hollow • Graphic 45 • Iron Orchid Designs
By Noreen November 9, 2016 - 11:07 am
I like the way the greenery looks, and it makes a great package decoration!
By Amy C. November 9, 2016 - 12:03 pm
Thanks for compiling such a great list of craft ideas and for the fabulous giveaways!
By ava gavloski November 9, 2016 - 9:02 pm
Give that Judy an award!!! Bravo and lucky 3L having Judy showcase for ya!!!
By Judy Hayes November 9, 2016 - 11:47 pm
Thank you Ava!
By Jean Bullock November 10, 2016 - 12:08 am
Great tutorial! I love your work, Judy! So good to see you creating.
By Arianna Barbara November 10, 2016 - 3:43 am
OMG! Great tutorial and awesome ornaments!!! Really amazing!!!
By Becca Y November 10, 2016 - 10:42 am
These are lovely! Love all the sparkle.
By Sue D November 11, 2016 - 9:54 am
These are so pretty!
By Christy Strickler November 14, 2016 - 11:25 am
So elegant! I love this!